Today, it is much easier to access music everywhere than ever before. With an internet connection, you can listen to your favorite music through a wide range of streaming services. However, you have to record the music playing if you intend to apply it as the background for your video story. This guide will explain how to record music playing on your iPhone or iPad with the best audio quality.
- Part 1: The Best Desktop Client to Record Music on iPhone
- Part 2: How to Record Music on iPhone with Screen Recording
- Part 3: Record Music on iPhone with GarageBand
- Part 4: Other Powerful Apps to Record Music on iPhone
- Part 5: FAQs about Recording Music on iPhone
Part 1: The Best Desktop Client to Record Music on iPhone
If you are recording a video with music on your iPhone, you probably notice that your device stops the playback automatically. That is because Apple performs serious copyright regulations. Fortunately, Apeaksoft Phone Mirror can help you resolve this problem. Moreover, the concise design makes it easy to learn for beginners.
4,000,000+ Downloads
Cast iPhone screen or audio to your computer easily.
Record video with music on iPhone or record audio on iPhone only.
Enhance audio quality using AI.
Compatible with the latest iPhones and iPad models.
How to Record Music Playing on an iPhone
Step 1Mirror audio from the iPhoneInstall the best music recording software on your PC and launch it. Connect your iPhone and computer to the same Wi-Fi network. Click the button with an Apple logo, and switch to the Audio mirroring tab. To record a video with music on an iPhone, choose the Screen mirroring tab.
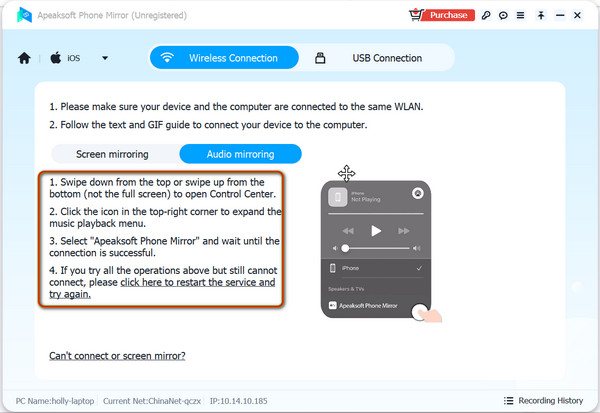
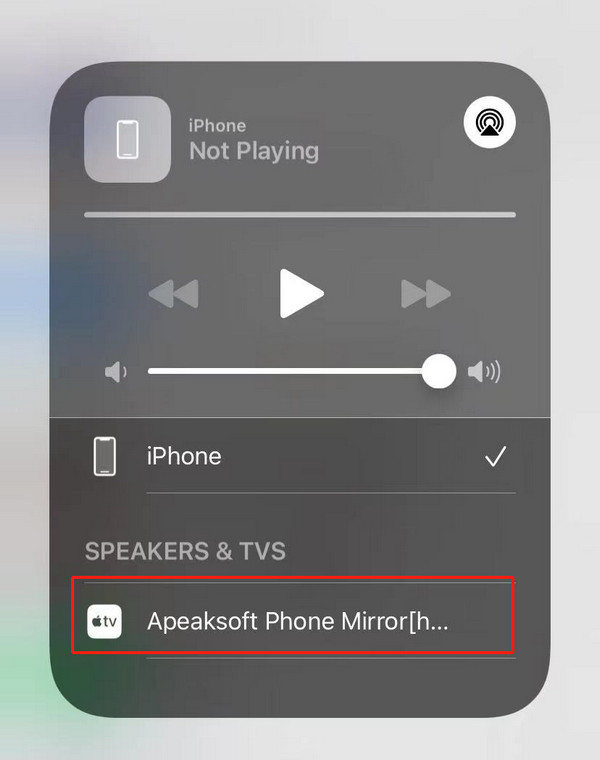
Turn on your iPhone, enter the Control Center, tap the AirPlay button on the Music Playback Panel, and select Apeaksoft Phone Mirror on the list.
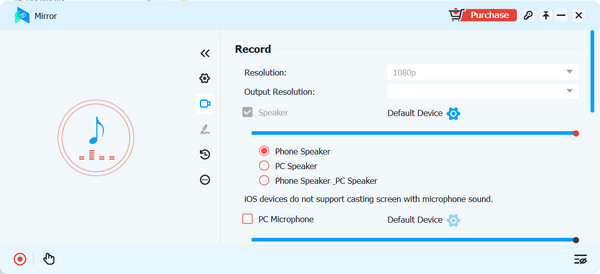
 Step 2Set up audio recording
Once audio mirroring is successful, you can record iPhone any audio on your iPhone now. Before starting, you'd better make some recording settings as you like. For example, you can choose the speaker as Phone Speaker, set the volume, location, and audio format according to your preference. You can even control your iPhone from PC directly by turning on the Control Phone button.
 Step 3Record audio on the iPhone
When you are ready, play the desired song on your iPhone, and click on the Record button to begin recording iPhone audio immediately.
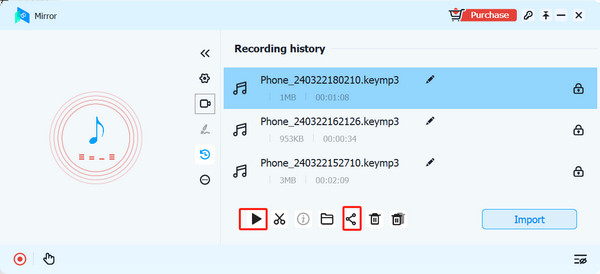
When the music finises playing, click the Stop button and Phone Mirror will automatically save the recorded iPhone music to your computer. You can click the Preview button to listen to the recording and save it if you are satisfied. This program also enables you to clip the recorded music, edit the metadata, share it on YouTube, Facebook, Twitter and more social media platforms.
Part 2: How to Record Music on iPhone with Screen Recording
Screen recording is the built-in screen recorder app on iPhones and iPad. It lets you record and share screen recordings with audio on an iOS device without extra software or hardware. Bear in mind that this feature records audio on an iPhone through the speaker. You’d better do the job in a quiet place.
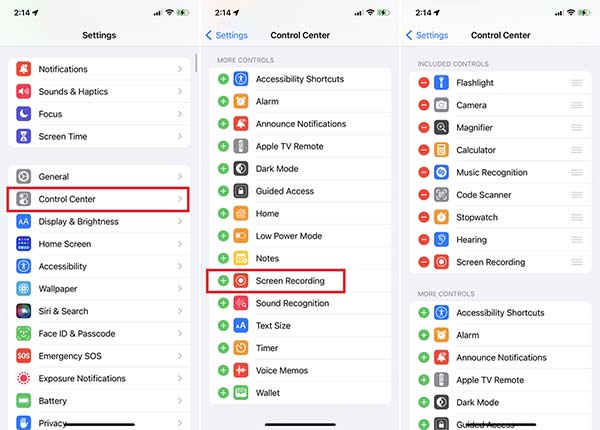
Step 1 Run the Settings app on your iPhone. Go to Control Center, and add Screen Recording to your Control Center.
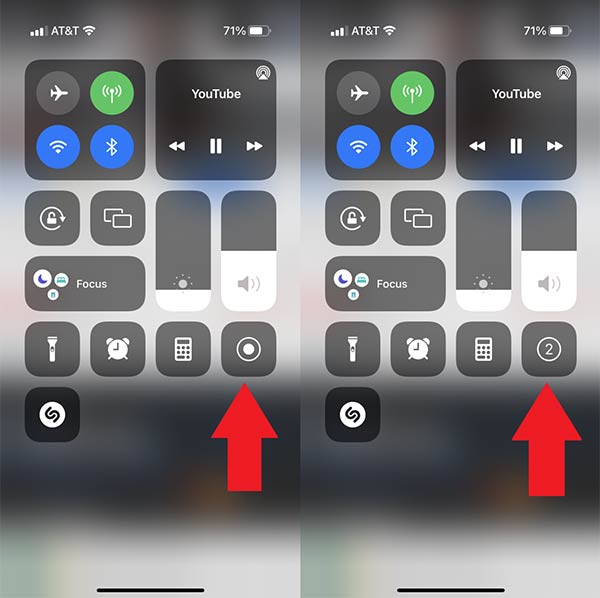
Step 2 Enter your Control Center panel, tap the Screen Recording button when you want to record music on your iPhone.
Step 3 Tap the Microphone button until it is on. Then press the Start Recording button. Then play the music.
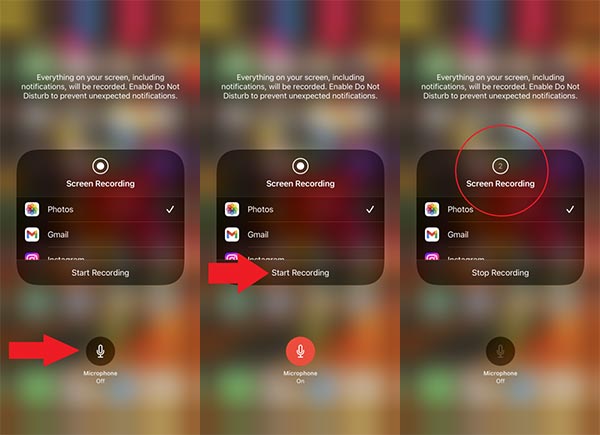
Step 4 When you want to stop recording, tap the timer bar on the top of your screen, and press the Stop button when prompted.
Step 5 Then go to your Photos app, and you will find the music recording. Bear in mind that it is saved as a video file. If you want to get an audio file only, you can use an online video converter to convert the recorded video to audio.
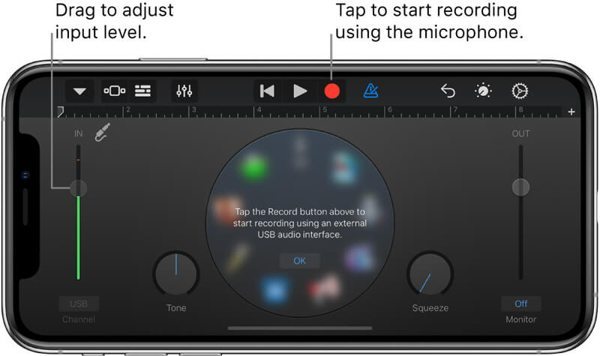
Part 3: Record Music on iPhone with GarageBand
GarageBand is a full-featured music recording studio developed by Apple. Although it is not pre-installed on your iPhone, you can download it from the App Store for free. Bear in mind that the app requires at least 1.7GB of space. Make sure that your iPhone has enough free storage.
Step 1 Install the app on your iPhone.
Step 2 Launch a browser or streaming app, find and play the song that you want to save.
Step 3 Run the music recording studio, and tap the Record button to begin recording audio on your iPhone.
Step 4 When it is done, tap the Stop button, and edit the recording on the track. Next, save or share the recording.
Part 4: Other Powerful Apps to Record Music on iPhone
Spotify for Podcasters
Price: Free
Spotify for Podcasters is a free way to record audio on an iPhone and share your recording. As its name indicates, it is developed for podcasters by Spotify, but everyone can use it to record audio on their iOS devices.
- PROS
- Completely free to use.
- Record audio from an iPhone speaker.
- Include an audio editor.
- Compatible with external microphones.
- CONS
- There are too many features.
- The audio editor is basic.
Here are the steps to record audio with Spotify for Podcasters:
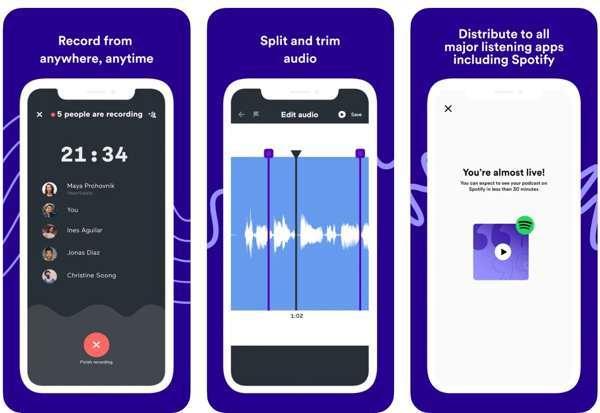
Step 1 Run the app after you install it on your iPhone.
Step 2 Sign up for an account with your email address and other information.
Step 3 Create a new podcast and begin recording audio on your device immediately.
Step 4 When you are done, tap the Finish recording button.
Otter
Price: Free with in-app purchases
Otter is a professional way to record audio on iPhones. When recording music, it transcribes the lyrics automatically. Moreover, it is optimized for iOS, such as recording via AirPods and controlling audio recording with Siri.
- PROS
- Record audio on iPhone easily.
- Support Apple services, like AirPrint.
- Identify speakers with AI.
- Transcribe in real-time.
- CONS
- Some features are only available in the Pro version.
- The built-in AI needs to improve.
Here are the steps to record music with Otter:

Step 1 Play a song in the background.
Step 2 Start the audio recorder app and log in to your account.
Step 3 Tap the Record button with a blue microphone icon to start recording it.
Recorder Plus
Price: Free with in-app purchases
Recorder Plus makes it an easy way to record music on your iPhone or iPad without losing much quality. Plus, it lets you back up recordings to cloud servers.
- PROS
- Record audio in the background.
- Easy to use.
- Support MP3, WAVE, M4A, etc.
- Create high-quality audio recordings.
- CONS
- It lacks audio editing features.
- The settings are complicated.
Here are the steps to record music with Recorder Plus:
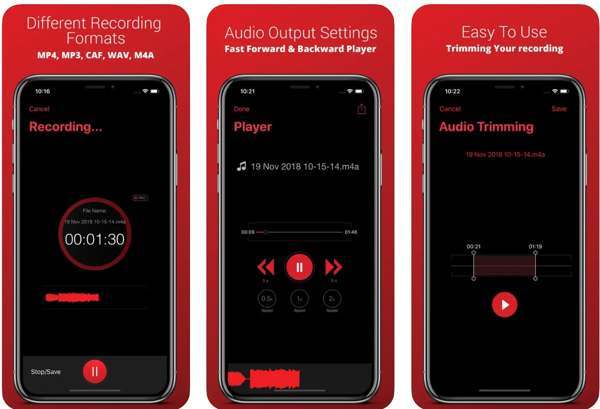
Step 1 Play the audio or music that you intend to record in the background on your iPhone.
Step 2 Launch the audio recorder app, and tap the Record button with a red microphone icon at the bottom to initiate it.
Step 3 When you want to stop it, tap the Stop button.
Part 5: FAQs about Recording Music on iPhone
Is it legal to record music on an iPhone?
The answer depends on the regulations in your country. If you just hope to listen to the recorded music on your device, it is okay. To distribute the recordings, you’d better get permission.
How long can I record audio on my iPhone?
That is determined by the free space in your memory. Before recording audio, you should free up space on your device.
Where is the record button on the iPhone?
If you have set up Screen Recording on your iPhone, you can find the Record button on the Control Center panel.
Conclusion
Following our guide, you should understand how to record music on your iPhone or iPad with the best audio quality. Apeaksoft Phone Mirror is the best option if you have a computer. The output quality is great and it is available to almost all online music. If you have other questions, please write them down below.