User Guide
- Introduction
- Install and Register
- Transfer between iPhone and PC
- Transfer between iPhone and Android
- Transfer between PC and Android
- Photos Manager
- Music Manager
- Videos Manager
- Contacts Manager
- Message Manager
- Contacts Backup
- Contacts Restore
- Ringtone Maker
- HEIC Converter
Try It Now!
Introduction
Thanks for choosing Apeaksoft MobieTrans. With this powerful data transferring tool, you will find it easy to transfer various data among iOS devices, Android phones and PC. No matter photos, music, videos, contacts or SMS, it makes data transferring and managing quickly easier without iTunes.
Furthermore, you can also backup and restore contacts in one click, Make a ringtone with your favorite music and convert HEIC files to other formats. Here are details of using. Let’s check it.
Install and Register
Install
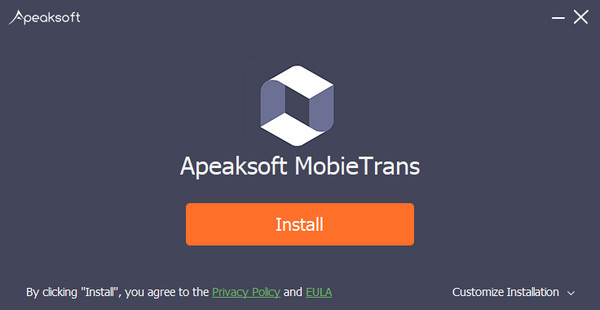
Step 1. You can download Apeaksoft MobieTrans by clicking the button:
Step 2. Click your file and allow the following installation.
Step 3. Press Install and wait for a moment. The installation will be finished soon.
Register
When you first open this software, the register window will pop up for you. Input your e-mail address and the registration code.
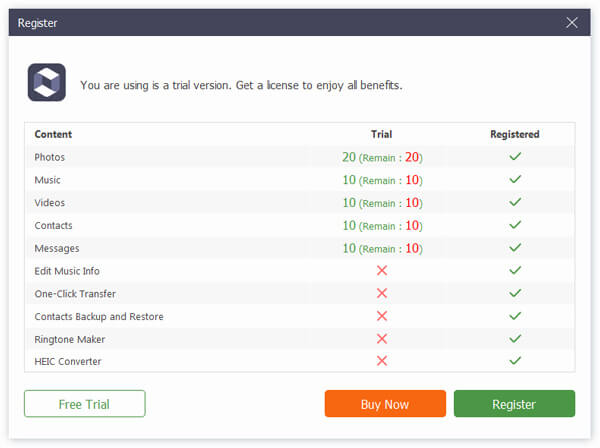
For purchased users, please fill out the Email Address and Registration Code. The Email Address is the email you used when you bought the program, the Registration Code lies in the confirm mail after you purchased the program successfully. We suggest you copy the Registration Code from the mail to ensure there’s no space or wrong letters.
For non-purchased users, click Order Later and you can free try the program for 30 days. If you are satisfied and want to purchase, click Purchase and you will be led to the purchase page.
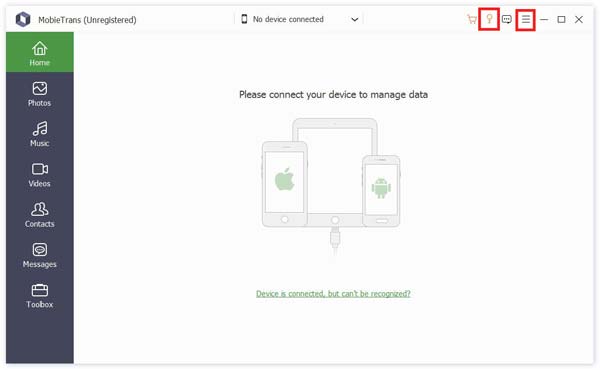
And you can also click the key button on the top right corner of the interface to open the register window.
It is the same to click menu button to find Register option.
Note: After you purchased it successfully, the registration code will be sent to your email address that you filled in the order form.
Email Address: The email address that you fill in the order form.
Registration Code: A string of characters marked as Activation key, license code or KEYCODE(S) in the order confirmation letter you received after the successful purchase.
Transfer between iOS and PC
As the professor of transferring and managing data among iOS devices, Android phones and PC, you can use it to transfer photos, music, videos, contacts, messages.
Here we would like to show you how to transfer photos, for example.
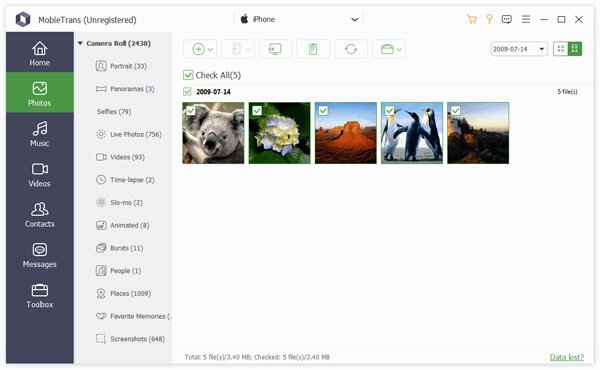
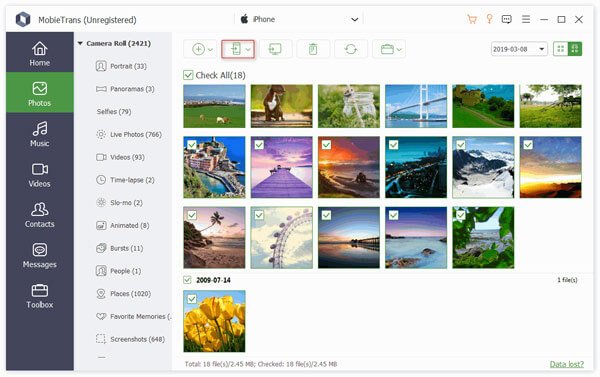
Step 1. Open the software and connect your iOS devices to the PC. Then click the Photo option on the left bar.
Step 2. After that, you can see the photos on different folders on your devices. Tap the target photos.
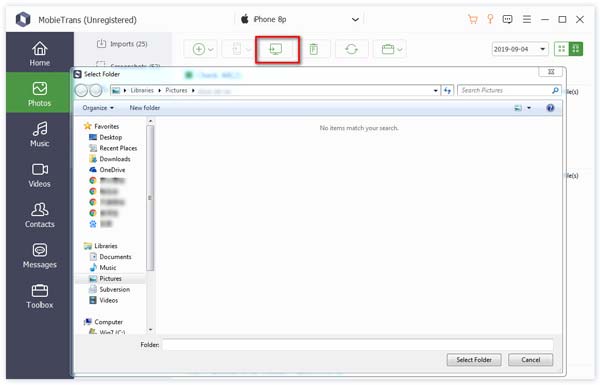
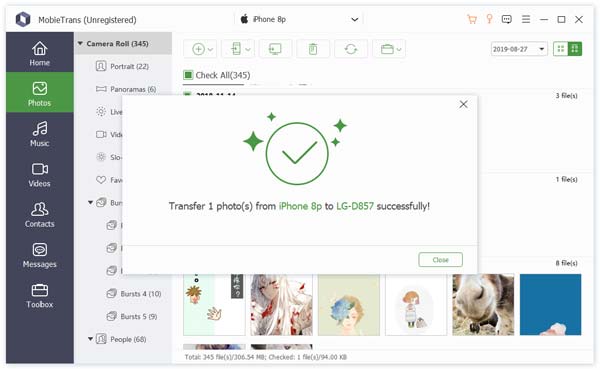
Step 3. Click the PC button on the middle of the interface. Then it will pop up a window for you to set the save path for your photos.
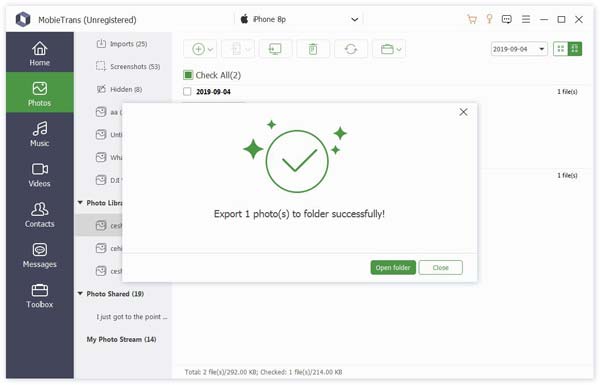
Step 4. After few seconds, you will see the successful window. You can click Open Folder to check out your photos.
Transfer between iOS and Android Devices
With its inside powerful transferring function, it breaks the barriers between iOS and Android devices. It makes the transmission of data between iOS and Android devices easier.
It can also transfer data from iOS device to iOS device or from Android device to Android device.
Here we just show you how to transfer data between iOS and Android devices.
Step 1. Open the software and connect your iOS device and Android device to the PC. Then click the Photo option on the left bar.
Step 2. After that, you can see the photos on different folders on your devices. Choose the target photos.
Step 3. Click the photo button and select the target device to receive the photos.
After few seconds, you will see the successful window.
Transfer between PC and Android
Step 1. Open the software and connect your Android device to the PC. Then click the Photo option on the left bar.

Step 2. Choose the photos you want to transfer and click the PC button on the top to transfer the photos.
Then it will pop up a window for you to set the save path for your photos.
Step 3. After few seconds, you will see the successful window. You can click Open Folder to check out your photos.
Photos Manager
Add photos from PC to devices.
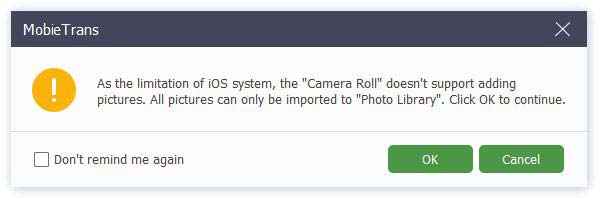
At the beginning, you should know that the Camera Roll doesn’t support adding pictures for the limitation of iOS system. So you can only add pictures to Photo Library.
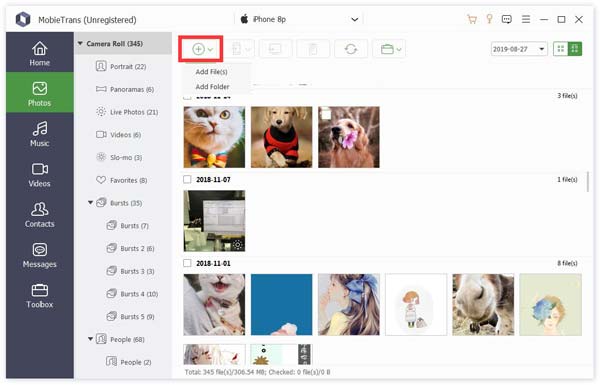
Step 1. Tap photo option. Click the add button on the top left to choose Add Files or Add Folder.
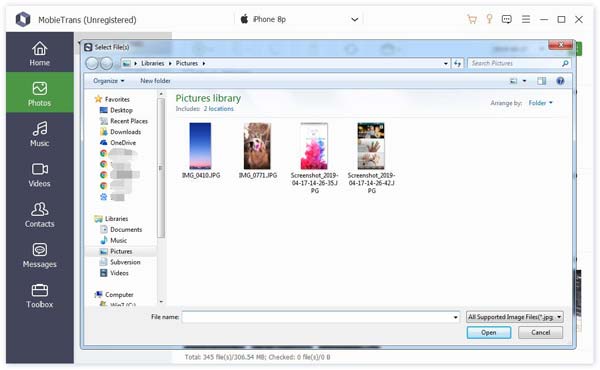
Step 2. Then the path window will pop up. Just find your photos on PC. And click Open to start the transferring.
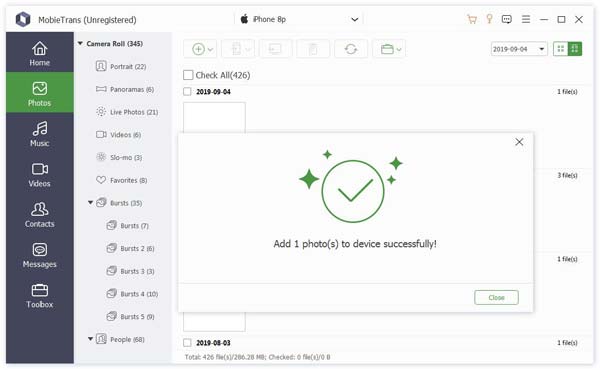
Step 3. After few seconds, you can see the target photos on your device.
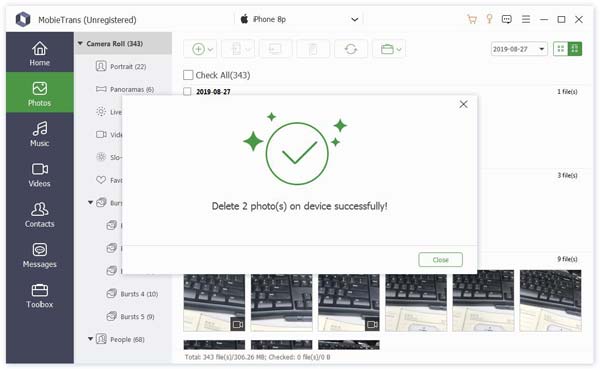
Delete photos on devices
Step 1. Into the photo option, choose the photo you don’t want.

Step 2. Click the Recycle bin button on the middle of the top bar. Or you can also right click the photo to find Delete option.
Step 3. Click Yes in the pop-up window. It will delete the photos in few seconds.
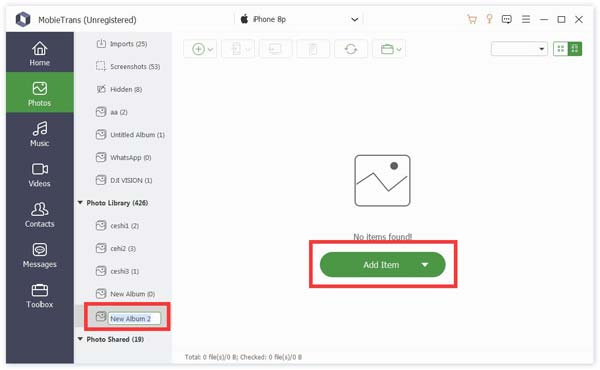
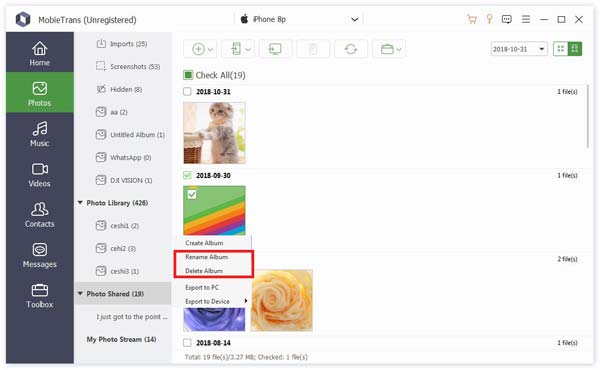
Create new album
Step 1. To create a new album on your device. Here are two ways for you.
First, you can click the portfolio button on the top and select Create Album.
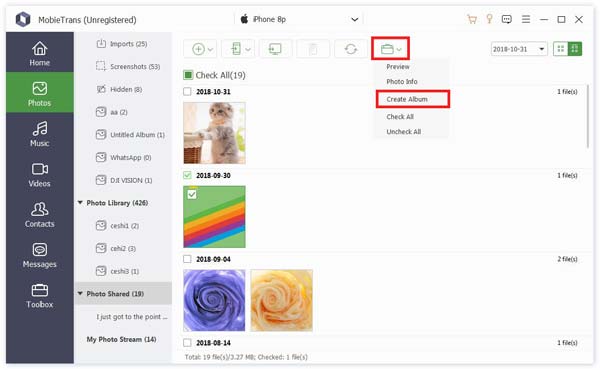
Second, you can right click on the area of the photo list. Select Create Album.
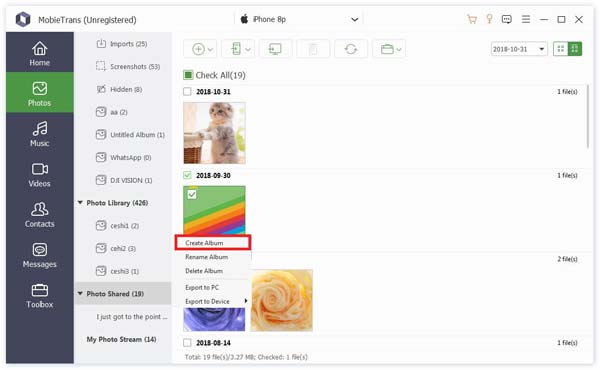
Step 2. Then you need to name the new album and add photo into it.
As you see the picture of step 1. Here are Rename Album and Delete Album options in the right-click- menu bar.
Export photos
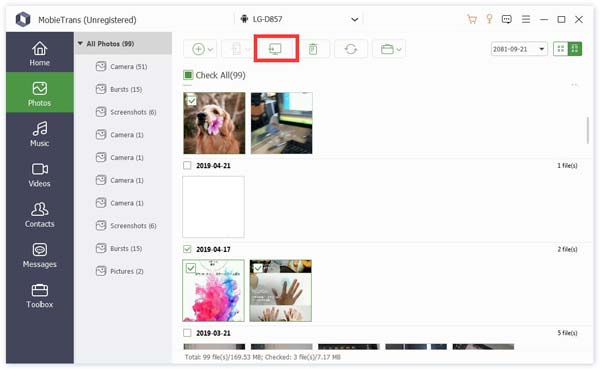
Step 1. Tap photo option. Select the target photos.
If you want to export the whole photo folder, you can just right click the album. You can also find Export options.
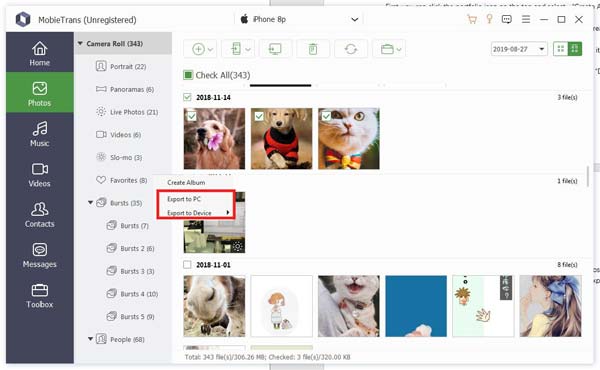
Step 2. Then you can click the phone button or PC button to export photos to other phones or PC.
By the way, you can also right click the target photos and select Export to PC or Export to Device.
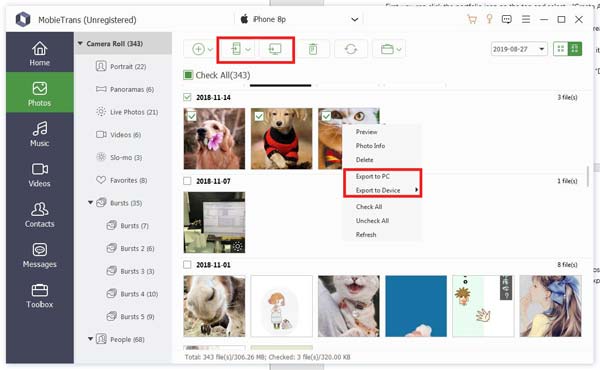
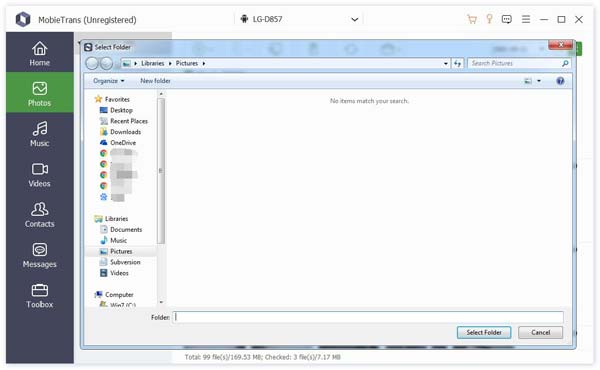
Step 3. If you want to export to PC, you still need to set the path of photos.
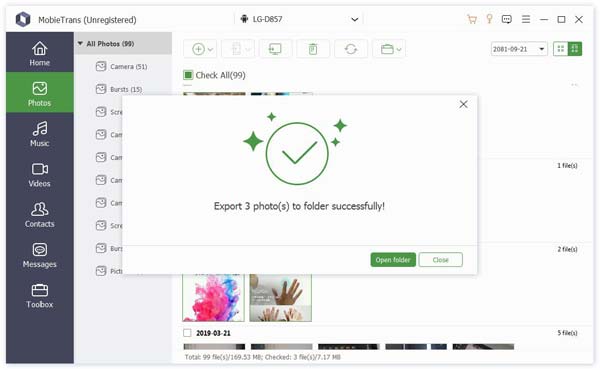
Step 4. After few seconds, you will see the successful window. You can click Open Folder to check out your photos.
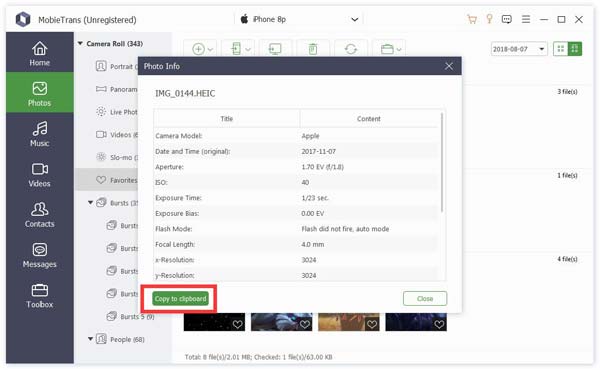
Preview and info
Right click the photo you want to see. You can see the Preview option first. Click it.
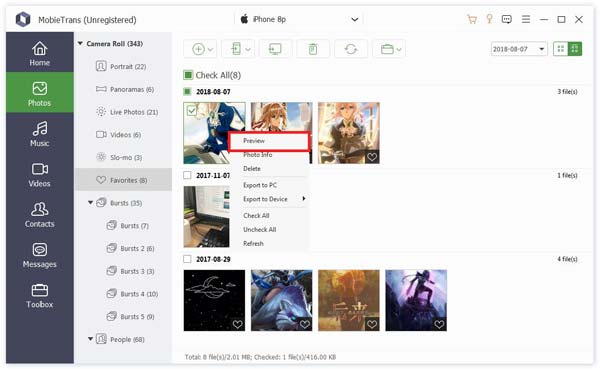
In the same list, you can also see Photo Info to see the information of it.

In the info window, you can click Copy to clipboard to save or share the information by copying.
Music Manager
Add music from PC to devices
Step 1. Tap music option. Click the add button on the top left to choose Add Files or Add Folder.
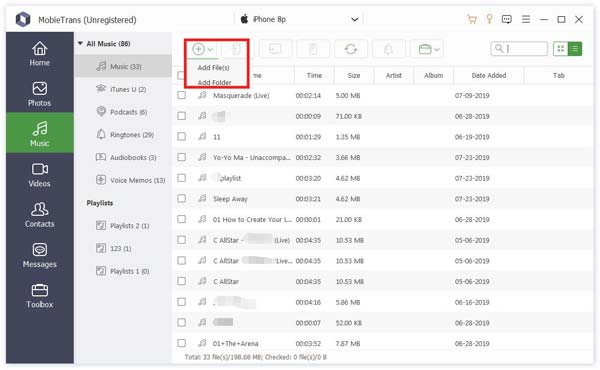
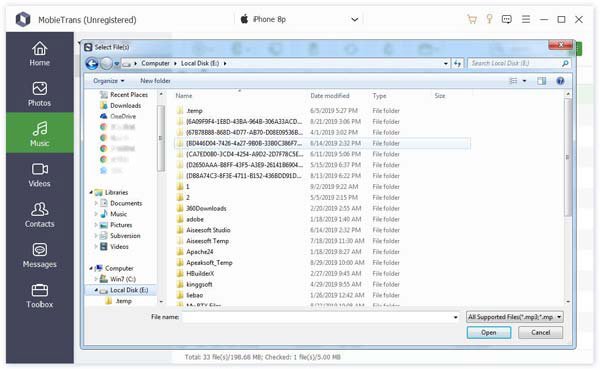
Step 2. Then the path window will pop up. Just find your music on PC. And click Open to start the transferring.
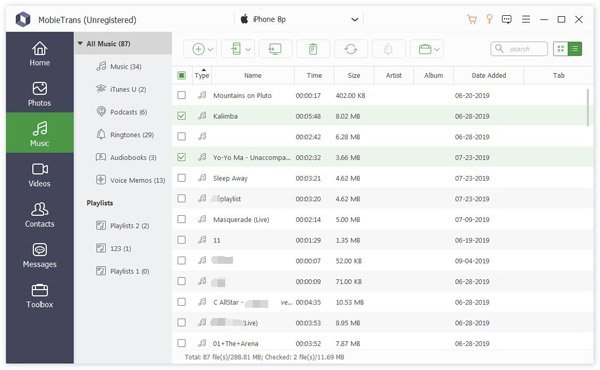
Step 3. After few seconds, you can see the target music on your device.

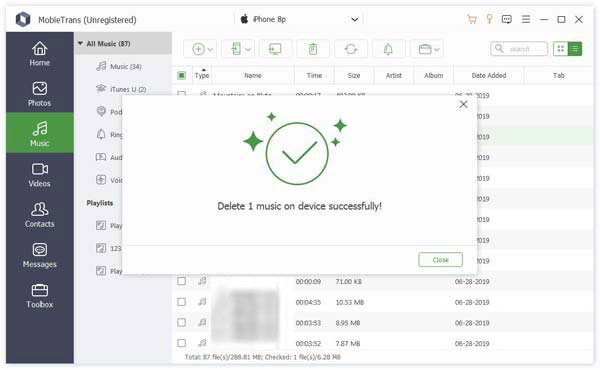
Delete music on devices
Step 1. Into the music option, choose the music you don’t want.
Step 2. Click the Recycle bin button on the middle of the top bar. Or you can also right click the music to find Delete option.
Step 3. Click Yes in the pop-up window. It will delete the photos in few seconds.
Make a ringtone
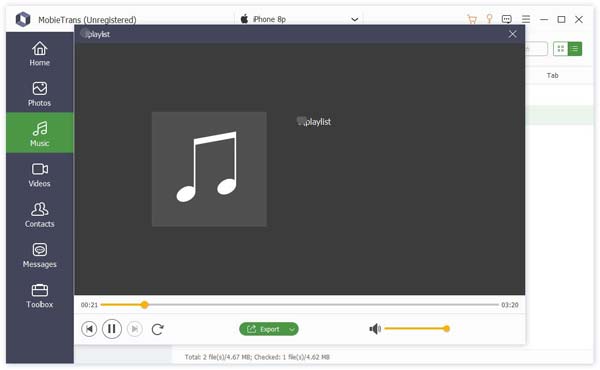
Step 1. Select the target music you want to use. Then click the bell button.
Step 2. In the following pop-up window, you need to do these:
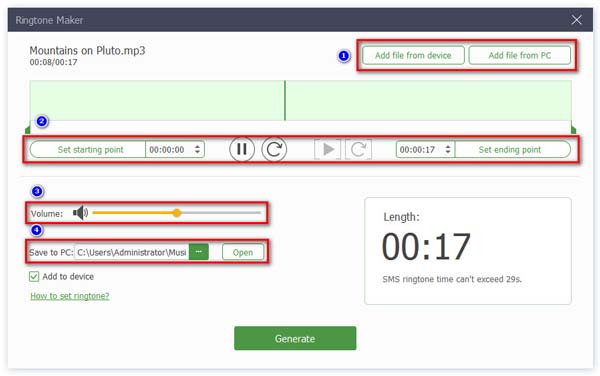
1. Make sure the file is right. If not, you can select another one.
2. Set the starting point and Ending point. And you can also click play button to listen.
3. Adjust the volume of your ringtone.
4. Set the save path on PC.
Then click Generate. It will be finished in seconds.
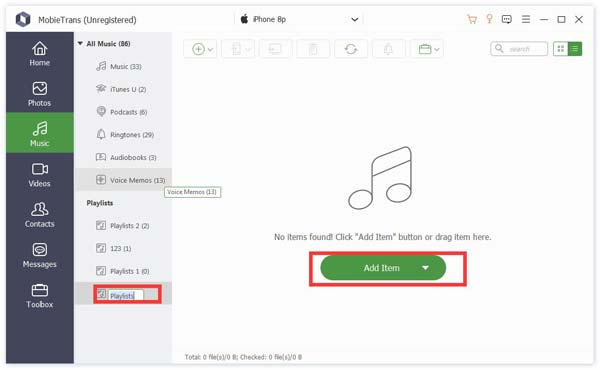
Create a new Playlist
Step 1. To create a new playlist on your device. Here are two ways for you.
First, you can click the portfolio button on the top and select Create Playlist.
Second, you can right click on the area of the music list. Select Create Playlist.
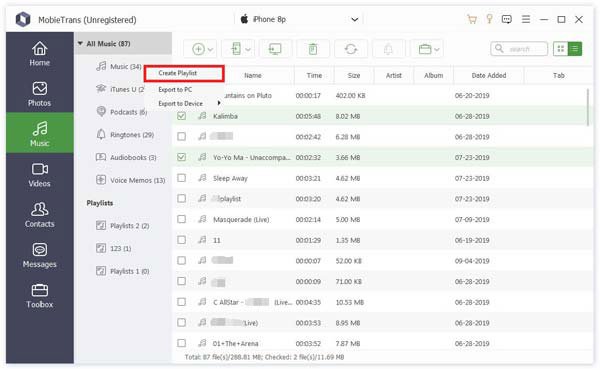
Step 2. Then you need to name the new album and add music into it.
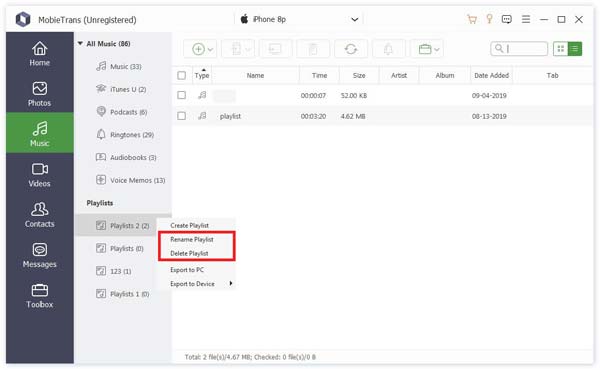
As you see the picture of step 1. Here are Rename Playlist and Delete Playlist options in the right-click- menu bar.
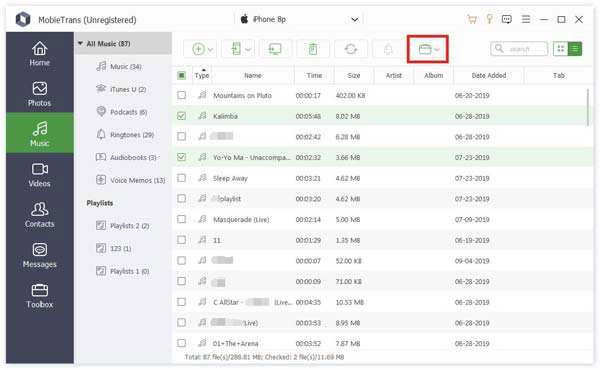
Export music
Step 1. Tap music option. Select the target music.
If you want to export the whole playlist, you can just right click the album. You can also find Export options.
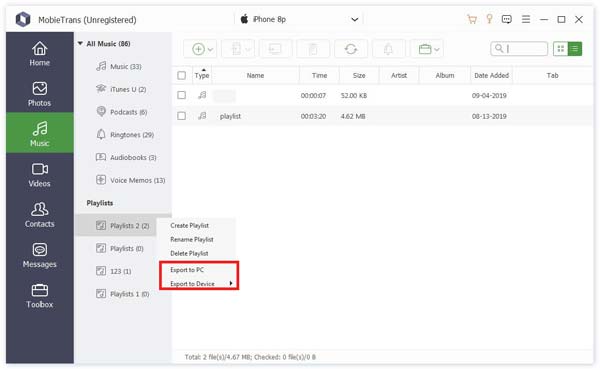
Step 2. Then you can click the phone button or PC button to export music to other phones or PC.
By the way, you can also right click the target music and select Export to PC or Export to Device.

Step 3. If you want to export to PC, you still need to set the path of music.
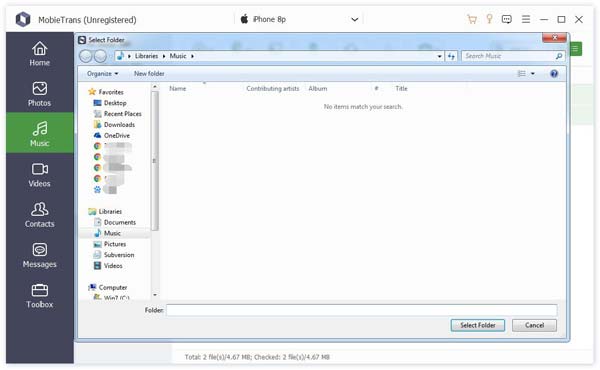
Step 4. After few seconds, you will see the successful window. You can click Open Folder to check out your music.

Play and edit music info
Right click the photo you want to see. You can see the Play option first. Click it.
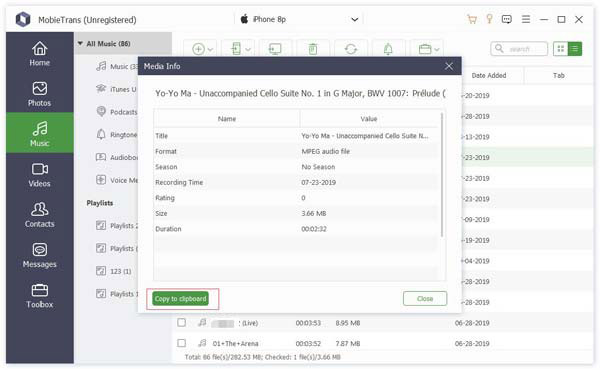
In the same list, you can also see Music Info to see the information of it.
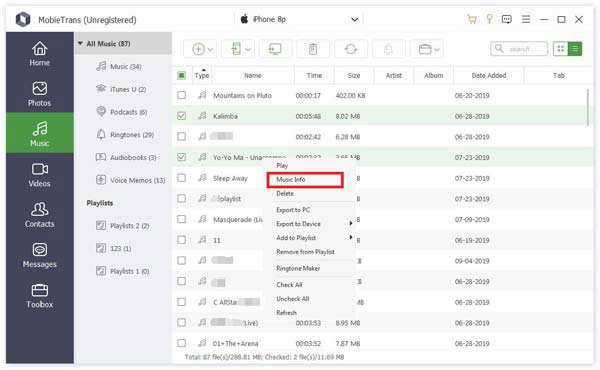
In the info window, you can click Copy to clipboard to save or share the information by copying.
Videos Manager
Add videos from PC to devices.
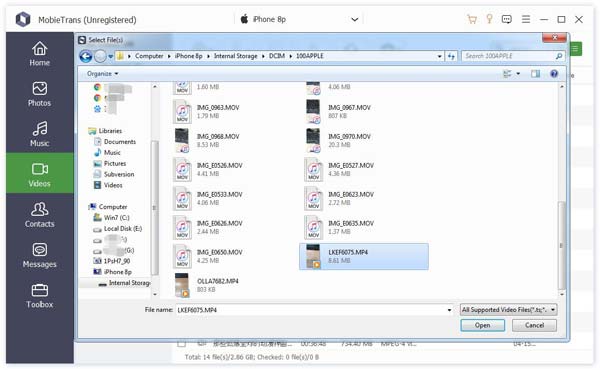
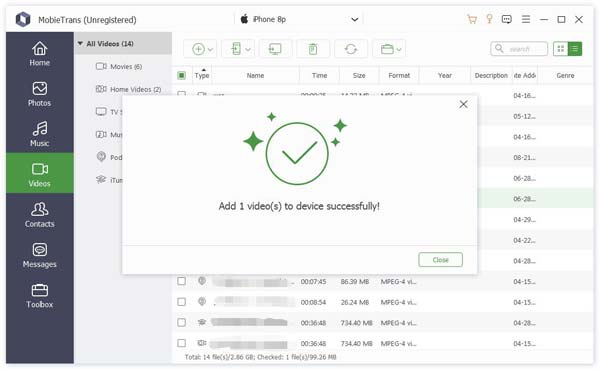
Step 1. Tap video option. Click the add button on the top left to choose Add Files or Add Folder.
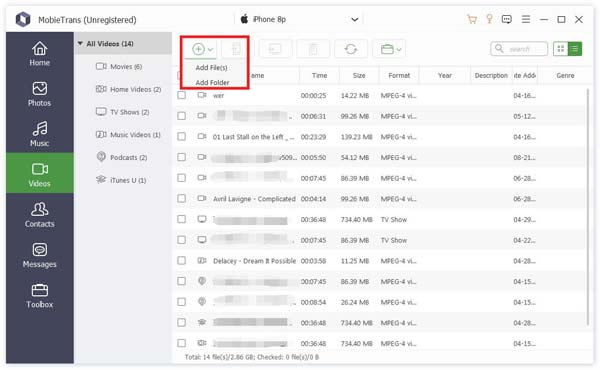
Step 2. Then the path window will pop up. Just find your videos on PC. And click Open to start the transferring.
Step 3. After few seconds, you can see the target videos on your device.
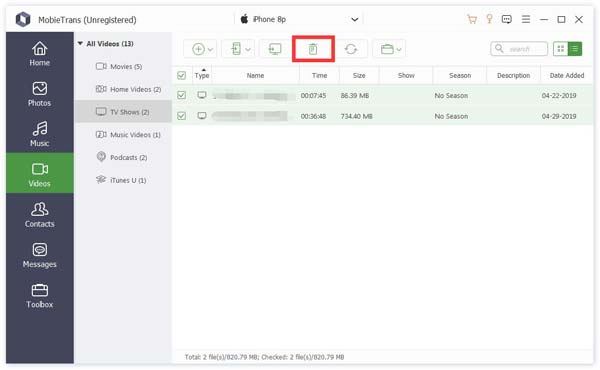
Delete videos on devices
Step 1. Into the video option, choose the video you don’t want.
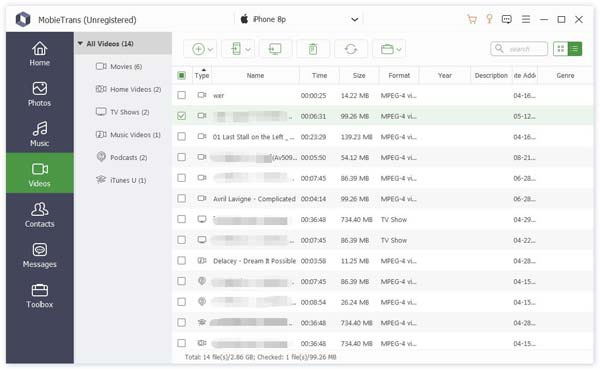
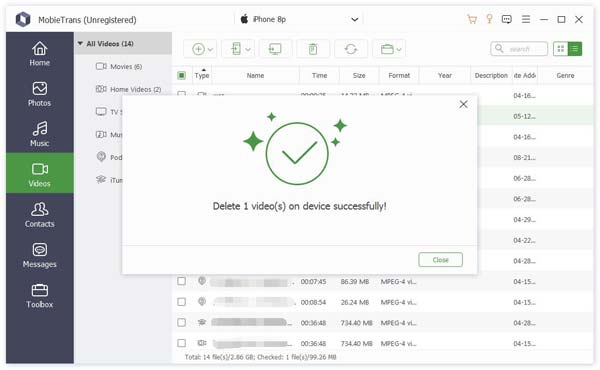
Step 2. Click the Recycle bin button on the middle of the top bar. Or you can also right click the video to find Delete option.
Step 3. Click Yes in the pop-up window. It will delete the video in few seconds.
Export videos
Step 1. Tap video option. Select the target videos.
If you want to export the whole video folder, you can just right click the folder. You can also find Export options.
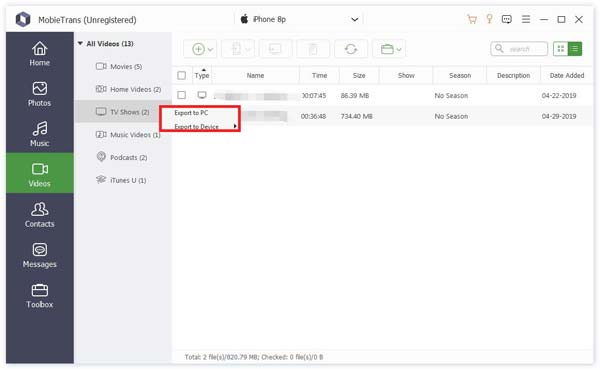
Step 2. Then you can click the phone button or PC button to export videos to other phones or PC.
By the way, you can also right click the target videos and select Export to PC or Export to Device.
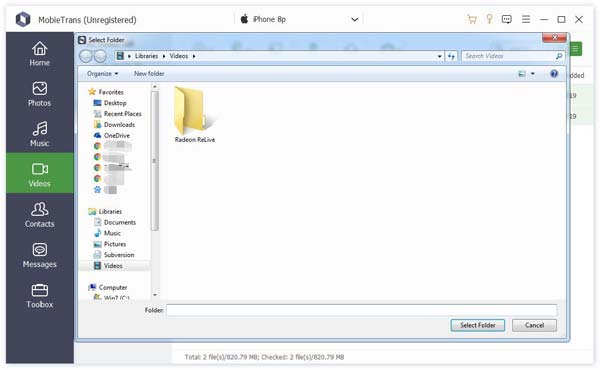
Step 3. If you want to export to PC, you still need to set the path of videos.
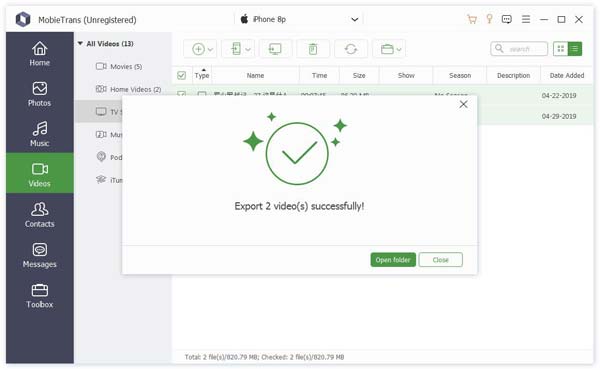
Step 4. After few seconds, you will see the successful window. You can click Open Folder to check out your video.
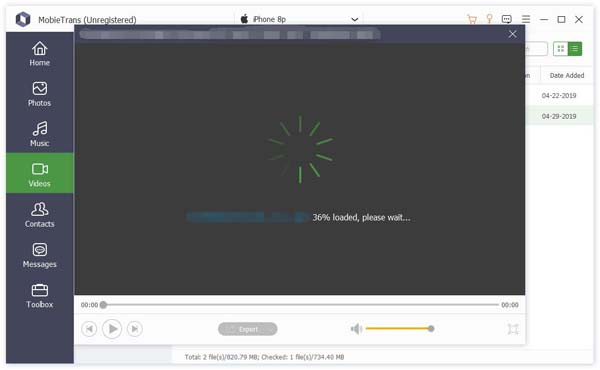
Play videos
Right click the video you want to see. You can see the Preview option first. Click it.
Contacts Manager
Add contacts to the devices
Step 1. Select contacts option on the left and click the plus button on the top.
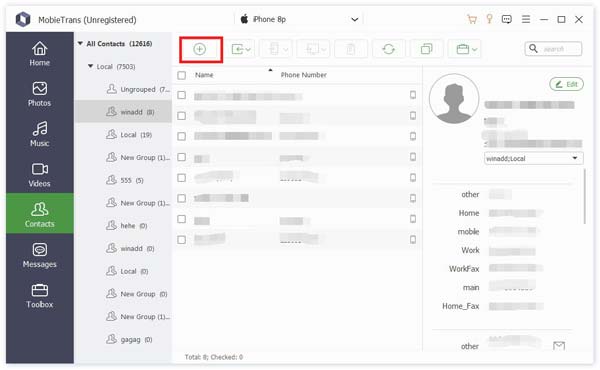
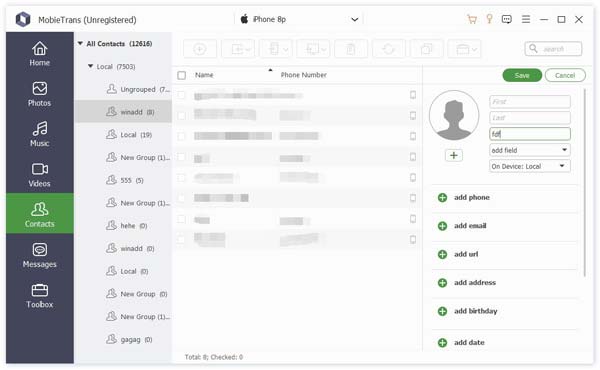
Step 2. Then it will show you an information list on the right of the new contact. You need to input the information.

Step 3. Click Save on the top of the list to finish creating new contact.
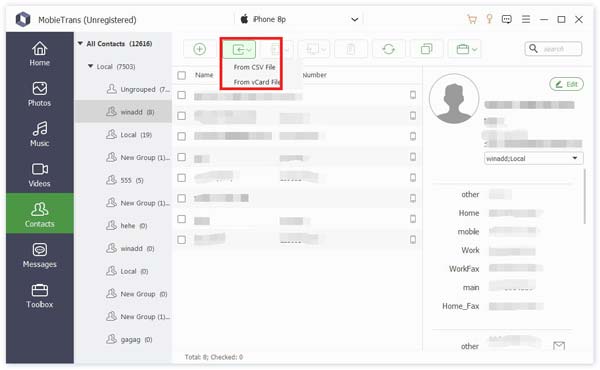
By the way, you can also add new-contacts from CSV card or vCard file. Click the second button from left. And select the files you want to add.
Delete contacts on devices
Step 1. Into the contacts option, choose the contacts you don’t want.

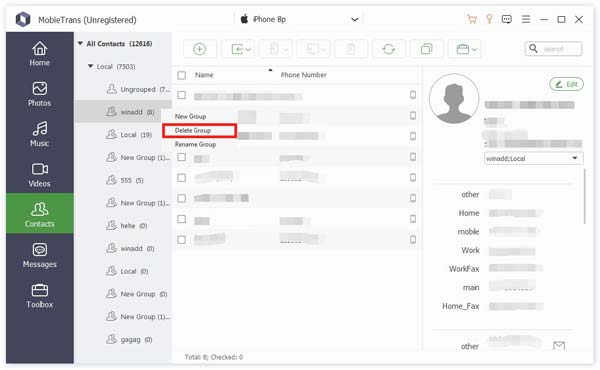
If you want to delete the whole contacts group, you can just right click the group. You can also find delete options.
Step 2. Click the Recycle bin button on the middle of the top bar. Or you can also right click the video to find Delete option.
Step 3. Click Yes in the pop-up window. It will delete the photos in few seconds.

Export contacts
Step 1. Tap contacts option. Select the target contact.
Step 2. Then you can click the phone button or PC button to export contacts to other phones or PC.
By the way, you can also right click the target videos and select Export to PC or Export to Device.
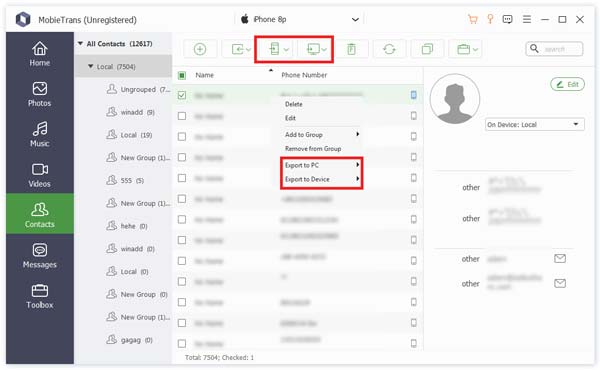
Step 3. If you want to export to PC, you still need to set the path of videos.
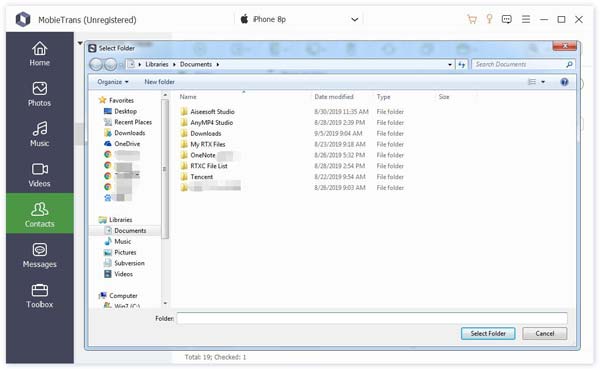
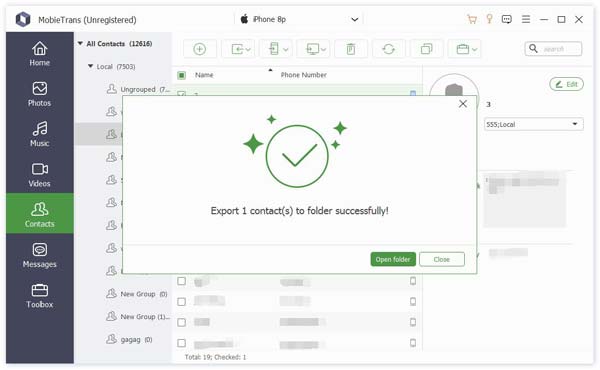
Step 4. After few seconds, you will see the successful window. You can click Open Folder to check out your contacts.
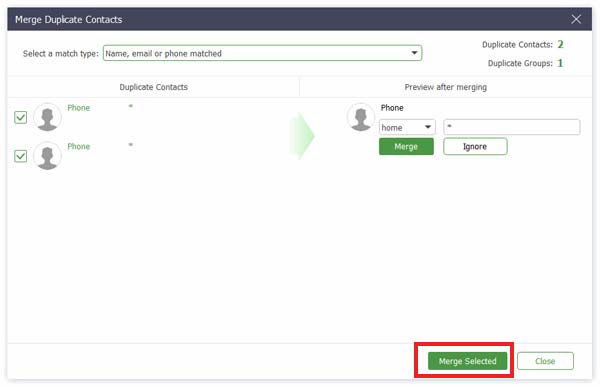
Find duplicated contacts
Step 1. Tap contacts option. Click the double squares button on the top.
Step 2. After few seconds, it will find out the duplicated contacts.
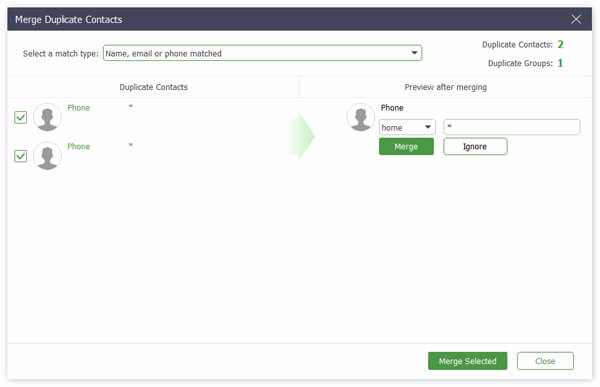
Step 3. Tap the contacts you want to merge and click Merge Selected to merge the duplicated. Then it will do this in seconds.
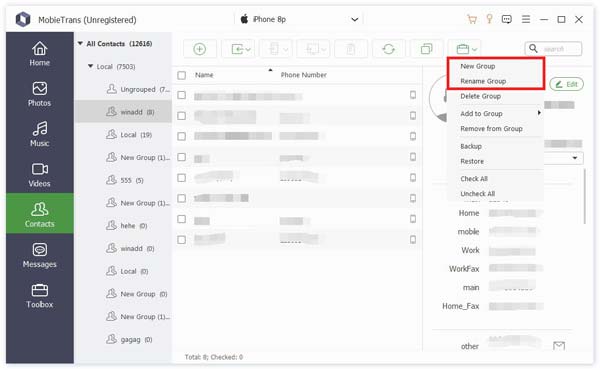
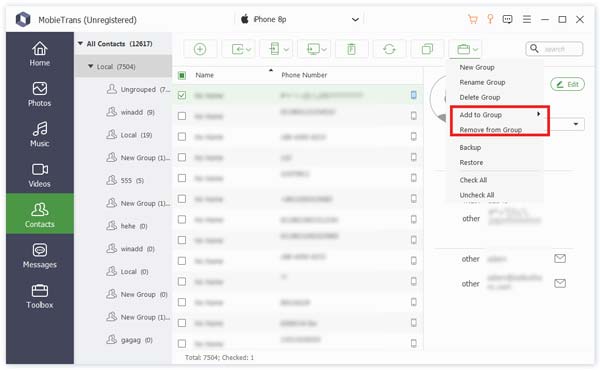
Create and rename group
Right click at the area of the left bar. You can find delete and rename options in the menu bar.
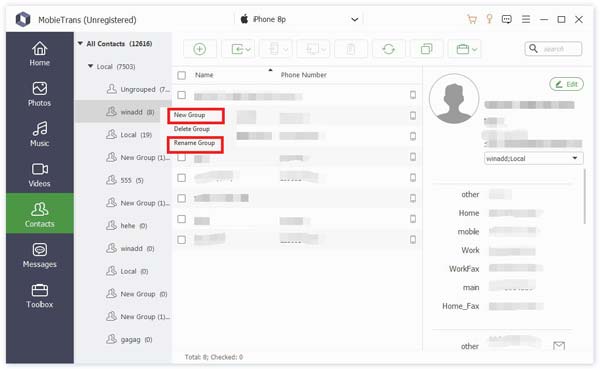
You can also find these options by clicking portfolio button on the top.
Add and remove contacts in groups
Step 1. Tap contacts option. Select the target contact.
Step 2. Right click at the contact and you can see Add to Group and Remove from Group. Select the one you want.
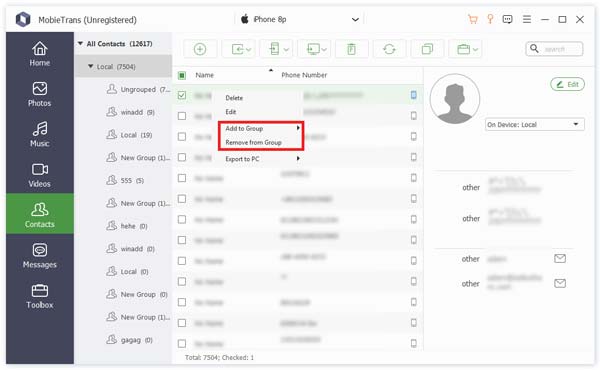
You can also do these operations by clicking portfolio button on the top.
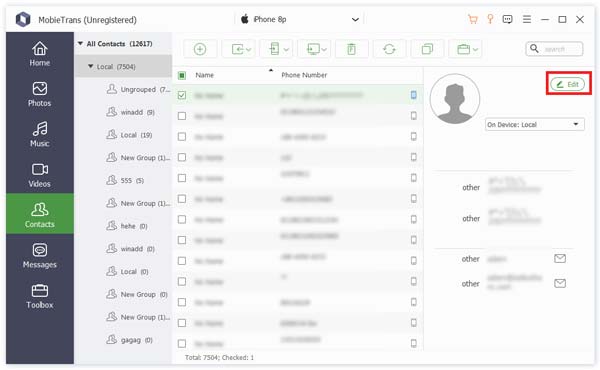
Edit contacts Info
By clicking Edit on the top right corner, you can edit the information of the target contact.
Message Manager
Export message to PC
Step 1. Tap the messages you want to export.
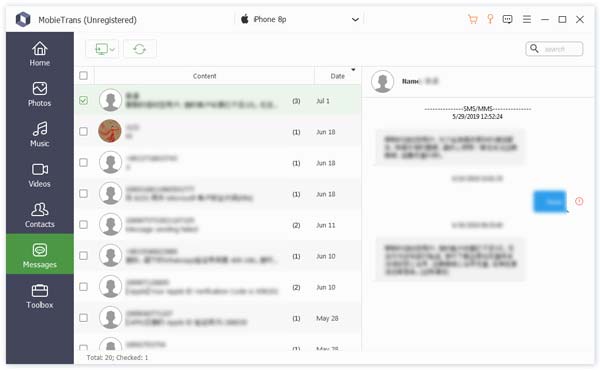
Step 2. Click the PC button on the top or right click to find export option. You can choose CSV File, HTML File and TXT File.

Step 3. Then you need to set the save path for your messages.
After few seconds, it will be finished.
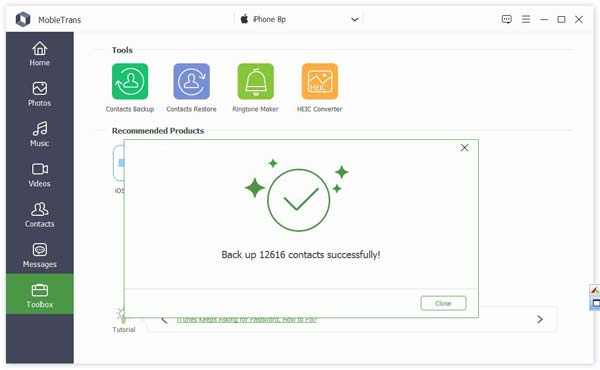
Contacts Backup
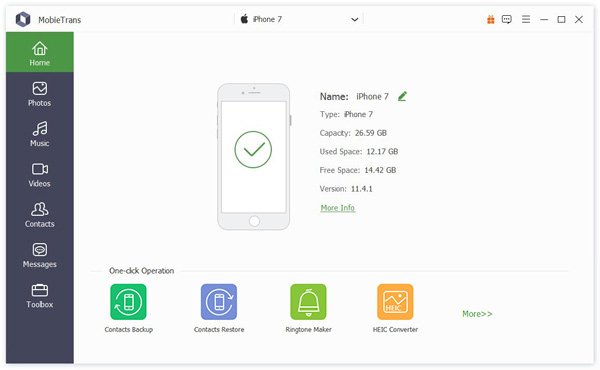
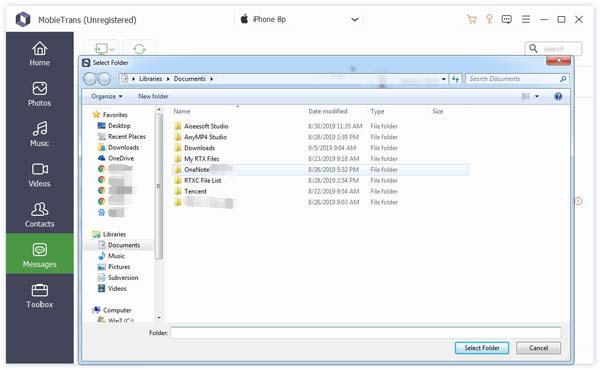
Step 1. Click Contacts Backup in the connected interface or the interface of the toolbox.
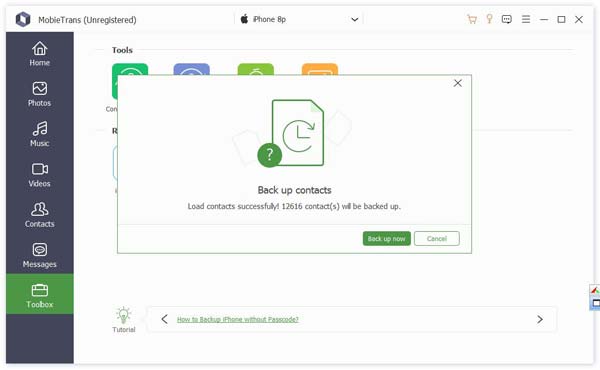
By the way, you can also find it by clicking portfolio button on the top of the interface of contacts option.
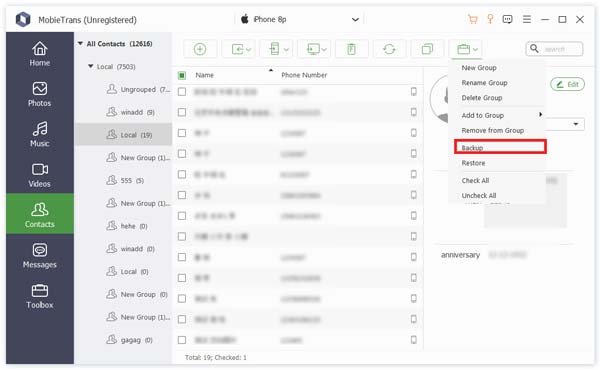
Step 2. Click Back up Now and you will get backup in few seconds.
Contacts Restore
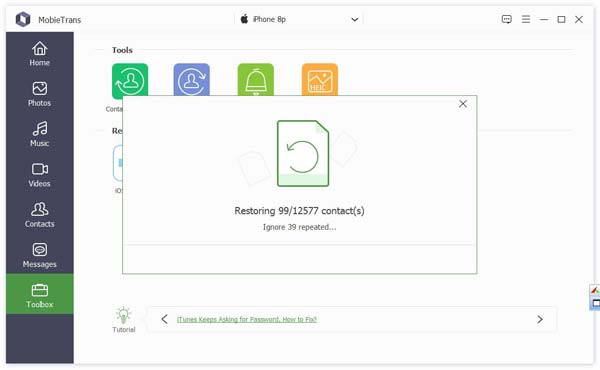
Before you restore the contacts, you should make sure the contacts backup exists.
Step 1. Click Contacts Restore in the connected interface or the interface of the toolbox.

By the way, you can also find it by clicking portfolio button on the top of the interface of contacts option.
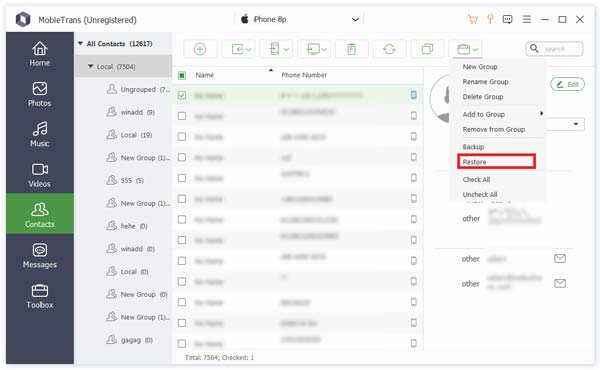
Step 2. Click Restore and you will get your contacts in few seconds.
Ringtone Maker
Step 1. Click Ringtone Maker in the connected interface or the interface of the toolbox. And choose the source of music.
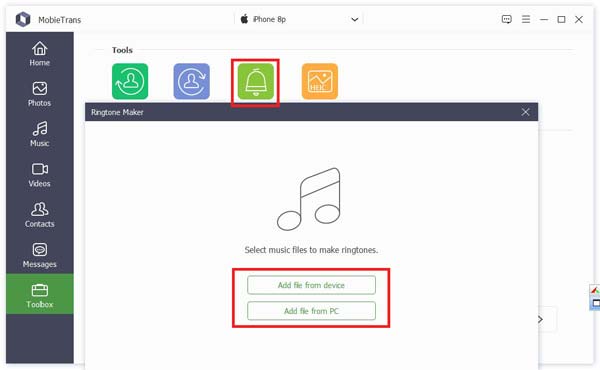
Step 2. In the following pop-up window, you need to do these:
1. Make sure the file is right. If not, you can select another one.
2. Set the starting point and Ending point. And you can also click play button to listen.
3. Adjust the volume of your ringtone.
4. Set the save path on PC.
Then click Generate. It will be finished in seconds.
HEIC Converter
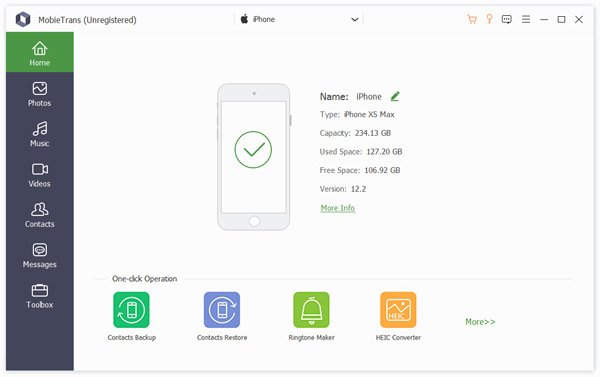
Step 1. Click HEIC Converter in the connected interface or the interface of the toolbox. And select the source of the picture.

Step 2. In the following pop-up window, you need to do these:
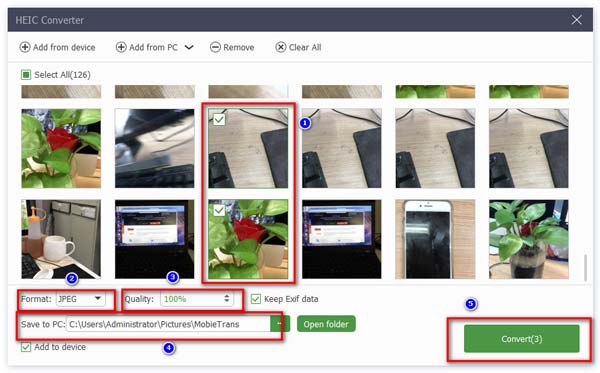
1. Select the pictures to convert.
2. Choose the target form, JPEG or PNG.
3. Set the quality of the picture.
4. Set the save path of the picture.
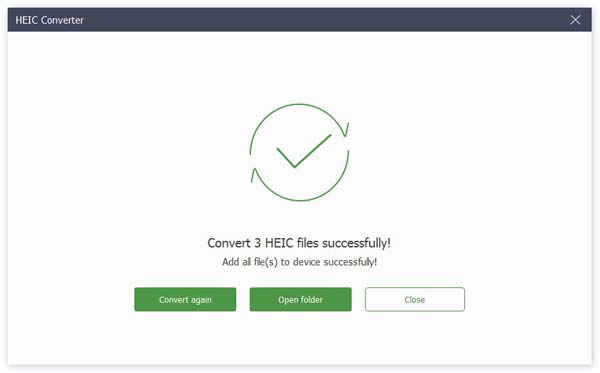
5. Click Convert to start.
After few seconds, it will be done.