"I want to root my old Android phone to free up internal storage and improve the performance; however, it just stuck at 90% and stop, I have tried several ways to troubleshoot root failed including use another cable or different computer, make USB Debugging mode and Unknown sources on, etc. But it doesn’t work, how to fix this problem?"

Even though there are many one-click Android rooting toolkits on market, it can't guarantee that they can root any Android device successfully. In this tutorial, we are going to concentrate on why Android root failed, how to troubleshoot it and how to root Android devices successfully.
- Part 1: Why root failed on Android phone
- Part 2: How to recover data if root failed
- Part 3. FAQs About Root Failed
Part 1: Why root failed on Android phone
The reasons why root failed are various in different cases. In this part, we will identify the common causes and share the corresponding solution.
Reason 1: The rooting tool does not support your device model
Every Android rooting toolkit has the special supportive devices, for example, Kingo Root is compatible with the devices running Android 4.4 and above. If you use Kingo Root on a device with Android 4.0, it will fail.

Solution: When root Android device, go to the official website of the toolkit, check if your device is supportive, and then download and use it. On the other hand, if you just get a latest Android phone model, you’d better wait for the developers to release update.
Reason 2: Root failed due to the root package
By default, Android devices support OTA or ICS upgrade. But the traditional way of OTA upgrade will lead to root failed.
Solution: Copy OTA and ICS packages to your SD card and root your Android by means of flashing your phone.
Reason 3: Root Android in wrong mode
Each Android root tool has different requires. Some are only able to flash your device under recovery mode.
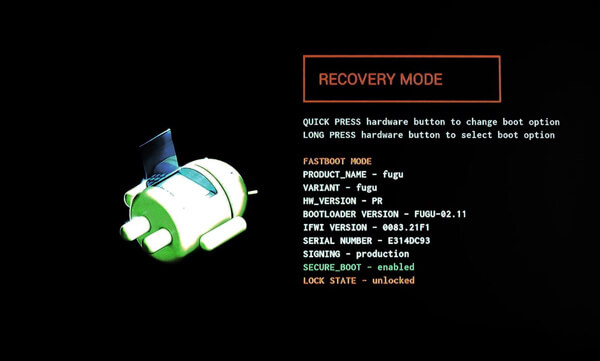
Solution: Read the requirements of your rooting toolkit carefully when root failed. If it asks you to put your device into recovery mode, shut it down, and press the button combination to boot into corresponding mode. You can get the button combination from your manufacturer’s website.
Reason 4: Cannot unlock bootloader
In some cases, the toolkit cannot unlock bootloader on your phone and lead to root failed.
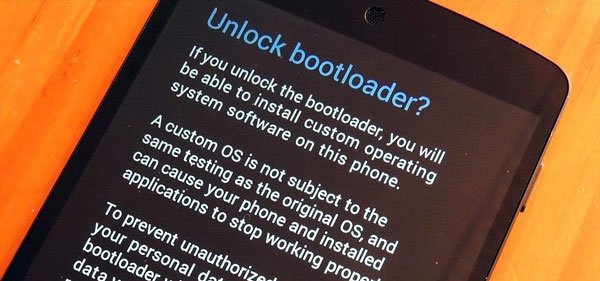
Solution: Firstly, access your manufacturer’s website and register a developer account, fill out the form according to your device and get the unlock password. Then unlock the bootloader of your phone with the password. Now, you can try the root toolkit again.
Reason 5: Something wrong on your phone drivers
In most cases, you need to root Android with a PC. Phone drivers are necessary during the process. If you are using the old version of phone drivers, root failed will happen.
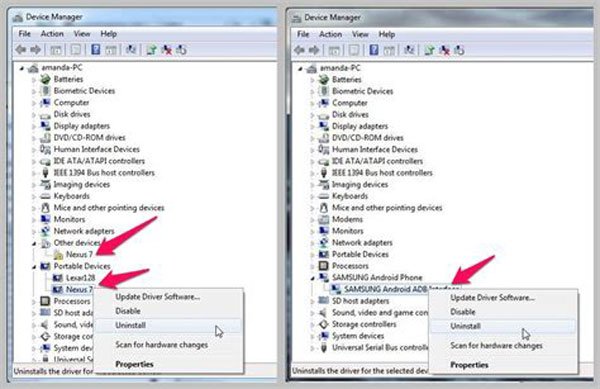
Solution: Download and install USB drivers from your manufacturer website. If you use old version, update it in PC’s Device Manager.
Reason 6: Incompatible computer system
Sometimes, root failed because of your rooting tools only work in Windows XP mode. If you use them on a Windows 7, it will fail.
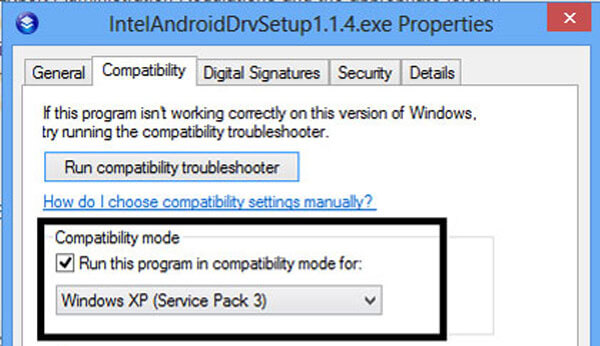
Solution: Right click on the root tool, click Properties > Compatibility, and pick up Windows XP from the dropdown list, hit Apply and then OK.
Reason 7: Rooting is interrupted
If the process is interrupted due to various reasons, you will encounter the problem of root failed.
Solution: Firstly, fully charge your Android device. It takes a while to complete the Android rooting process. Plus, use the USB cable came with your device to connect your phone to the computer. If it does not work fine, use another cord. Make sure that the rooting process is smooth.
Reason 8: Poor internet connection
During rooting Android, toolkits need internet connection to download necessary firmware, drivers, or packages. Poor internet connection may cause root failed as well.
Solution: Check your Wi-Fi network or cellular data and make sure they work well.
Part 2: How to recover data if root failed
Besides fix root failed, you may face the trouble of data loss when it happens. From this point, we recommend Apeaksoft Android Data Recovery since it provides many powerful features, such as:
- Get back lost data from root or non-rooted devices with a single click.
- Recover data from Android and save them to your computer in original format and quality.
- Not damage existing data on your phone while perform data recovery.
- Work on a wider range of data types, including contacts, call history, messages, photos, videos, music, document, app data, etc.
- Available to various situations, like root failed cause data loss.
- Support all Android tablets and smartphones from Samsung, HTC, Sony, Moto, Google, and other major manufacturers.
- Compatible with Windows 10/8/8.1/7/XP and Mac OS.
In short, it is the best way to get back your data once root failed.
How to recover lost data with Android Data Recovery
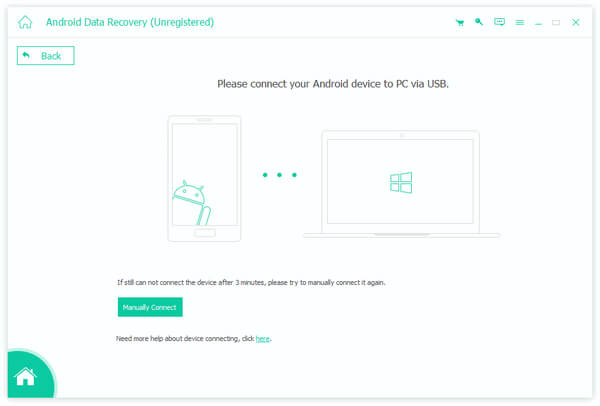
Step 1: Get the best Android data recovery tool
Download and install Android Data Recovery on your computer.
Next, enable USB Debugging mode and plug your phone to the computer via a USB cable. The program will detect your device automatically as soon as you launch it.
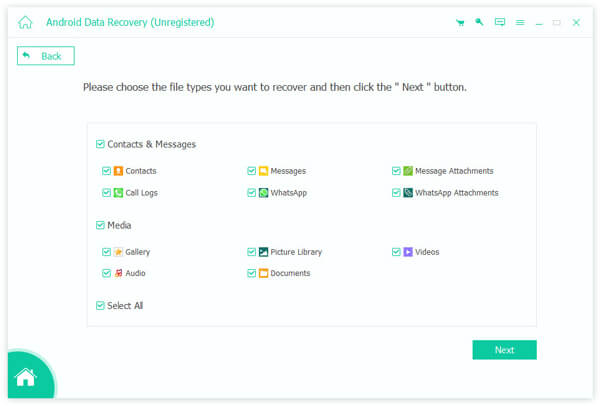
Step 2: Preview your data before recovery
Next, data type window will pop up showing all data types, like Contacts, Messages, Videos, etc. Or you can check the box of Select All at the bottom. Then click on the Next button to open the detail window. Here you can look at all lost data organized by data types and select the items you want to recover.
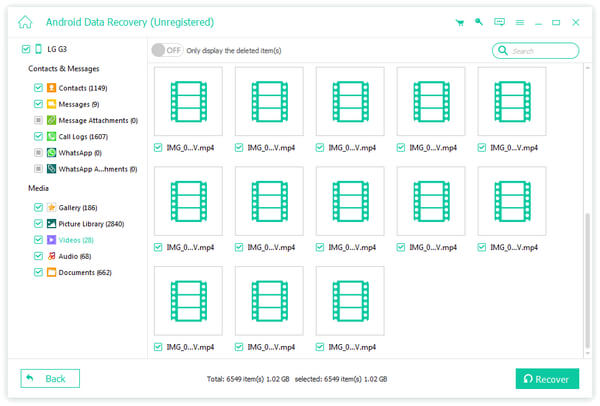
Step 3: Recover lost data when root failed
Finally, click on the Recover button at bottom right corner. When prompted, select a proper destination to save your data and hit Recover again to trigger the process.
Part 3. FAQs About Root Failed
How long does rooting an Android take?
If your device is normally functional and connected to a stable network, rooting your Android will only take 30-60 seconds. But if you have a slow internet connection or if there is a problem with the firmware, this time may be extended to 10 minutes. But if after half an hour, this process is still not completed, then it is possible that the rooting has failed.
What happens if my phone is not rooted?
If your phone is not rooted, then your file manager app, like Files by Google, may not be able to access some system files. While this will limit your operations to a certain extent, your phone is relatively less susceptible to external intrusions.
Will root reset my phone?
Of course not. Rooting your Android device will not have any effect on your other data and system settings. It will only give you higher administrative privileges than a normal user so that you can do more operations.
Does resetting Android remove the root?
It won't. Once you root your Android device, this action is permanent. Unless you use another tool to unroot, resetting your device will not change this setting.
Will I lose my data after root?
No. Rooting will not cause any loss of data in the device. If you are worried about losing your data due to system problems caused by rooting your phone, you can make a backup of your data before you do this.
Conclusion
In this tutorial, we have talked about why root failed and what you should do when the situation happened. We analyzed the common causes that root is not successful, such as improper toolkit, OTA upgrade, wrong mode, and more. We also shared solution for each cause to help you fix the problem and obtain root access privilege. At the same time, we also told you how to get back your data with Apeaksoft Android Data Recovery if you face the root failed situation.