User Guide
- Getting Started
- Convert video/audio
- Edit video/audio
- Toolbox
- Create MVs
- Collage Videos
- Set Preference
Try It Now!
Install software
Before installing this software, please make sure your computer meets the following system requirements:
For Windows users:
Windows OS: Windows 11, Windows 10, Windows 8.1, Windows 8, Windows 7
CPU: 1GHz Intel/AMD CPU or above
RAM: 1G RAM or more
For Mac users:
Mac OS: Mac OS X 10.7 or above (macOS Sonoma and macOS Ventura)
Processor: 1GHz Intel® processor and Apple M1/M2/M3 chip
RAM: 512 MB or more (1024 MB Recommended)
Then follow the steps below to install Video Converter Ultimate on your computer:
Step 1. After downloading this software on your computer, double-click the .exe or .dmg file.
Step 2. In the pop-up window, click the Install button to start installing this program on your computer. You can make a customized installation by clicking the option of Customize Installation.
The installation process will take some time. Please wait for a while.
Step 3. When the installation is completed, click Start Now to launch the program.
Step 4. For Mac users, you just need to double click the .dmg file to follow the on-screen instructions to complete the installation, and optionally drag the app to your application folder to use it further.
Launch software
Launch Video Converter Ultimate on PC
After installing Apeaksoft Video Converter Ultimate successfully, just double click its button on your desktop to launch it.
Launch Video Converter Ultimate on Mac
Click the Finder button in the Dock > Select Applications from the Favorites section in the Finder window > Locate Video Converter ultimate and double-click the button to launch Video Converter Ultimate on your Mac.
Order software
You can purchase Video Converter Ultimate online by visit this page (for Windows) and this page (for Mac).
Alternatively, if you have already downloaded this software on your computer and installed it, just click the buy button (![]() ) on the upper right corner of the main user interface.
) on the upper right corner of the main user interface.
After the purchase is complete, your purchase email address will receive the registration code.
Register software
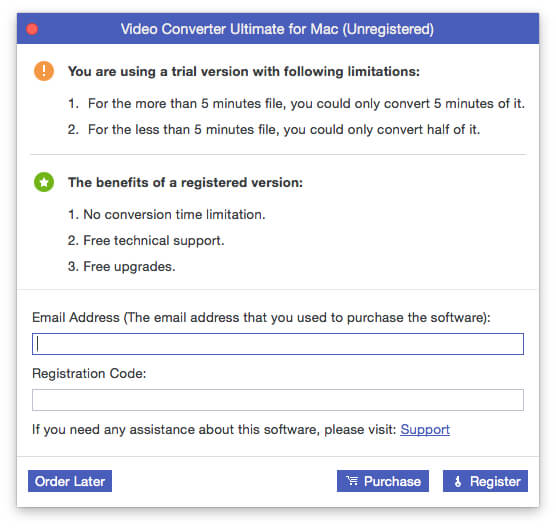
Apeaksoft supports free trial version of Video Converter Ultimate.
Free trial version provides you with the limited features. For enjoying this software with full functions, you need to purchase and register it.
1. Every day when the program is started for the first time, the register window will pop up automatically. You just need to type the email address and received registration code to activate it.
2. Do not see the registration window? Click Register from the drop-down list of the Menu in the main interface to open the registration window, type in the email address and registration code and click Activate to complete the registration of Apeaksoft Video Converter Ultimate.
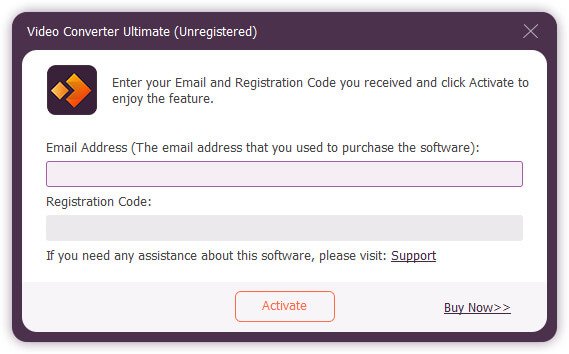
Email Address: The email address that you fill in the order form.
Registration Code: A string of characters marked as Activation key, license code or KEYCODE(S) in the order confirmation letter you received after the successful purchase.
Update software
Apeaksoft Video Converter Ultimate always keeps it up to date. You can update this software automatically once or manually.
Update Video Converter Ultimate manually
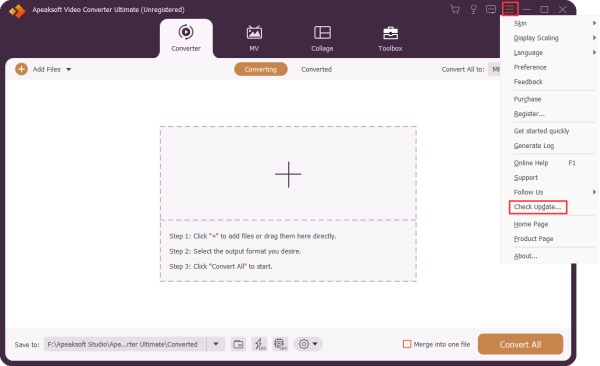
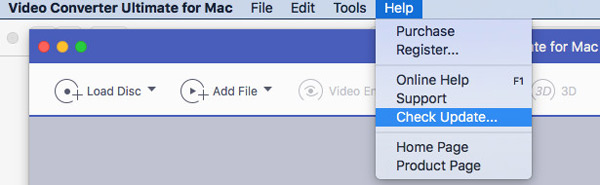
Run Video Converter Ultimate, in the main interface, click Check Update… from the dropdown list of the menu to have a check Check Update… from the dropdown list.
Update Video Converter Ultimate automatically
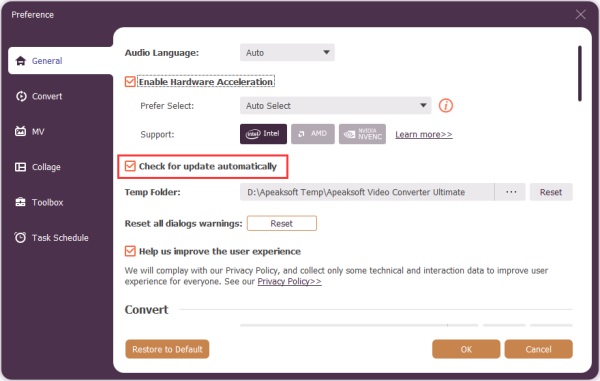
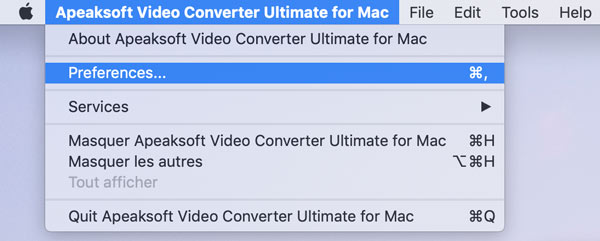
If you will not want to miss the fantastic updates every time, just enable Check for Updates automatically option by clicking Menu > Preferences > General.
Note: For updating this software, you need to make sure the Internet connection is enabled on your computer.
Apeaksoft support
Apeaksoft provides you with the technical support via online help guide or just contact the support team.
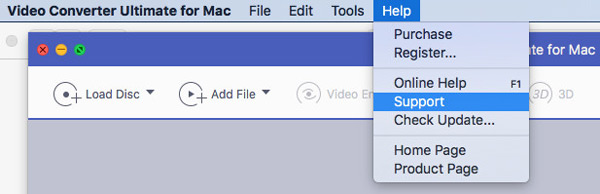
Under Menu or Help dropdown list, you can click Online Help or press F1 to visit the online help page. Or click Support to navigate the support team contact information.
Email to Apeaksoft Support anytime at support@apeaksoft.com

Convert video/audio
Apeaksoft Video Converter Ultimate offers the Converter feature for your video converting. It lets you convert video over 300 formats. Whether you want to convert video to video, change audio to audio, or even extract background audio from video file, you could easily achieve the goal.
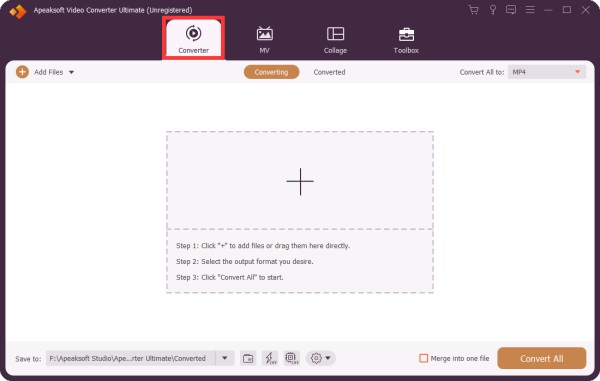
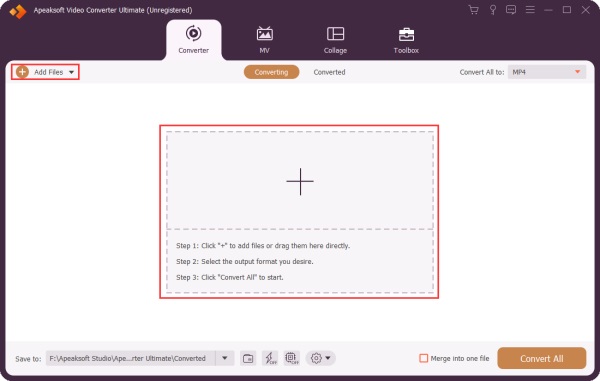
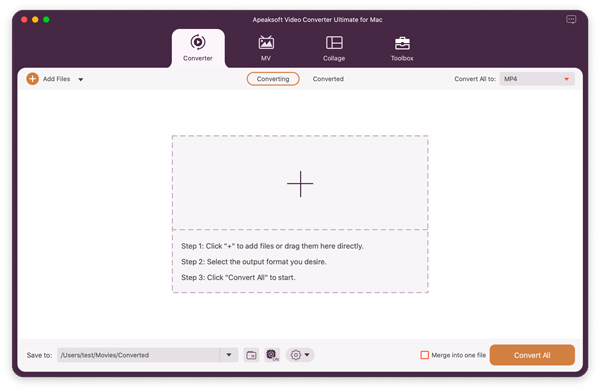
Step 1. Add video or audio file
Run this software on your computer on your computer. Click Add Files to add files to this software.
Alternatively, you are able to drag multiple video and audio files to this program.
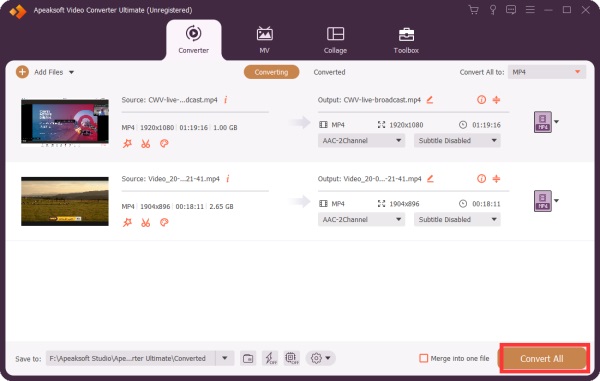
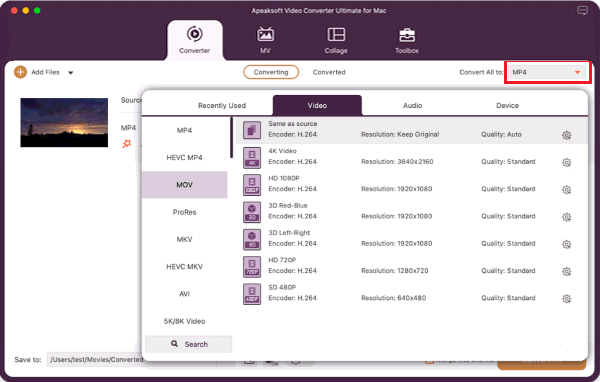
Step 2. Set the output file
Select the output format you want by clicking the dropdown list of Convert All to. You could select the output format for your devices, even the streaming sites.

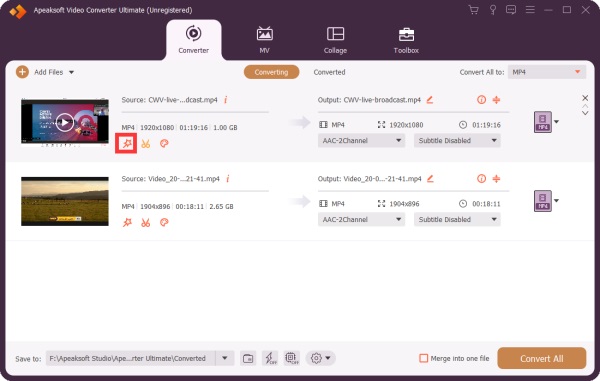
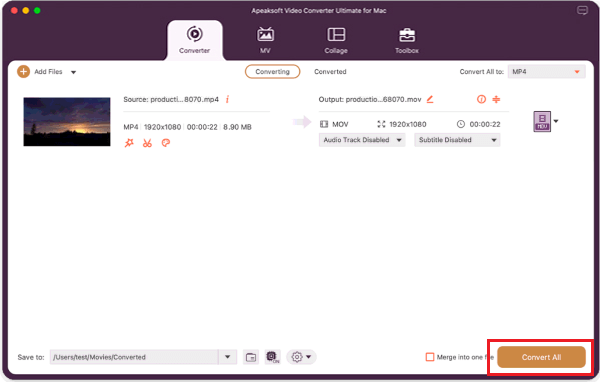
Step 3. Convert video/audio file
In the end, click Convert All button at the bottom-right corner to start to convert video or audio files on your computer.
Edit video/audio
Video Converter Ultimate also provides you with the wonderful editing functions.
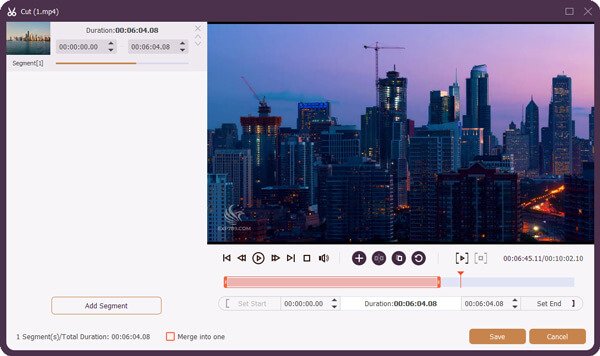
Cut and merge video
To get parts of a video file or combine several video clips into one, click the Cut button in the main interface.

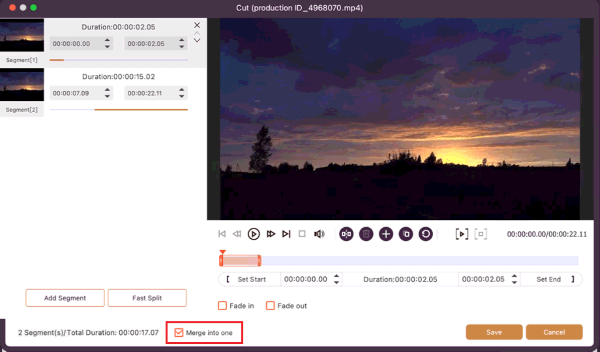
Then, you could start clipping your video. After making the clips, you could adjust the position by clicking the arrow-down or arrow-up and check the box of Merge into one to combine them together.
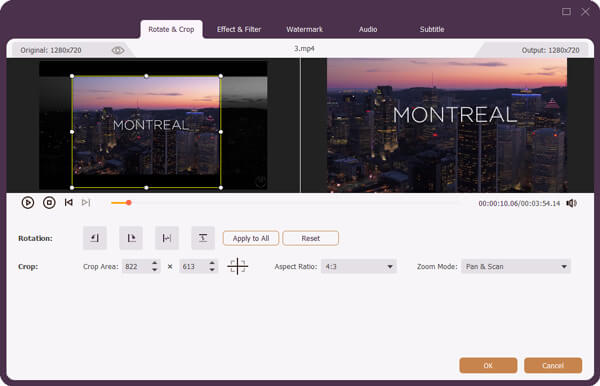
Rotate & crop video
When your video file is sideways, you could try the Rotate feature to rotate it in 90 clockwise or counterclockwise or flip video horizontally or vertically.
Or you can use the Crop feature to crop the video by setting the crop area, changing aspect ratio and zoom mode.
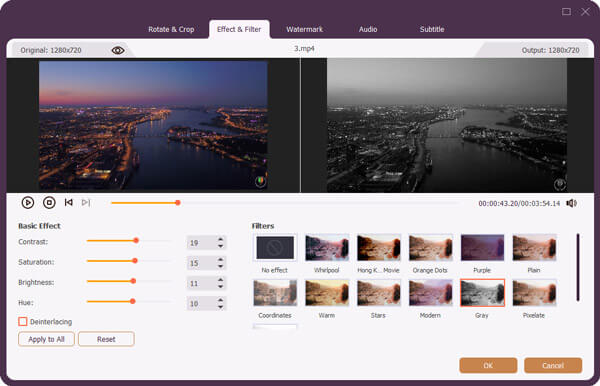
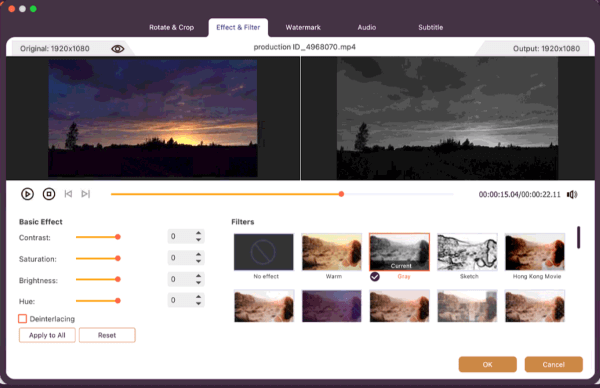
Adjust video effect & filter
If you want to create a special video effect like horrible, romantic, old, etc., you could adjust the effects by yourself manually.
Go to the Effect & Filter section after clicking the Edit button.
You can adjust the brightness, contrast, saturation and hue by adding the value or dragging the circle bar separately. And you can also select a suitable filter for your video.
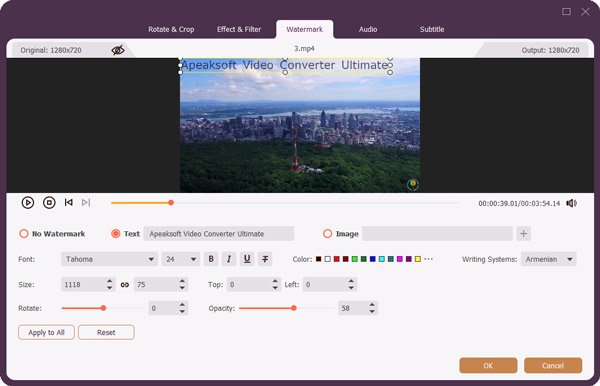
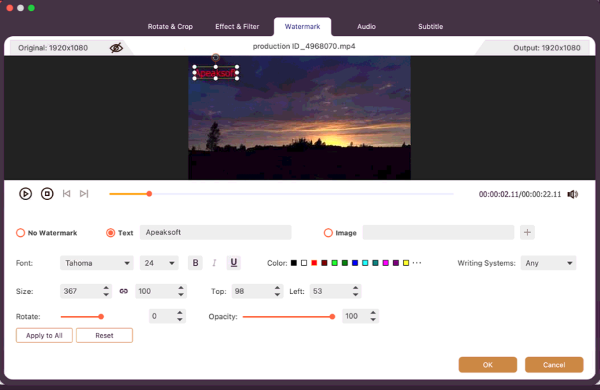
Add watermark
Want to specify your own video file? Just use the Watermark feature in this software. Navigate the Watermark section after clicking the Edit button. Here you can add either text or picture as the watermark.
For text watermark, you just need to type the words, set the text font, color, style, size, effects and writing system.
For picture watermark, you need to select the picture on your computer.
Then drag your mouse to move the watermark or set the value for watermark area and transparency.
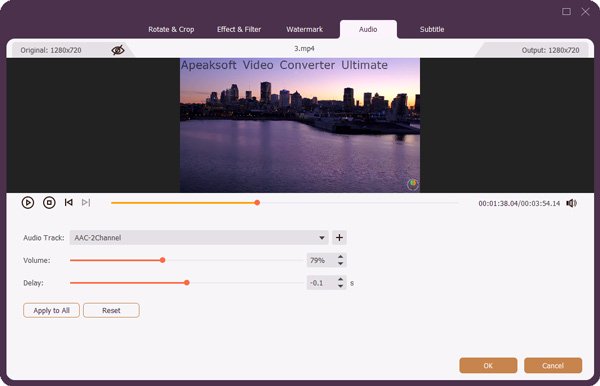
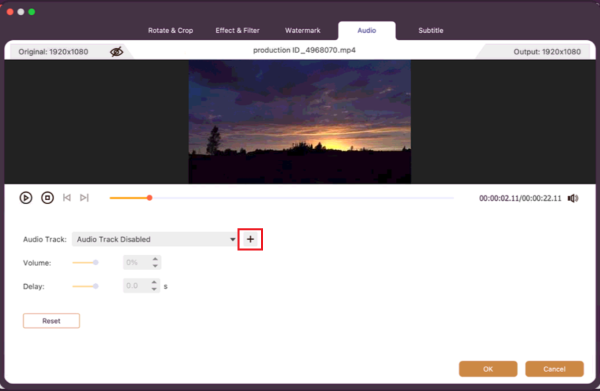
Adjust audio
Go to the Audio section after clicking the Edit button. Here you can change the delay time, and adjust audio volume by adding the value or dragging the circle bar. Also, you can select the audio track you’d like to play.
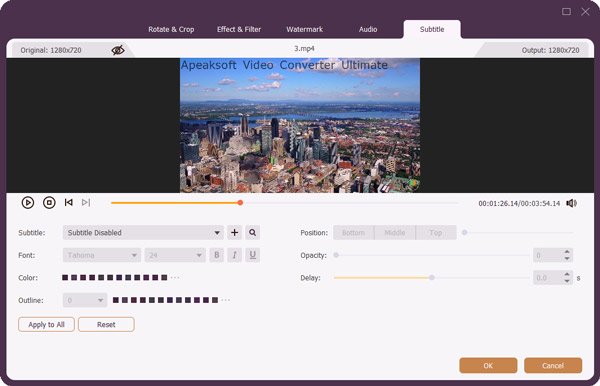
Add subtitle
Feel a headache for the unsynchronized subtitle of the video file? Just use its Subtitle feature. After entering into the Subtitle window, just click + to import the subtitle file (*.srt; *.ssa; *.ass) from your computer. Then, you can adjust the position, font, color, transparency, delay time, outline and more according to your needs.
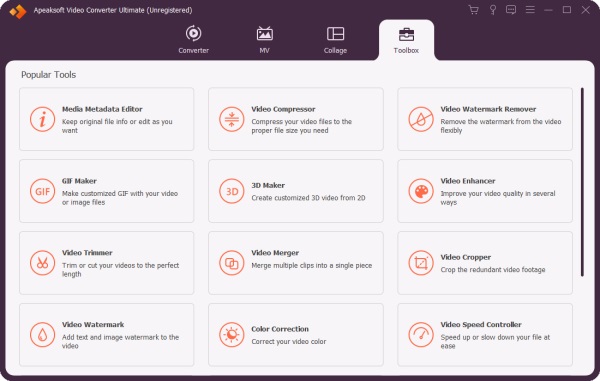
Toolbox
Video Converter Ultimate also provides powerful tools to help you edit media metadata information, compress video files, make animated GIFs, make a 3D video, enhance the video quality, trim videos, control video speed, reverse videos, merge multiple clips into one video, rotate videos, adjust the volume of videos, and sync audio with video.
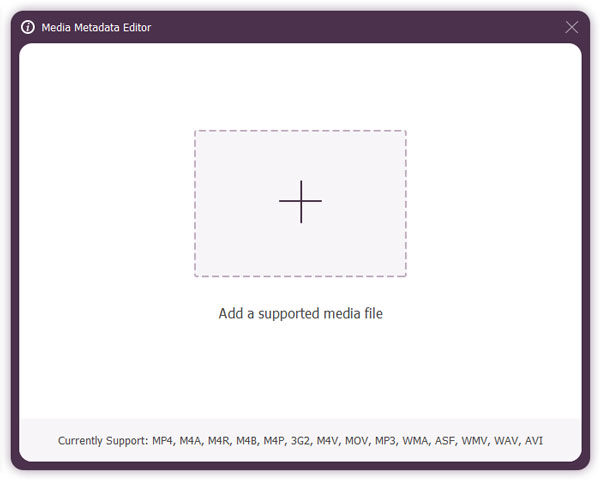
Media Metadata Editor
You can use this media metadata editor to edit your video or audio files effortlessly.
Step 1. Add a media file to this program.
Step 2. You can edit the file by changing the file name, cover, artist, album, composer, genre, year, track, comments.
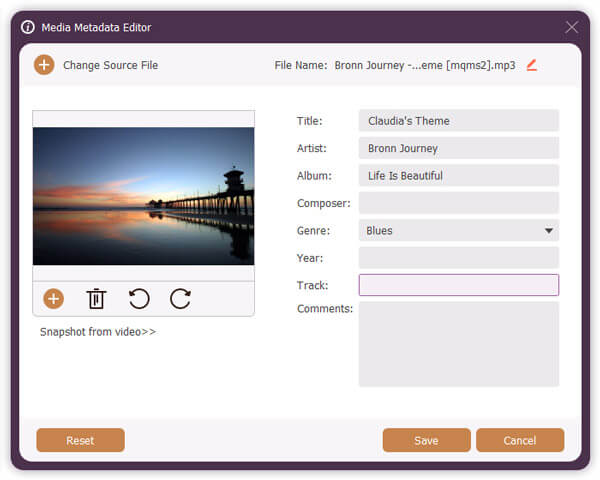
Step 3. Click the Save button to save your file.
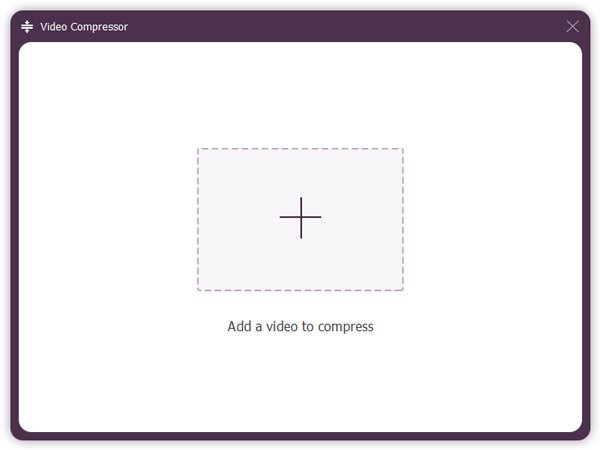
Video Compressor
You can use it to compress large video files easily.
Step 1. Add a video file.
Step 2. Change the size, format, resolution, bitrate to compress your video file.
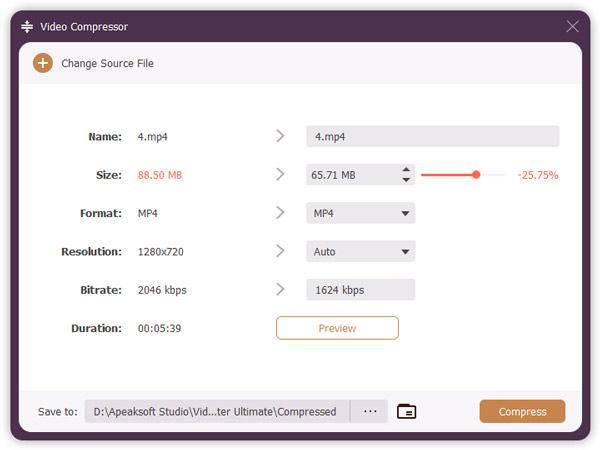
Step 3. Click the Compress button to compress your video file.
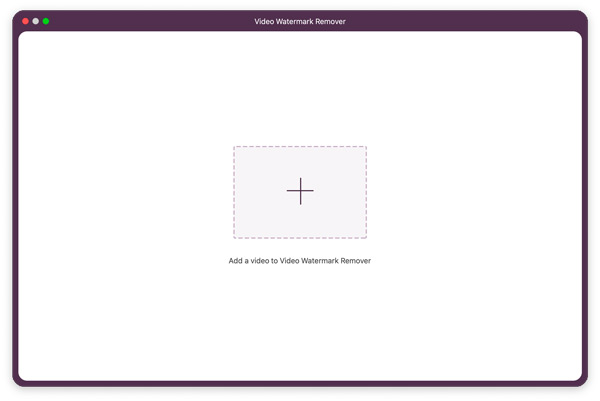
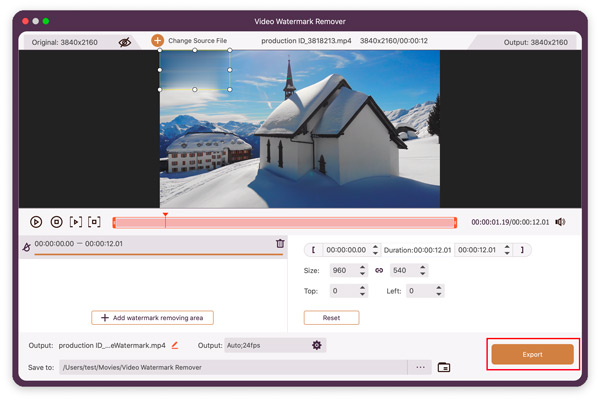
Video Watermark Remover
If there is an annoying watermark on the video, you can apply the Video Watermark Remover to get rid of it.
Step 1. After entering the interface of Video Watermark Remover, you can upload the video that you want to remove the watermark from.

Step 2. Click the Add watermark removing area button, and there will be a shape added to the video. You can move and resize the shape to cover the watermark on your video. You can even change the duration when the shape shows up or disappears.
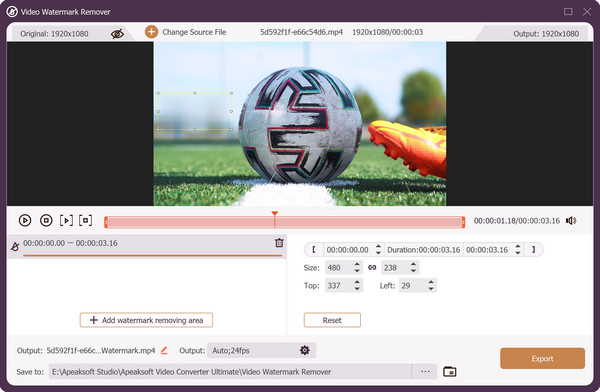
Step 3. Click Export if you finish removing the unwanted watermark.
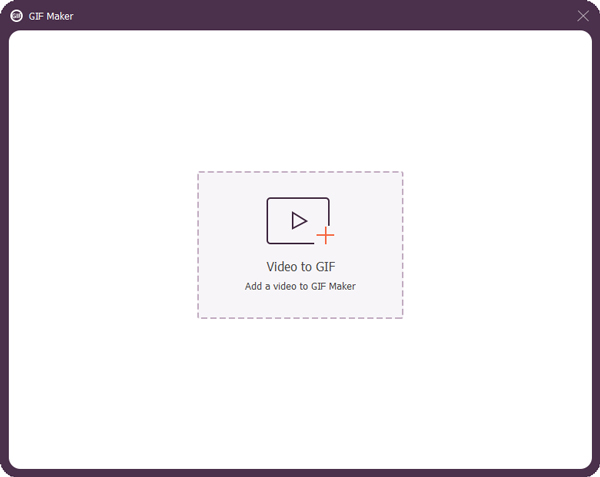
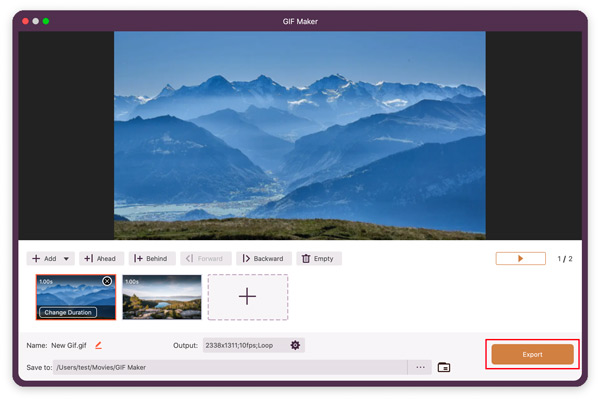
GIF Maker
It also works as a GIF maker to help you make animated GIFs.
Step 1. Add a video file.
Step 2. Edit the video with multiple functions, including Rotate & Crop, Effect & Filter, Watermark, Audio, and Subtitle.
You can also cut the video and save the clip to make a GIF.

Step 3. Click Generate GIF to create your GIF.
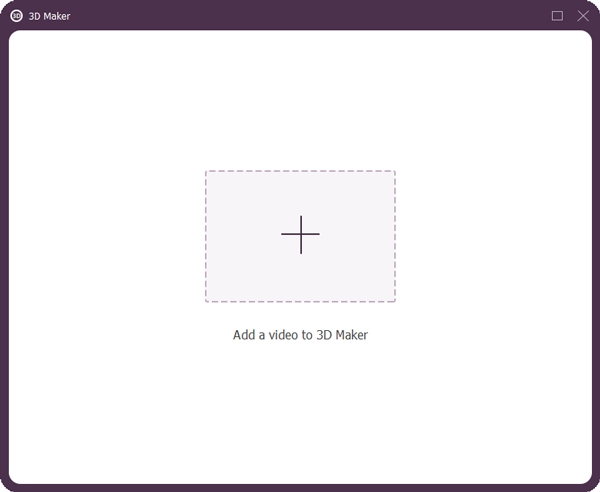
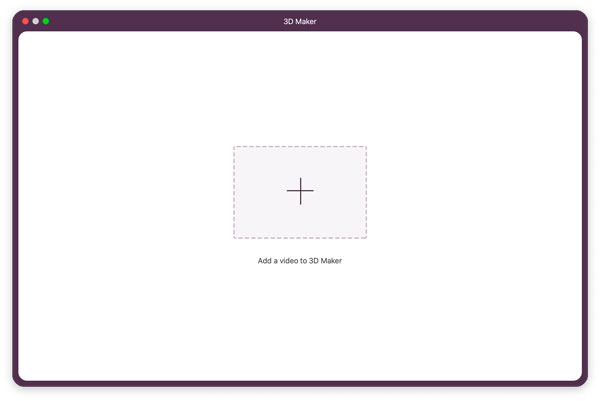
3D Maker
For your needs to convert 2D into 3D video, or change 3D modes, 3D Maker will be exactly for you.
Step 1. Add a video file to 3D Maker.
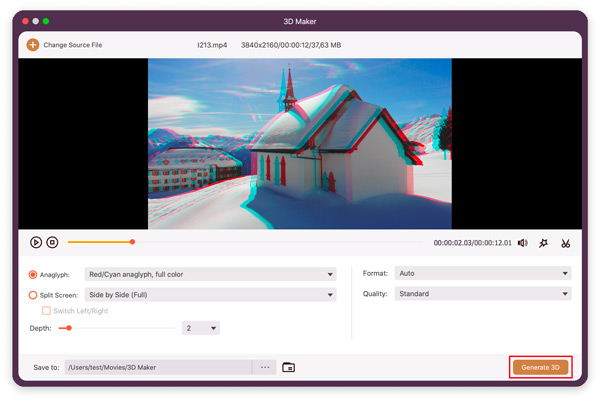
Step 2. It offers various options for you to make a 3D video.
Red/cyan anaglyph: Red/cyan anaglyph, monochrome/half color/full color/high quality Dubois, Green/magenta anaglyph, monochrome/half color/full color, and Amber/blue anaglyph, monochrome/half color/full color.
Split Screen: Side by Side (Half-Width/Full) and Top and Bottom (Half-Height/Full)).
Depth: From 1 to 15.
Switch Left/Right: This is optional for you.
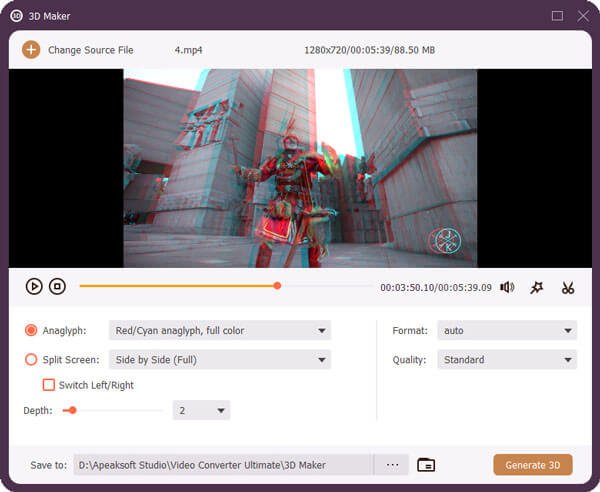
Step 3. In the end, click Generate 3D to create your 3D video.
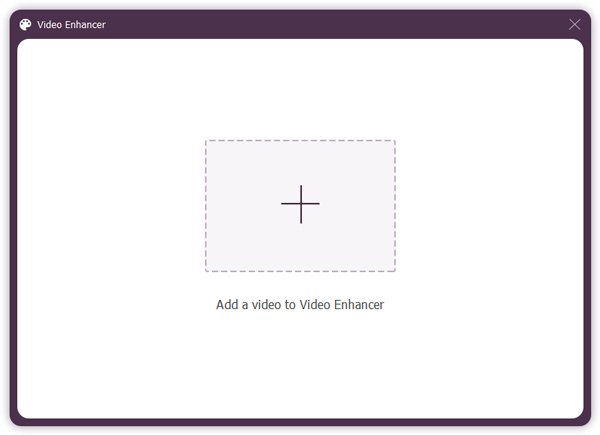
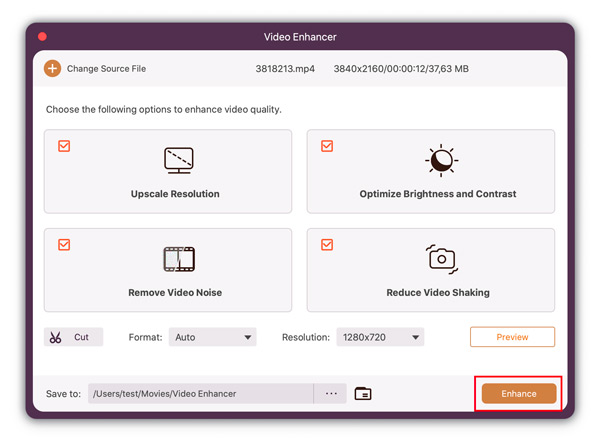
Video Enhancer
If you get a poor quality video file, or have some dirt-like spots on your video file, you should use Video Enhancer tool.
Step 1. Add a video file to Video Enhancer.
Step 2. You are provided with 4 options to enhance your video file.
Upscale Resolution: This function enables you to get superb video quality when you convert lower resolution video to high resolution video, including 4K.
Optimize Brightness and Contrast: Compared with the manual effect adjustment mentioned above, this feature will automatically optimize your brightness and contrast to make your videos more enjoyable.
Remove Video Noise: Dirt-like spots can be removed, and getting rid of the noise from your video file can be done in one click with this software.
Reduce Video Shaking: When you get some shaky video files, this function can reduce video shaking motion with the whole frame movements.
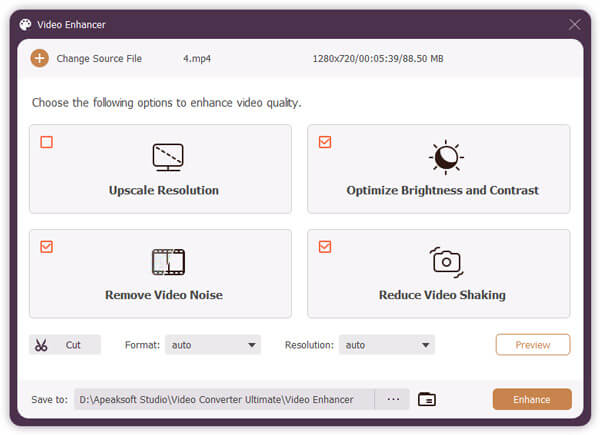
After that, you can preview your video in advance.
Step 3. At last, click the Enhance button to enhance your video.
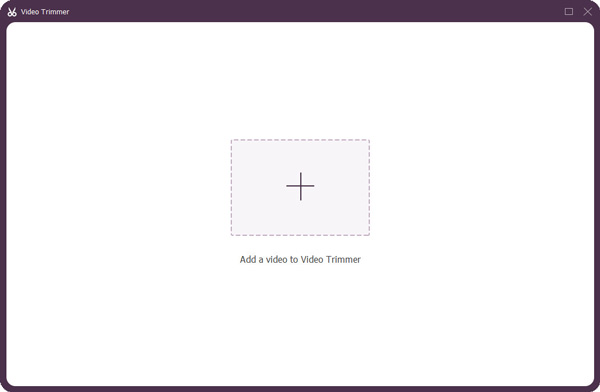
Video Trimmer
You can use it to trim or cut your video length as you want.
Step 1. Add a video file.
Step 2. You can cut your video by moving your mouse on the bar or editing the timing. And you also can click the Split button to turn your video into two segments. Besides, you can choose a clip from your original video to add by clicking the Add Segment button/button or the Copy and create a new segment button. If you are not satisfied with these changes, you can click the Reset button. Moreover, you can click the Fast Split button to select a mode from Split by average and Split by time to split the video easily. When you want to turn these video clips into one video, you can check the box of Merge into one.
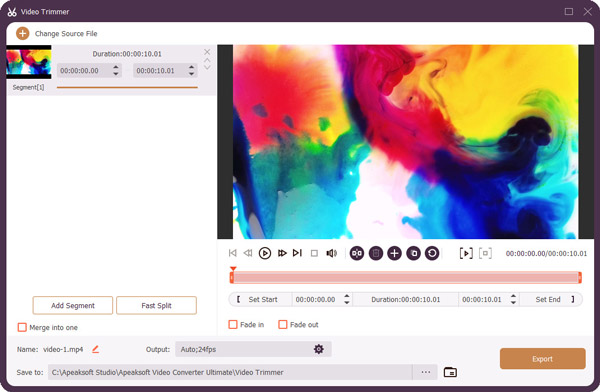
Step 3. Finally, click the Export button to get the result.
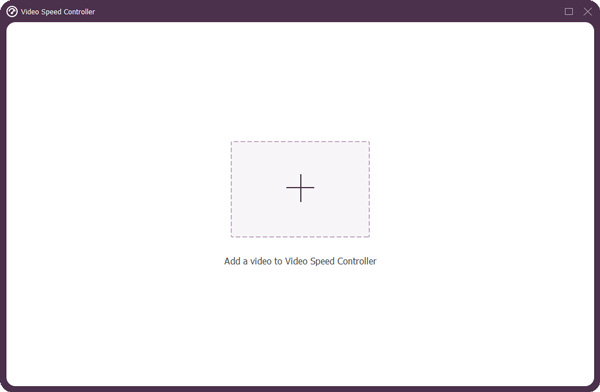
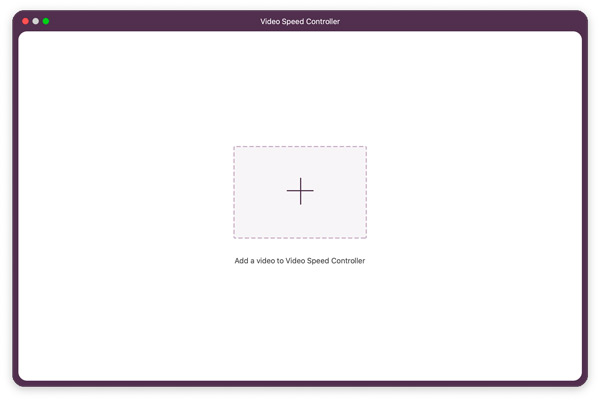
Video Speed Controller
If you want your video to be played quicker or slower, you can use this tool.
Step 1. Add a video file.
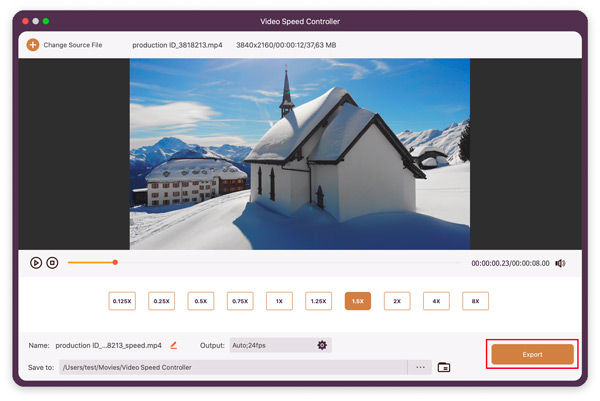
Step 2. Choose the speed you like by clicking the button with 0125X/0.25X/0.5X/0.75X/1X/1.25X/1.5X/2X/4X/8X. Then you can slow down or speed up your video.
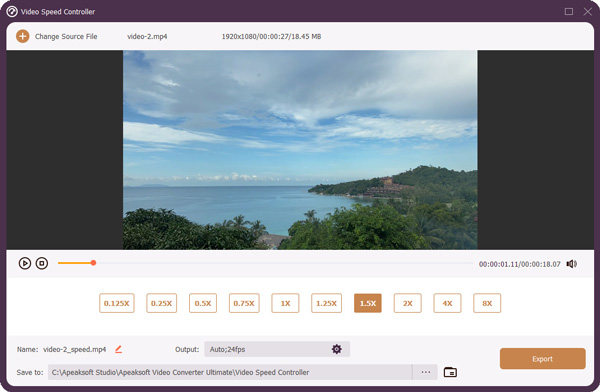
Step 3. Click the Export button to control your video speed.
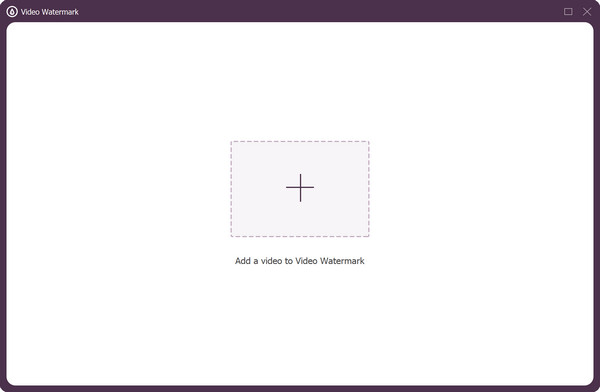
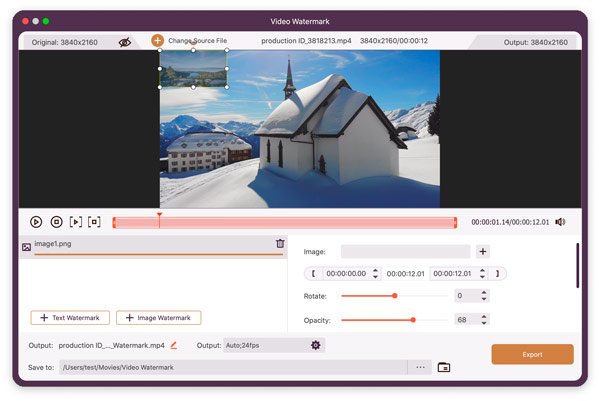
Video Watermark
Besides removing watermark, you are also able to add custom watermark to your video to protect your copyright.
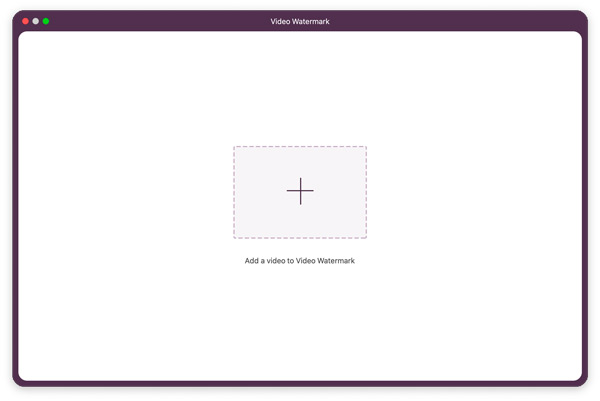
Step 1. Add the video that you want to protect into the Video Watermark tool.
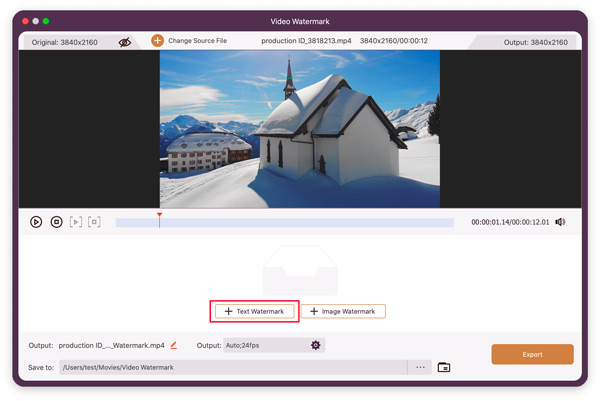
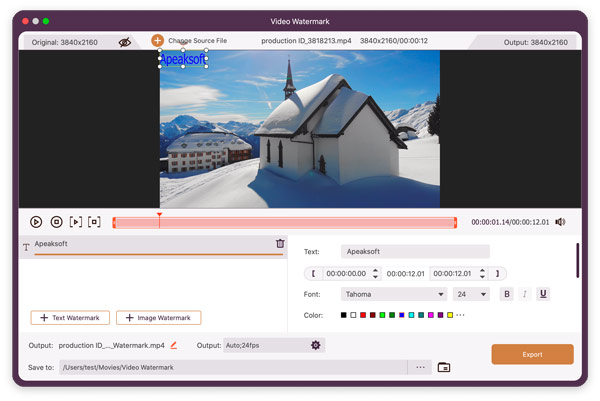
Step 2. You can choose to add either Text Watermark or Image Watermark according to your need. If you choose to text watermark, you can decide the text content, watermark position, duration, font, color, size, opacity as you like. You can even add multiple watermarks as you like.
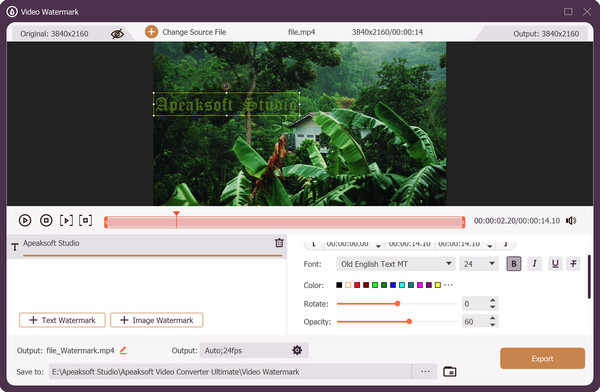
Step 3. Click on the Export button once you are done watermarking your video.
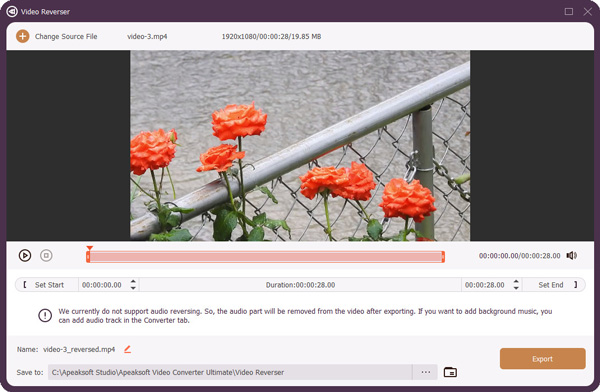
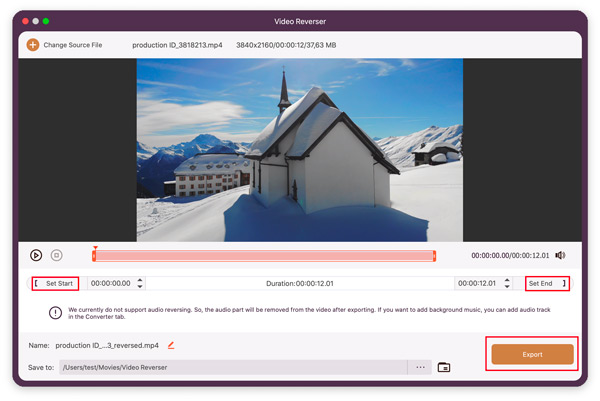
Video Reverser
You can use it to make your video more interesting when you want to create a video to share on social networks for getting more attention.
Step 1. Add a video file.

Step 2. Click the Export button to turn your video backwards. If you want to only reverse a part of your video, you can cut your video by moving cursors with your mouse on the bar or changing the starting and ending time. It is worth noting that this tool does not support reversing audio now, so the audio track will be removed after exporting.
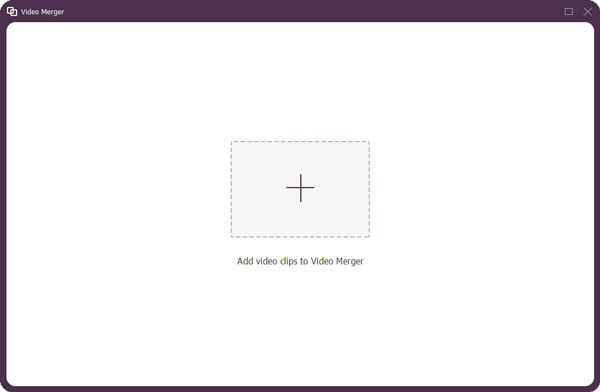
Video Merger
Sometimes, you take a lot of video clips with your camera, but you want to turn them into one video to share with your friends, and you can use this tool.
Step 1. Add several video clips to Video Merger.
Step 2. Before getting the final video, you can edit and trim your video clips, and adjust the order of them.
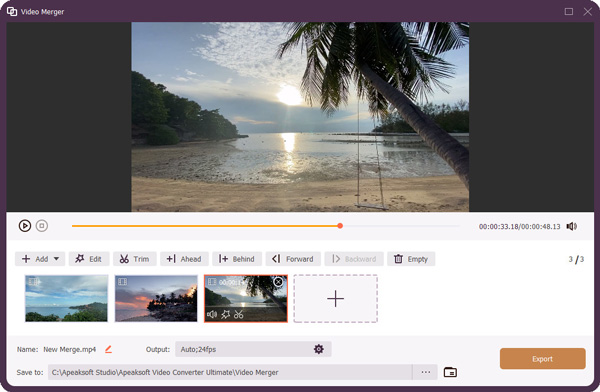
Choose a video clip and click the Edit button, then you can change its direction, crop its widow, adjust its basic effects and audio track, and add the filter, watermark, and subtitle to it. Besides, you can apply these changes you made to all video clips you added like rotating, editing basic effects, and adding watermark. Finally, you can click the OK button to save all changes.

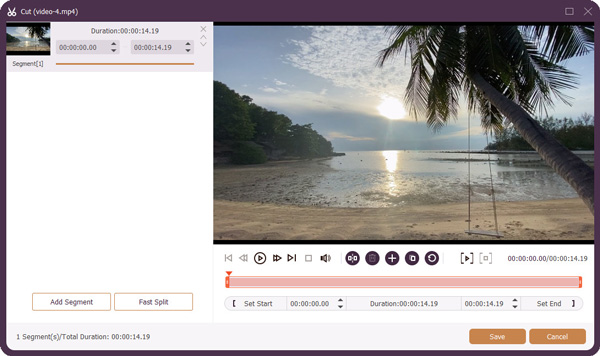
Select a video clip you want to cut and click the Trim button, then you can do as the guide of Video Trimmer said and click the Save button.
Step 3. In the end, click the Export button to merge your video clips into one video.
Video Cropper
To crop a video, please try the Video Cropper feature.
Step 1. Open Video Cropper. Then you need to select the video for cropping.
Step 2. You can simply drag and resize the selected area to get rid of unwanted parts of the video. You can also input the exact number or aspect ratio to change the cropping area. Click Preview to see the effect.
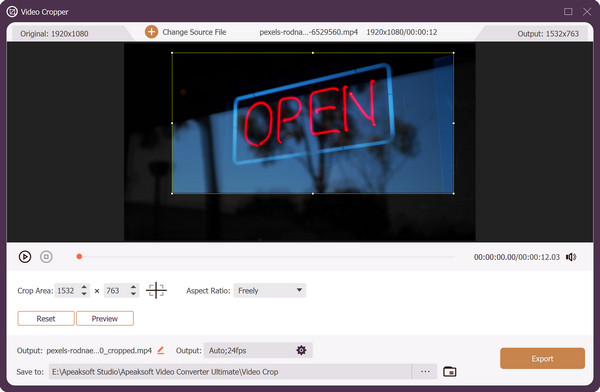
Step 3. If the video is cropped perfectly, you can click on the Export button to save it on your computer.
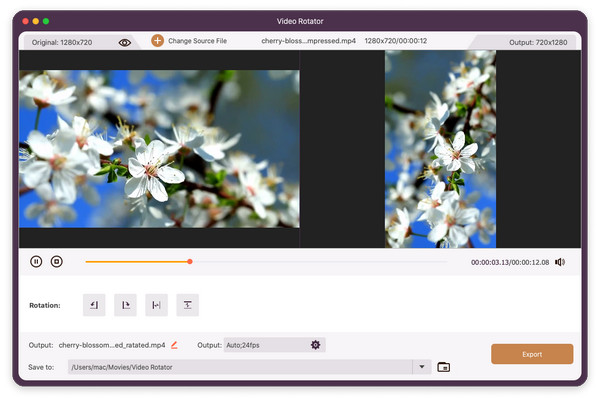
Video Rotator
When you play some videos recorded by your mobile phone on your computer, you find that your videos directions do not fit the computer window, and in this case, you can use Video Rotator to change directions.
Step 1. Add a video file.

Step 2. You can rotate your video 90 degrees to the left or right, or flip your video horizontally or vertically by clicking buttons after Rotation.
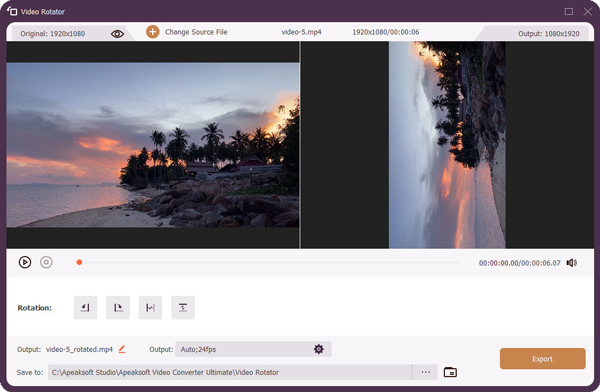
Step 3. Click the Export button to rotate or flip your video.
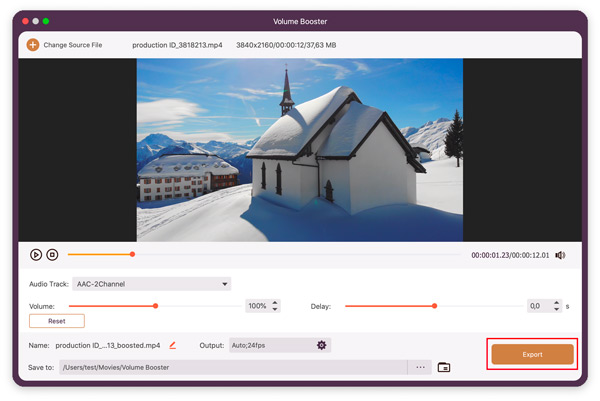
Volume Booster
If you think that the audio of your video is too loud, you can use this tool to lower the volume.
Step 1. Add a video file.
Step 2. You can turn the volume of your video up or down by moving your mouse on the Volume bar. In addition, you can move your mouse on the Delay bar to sync the audio with video.
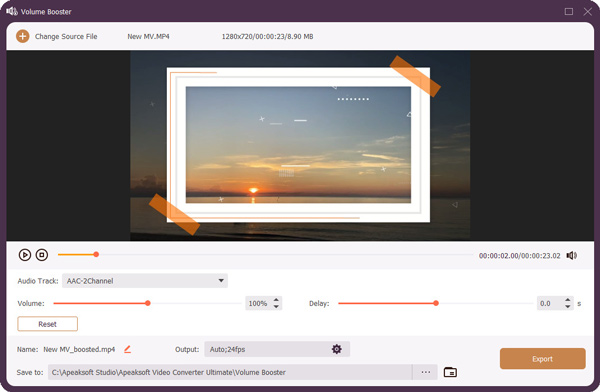
Step 3. Finally, click the Export button to get the result.
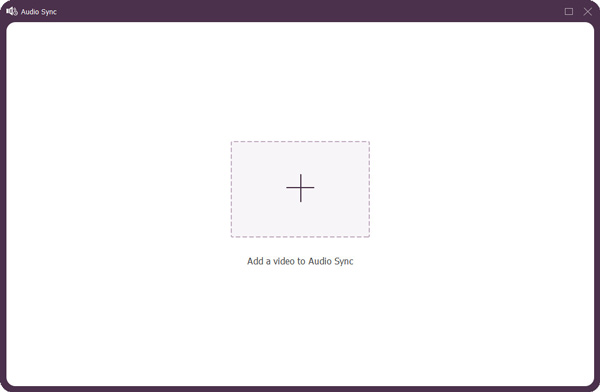
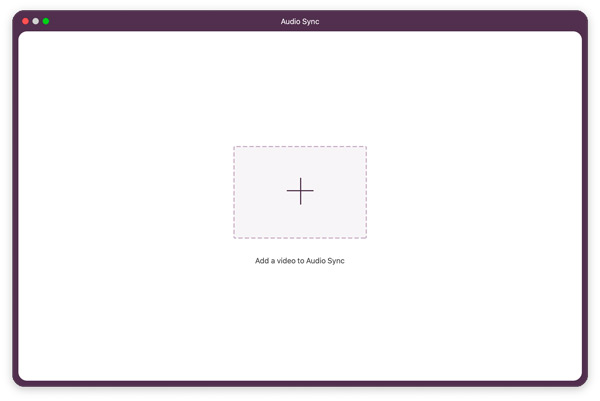
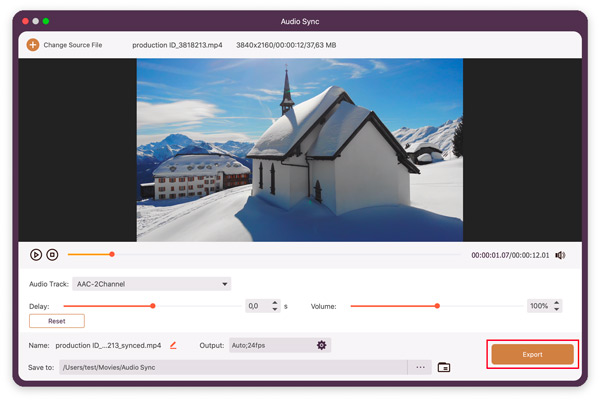
Audio Sync
The soundtrack is not in sync with the picture, which is annoying for the audience. You can use this tool to solve it.
Step 1. Add a video file.
Step 2. To make the audio is in sync with your video, you can move your mouse on the Delay bar. Besides, you also can move your mouse on the Volume bar to turn your video up or down.
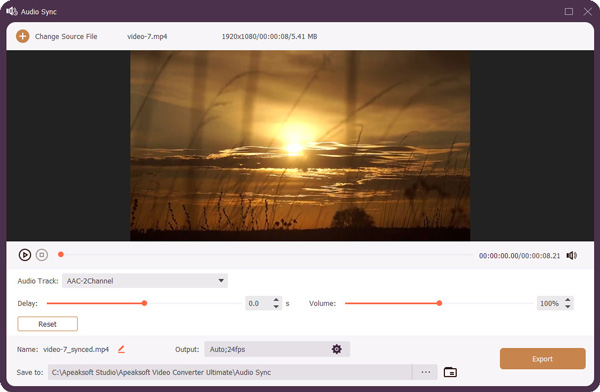
Step 3. In the end, click the Export button to adjust the audio.
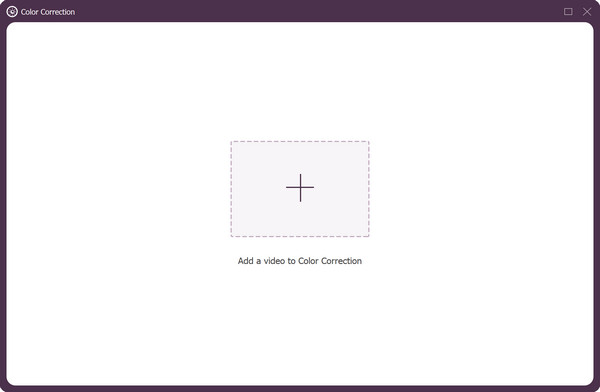
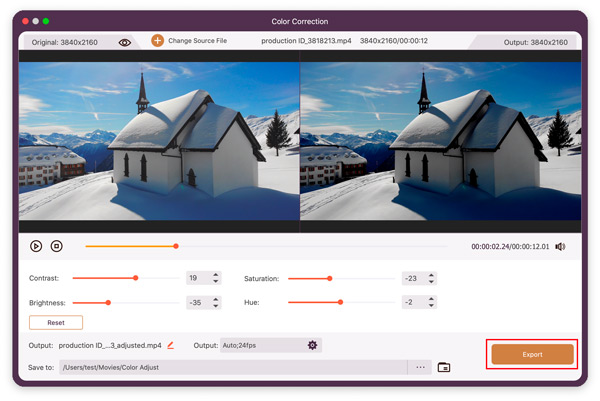
Color Correction
You can also fix the color of your video at ease using Color Correction.
Step 1. Upload the video file to the program for color correction.
Step 2. There will be a before & after module for you to check and preview the effect in real time. You can change contrast, brightness, saturation, hue as you like.
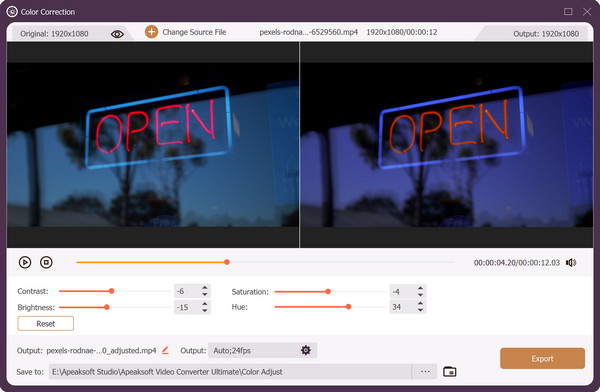
Step 3. Click on the Export button in the right corner to apply the changes.
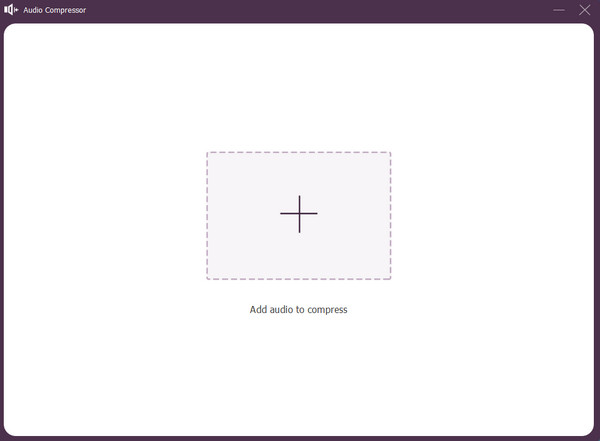
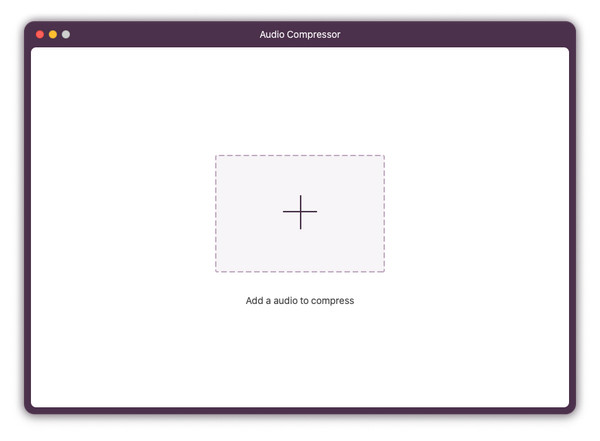
Audio Compressor
To change your audio size to a smaller one, you can move to Audio Compressor from Toolbox in Apeaksoft Video Converter Ultimate.
Step 1. Click the central Plus button to add the audio.
Step 2. In the following window, you can change the name, size, format, audio track channel, sample rate, bitrate and duration of your audio. You can also enjoy the timely effect by clicking the Preview button.
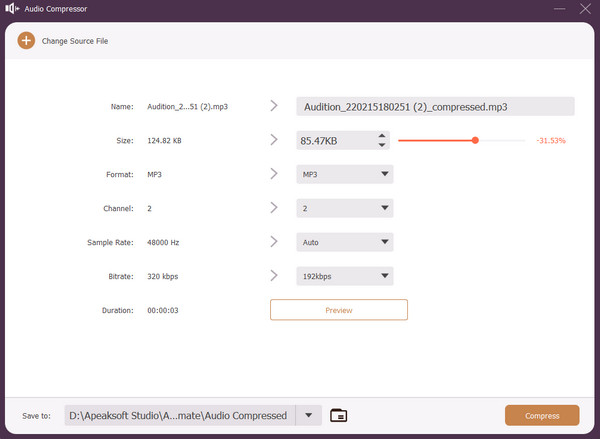
With all set, tap Compress to generate your works.
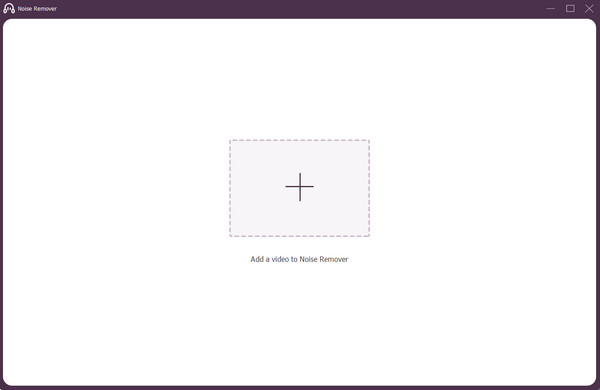
Noise Remover
It helps you get rid of annoying noise in the video files within a few clicks.
Step 1. Add your video file to Noise Remover.
Step 2. After adding your file, you can select the audio track by clicking the Drop-down button and ticking Enable audio noise reduction to remove the excess noise. For multiple audio tracks, you can tap the Check button to apply the settings to all audio tracks. Besides, you can also move the bar following Volume and Delay to fit. If you are not satisfied with the adjustment, choose Reset to restart the process.
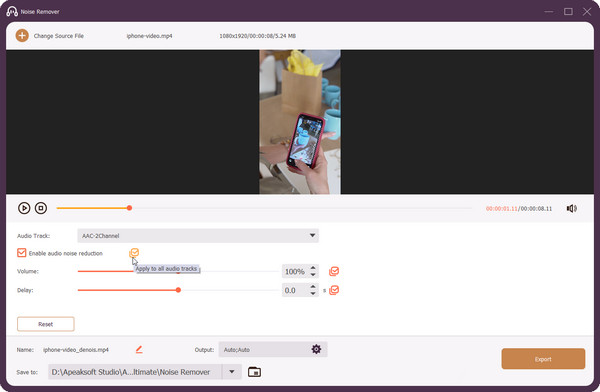
Step 3. Select a path to save your file and click Export to view the result.
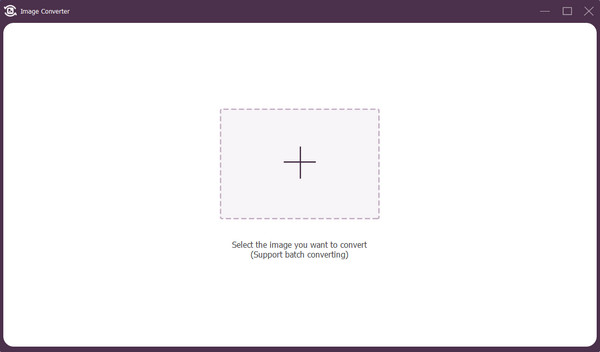
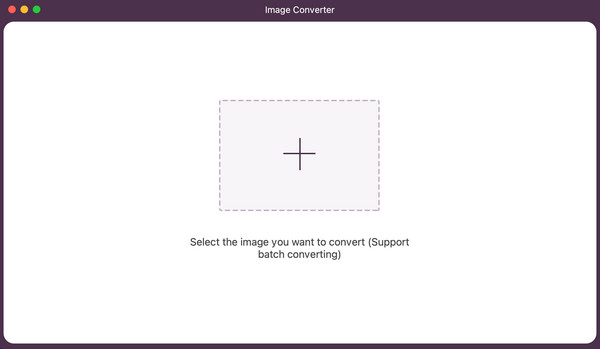
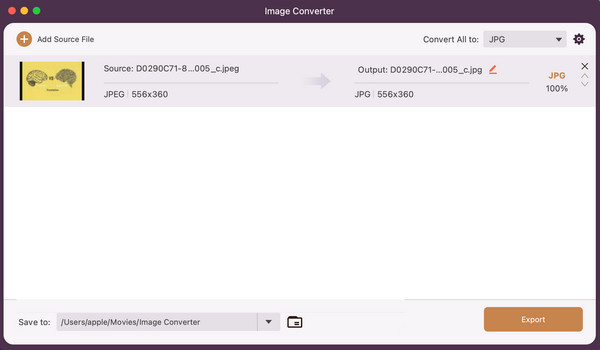
Image Converter
You can convert your image files between popular formats, including JPG/JPEG, PNG, WEBP, BMP. TIF/TIFF and so on.
Step 1. Select the image you want to convert by clicking the central Plus section.
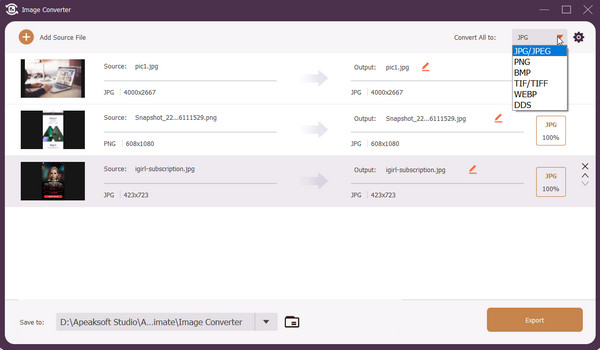
Step 2. After that, you can change the output name by clicking the Edit button following Output. To change the output format, you can move to the Format box to select the wanted one.

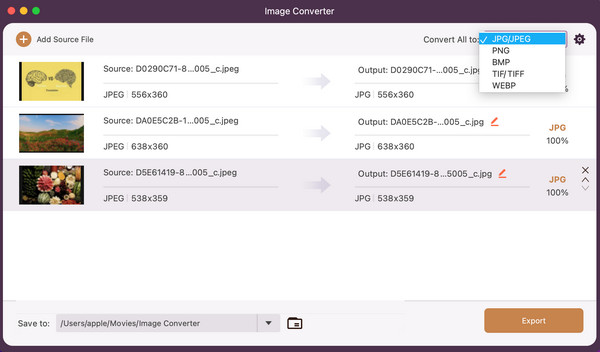
If you want to convert multiple pictures at one time, click the Add Source File to input all files and drop down the Convert All to box to select the export format in the top right corner.
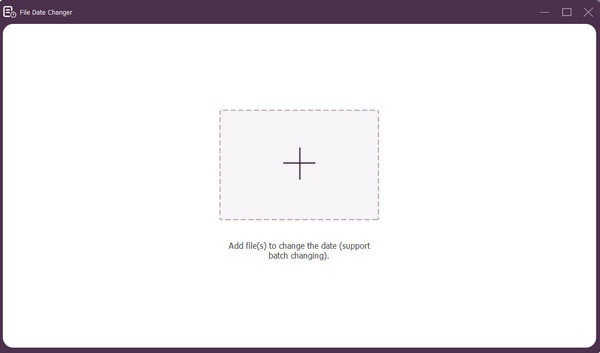
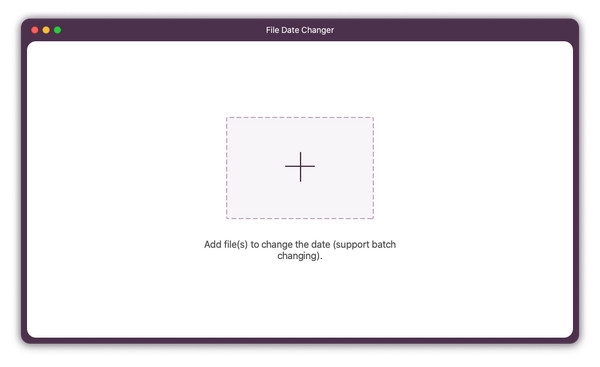
File Date Changer
It will do you a favor to change the file date details for individual or batch conversion.
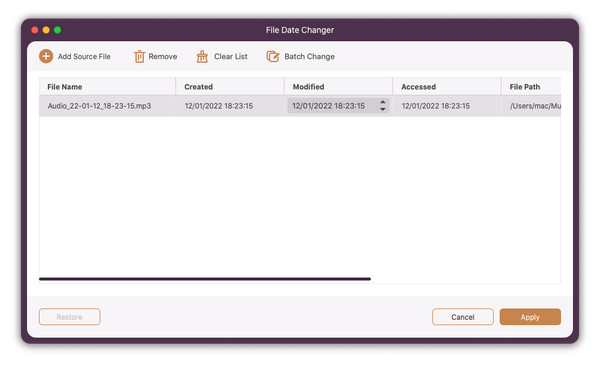
Step 1. Add the files you want to change the date.
Step 2. After that, you can change the created, modified and accessed file date by clicking and editing the date box.

You can also tap the Batch Change button to process multiple files with adjusted dates.
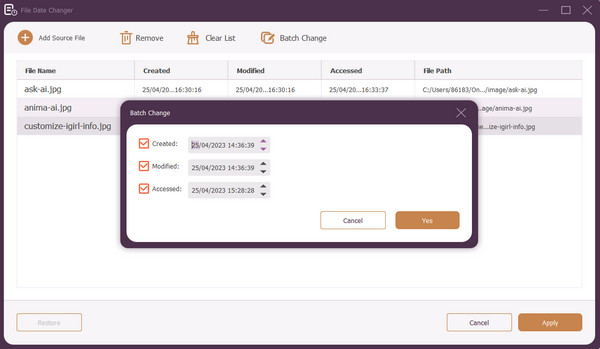
Step 3. With all done, click the Apply button to generate the adjusted file.
Video/ Audio Recorder
This powerful recorder can help you record HD video and audio files on your computer without any delay.
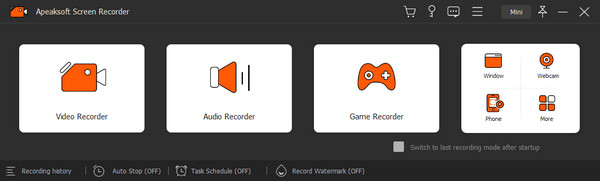
To record your video:
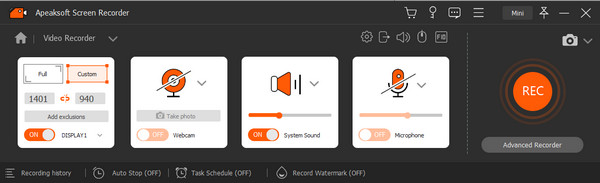
Step 1. Choose Video Recorder and get prepared. If you want to record a specific window on your desktop, you can choose the Window section. For those who want to record themselves in a video for tutorials or presentations, you can enter the Webcamsection. And you can also record the phone activities in videos with the Phone access.
In the following interface, you can select a recorded area and decide whether to turn on the webcam, system sound and microphone. When you make your decisions, click the REC button to start recording.
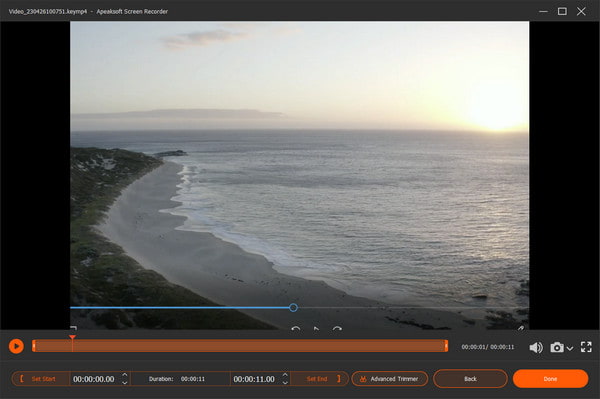
Step 2. Click the Stop button when you finish the recording. You can adjust the duration, adjust the volume and take snapshots before you save your work. Then click Done to save the changes.
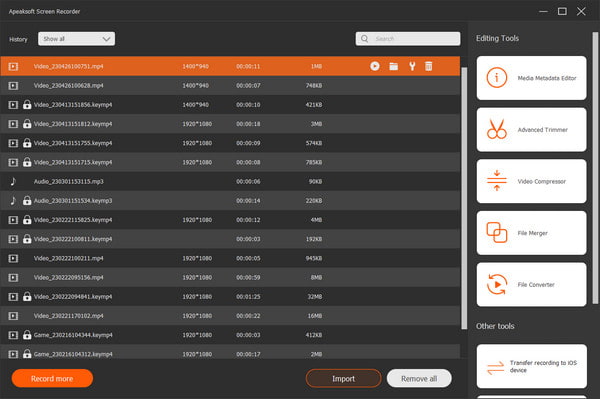
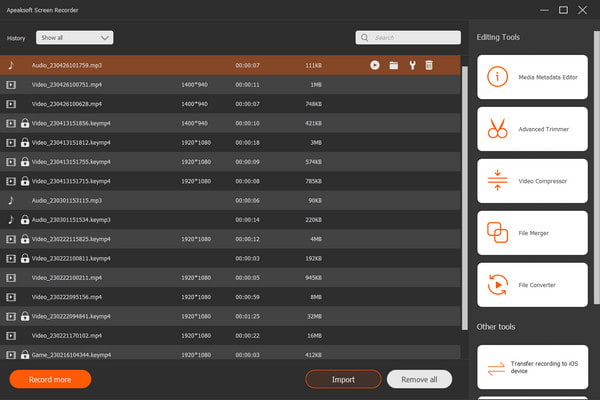
Step 3. You can view the recording history in the following window and choose to play, edit or delete the file based on your needs.
To record your audio:
Step 1. Enter Audio Recorder. And you can turn on the System Sound and Microphone according to your needs. Besides, you can adjust the audio effect by moving the volume bar. Then click the REC button to get started.
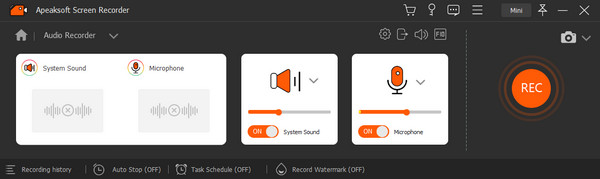
Step 2. After you complete the recording, click the End button and you can preview the effect in the following window. Here you can adjust the audio duration, change the volume and take snapshots if you like. Then click Done to generate your work.

Step 3. Then you can view the recording history and play the audio, open the folder, use the editing tools or delete the recorded files.
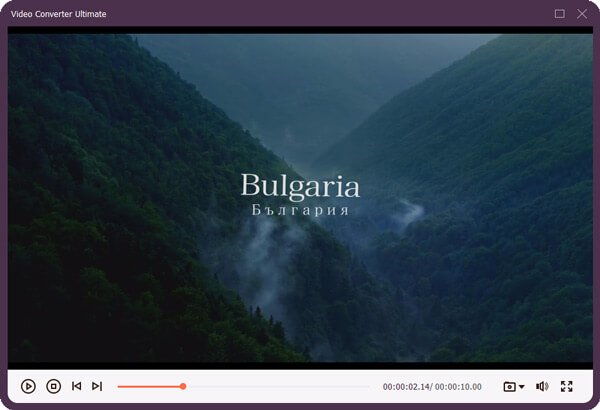
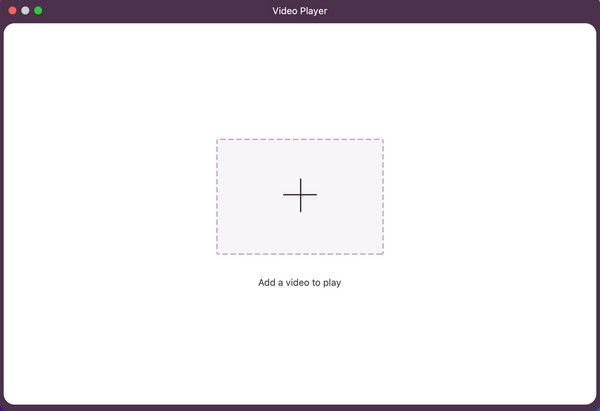
Video Player
You can easily play your video files with this tool.
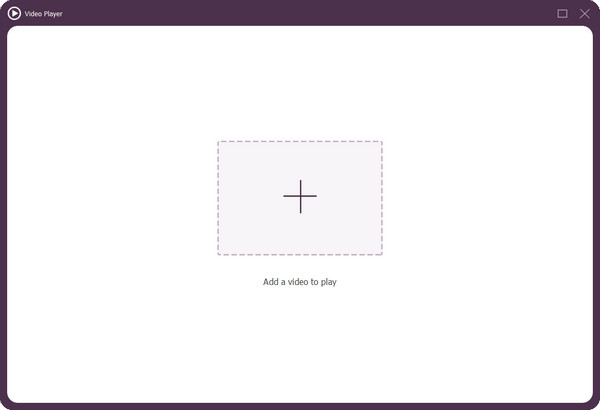
Step 1. Add a video to play.
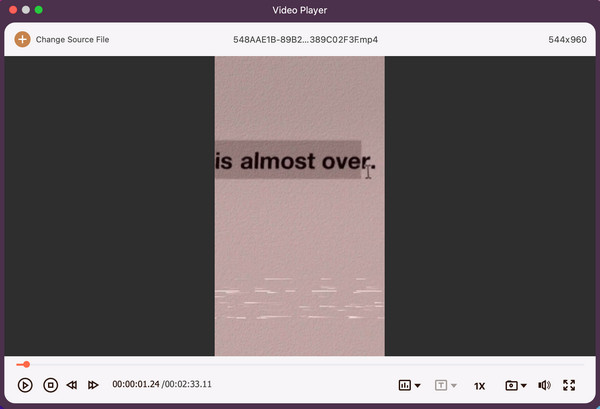
Step 2. Next, you can choose to play, stop or move the video to the previous/next 5 seconds accordingly. You can also switch the audio track, edit subtitles, change the play speed, take snapshots, adjust the volume as well as enter the full screen.
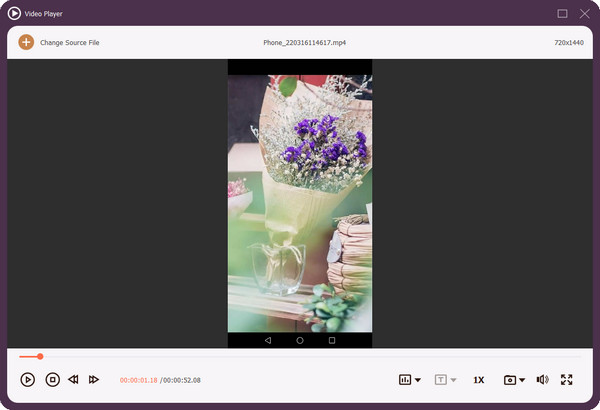
To play another video, you just need to click the Change Source File to select a new file to play.
Create MVs
When you want to create a quick music video collection, Video Converter Ultimate does you a favor greatly.
Step 1. Select MV
When running this software on your computer, go to the MV tab.
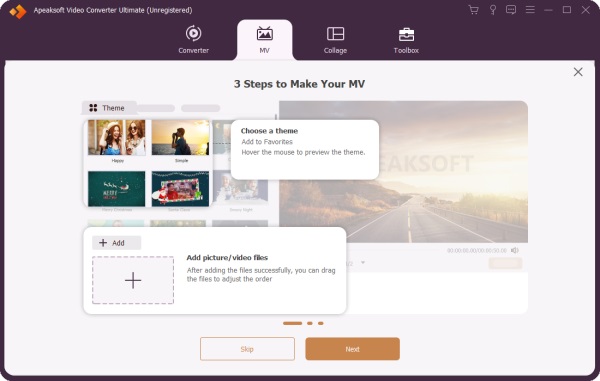
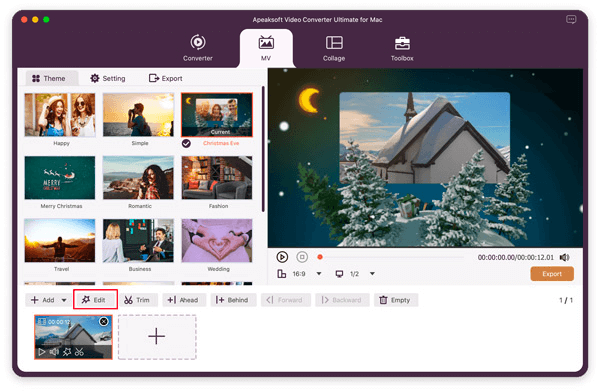
Step 2. Add videos and images
Select one MV theme from the ready-made themes, and click the add (the plus button) button at the bottom to import the videos and images you want to create in an MV.

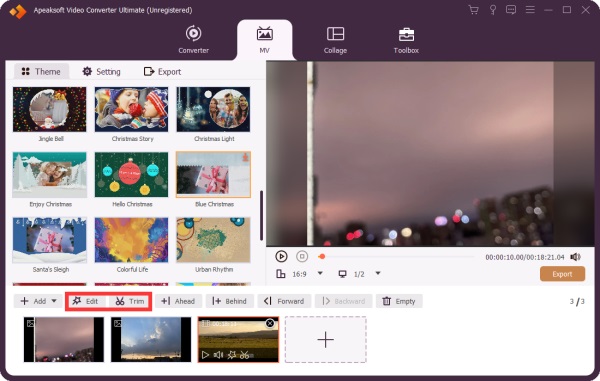
Step 3. Edit video effects
Click the preview button at the right pane to watch the MV production. Navigate one item, and the Edit or the Trim button lets you adjust the video effects like rotate, crop, watermark, filter, etc.
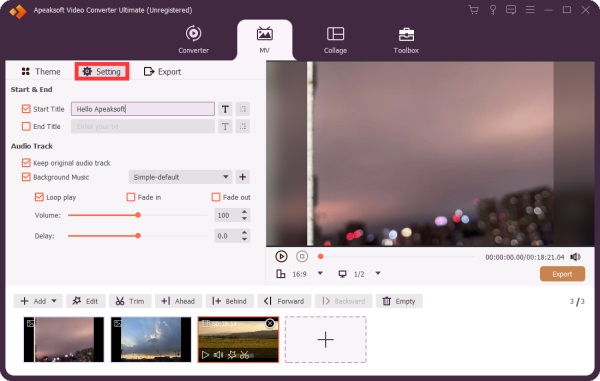
To add the starting and ending title and adjust the background audio track, you should go to the Setting section.
Here, you can change the background music, add the title for the MV, get the MV loop playback, etc.
Step 4. Export MV
While all the settings are made well, just click the Export button. Then select the output format, resolution, frame rate, and choose the location to save the exported MV file.
Finally, click Start Export to create and export the MV file.

Collage Videos
To create multiple-screen videos, Video Converter Ultimate can help you.
Step 1. Select Collage
After running this software on your computer, select the Collage tab.
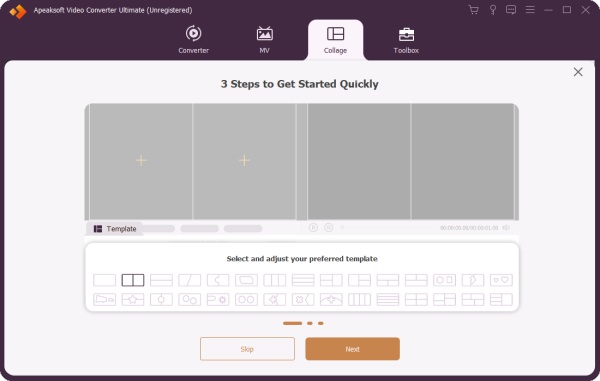
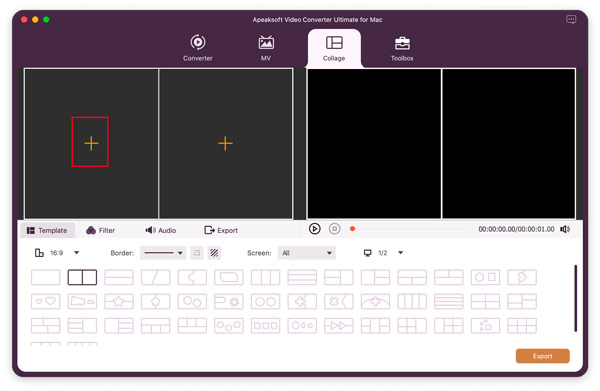
Step 2. Select layout
Then you will see various video layouts. Select the one you need by clicking it. You can adjust the layout ratio, border size, and color to get the one you want.
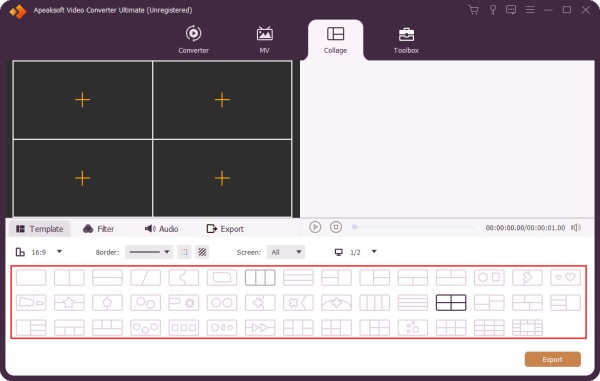
Step 3. Add videos and images
Click the add button (the plus button) on the left layout to add the video or image one by one.
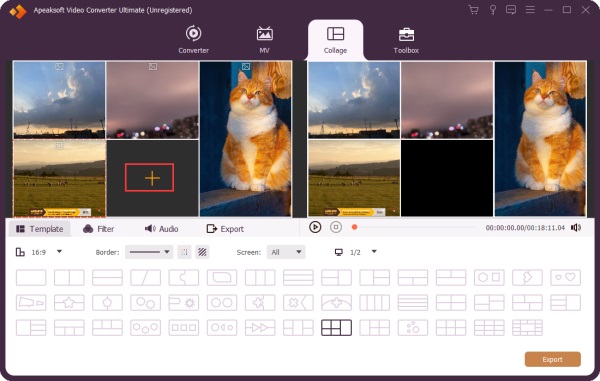
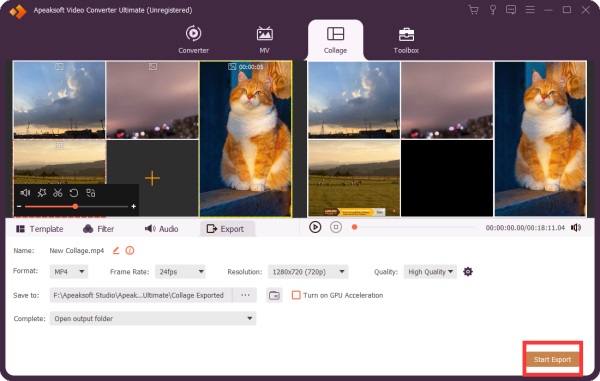
Step 4. Preview and adjust the video effect
Hover your mouse over the video or image you added, and you will see a floating bar, where you can silence or enable background audio, edit the video or image effects, clip video, reset scale and position and replace the file with another one.
While adjusting the video effects, you can click the preview button at the right side to see the output file.
Step 5. Export video side by side
Click the Export button at the right-bottom corner or go to the Export section.
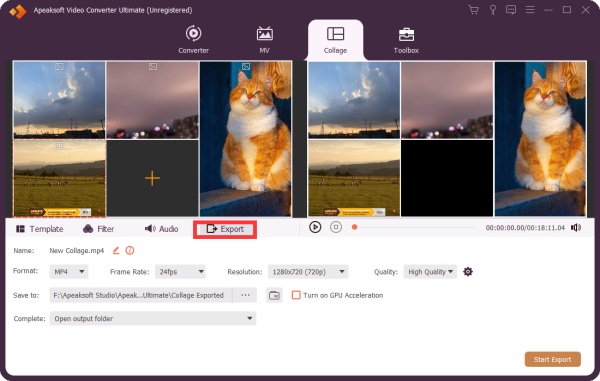
Then select the exported video format, frame rate, resolution, and quality; find the location to store the output video file.
Finally, click Start Export to collage the video and export it to your computer.
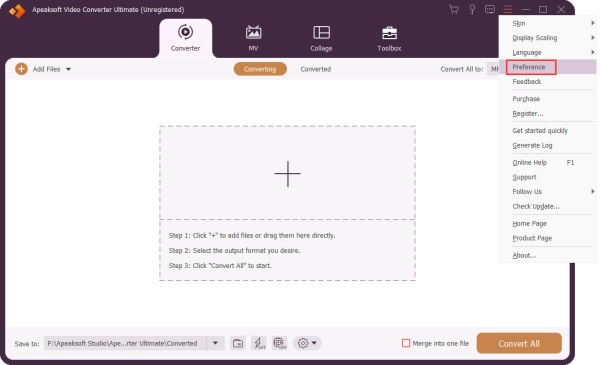
Set Preference
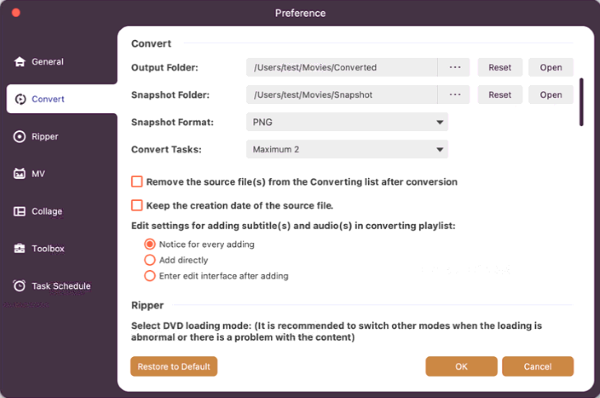
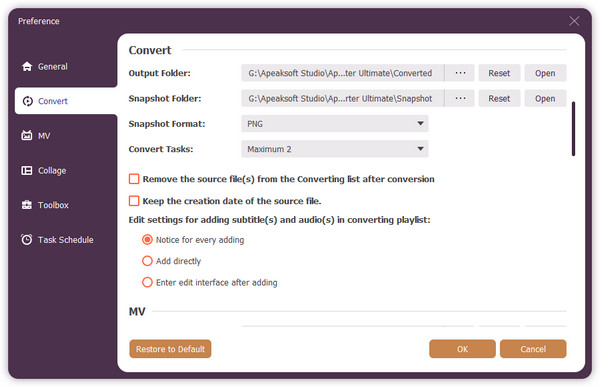
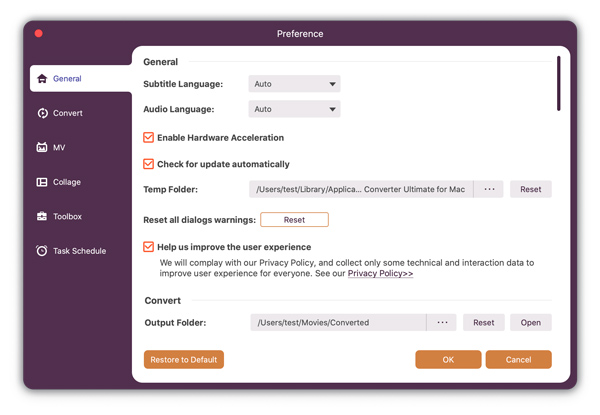
When clicking Preference, you will enter the preference window. Here are 5 sections for you.
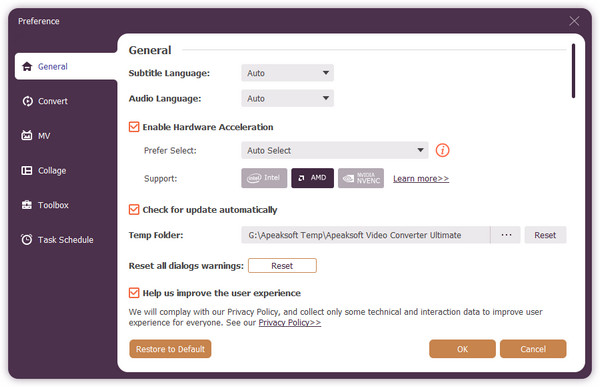
General
You can set the subtitle language and audio language, enable GPU acceleration, and check for update automatically.
Convert
Set the output folder and snapshot folder location. Moreover, you could set the convert tasks.
MV
Set the default location to store the MV video production file on your computer.
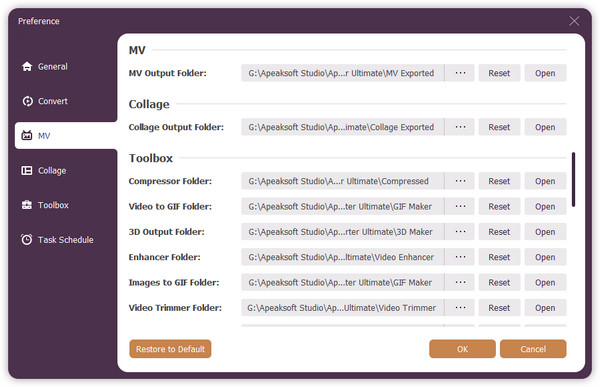
Collage
Set the default location to store the side-by-side video production video file on your computer.
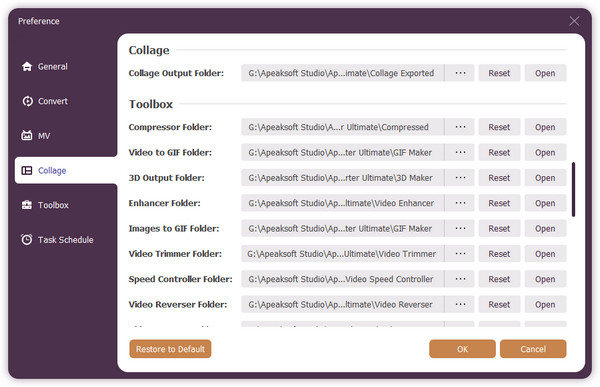
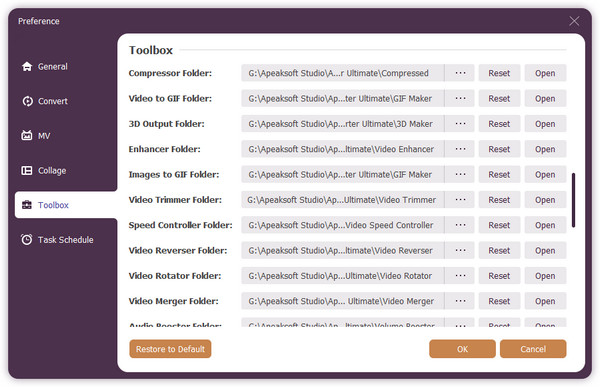
Toolbox
Set the compressor folder, GIF folder, and 3D output folder.
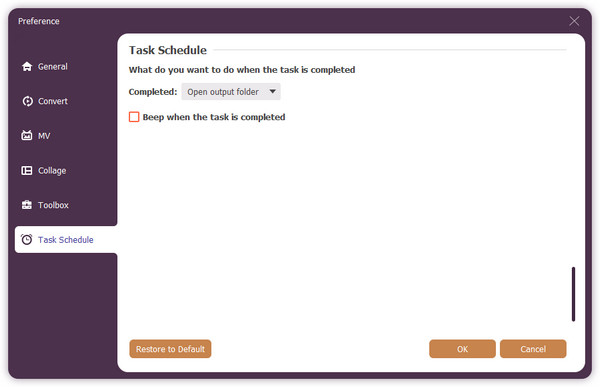
Task Schedule
When the task is completed, you can choose to open output folder, shut down computer, sleep computer, exit program or do nothing.
User Guide
- Getting started
- Convert video/audio
- Edit video/audio
- Make MVs
- Make Video Collage
- Toolbox
- Set preferences
Try It Now!
Getting Started
Install software
Before installing this software, please make sure your computer meets the following system requirements:
For Windows users:
Windows OS: Windows 11, Windows 10, Windows 8.1, Windows 8, Windows 7
CPU: 1GHz Intel/AMD CPU or above
RAM: 1G RAM or more
For Mac users:
Mac OS: Mac OS X 10.7 or above (macOS Sonoma and macOS Ventura)
Processor: 1GHz Intel® processor
RAM: 512 MB or more (1024 MB Recommended)
Then follow the steps below to install Video Converter Ultimate on your computer:
Step 1. After downloading this software on your computer, double-click the .exe or .dmg file.
Step 2. In the pop-up window, click the Install button to start installing this program on your computer. You can make a customized installation by clicking the option of Customize Installation.
The installation process will take some time. Please wait for a while.
Step 3. When the installation is completed, click Start Now to launch the program.
Step 4. For Mac users, you just need to double click the .dmg file to follow the on-screen instructions to complete the installation, and optionally drag the app to your application folder to use it further.
Launch software
Launch Video Converter Ultimate on PC:
Double click Video Converter Ultimate button on the desktop.
Launch Video Converter Ultimate on Mac
Click the Finder button in the Dock > Select Applications from the Favorites section in the Finder window > Locate Video Converter ultimate and double-click the button to launch Video Converter Ultimate on your Mac.
Order software
You can purchase Video Converter Ultimate online by visit this page (for Windows) and this page (for Mac).
Alternatively, if you have already downloaded this software on your computer and installed it, just click the buy button (![]() ) on the upper right corner of the main user interface.
) on the upper right corner of the main user interface.
After the purchase is complete, your purchase email address will receive the registration code.
Register software
Apeaksoft supports free trial version of Video Converter Ultimate.
Free trial version provides you with the limited features. For enjoying this software with full functions, you need to purchase and register it.
1. The first lunchmeat of everyday, the register window will pop up automatically. You just need to type the email address and received registration code to activate it.
2. Do not see the registration window? Click Register from the drop-down list of the Menu in the main interface to open the registration window, type in the email address and registration code and click Activate to complete the registration of Apeaksoft Video Converter Ultimate.
Email Address: The email address that you fill in the order form.
Registration Code: A string of characters marked as Activation key, license code or KEYCODE(S) in the order confirmation letter you received after the successful purchase.
Update software
Apeaksoft Video Converter Ultimate always keeps it up to date. You can update this software automatically once or manually.
Update Video Converter Ultimate manually
Run Video Converter Ultimate, in the main interface, click Check Update… from the dropdown list of the menu to have a check Check Update… from the dropdown list.
Update Video Converter Ultimate automatically
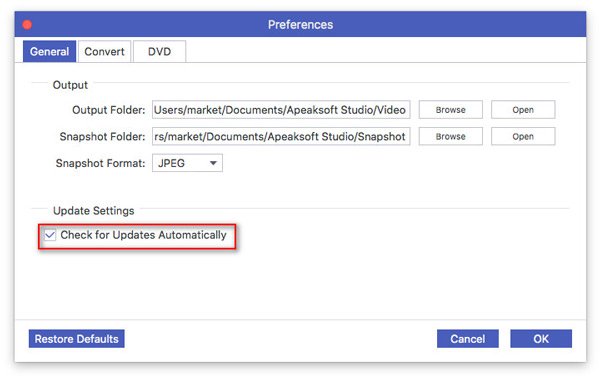
If you will not want to miss the fantastic updates every time, just enable Check for Updates automatically option by clicking Menu > Preferences > General.
Note: For updating this software, you need to make sure the Internet connection is enabled on your computer.
Apeaksoft support
Apeaksoft provides you with the technical support via online help guide or just contact the support team.
Under Menu or Help dropdown list, you can click Online Help or press F1 to visit the online help page. Or click Support to navigate the support team contact information.
Email to Apeaksoft Support anytime at support@apeaksoft.com
Convert video/audio
Step 1. Add video or audio file
Run this software on your computer on your computer. Click Add File to add files or the whole folder to this software.
Alternatively, you are able to drag multiple video and audio files to this program.
Step 2. Set the output file
Select the output format you want by clicking the dropdown list next to Convert All to. You could select the output format for your devices, even the streaming sites.
Step 3. Convert video/audio file
In the end, click Convert button at the bottom-right corner to start to convert video or audio files on your computer.
Edit video/audio
Video Converter Ultimate also provides you with the wonderful editing functions by clicking the Edit or Trim button.
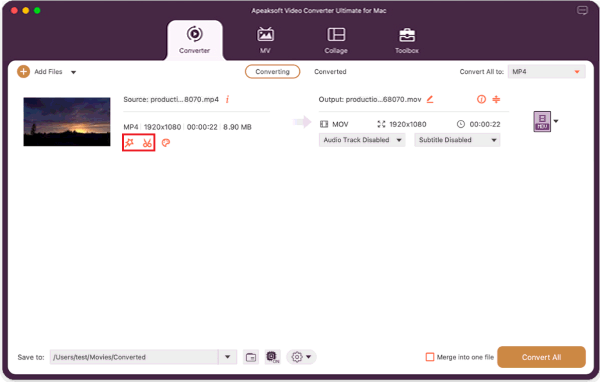
Cut and merge video
To get parts of a video file or combine several video clips into one, click the Trim button in the main interface.
Move the slide bar to set the starting and ending time and create a new segment or split one files into 2 parts.
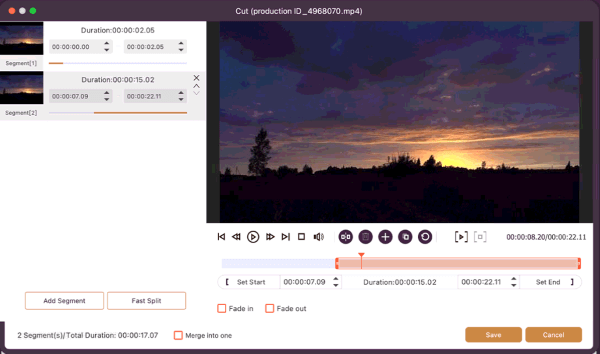
After making the clips, you could adjust the position by clicking the arrow-down or arrow-up and check the box of Merge into one file to combine them together.
Rotate and flip video
When your video file is sideways, you could try the Rotate feature to rotate it in 90 clockwise or counterclockwise or flip video horizontally or vertically.
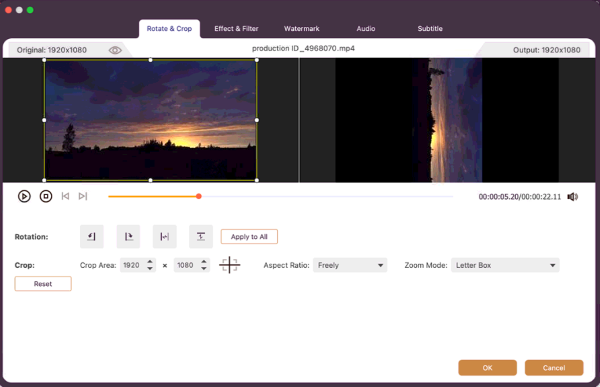
Crop video
Click Crop to select the zoom mode as Letterbox, Center, Pan & Scan or Full to get rid of the unwanted edges or capture the wanted parts.

Change effects
Click Effect to change effects here. You can adjust brightness, contrast, saturation, hue, volume and more video/audio effects.
Watermark
If you want to add your own mark to the video, you can click Watermark to add text or images as the watermark on your video files.
Edit audio tracks
Feel annoyed for the silent video without background audio? You can choose the Audio tab and click the plus sign to add the audio track based on your needs.
Edit subtitles
Feel a headache for the unsynchronized subtitle of the video file? You can click Subtitle to change or add subtitles of your videos.

Make MVs
If you need to make a music video or a slideshow, you can use this function.
Step 1. Choose the MV tab
After launching Video Converter Ultimate for Mac, please go to the MV tab.

Step 2. Import videos and images
Choose the MV theme from the ready-made themes, and click the Add button at the bottom to import the videos and images you want to create in an MV.
Step 3. Edit videos
After adding videos, you can click the Edit button to rotate and crop your videos, adjust the effects of your videos, add filters to your videos, etc.
To add the starting and ending title and adjust the background audio track, you should go to the Setting section.
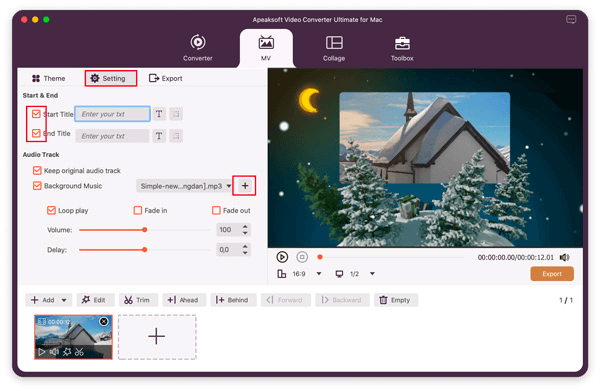
Here, you can change the background music, add the starting and ending title to the MV, etc.
Step 4. Export MV
When you finish making the MV, please choose the Export section. Here you can choose the output format, resolution, frame rate, and select the location.
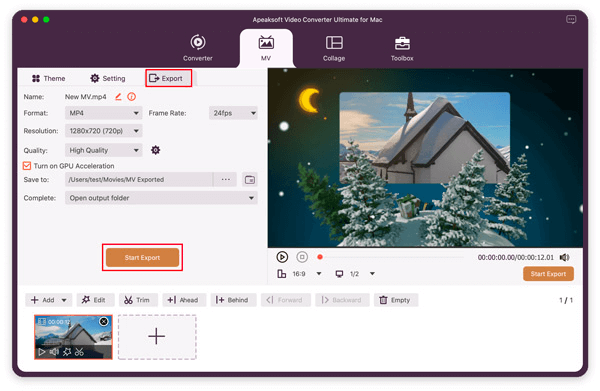
Finally, click Start Export to create and export the MV file.
Make Video Collage
You can use Video Converter Ultimate for Mac to make video collages.
Step 1. Choose Collage
After launching this software on your computer, select the Collage tab.

Step 2. Select template
Then you will see various video collage templates. You can choose the one you like by clicking it. You can adjust the template ratio, border size, and color to get the one you want.

Step 3. Add videos and images
Click the big plus sign on the left layout to add the video or image.
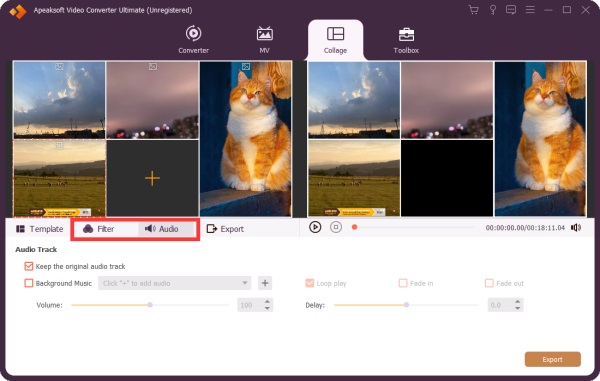
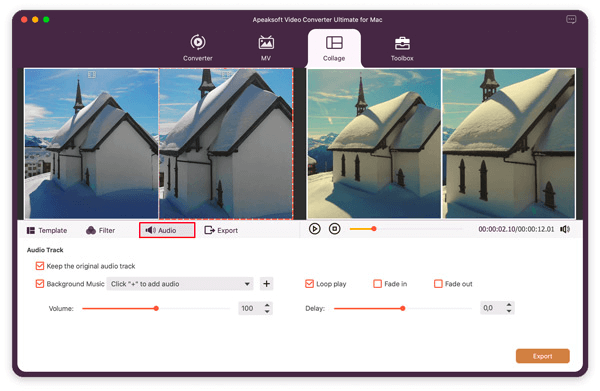
Step 4. Edit videos
Choose a video you want to edit and click the Filter button to select a filter to add.
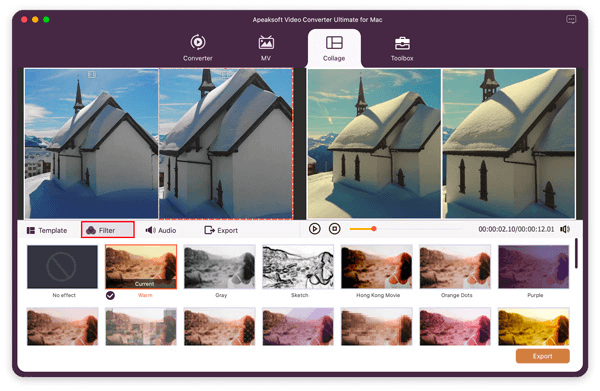
You can also adjust the audio or background music of your video collage by switching to the Audio section.
Step 5. Export video collage
Click the Export button at the right-bottom corner or go to the Export section to click Start Export.

Toolbox
Video Converter Ultimate for Mac also provides popular and helpful tools to help you edit media metadata information, compress video files, make animated GIFs, make a 3D video, enhance the video quality, remove watermarks from videos, trim videos, control video speed, reverse videos, merge multiple clips into one video, adjust the volume of videos, and sync audio with video.

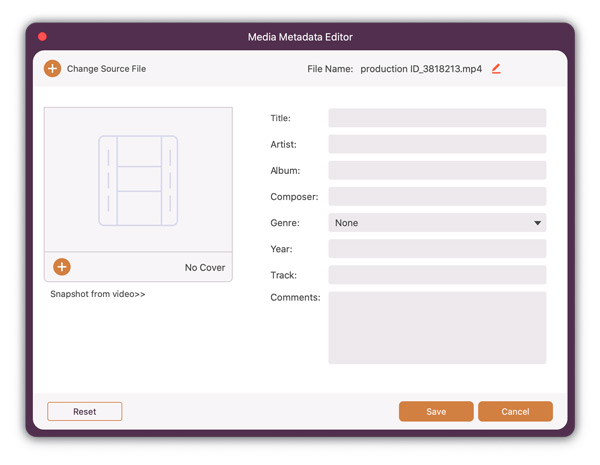
Media Metadata Editor
Step 1. Choose Media Metadata Editor, and then click the big plus sign to add the media file.

Step 2. Then you can edit the video or audio formation automatically. You can also edit the ID3 tags as you like.
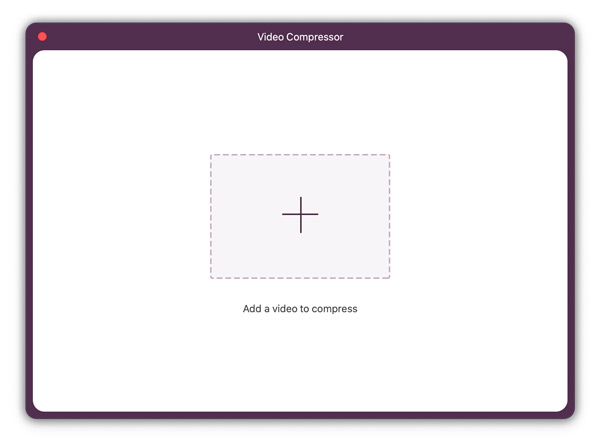
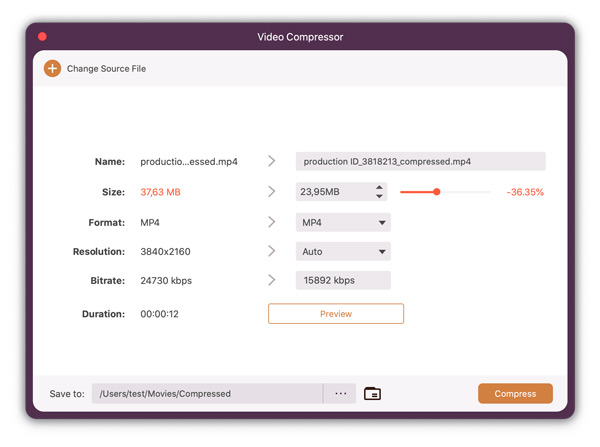
Video Compressor
Step 1. Select Video Compressor, and then please click the big plus sign to add one video file.
Step 2. You can move the bar or select the file size value to adjust the file size. You can also change the output format and resolution. Then you can click the Preview button to view the file. Finally, click Compress to start compressing the video file.
Audio Compressor
Step 1. Select and upload the audio file that you want to compress.
Step 2. Then you can compress the file size to a certain number or drag the slider behind to adjust the file size. You can also change the name, format, channel, sample rate, bitrate, and duration at the same time.
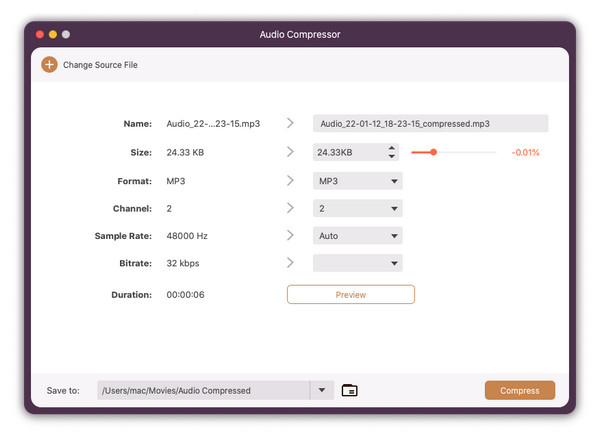
Step 3. Click on the Compress button to start reducing the file size.
Video Watermark Remover
Step 1. You can choose the Video Watermark Remover button and click the + sign to import the video.
Step 2. To select the area of the watermark that you want to remove in your video, you need to click the Add watermark removing area button.
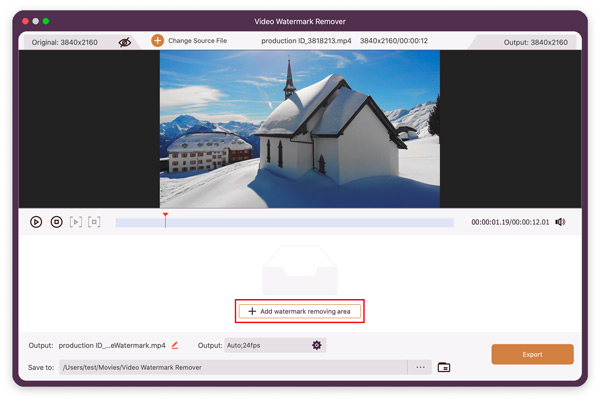
Step 3. After that, you can set the duration for watermark removing, change the size and location of the watermark area as you like. Finally, click the Export button to save the video without watermark.
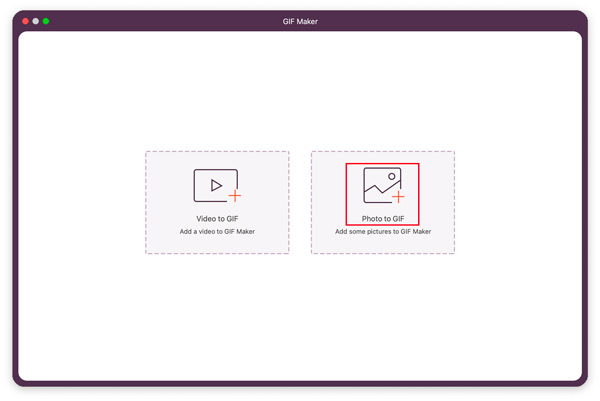
GIF Maker
Step 1. Choose GIF Maker.
If you want to make a GIF from a video, you need to choose the Video to GIF button and add videos.
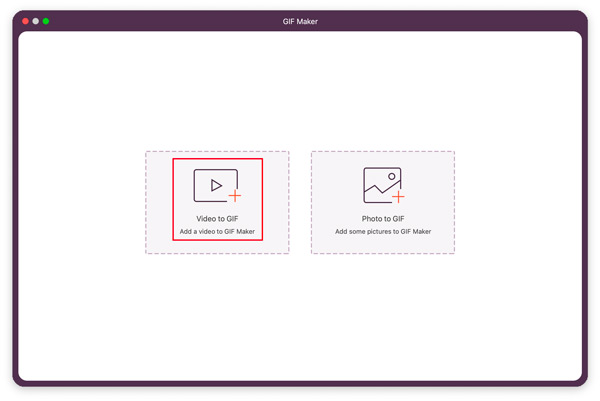
If you want to make a GIF from images, you need to choose the Photo to GIF button and add photos.
Step 2. Create GIF
When you want to make GIFs from videos, you will enter a window like below. Here you can use the Edit button or clip feature to cut down the long video. After that, you should set the output size, loop option and frame rate and click Generate GIF to start creating GIF from the video file.
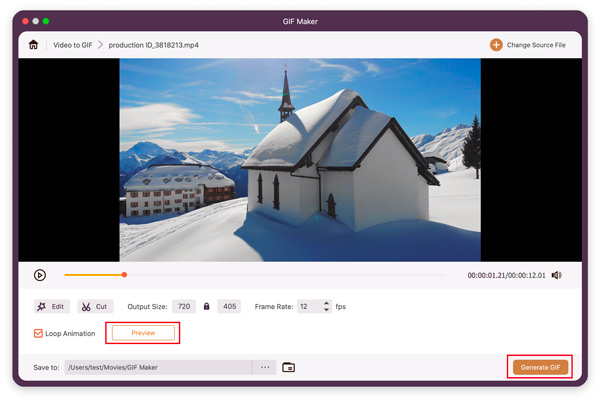
The Preview button lets you preview the GIF image for at the maximum of 10 seconds.
When you want to make GIFs from images, you will enter a window like below. Then, please click the Export button to output the GIF.
3D Maker
Step 1. Find 3D Maker in the Toolbox window and click the + button in the center to add a video.
Step 2. After entering the 3D Maker interface, you will see your video has been adjusted automatically. You can change the settings like Anaglyph, Split Screen, etc. Then you can click the Generate 3D button to save the 3D video.
Video Enhancer
Step 1. Select Video Enhancer. Add the video that you want to improve quality.

Step 2. You can select the Upscale Resolution option to get higher resolution. You can also optimize the video’s brightness and contrast. After that, you can click Enhance to apply the changes.
Video Trimmer
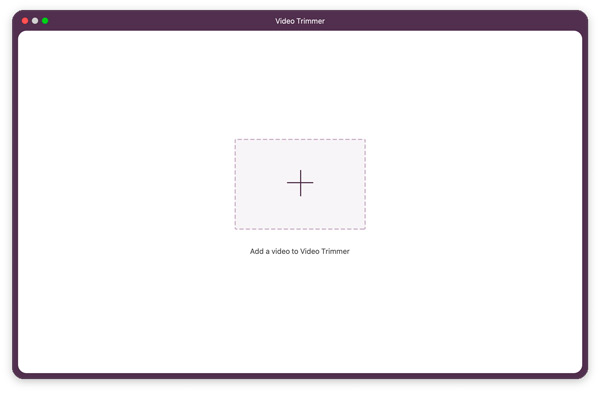
Step 1. Choose Video Trimmer and click the big Plus button in the center.
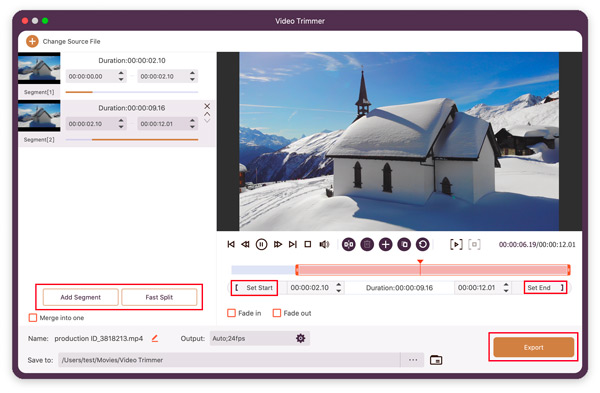
Step 2. Here you can change the time in Set Start and Set End. On the left, you can Add Segment and Fast Split the video. Then hit the Export button.
Video Merger
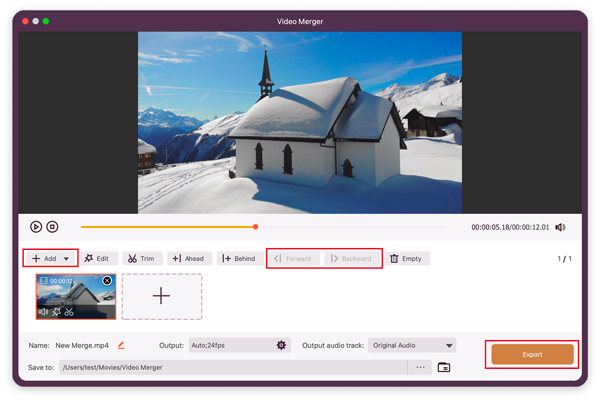
Step 1. Click the big Plus button in the center and select the videos you want to merge.

Step 2. Click the Add button on the left to add videos. Here you can click Forward or Backward to change the order of the videos. When everything is ready, click the Export button.
Video Cropper
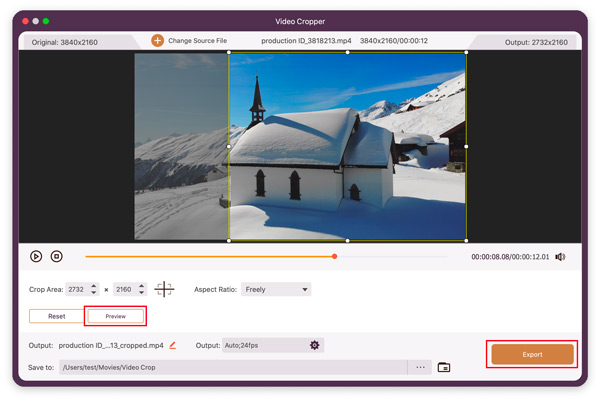
Step 1. Choose the Video Cropper option and click the center plus sign to add your videos.

Step 2. Here you can select the area you want to keep as you like. In addition, you can select the aspect ratio if you need. Then you can click the Export button to save the cropped video.
Video Watermark
Step 1. If you want to add the watermark to your videos to let others know that these videos belong to you, please click the Video Watermark button and import your videos by clicking the plus sign.
Step 2. Add watermarks to video
If you want your watermark to be the form of text, please choose the Text Watermark button.
Later, you can enter the text you like, and choose the font style and the color for your text watermark.
If you want your video to have an image watermark, you can click the Image Watermark button.
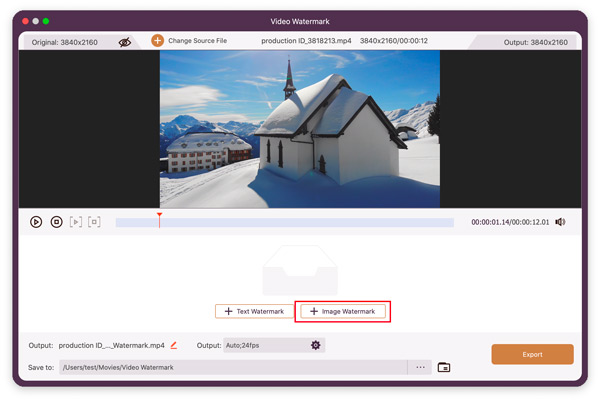
After choosing the photo, you can change the orientation and opacity of this image here.
Color Correction
Step 1. Choose the Color Correction button and click the center plus sign to add your videos.

Step 2. Here you can adjust the Contrast, Brightness, Saturation, and Hue of your videos as you like. Then, you can click the Export button to get the video.
Video Speed Controller
Step 1. Choose Video Speed Controller first. Click the big Plus button and import the target video to this tool.
Step 2. Here you can slow down or speed up the video. After choosing the speed, please click the Export button.
Video Reverser
Step 1. Select the Video Reverser button. Click the + at the center add the video from your computer.

Step 2. Here you can choose to reverse the whole video or specific parts. Later you can adjust the progressing bar or change the time in Set Start or Set End to reverse the video. Next click Export to see your reversed video.
Video Rotator
Step 1. If you want to rotate the video to a different direction, please add that video to the program first.
Step 2. You can rotate the video to the left or right from 90 degrees to 360 degrees as you like. You can even flip the video horizontally or vertically if needed.
Step 3. Click Export to output the edited video file.
Volume Booster
Step 1. Choose Volume Booster and click the Plus button to add videos.

Step 2. Here you can drag the progressing bar to adjust the video volume. The click Export to output the video.
Audio Sync
Step 1. Choose Audio Sync and click the Plus button to import the video.
Step 2. Here you can change the Delay bar to sync the audio with the video.
File Date Changer
Step 1. Add the file that you want to change its date. You can add multiple files if you have many to modify.
Step 2. Since it supports batch changing, you can adjust the created date, modified date, and accessed date to any date that you prefer separately or together.
Step 3. Click the Apply button apply your changes.
Image Converter
This image converter can change your image files between JPG/JPEG, PNG, WEBP, BMP. TIF/TIFF and so on.
Step 1. Choose the image you want to convert by clicking the central section.
Step 2. Then you can modify the output name with the Edit button following Output. To change the output format, you can open the Format box to select the wanted one.
With multiple pictures to convert for once, you can click the Add Source File to input all files and drop down the Convert All to box and find the export format in the top right corner.
Video Player
You can play your video files with handy buttons here.Step 1. Add the video you want to play.
Step 2. After that, you can choose to play, stop or move the video to the previous/next 5 seconds as you like. On the right corner below, you can also switch the audio track, edit subtitles, change the play speed, take snapshots, adjust the volume or enter the full screen.
Set Preference
When clicking Preference, you will enter the preference window. Here are 3 sections for you.
When clicking Preferences, you will enter the preferences window. Here are 3 sections for you.
General: Set the output folder and snapshot folder location. Moreover, you could set the Snapshot format as JPEG, PNG or BMP.
Convert: Enable your computer to shut down or no action after conversion. Choose CPU affinity and enable GPU acceleration. For the maximum simultaneous running process, you can set up to 8.