Solutions par défaut - Comment supprimer facilement un album sur iPhone
Supprimer des albums photo sur un iPhone L'utilisation d'albums est un moyen efficace d'organiser votre galerie, surtout lorsque les photos s'accumulent. Cependant, de nombreux utilisateurs ne savent pas quels albums supprimer ni comment leur suppression affecte les photos qu'ils contiennent. Ce guide explique les méthodes de base et avancées pour supprimer des albums sur iPhone, vous aidant ainsi à faire le ménage en toute sécurité et sans perdre d'images importantes.
CONTENU DE LA PAGE :
Partie 1 : Ce que vous devez savoir avant de supprimer des albums sur iPhone
Avant de supprimer un album sur un iPhone, il est important de comprendre comment l'application Photos d'Apple gère les albums et les photos. La suppression d'un album n'entraîne pas la suppression automatique des photos qu'il contient ; les images restent dans la bibliothèque principale tant qu'elles ne sont pas supprimées manuellement.

De plus, les albums par défaut comme « Récents », « Favoris », etc., ne peuvent pas être supprimés car ils sont générés par le système. Si l'album est partagé, sa suppression en retirera l'accès à tous les utilisateurs. Par ailleurs, si vous prévoyez de nettoyer plusieurs albums simultanément, il est fortement recommandé de sauvegarder vos photos importantes au préalable afin d'éviter toute perte de données accidentelle.
Partie 2 : Comment supprimer rapidement un album sur iPhone
Bien que vous ayez vous avez créé des albums sur votre iPhoneTrop d'albums peuvent encombrer votre photothèque. Pour les albums dont vous n'avez plus besoin, iOS propose une méthode simple pour les supprimer directement depuis l'application Photos sur iPhone. Cette méthode est idéale pour les albums créés par l'utilisateur et permet de les supprimer en quelques secondes sans affecter les photos originales stockées dans votre photothèque. C'est la solution la plus rapide pour un nettoyage d'albums basique.
Étape 1 : Ouvrez Photos sur votre iPhone. Sous le Collections onglet, appuyez sur Albums procéder.

Étape 2 : Lorsque vous sélectionnez l'album que vous avez décidé de supprimer, appuyez longuement dessus et appuyez sur Supprimer l'album.
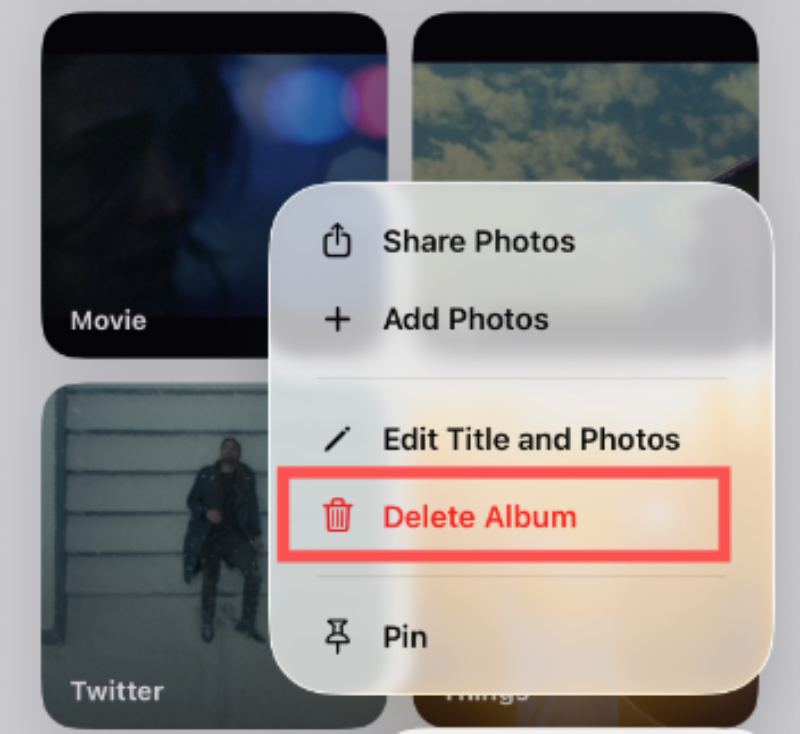
Étape 3 : Une fenêtre s'affichera vous demandant si vous êtes sûr de vouloir supprimer l'album. Appuyez sur Supprimer l'album pour confirmer.

Partie 3 : Comment supprimer un album lors de la vérification de son contenu
Dans certains cas, il est nécessaire de vérifier les photos d'un album avant de le supprimer afin d'éviter de supprimer par erreur des fichiers importants. Sur iPhone, la suppression d'un album directement depuis son contenu offre un meilleur contrôle et permet de confirmer que l'album est réellement inutile avant de procéder à la suppression.
Étape 1 : Lorsque vous parcourez le contenu d'un album, appuyez sur Options.

Étape 2 : Dans la fenêtre contextuelle, appuyez sur Supprimer l'album Si vous souhaitez supprimer cet album de votre iPhone, veuillez noter qu'un album supprimé sera automatiquement supprimé. L'album ne peut pas être récupéré. normalement.
Étape 3 : Une notification vous demandera si vous souhaitez supprimer l'album. Appuyez Supprimer l'album pour finir la tâche.

Partie 4 : Une solution pratique pour supprimer des albums sur iPhone
Comme indiqué précédemment, lorsque vous supprimez un album sur votre iPhone, les photos qu'il contient ne sont pas effacées ; elles restent dans votre photothèque. Cela se complique encore davantage pour les utilisateurs qui souhaitent supprimer l'album entier et tout son contenu. Par ailleurs, sélectionner et supprimer les photos une par une peut s'avérer très long sur iPhone. Une solution plus complète est donc nécessaire. Apeaksoft iPhone Eraser permet de supprimer plus efficacement les albums et les données associées, offrant des options de nettoyage plus poussées que les limitations par défaut d'iOS.
Étape 1 : Téléchargez et installez le package Apeaksoft iPhone Eraser. Lancez l'outil une fois l'installation terminée.
Téléchargement sécurisé
Téléchargement sécurisé
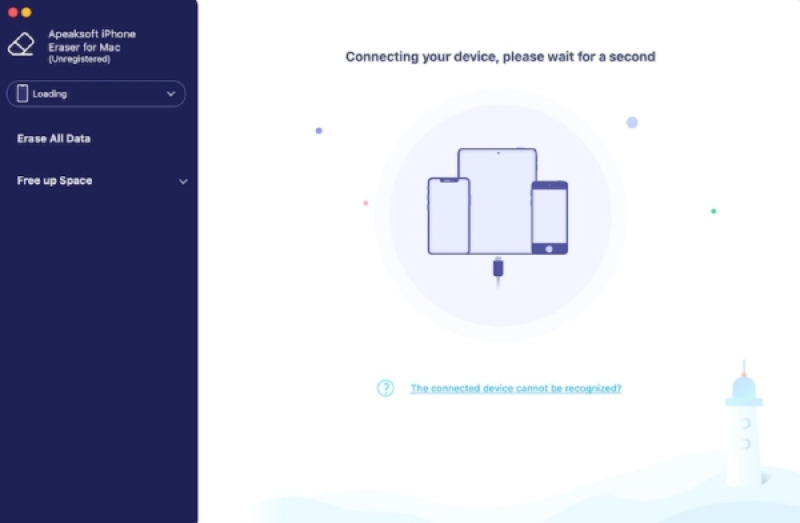
Étape 2 : Connectez votre iPhone à l'ordinateur à l'aide d'un câble Lightning, en vous assurant que la connexion est stable. Si tout se passe bien, votre iPhone sera détecté automatiquement.
Étape 3 : Dans le panneau de gauche, cliquez sur Espace libre pour afficher plus d'options. Cliquez Nettoyer les photos et alors Exporter et supprimer pour vérifier toutes les photos sur votre iPhone, y compris l'album que vous souhaitez supprimer.

Étape 4 : Si vous n'avez pas sauvegardé vos photos, cliquez pour sélectionner les photos souhaitées ou cliquez simplement Sélectionner tout. Puis clique TéléchargerSélectionnez le dossier de destination pour sauvegarder les photos de votre iPhone. Enfin, cliquez sur le bouton. effacer bouton permettant de supprimer définitivement des photos et des albums sur votre iPhone.

Conclusion
Suppression d'un album iPhone L'opération peut être rapide et sûre une fois la méthode maîtrisée. Qu'il s'agisse d'utiliser les outils intégrés pour un nettoyage simple ou un outil d'effacement professionnel pour un contrôle plus précis, chaque approche répond à un besoin différent. En choisissant Apeaksoft iPhone EraserVous pouvez ainsi garder votre photothèque organisée tout en évitant les pertes de données inutiles.
Téléchargement sécurisé
Téléchargement sécurisé
