


Level Up Your Audacity Audio Recording in Just 5 Mins

We have all done it: holding a mic up to the laptop speakers, holding our breath, and praying the dog won't bark. You don't need that clumsy setup to save clean sound from a video or stream. Here's the simple way to make Audacity record computer audio directly - no room noise, and no extra gear.
SIDINNEHÅLL:
Part 1. Audacity Desktop Audio Settings for Windows and Mac
Wrong settings are the main reason for audio not recording in Audacity issues. Configure your input and output properly before hitting record.
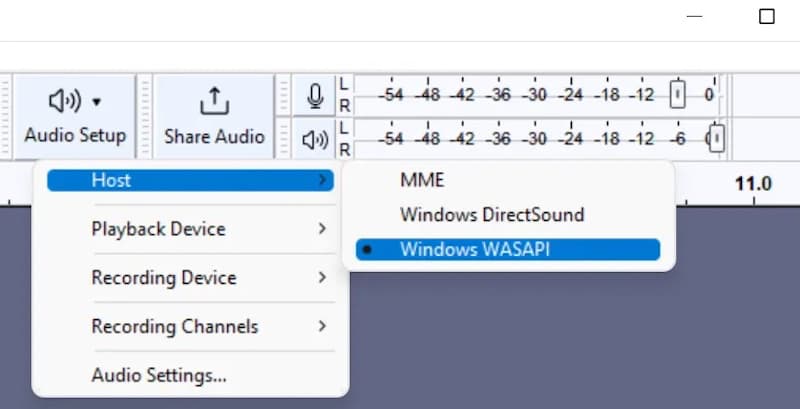
Windows-inställningar
Windows can handle system audio through Audacity, so you don't need another tool for basic playback recording.
Steg 1. Klicka Ljudinställningar på den övre verktygsfältet.
Steg 2. uppsättning Host till Windows WASAPI.
Steg 3. uppsättning Inspelningsutrustning to your current output device with (loopback) attached.
Steg 4. uppsättning Kanaler till 2 (stereo).
Mac Settings
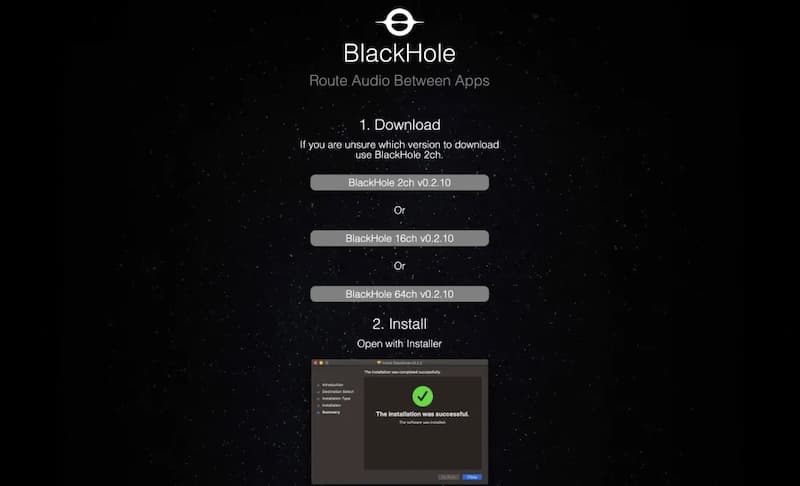
macOS blocks direct internal audio recording, so you need a virtual driver like BlackHole 2ch to help Audacity record computer sound.
Steg 1. Install the free BlackHole 2ch driver.
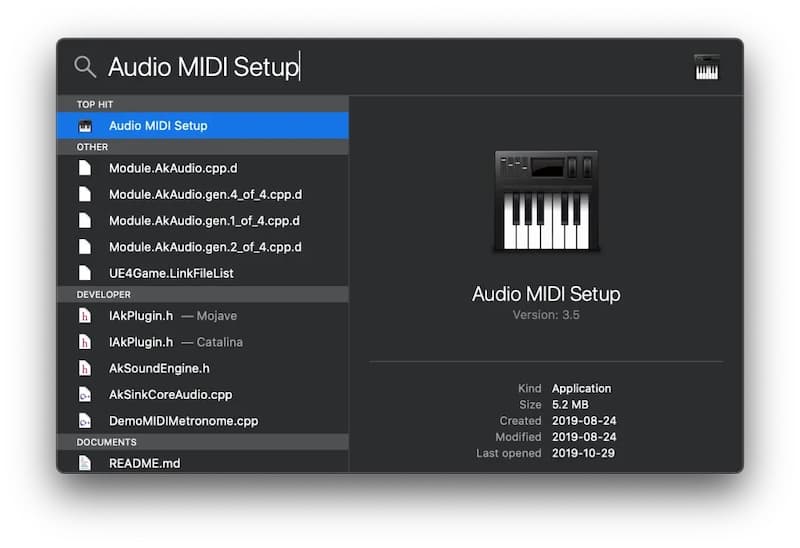
Steg 2. Open Mac's Audio MIDI Setup, klicka på +, och välj Skapa enhet med flera utgångar. Check both your normal speaker and the BlackHole 2ch to hear what you record.
Steg 3. Click the Mac menu bar volume icon and set the output to Enhet med flera utgångar.
Steg 4. In Audacity, click Ljudinställningar och ställa in Inspelningsutrustning till BlackHole 2ch.
Part 2. How to Record Computer Audio with Audacity
Once your settings are in place, you are ready to record computer audio with Audacity. Follow the step-by-step instructions below tailored for Windows and Mac.
För Windows
Steg 1. Prepare your audio source (video, music, or app) and pause it at the beginning.
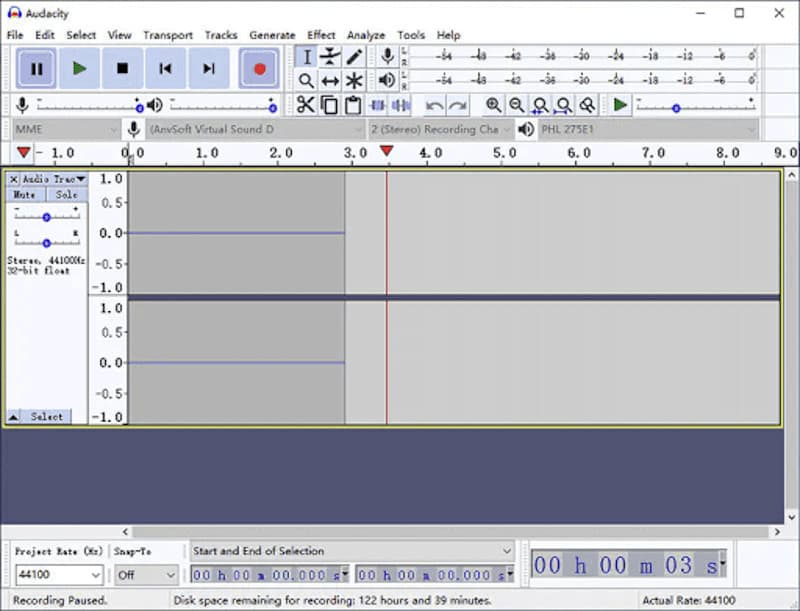
Steg 2. In Audacity, click the red Spela in knappen (eller tryck på R). The cursor may stay still at 0:00 until the audio starts playing.
Steg 3. Play your source audio immediately. Blue waveforms will now start drawing across the track.
Steg 4. Klicka på rutan Sluta knappen (eller tryck på Mellanslag) once playback finishes.
Steg 5. Highlight any empty silence at the start or end using your mouse, then press Radera to trim.
Steg 6. Gå till Fil > Exportera ljud, choose MP3 or WAV, and click Export för att spara din fil.
för Mac
Steg 1. Queue up the video, music, or stream you want to capture.
Steg 2. In Audacity, click the red Spela in knappen (eller tryck på R) to begin rolling the track.
Steg 3. Switch to your app or browser immediately, then play the audio so Audacity can record computer audio.
Steg 4. Klicka på Sluta knappen (eller tryck på Mellanslag) when the playback ends.
Steg 5. Click the sound icon in the Mac menu bar and switch your output back to your default Interna högtalare or Hörlurar (otherwise, you cannot hear the playback or adjust the volume).
Steg 6. Spela the recording to make sure everything sounds right. Delete any silence at the start or end, then select Fil > Exportera ljud att spara den.
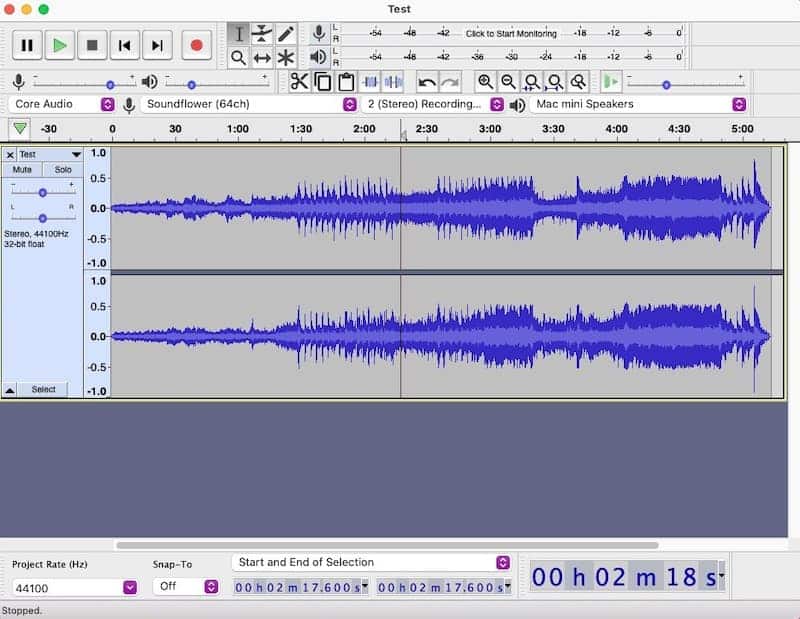
Tips: If Audacity crashes or you close a recording before saving it, there may still be a way to get it back. Check our guide on how to återställa förlorade Audacity-filer and restore your unfinished work.
Part 3. Best Alternative to Audacity for Computer Audio Recording
If you find configuring drivers in Audacity too complicated or frequently run into the "audio not recording" issue in Audacity, Apeaksoft skärminspelare is your top choice. It captures internal computer audio on both Windows and Mac directly without virtual audio cables.
| Leverans | Audacity | Apeaksoft skärminspelare |
| Setup & Learning Curve | Higher (may require extra audio setup) | Lower (simple audio controls) |
| Mac Internal Audio | ⚠ Requires additional software or audio routing | ✅ Built-in system audio recording |
| Record Mic + System Audio | ⚠ Requires extra setup | ✅ Supports both sources |
| Screen / Video Recording | ❌ Audio recording and editing | ✅ Ja |
| Verktyg för ljudredigering | Advanced (multi-track editing and mixing) | Basic (recording-focused tools) |
| bäst för | Detailed audio editing and post-production | Quick, straightforward recording |

Nedladdad av över 1,000,000 användare
- Directly captures internal audio on Windows and Mac without extra plugins or virtual sound cards.
- Records system sound and microphone simultaneously or separately.
- Features built-in microphone noise cancellation and audio boost.
- Exports directly to MP3, AAC, M4A, FLAC, and WAV with no manual export steps.
- Offers built-in trimming and audio compression tools.
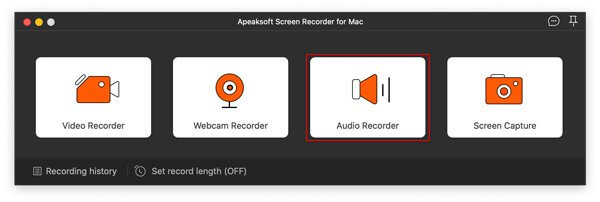
Steg 1. Download, install, and launch the latest version of Apeaksoft Screen Recorder. Choose Ljudinspelare från huvudinstrumentpanelen.
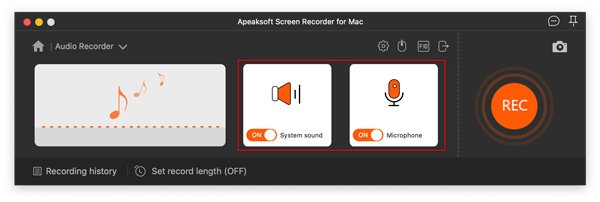
Steg 2. Växla på Systemljud to capture internal audio from your desktop. Toggle off Mikrofonen to avoid capturing external room noise.
Steg 3. Klicka på orange REC button to begin recording, then play your streaming music, video, or game audio.
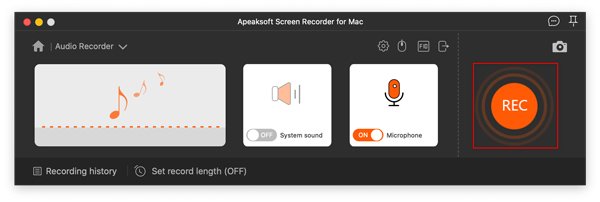
Steg 4. When you are done, click the red square Sluta button. In the preview window, use the sliders to trim the track if needed, then click Färdig to export the recording.

Part 4. FAQs About Audacity Audio Recording
Can Audacity record audio from only one specific app?
Not by itself. Audacity can record your computer's audio, but it doesn't have a setting to choose just one app. To isolate audio from a specific app, you'll need a virtual audio cable or another routing tool.
How do I record my microphone and computer sound at the same time?
Audacity doesn't make this easy with separate input sources. You can use a virtual mixer such as Voicemeeter to combine your mic and computer audio first, then record them together in Audacity.
What's the best format to export my recorded audio in Audacity?
WAV is the better choice if you want to keep the original audio quality. For smaller files that are easier to share, an MP3 at 320 kbps works well.
Can Audacity extract sound from a video without playing it in real time?
Yes. After installing FFmpeg, you can import supported video files such as MP4 or MKV into Audacity and extract their audio without playing the video from start to finish. If you need to remove unwanted sound from a video before editing, you can also ta bort ljudet.
Slutsats
You can get good results with recording computer audio with Audacity, but the setup takes a little getting used to. For a quicker way to capture system sound, Apeaksoft skärminspelare skips most of that setup.

Relaterade artiklar