
Double click the Download button to save the right version on your computer. Follow the on-screen instruction to install this iOS Data Backup & Restore, and then open it.
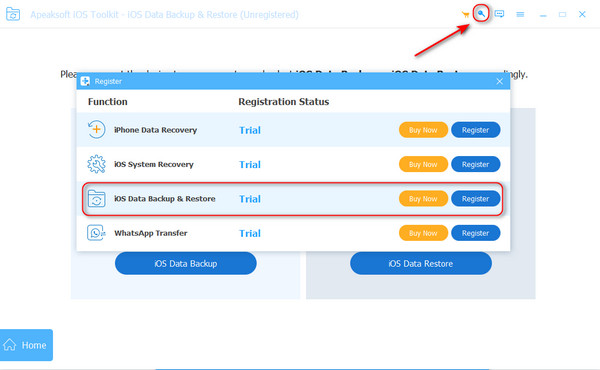
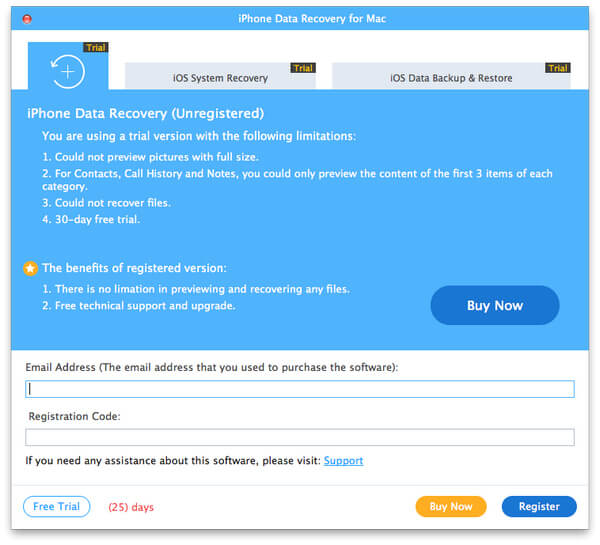
Click the Register button on the top right side and locate iOS Data Backup & Restore. Then, click the Register button to enter the registration code from your email.
Note: After you purchased it successfully, the registration code will be sent to your email address that you filled in the order form.
Email Address: The email address that you fill in the order form.
Registration Code: A string of characters marked as Activation key, license code or KEYCODE(S) in the order confirmation letter you received after the successful purchase.
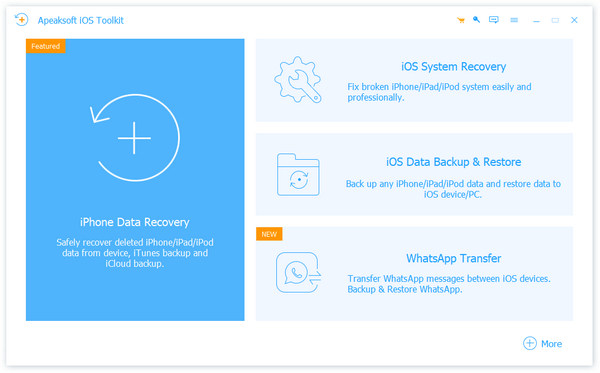
Install and launch Apeaksoft iOS Toolkit. Choose iOS Data Backup & Restore to enter the main interface.

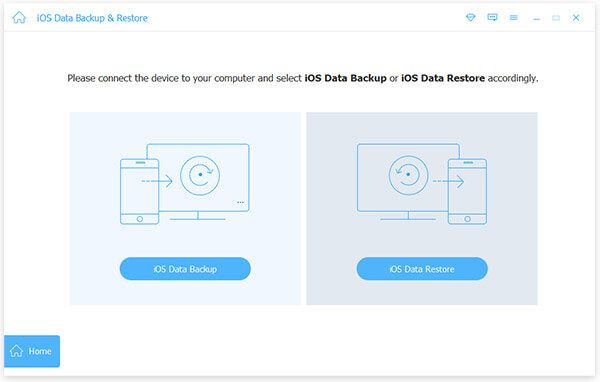
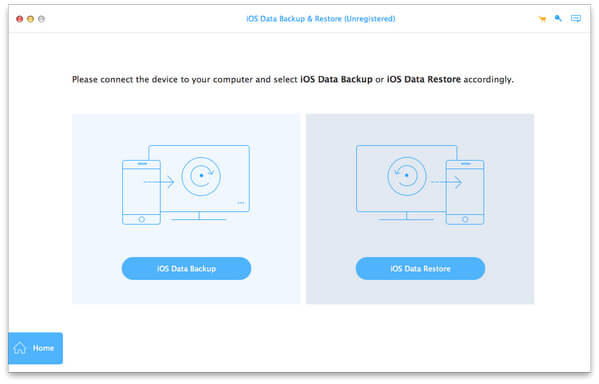
You can now choose iOS Data Backup or iOS Data Restore. Here, we take the feature iOS Data Backup as the example.
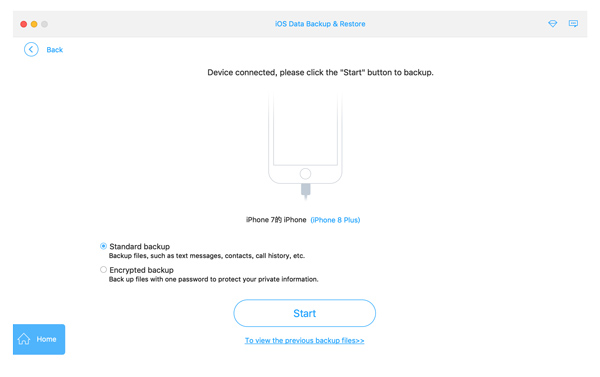
Click the button of iOS Data Backup, and connect your iOS device with computer. Two backup options are provided, Standard backup as well as Encrypted backup.
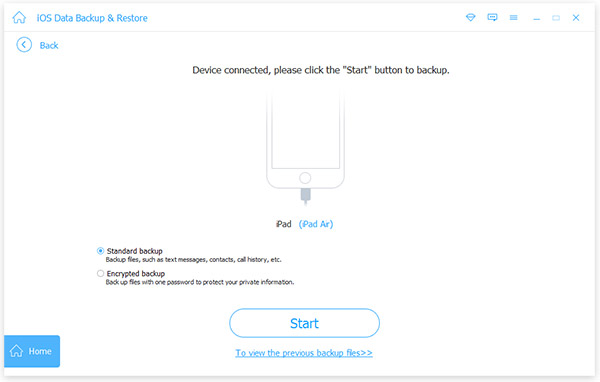
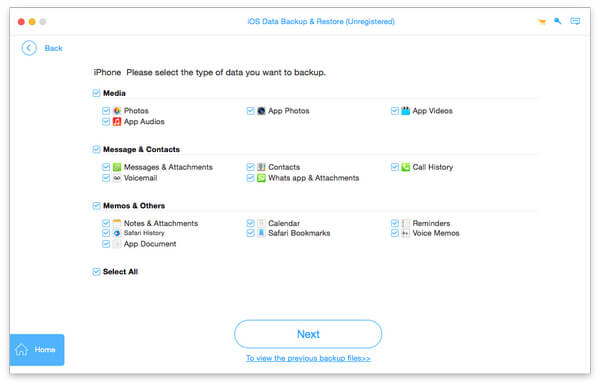
If you choose Standard backup you need to choose the data type for backup. And here, this program enables you to back up contacts, messages, call history, photos, notes and so on.
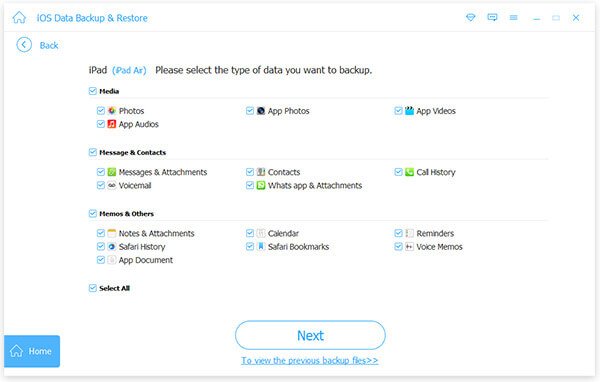
For Encrypted backup, you'll first set a password for your backup. Keep well the password, as it is needed when you want to restore data from the encrypted backup to iOS device or to PC. After setting the password, you are able to choose the file type for backup.
When you complete choosing the file types, click the Next button and choose the file folder to save the backup.
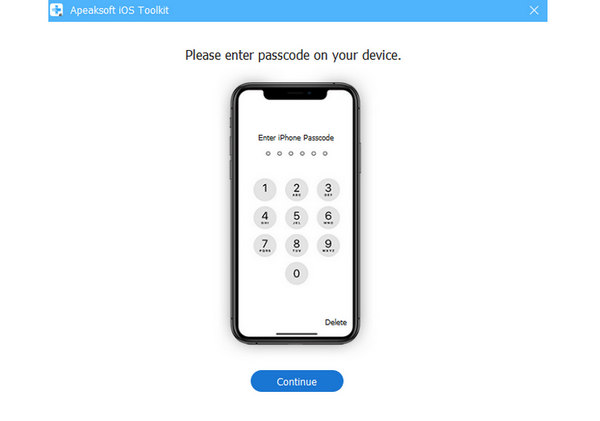
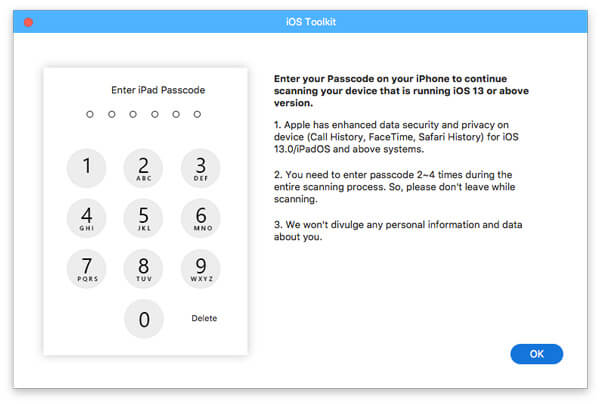
Note: iOS 13 update has strengthened the data security of call history and Safari history. So, for backing up data like Call history including FaceTime calls, and Safari history, you need to input the iPhone password for extra 2-4 times by following the pop-up screen instructions on iOS devices.
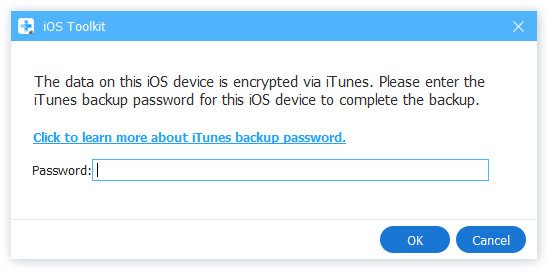
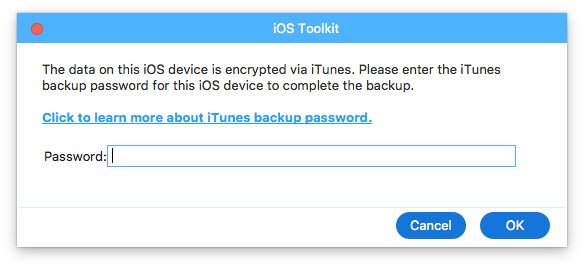
Another tip you should not miss is entering the iTunes encrypted password in this software, if you have backed up iPhone to computer with creating the encryption.
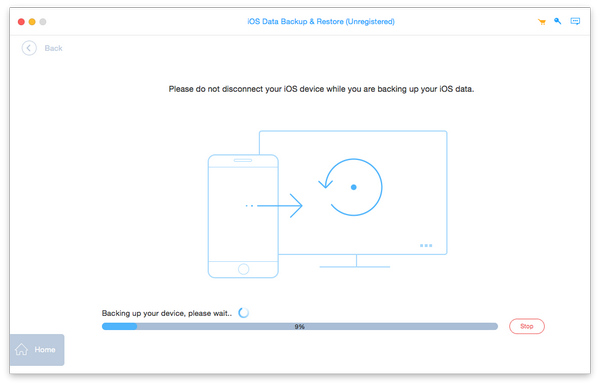
When you complete choosing the file types, click the Next button and choose the file folder to save the backup. Then the program will back up the selected data from your iOS device immediately.
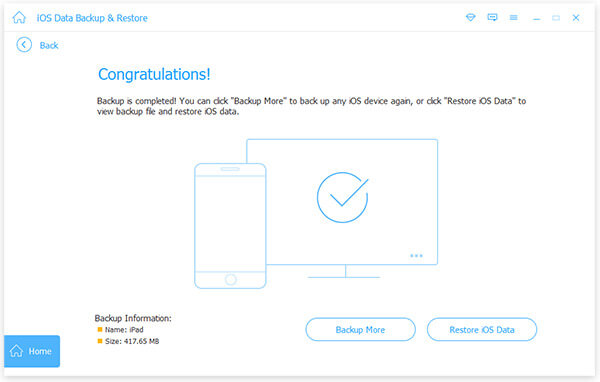
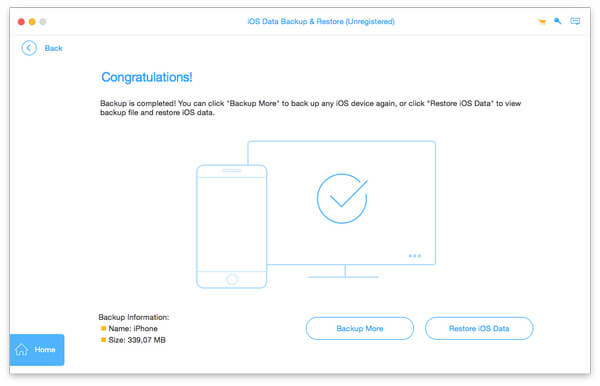
Finally, iOS Data Backup & Restore will manage to back up your iOS device. You can learn the backup information clearly, including the backup size and path.

Click the OK button and you can find the backup from the list. Click it, and you are able to easily view the backup you made. You are able to selectively restore the data to iOS device or to PC according to your need.
Choose iOS Data Backup & Restore. Choose and click the button of iOS Data Restore.
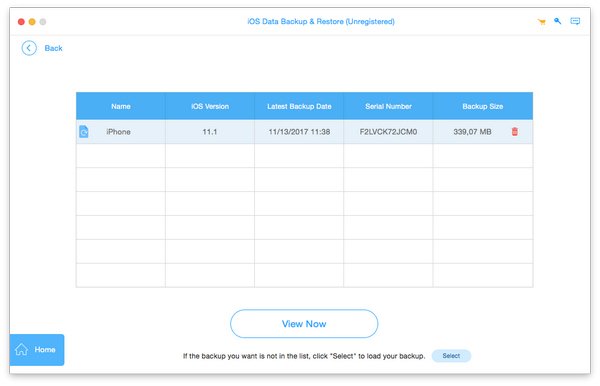
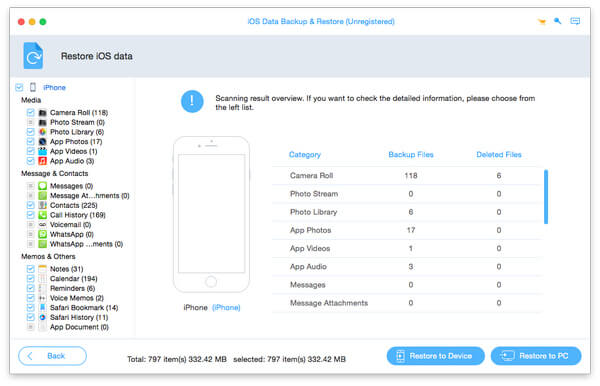
You now can see all available backup files from the list. Choose the one and click the View Now button.
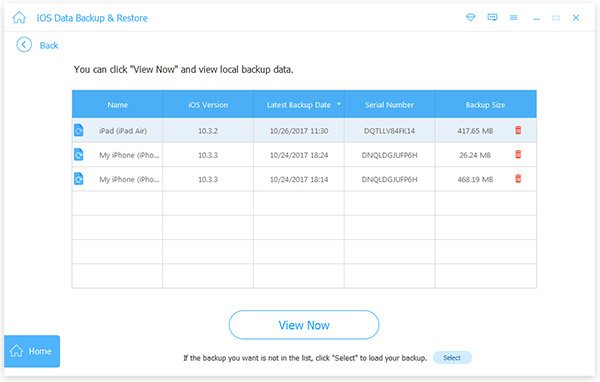
You can view the detailed data information from the interface. Choose what you want to restore.
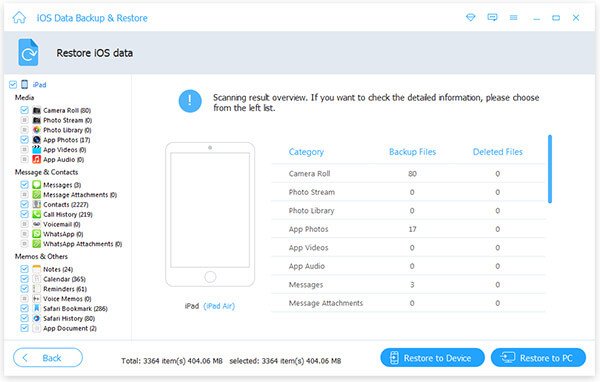
Note: Currently, only contacts and notes can be restored to the iOS device. For other data, you are able to click Restore to PC to meet your need. No limitation for Restore to PC.
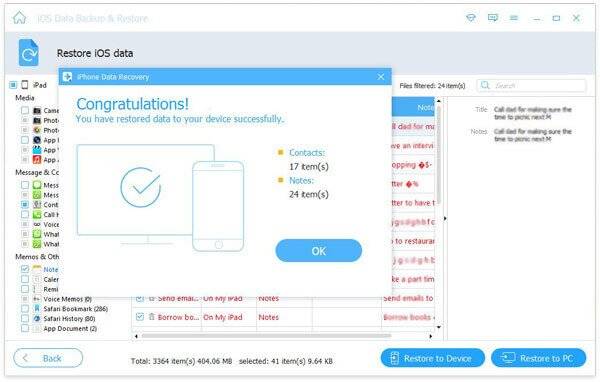
To restore data to your iOS device, click Restore to Device. To restore data to your PC, click the Restore to PC button and choose the file folder to save the backup data. Hit the Restore button.
Whether you want to back up various iOS data, or restore backup files to iPhone, iPad, iPod or PC/Mac, this powerful iOS Data Backup & Restore can be your great helper.
Double click the Download button to save the right version on your computer. Follow the on-screen instruction to install this iOS Data Backup & Restore, and then open it.
Click Register on the upper right corner of the main interface to open the registration window or choose the Register option in the Help menu. Three registration tabs are provided here, including iPhone Data Recovery, iOS System Recovery and iOS Data Backup & Restore. Choose the feature according to your need. After that, input Email Address and Registration code and click OK Button to finish registration.
Note: After you purchased it successfully, the registration code will be sent to your email address that you filled in the order form.
Email Address: The email address that you fill in the order form.
Registration Code: A string of characters marked as Activation key, license code or KEYCODE(S) in the order confirmation letter you received after the successful purchase.
Install and launch Apeaksoft iPhone Data Recovery software. Choose iOS Data Backup & Restore to enter the main interface.
You can optinally choose iOS Data Backup or iOS Data Restore. Here, we are going to do an iOS Data Backup step by step.
Click the button of iOS Data Backup, and connect your iPhone/iPad/iPod with Mac. Two backup options are here for you, Standard backup and Advanced backup.
The Standard backup" enables you to directly choose data type for backup, so that you can back up contacts, messages, call history, photos, notes and so on based on your need.
For Encrypted backup, you'll first set a password for protecting your backup. Keep well the password, as it is needed when you restore data from the encrypted backup to iOS device or to Mac PC. After setting the password, you can choose the file type for backup.

After that, click the Next button and set a path to save the backup. iOS Data Backup & Restore will back up the selected data from your iOS device immediately.
Note: iOS 13 update has secured such data on iOS devices as call history and Safari history. When you want to backup call history including FaceTime calls, and Safari history from iOS devices, you will be popped up to enter the iPhone password on iPhone for 2-4 times for successful backup.
Moreover, if you have created a backup password for local file on iPhone while using iTunes, you should enter the iTunes encrypted password in this software to unlock it, so that this software can operate a successful backup.
Finally, iOS Data Backup & Restore will manage to back up your iPhone/iPad/iPod. You can learn the backup information clearly, including the backup size and path.
Click the OK" button and you can find the backup from the list. Click it, and you are able to easily view the backup you made. You are able to selectively restore the data to iOS device or to Mac computer according to your need.
Choose iOS Data Backup & Restore, then Choose and click the button of iOS Data Restore.
You now can see all available backup files from the list. Choose the one and click the View
Now"
button.
You can view the detailed data information from the interface. Choose what you want to
restore. Note: Currently, only contacts and notes can be restored to the iOS device.
For
other
data, you are able to click Restore to PC to meet your need. No limitation for
Restore to PC.
To restore data to your iOS device, click Restore to Device. To restore data to
your Mac, click
the
Restore to PC button and choose the file folder to save the backup data. Click
the Restore
button.
Step 3. Restore data to iOS device or Mac
Whether you want to back up various iOS data, or restore backup files to iPhone, iPad, iPod or PC/Mac, this powerful iOS Data Backup & Restore can be your great helper.
 iPhone Data Recovery
 iOS System Recovery
 iOS Data Backup & Restore
 iOS Screen Recorder
 MobieTrans
 iPhone Transfer
 iPhone Eraser
 WhatsApp Transfer
 iOS Unlocker
 Free HEIC Converter
 iPhone Location Changer
 Android Data Recovery
 Broken Android Data Extraction
 Android Data Backup & Restore
 Phone Transfer
 Data Recovery
 Blu-ray Player
 Mac Cleaner
 DVD Creator
 PDF Converter Ultimate
 Windows Password Reset
 Phone Mirror
 Video Converter Ultimate
 Video Editor
 Screen Recorder
 PPT to Video Converter
 Slideshow Maker
 Free Video Converter
 Free Screen Recorder
 Free HEIC Converter
 Free Video Compressor
 Free PDF Compressor
 Free Audio Converter
 Free Audio Recorder
 Free Video Joiner
 Free Image Compressor
 Free Background Eraser
 Free Image Upscaler
 Free Watermark Remover
 iPhone Screen Lock
 Puzzle Game Cube


