How to Quickly Restore a MacBook Pro to Factory Settings
Restoring MacBook Pro to factory settings means bringing your laptop to the box status. There are a few reasons why you have to perform a factory reset on your device. Before selling your MacBook Pro, for example, you must factory reset it and erase all data to protect your information. That is also a significant step of troubleshooting when you are locked out of your laptop, the screen is frozen or unresponsive, and more.
SIDEINDHOLD:
Part 1: Before You Start Restoring MacBook Pro
Since restoring factory settings on a MacBook Pro will erase all data on your laptop, you’d better back up your device using Time Machine. Moreover, you need to sign out of services and accounts on your device.
Back up MacBook Pro with Time Machine
Trin 1 Insert a backup storage device into your laptop.
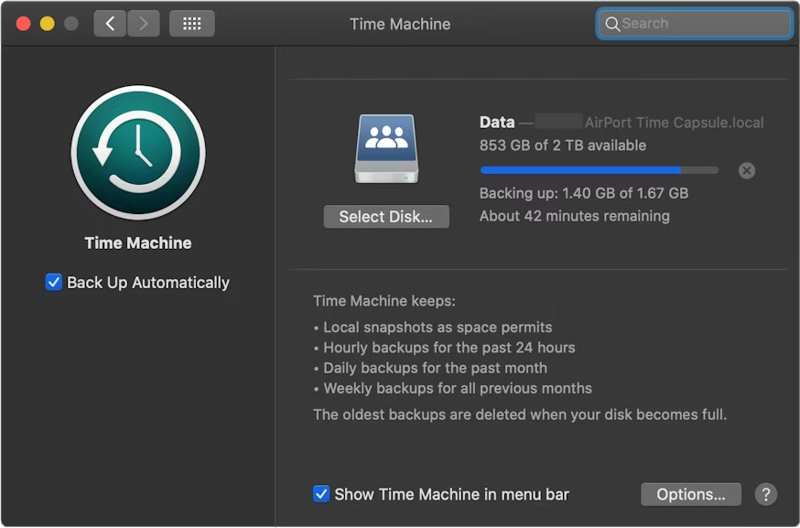
Trin 2 Klik på knappen Apple menuen og vælg Systemindstillinger or System Preferences.
Trin 3 Klik Generelt i sidebjælken og vælg tid Machine.
Trin 4 Hit Tilføj backup-disk eller trykke på Tilføj .
Trin 5 Next, select your backup storage device, and click Opsæt disk.
Trin 6 Follow the onscreen instructions to set up the backup storage device.
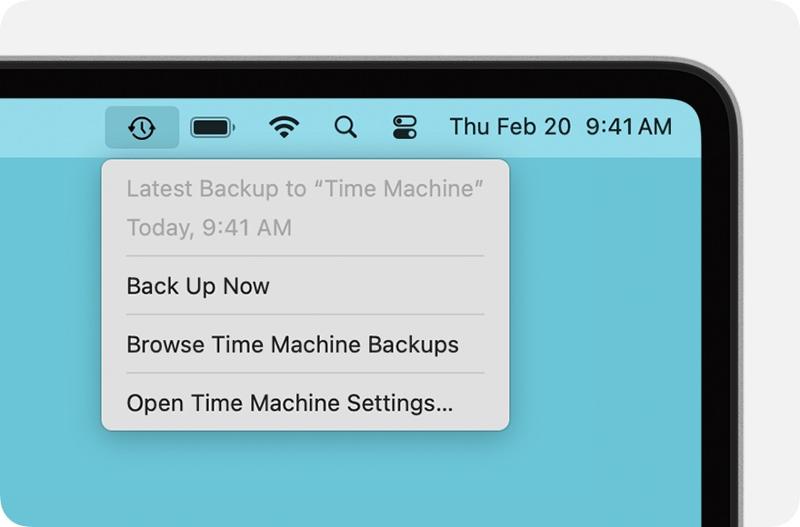
Trin 7 Efter opsætningen skal du klikke på tid Machine menu på det øverste bånd og vælg Backup nu to back up your MacBook Pro before factory resetting it.
Sign out Accounts
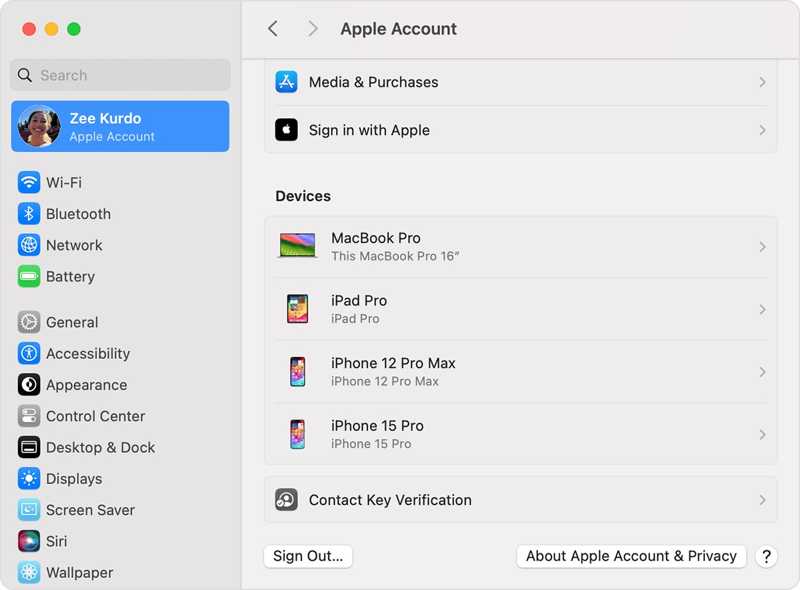
To complete restore MacBook Pro to factory default, you must sign out all accounts added to your machine.
On macOS Catalina or later, choose Systemindstillinger or System Preferences i din Apple menu. Toggle off Find min Mac. Klik derefter på Apple Account, scroll down, and hit Log ud.
On macOS Mojave or earlier, choose System Preferences i Apple menu. Klik iCloud, og hit Log ud.
Plus, you’d better sign out of iMessage, FaceTime, and other services.
Part 2: How to Restore MacBook Pro from Settings
If your machine has updated to macOS Ventura or later, the easiest way to restore factory settings on a MacBook Pro is the built-in feature in your System Settings. This method can complete the job in the normal mode.
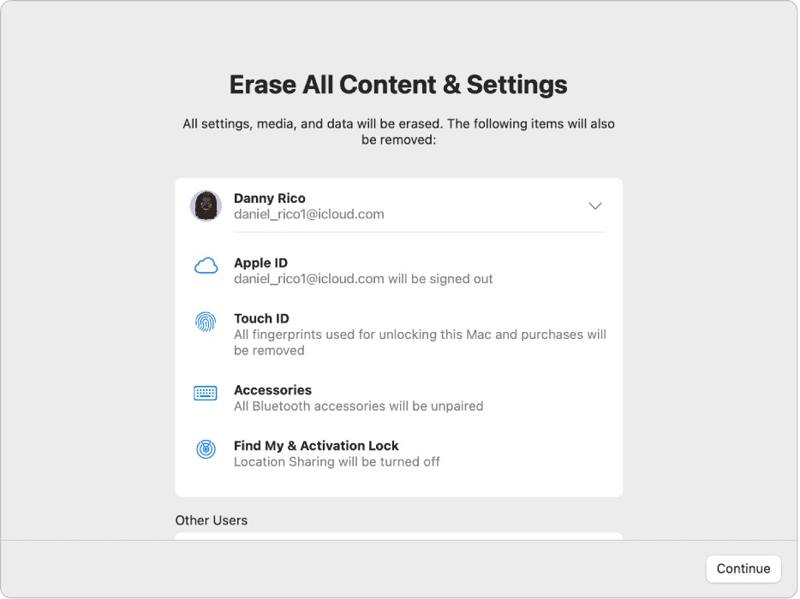
Trin 1 Klik på knappen Apple menuen på enhver skærm.
Trin 2 Gå til System Settings, choose Generelt, og klik Overfør eller Nulstil.
Trin 3 Klik på knappen Slet alt indhold og indstillinger valgmulighed.
Trin 4 If prompted, enter your Apple ID password or admin password.
Trin 5 Læs advarslen og klik Fortsæt. to begin restoring your MacBook Pro.
Part 3: How to Restore MacBook Pro to Factory Settings with Disk Utility
If you cannot restore factory settings on MacBook Pro from System Settings or you are using macOS Monterey or earlier, you have to put your laptop in Recovery Mode and reset it using Disk Utility.
Bemærk: You'd better ensure that you've backed up MacBook to iCloud or other storage in advance.
Trin 1 Gå til Apple menuen og vælg Nedlægge to power off your laptop. If your screen is unresponsive, long-press the Effekt button until it turns black.
Trin 2 Hold Effekt button to turn on your Mac and immediately press the Kommando-R tasten, indtil Apple-logoet vises.
tips: If your MacBook Pro is equipped with Apple Silicon or Apple T2 Security Chip, hold the Effekt button after your laptop turns on.
Trin 3 When prompted, enter your admin password. Then, you will face two options:
Mulighed 1:
Trin 4 Vælg Diskværktøj option once the macOS Hjælpeprogrammer vinduet dukker op.

Trin 5 Klik på knappen Fortsæt. knappen for at fortsætte.
Trin 6 Now, you should see your startup disk. If you have a data disk, select it, click Redigere, vælg Slet APFS-lydstyrke, og hit Slette.
Trin 7 Next, select your startup disk. By default, it is Macintosh HD.
Trin 8 Klik på knappen Slet .
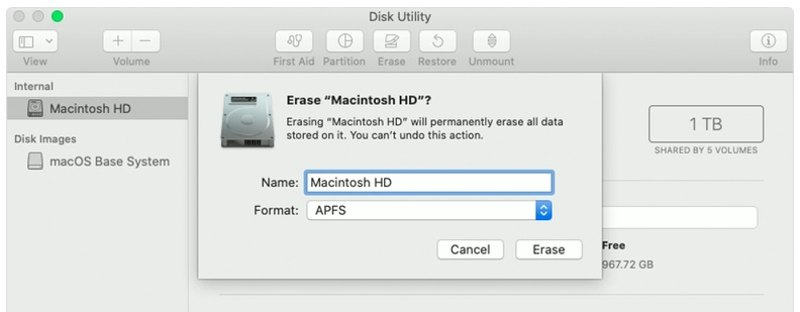
Trin 9 Type Macintosh HD as the name and select a format.
Trin 10 Klik på knappen Slet knappen igen.
Trin 11 If prompted, enter your Apple ID password or admin password.
Trin 12 Wait for the MacBook Pro factory restore to finish.
Trin 13 When it is done, you will be taken to the macOS Hjælpeprogrammer skærmbilledet.
Trin 14 Vælg Geninstaller macOS and follow the onscreen instructions to set up your laptop.
Mulighed 2:
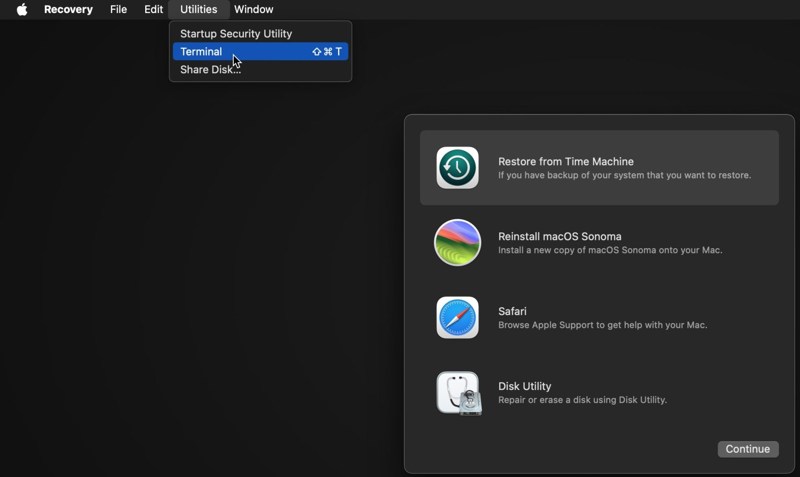
Trin 4 Klik på knappen Hjælpeprogrammer menuen og vælg terminal.
Trin 5 Type diskutil liste og tryk på Returnering key on your keyboard to identify the startup disk.
Trin 6 Next, perform the command:
diskutil eraseDisk APFS "Macintosh HD" disk0
tips: If your Mac equips a hard drive instead of an SSD, perform the command: diskutil eraseDisk HFS+J "Macintosh HD" disk0.
diskutil eraseDisk HFS+J "Macintosh HD" disk0.
Trin 7 Then, download the latest macOS with the command below:
softwareupdate --fetch-full-installer --full-installer-version [number].
Trin 8 Input sudo /Applications/Install macOS Sequoia.app/Contents/Resources/startosinstall --eraseinstall --newvolumename "Macintosh HD", og hit Returnering at geninstallere macOS.
Trin 9 When your MacBook Pro reboots, set it up.
Part 4: How to Recover Data After Restoring MacBook Pro
After restoring the MacBook Pro, all your data will be erased. Thankfully, Apeaksoft Data Recovery can help you resolve this problem. It can scan your hard disk and retrieve lost data without a backup.
Et klik for at få adgang til slettede YouTube-videoer
- Recover lost data on MacBook Pro with one click.
- Available for various situations, like factory reset, accidental deletion, and more.
- Støtte en lang række datatyper.
- Forhåndsvisning af mistede filer til selektiv gendannelse.
- Kompatibel med macOS 10.7 og nyere.
Sikker download
Sikker download

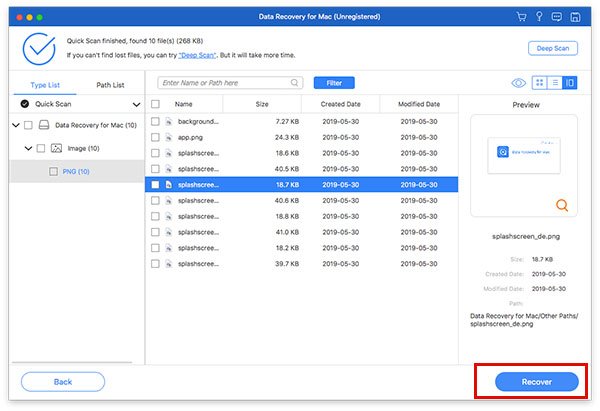
How to Recover Data on MacBook Pro After Restoring
Trin 1
Vælg datatyper
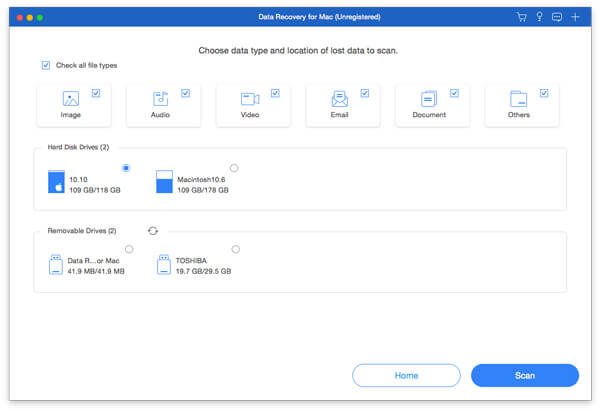
Launch the best data recovery for Mac after installing it on your MacBook Pro. Select the data types you want to recover, like Billede, lyd, video, and more. Then, select the disk where the lost files are. Click the Scan button to begin scanning the Mac.
Trin 2
Se eksempel på mistede filer
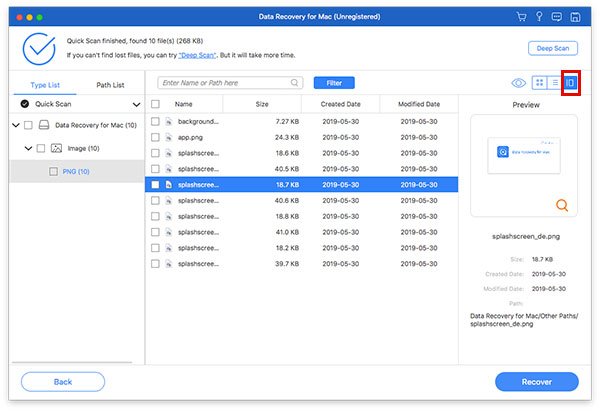
When scanning finishes, go to the Type liste tab, and preview lost data by type. You can also find a specific location in the Baneliste tab. If you cannot find the desired files, click the Dyb scanning for at udføre en dyb scanning.
Trin 3
Recover files on MacBook Pro
Make sure to select all files and items you wish to get back and click the Recover button. Set an output folder and hit Recover again. This program can even recover deleted messages on Mac.
Konklusion
Nu burde du forstå hvordan man gendanner en MacBook Pro til fabriksindstillinger. For newer versions, you can perform a factory reset in the System Settings app. For older versions, you can do the job in Recovery Mode. Apeaksoft Data Recovery is able to restore lost data after factory resetting on MacBook Pro. It doesn’t require a backup.
Relaterede artikler
Har du ved et uheld slettet de billeder, du kunne lide på din Mac? Bare rolig. Denne artikel hjælper dig med at gendanne slettede billeder på en Mac.
Gendannelsestilstand på Mac er en indbygget tilstand designet til at gendanne Mac og reparere diskproblem. Her lærer du, hvordan du går ind i og bruger gendannelsestilstand på Mac.
Hvad er den bedste datagendannelsessoftware til Mac? Her er en top 10-liste med anmeldelser, der hjælper dig med at finde den bedste til at gendanne data på Mac sikkert og hurtigt.
Denne artikel viser detaljerede oplysninger om, hvad internetgendannelse på Mac er, hvordan du indtaster Mac Internet Recovery-tilstand og løsninger til løsning af ikke arbejdsproblemer.
