– "I have an iPad that's stuck on the Apple logo. Tried restoring it in DFU, recovery mode and cooked-up custom firmware. However, the screen just keeps turning on and off on the Apple logo. And the phone just keeps throwing iTunes error 9. Any help would be appreciated."
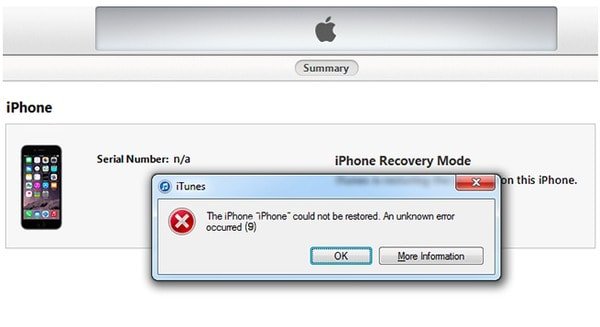
Many people report that they have iTunes error 9 while updating to iOS 26/27 Beta or restoring from iTunes backup. When you receive the message "The iPhone [device name] could not be restored. An unknown error occurred (9).", the iOS update or restore process will be interpreted. Therefore, you need to fix iTunes error 9 as soon as possible. After that, you are able to continue updating or restoring your iOS device.

- Part 1: What does Error 9 Imply and Why Would It Happen
- Part 2: Common Solutions to Fix The iTunes Error 9
Partie 1: What does Error 9 Imply and Why Would It Happen?
So what does the message "The iPhone [device name] could not be restored. An unknown error occurred (9)." mean? Error 9 is an Erreur iTunes that occurs during firmware updates or system restores on iPhone or iPad using iTunes. In addition, iTunes error 9 is always associated with "iPhone has timeout" message. The moment iTunes error 9 pops up, there is something wrong with your iOS device or other factors. Thus, you need to find out the real reason before fixing iPhone error code 9.
There are many reasons that can trigger error 9 in iTunes. The first one is the prevention from security software and firewall. The process to Apple servers are blocked by those two factors. Moreover, your jailbroken iPhone or iPad can cause unexpectedly error 9 and other iTunes codes as well. In addition, you need to check the Internet condition and USB connection, because the poor Wi-Fi connection can result in iPhone or iPad error 9 too. Well, the network database on the computer that was previously used to hack or jailbreak other iPhone or iPad and was corrupted can also explain why error 9 occurs.
Partie 2: Common Solutions to Fix The iTunes Error 9
You can try the following solutions to fix iTunes error 9 in iPhone or iPad with ease. Just locate the certain part to find the most related method. Otherwise, you can also try those solutions to test the real cause of iTunes error 9.
Méthode 1: Hard Reset iOS Device to Fix iTunes Error 9
Étape 1. Press and hold the "Sleep/Wake" button and the "Home" button together.
Étape 2. Keep pressing two buttons for about 10 seconds.
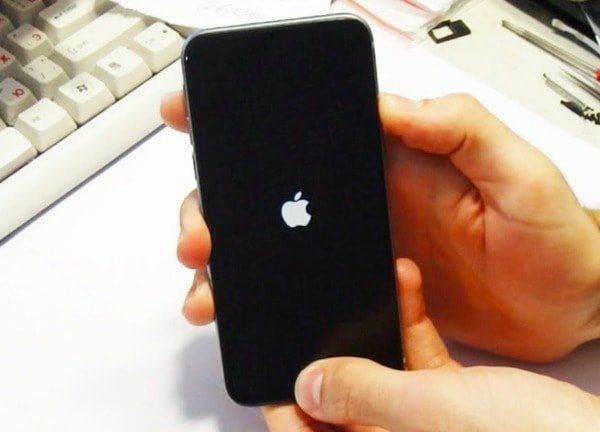
Étape 3. Do not release them until you see the Apple logo.
Étape 4. Hard reset iPhone or iPad to see if iTunes error 9 is fixed.
Hard resetting iPhone is always a simple way to fix all types of iTunes errors. For instance, you can also use it to fix Erreur iTunes 14.
Méthode 2: Update Your iTunes to Fix Error 9
Étape 1. Open iTunes on your Windows or Mac computer.
Étape 2. Get the latest version to update iTunes.
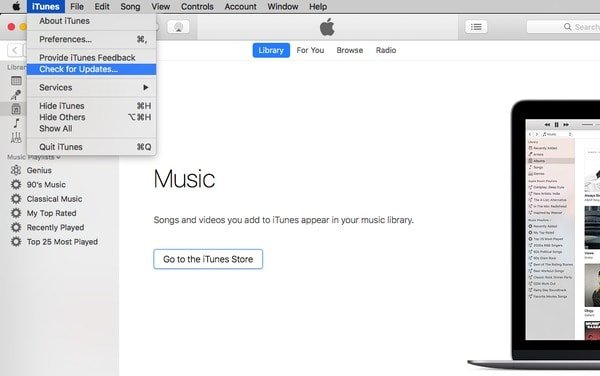
Les utilisateurs de Mac: Choose "iTunes" from the toolbar on the top. Click "Check for Updates" and follow the instruction to update iTunes.
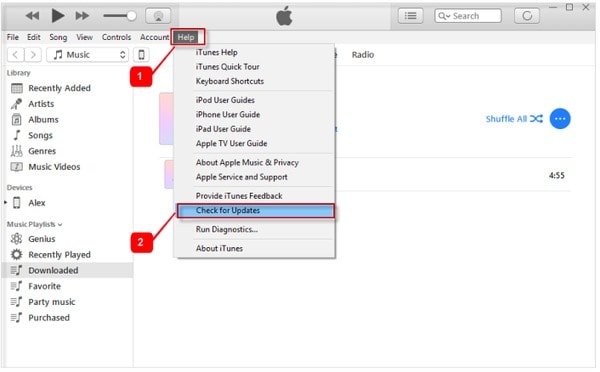
Utilisateurs Windows: Click "Help" in the menu bar and select "Check for Updates". Choose the latest iTunes version to update.
Later, you can update or restore iPhone with iTunes. if iTunes error 9 still pops up, then you can try the next solution.
Méthode 3: Change a Different Computer
If iTunes error 9 occurs all the time, you can borrow a computer from your friend. Then you can try to update or restore an iOS device using iTunes. In addition, you are able to try another computer when you have error 4013 iTunes and other iTunes error codes.

Méthode 4: Check USB Cable and Ports
Étape 1. Check if you are using the original standard USB cable.
Étape 2. Disconnect and reconnect your iPhone or iPad from the computer.
Étape 3. Plug the USB cable into another USB port to the computer.

Méthode 5: Check Your Security Software and Firewall
Étape 1. Open your anti-virus software to see if iTunes is blocked or not included in the exceptions list.
Étape 2. Locate Windows firewall and make sure iTunes is in the exempted list.
Étape 3. Turn off virtualization apps and update the OS version of your Windows or Mac.

Solution 6: Get the Best iTunes Alternative: iPhone Data Recovery
By using Apeaksoft Récupération de Données iPhone, you can get rid of iTunes disadvantages and restaurer l'iphone or iPad from iTunes backup safely and selectively. In another word, you can restore and extract data from iTunes backup without any data loss. Even though you have not backed up iPhone with iTunes before, iPhone Data Recovery also enables users to recover data from iPhone itself or iCloud backup without erasing the original files. In a word, this iPhone Data Recovery is your best choice to avoid iTunes error 9 and recover lost iOS data easily.
Récupération de Données iPhone
- Recover data from iTunes backup in a snap.
- Recover lost data from iPhone, iPad, and iPod directly.
- Extract and download files from iCloud.
- Scan and preview both deleted and existing files in detail.
- Support more than 20 different file types like contacts, messages, and photos, etc.
- Highly compatible with the latest iOS 26/27 Beta and iPhone 17/16/15/14/13/12/11, etc.
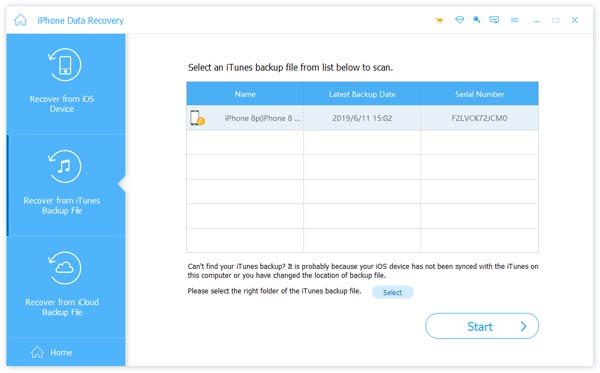
Étape 1. Access iTunes backup files
Download and install the iTunes alternative software on your Windows or Mac computer. Make sure you have synced iPhone or iPad with iTunes on this computer before. Choose "Recover from iTunes Backup File" to see all your iTunes backup files automatically.
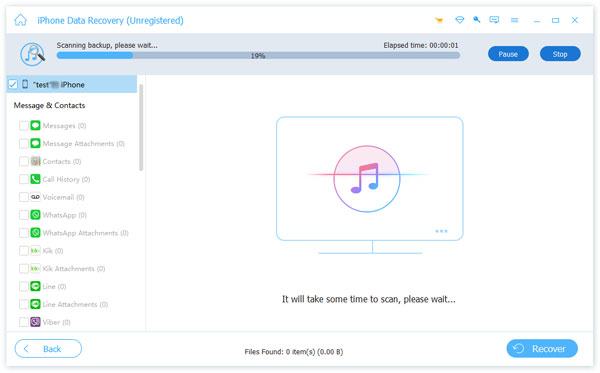
Étape 2. Scannez votre sauvegarde iTunes
Pick out the most relevant iTunes backup, then click "Start Scan" button in the lower right corner. It takes few minutes to scan your iTunes backup. Later, you can see all categories displaying in the left panel.
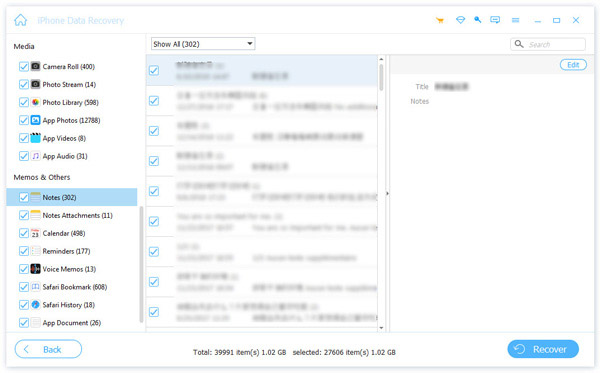
Étape 3. Preview and recover data from iTunes
Choose the certain file type to see the containing files. You can click one item and then preview the detailed information in the right side. Mark all iOS data you want to restore. Later, click "Recover" to restore iTunes backup to PC with no data loss.
With above iTunes error 9 fix solutions and iTunes alternative software, you can get better experience of iPhone update and restore than before. If you have any other iTunes errors like Erreur iTunes 3194, please don't hesitate to contact us.