
User Guide
- Introduction
- Install and Register
- Record Video
- Record Audio
- Record Game
- Record Window
- Record Webcam
- Record Phone
- Take Screenshot
- Recording Settings
- Task Schedule and More
- Different Recording Solutions
Try It Now!
Introduction
Apeaksoft Screen Recorder is a professional screen recording application burn with multiple practical functions. With it, you will find it so easy and interesting to record any on-screen activities you like in original images/sound quality. It can record games smoothly with its 60 fps frame rate and capture screen in PNG/JPG/GIF/BMP/TIFF format. Both videos and audio are easy for it to record. And you can save the recorded videos in various formats, like WMV, MP4, VOB, AVI, FLV and others. What’s more? You can add your favorite elements into recorded videos. Thank you for trusting and choosing us. Here are the details of Screen Recorder. If you have any questions. Please contact us and we will help you solve it.
Install and Register
Install
Step 1: After you finished downloading the .exe file of Screen Recorder, find it in the destination folder and open it. It will show the next window.
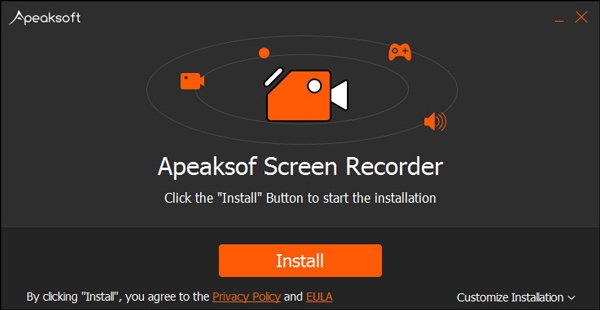
For your own personal need, you can click Customize Installation on the right bottom corner. In the drop-down window, you can set the install path and other install options, like create a desktop button and install for all users.
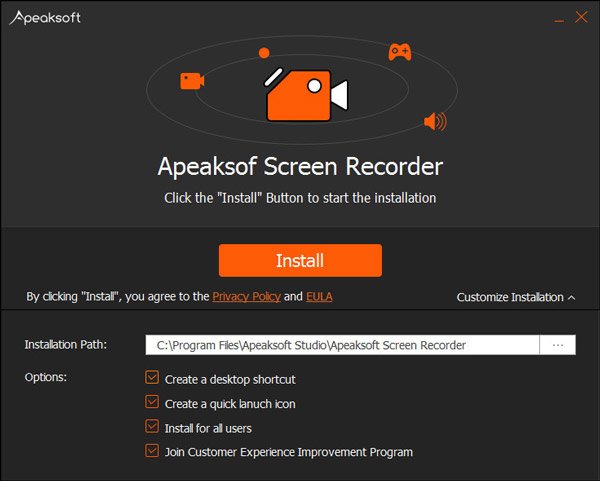
Step 2: When you make sure the settings are OK, click Install in green background. Then the software will be installed in seconds.
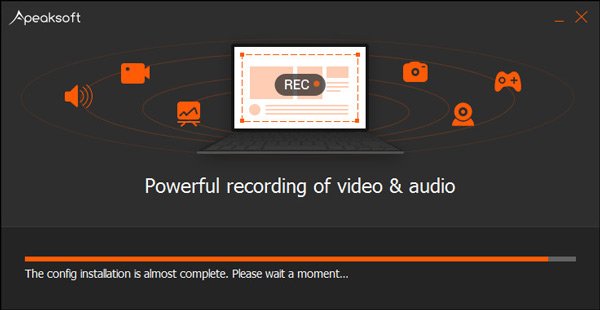
Finally, it will remind you it is done. And you can launch the software immediately.
Register
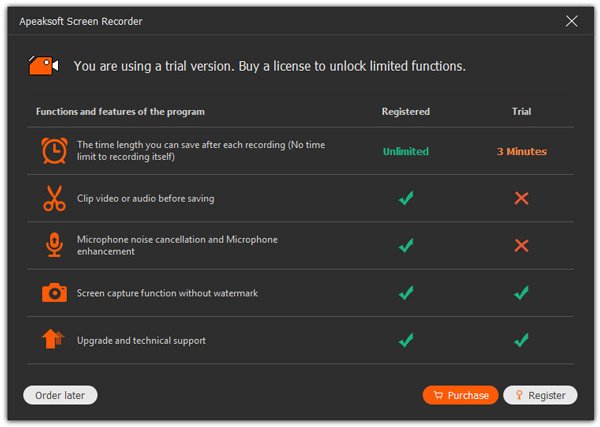
Step 1: To register this screen recording software, you can click Register on the right bottom corner in the pop-up window which will appear every time you open the software.
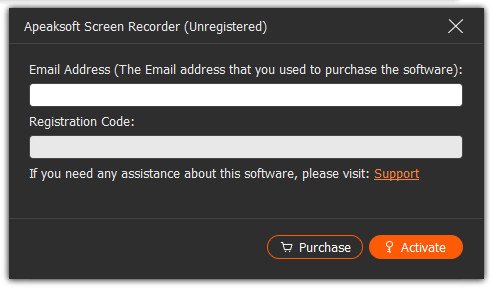
Step 2: After clicking the Register button, it will show you the little window to input your email address which you use to receive the registration code and registration code. Then click Active to register.
By the way, you also can click the key button on the top right corner of the main interface. Please input your email address which you use to receive the registration code and registration code, then click Active to register.
Note:
1: After you purchased it successfully, the registration code will be sent to your email address that you filled in the order form.
2: The free trial version only allows you to save 3 minutes of your recordings. If you want to unlock the limitation, then please purchased the full version herepurchase If you want to unlock the limitation, then please purchased the full version here.
Email Address: The email address that you fill in the order form.
Registration Code: A string of characters marked as Activation key, license code or KEYCODE(S) in the order confirmation letter you received after the successful purchase.
Record Video
Step 1: Launch Screen Recorder
After installing this screen recording software, you can run it on your PC.

Step 2: Recording area selection
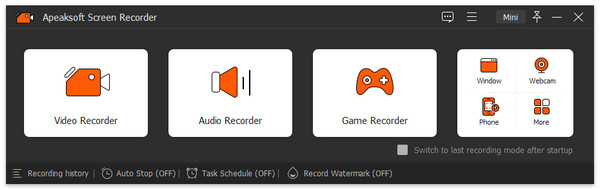
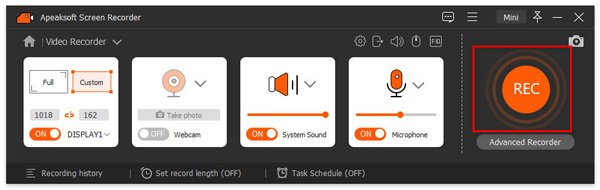
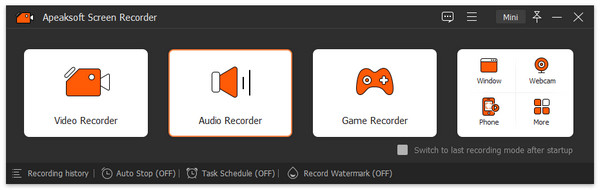
Choose the option Screen Recorder from the drop-down list of the main interface. Before recording gameplay, Skype chats, online meetings or streaming videos with this screen capturing software, you should choose the recording area at first.
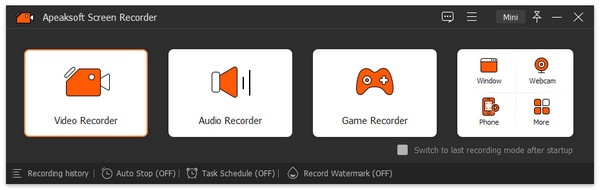
After clicking Video Recorder, it will show you the red dotted line. It is used to delineate the recording area. You can select the size of the recording area by dragging the red point on the side. And you also can input the width and length on the bar to select the size.
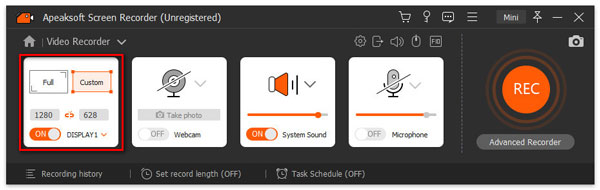
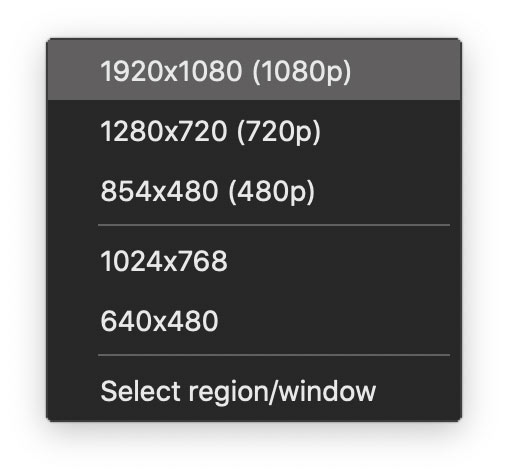
Or click Custom to choose fixed region. It also has five types: 1920*1080, 1280*720, 854*480, 1024*768 and 640*480.
And you also can select region/window directly.

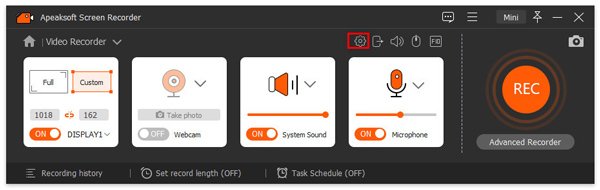
Step 3: Customize audio settings
If you are going to record a video conference, or record the Skype chat, you may need to select both system audio and the microphone. Click the system sound and microphone to make sure the checkmarks appear.
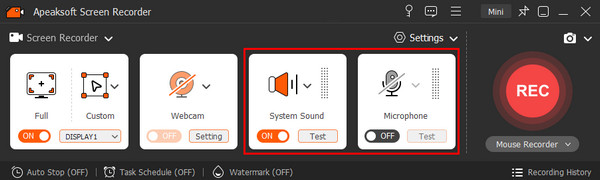
Besides, this software also offers ways to optimize your audio recording quality by customizing the audio settings.
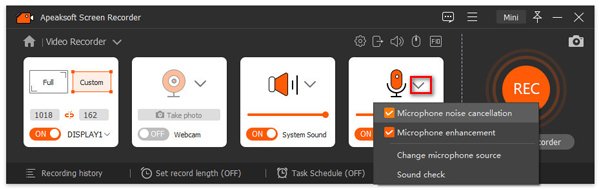
Click the drop-down option of the arrow-down from Microphone, and checkmark the box of Microphone noise cancellation and Microphone enhancement, which can stop audio echo while recording. Besides, you can change the microphone source if you have plugged more than one microphone.
When you want to record computer speaker audio, the drop-down option next to System Sound can help you change the sound source, open volume mixer to adjust the volume for other applications.

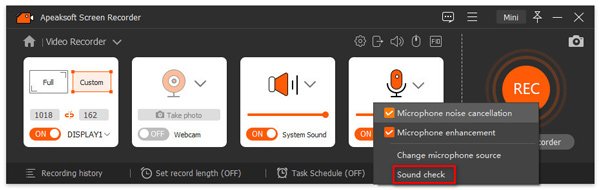
The Sound Check option under Microphone and System Sound will direct you into the sound preferences to make the detailed settings for the sound.
Step 4: Record computer screen
After setting the recording area and audio, click REC on the right side of this video screen recorder to begin recording.
And it will show you the hotkeys. You can change it according to your need.

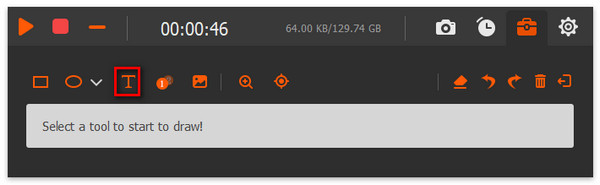
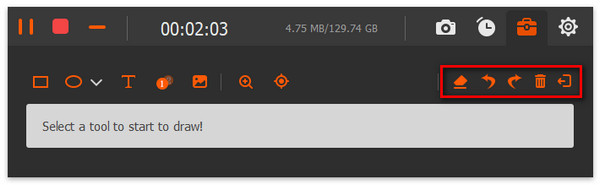
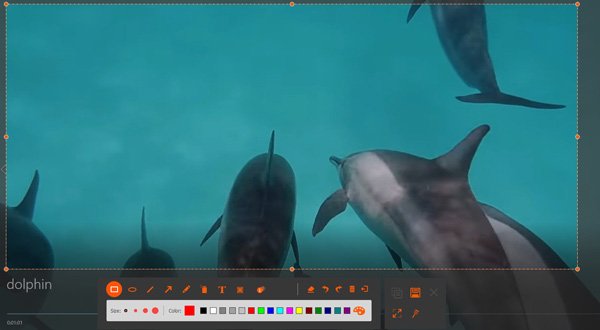
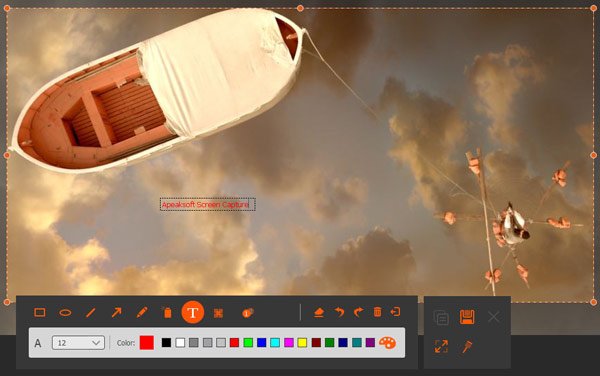
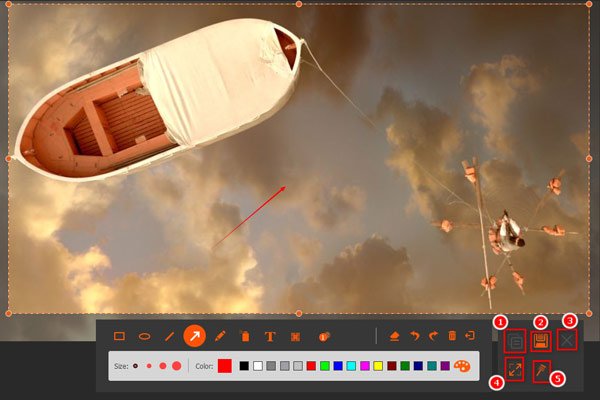
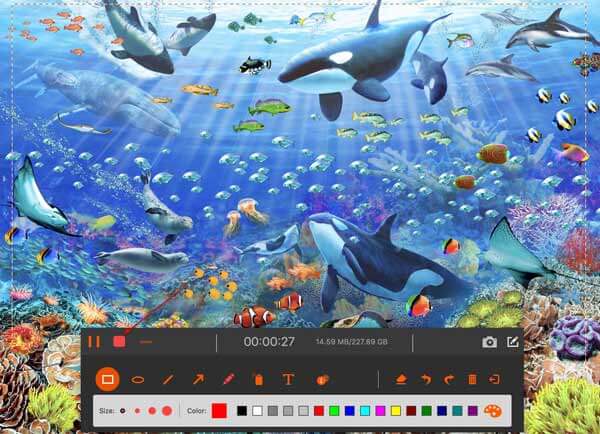
During the recording, you are able to make drawing or add annotations based on your need by clicking the briefcase button.
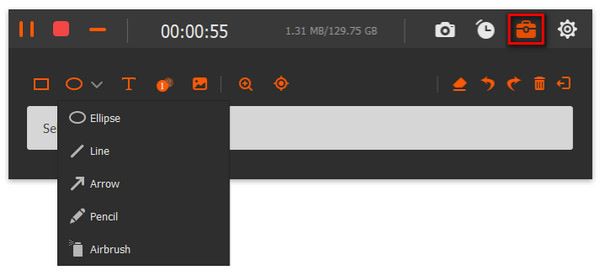
1. Draw the border, line, arrows and any shape you need. You can select the size and color of it. It always means emphasizing.
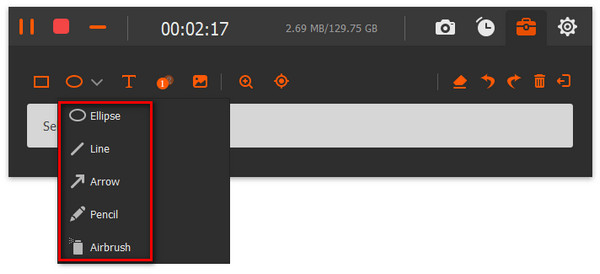
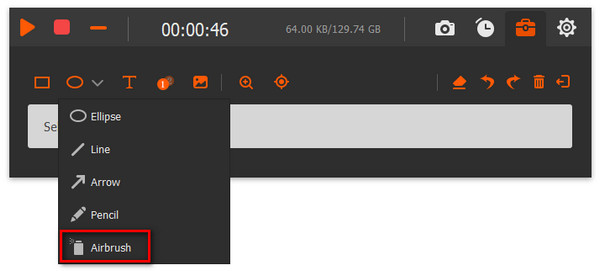
2. Air brush. You also can select the size and color of it. It would add powder effect to your recorded videos.
3. Text. By clicking the big T button, you can input the words you want into your videos.
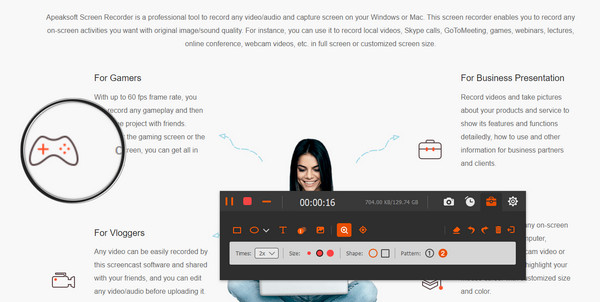
4. Magnifier. Click the magnifier button.
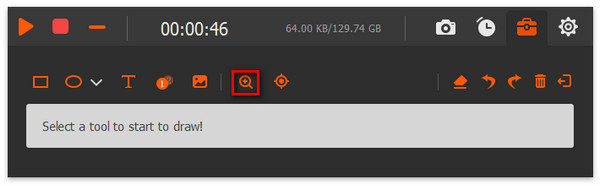
Move your cursor to the part you want to zoom in. You can adjust the magnification by changing the number of Times in the bottom-left corner. Change the Size, Shape, and Pattern of the circled area as you like.
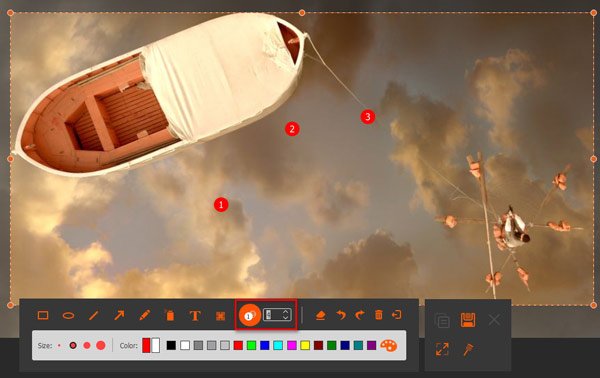
5. Callout. Using this, you can mark the order of the content. Apart from the size and color, you also can set the color of the number and its background in color and select the next beginning number by clicking the up and down keys beside the callout.

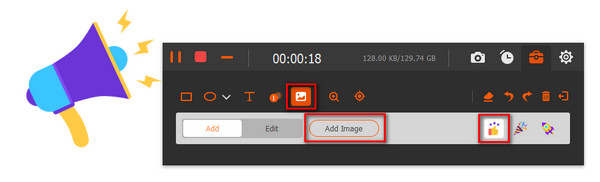
6. Image. With this function, you can put your picture or elements provided by this program on the screen you are recording.
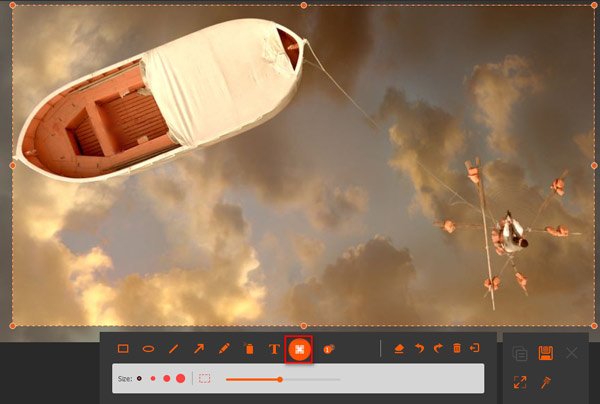
7. Focus. When you use this feature, you can highlight and focus the content easily when you are recording the screen.
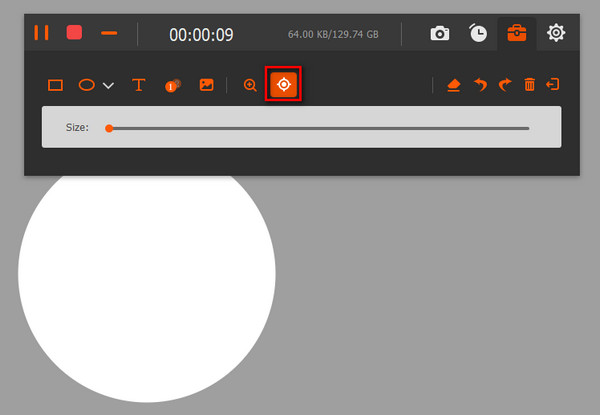
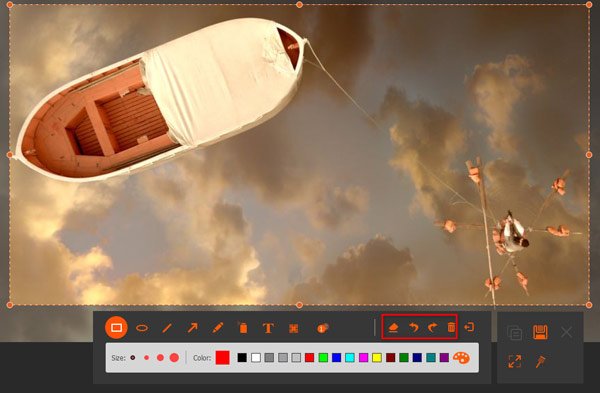
If you make the wrong effect, you can click eraser button to clear the wrong effect or click the dustbin button to clear all items you add. You also can click undo and redo buttons to adjust the effect you add just.
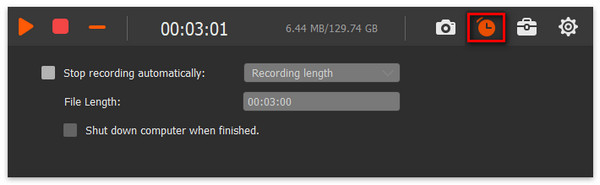
You also can click the clock button to set the length of the target video and take snapshot by clicking the camera button.
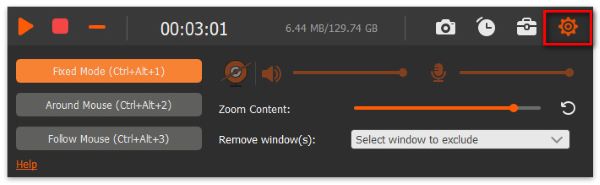
If you forget to set the sound or want to move the window when recording, you can click the wheel button on the top right corner of the interface to accomplish it.
Step 5: Save the recorded video
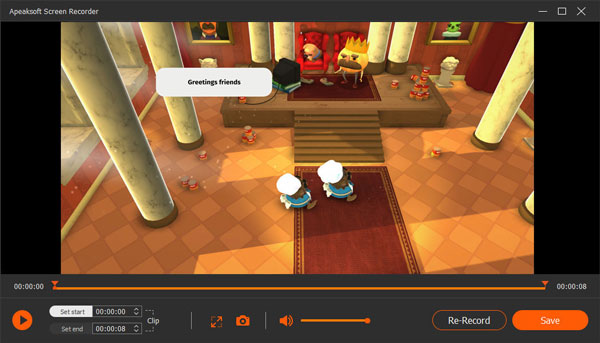
Click the red square on the top left corner to finish recording.
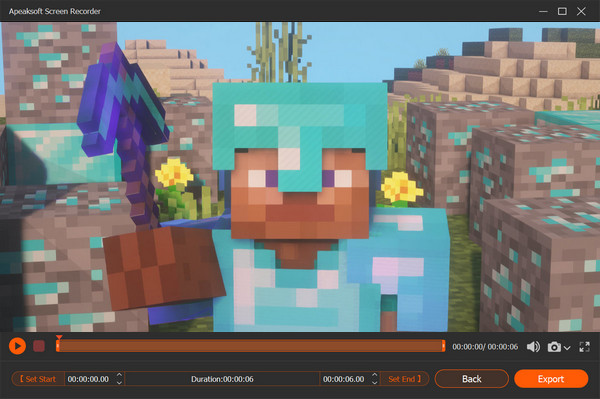
It will show the video you record. And you can preview it immediately.
1. You can clip the video by inputting the number in bars.
2. Click the camera button to take screenshot.
3. Adjust the volume
4. Re-record and save the video.
To save the video, it will remind you to select the save path. Make sure you choose the path you want.
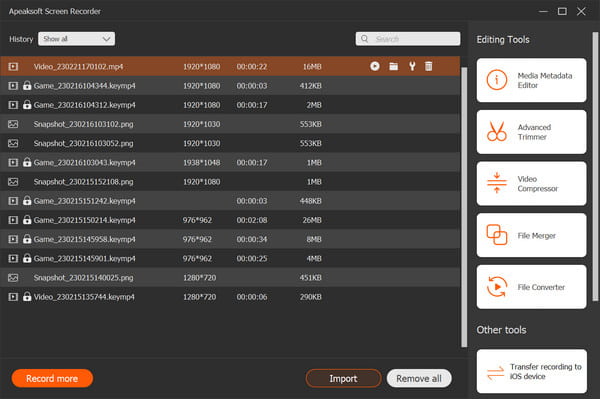
After that, it will show all recorded files to you. It also offers other tools on the right-side bar for you to edit videos.

Note: Powerful as the Screen Recorder is, it enables you to make the settings you prefer in advance, then you are able to record video using these settings next time. It is pretty convenient if you have lots of on-screen activities to record in the same demand.
Record Audio
Step 1: Install Screen Recorder
After downloading the video audio recorder tool, install and run Apeaksoft Screen Recorder on your Windows PC.
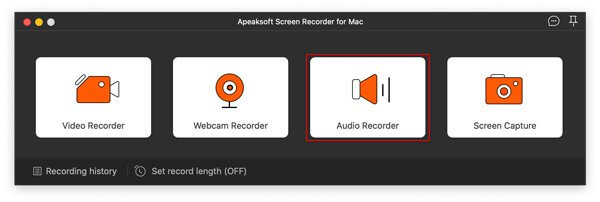
Step 2: Choose Audio Recorder
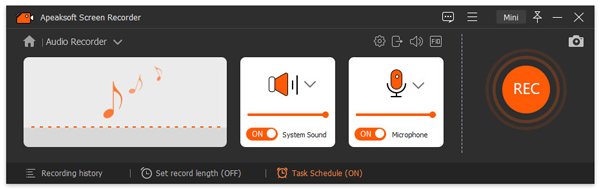
Choose the second option, Audio Recorder when you enter the drop-down list of the main interface.
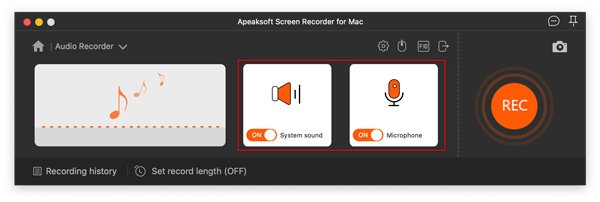
Step 3: Make audio settings
For recording online audio, music or radios, turn on System Audio, and turn off Microphone on this audio recorder before that. If you want to record other’s or your voice, you can just turn on Microphone and begin recording. Adjust the volume as you like.
Similar to Video Recorder, here you can customize the detailed audio settings.
From System Sound, you change the sound source, if you have run more than one audio applications on your computer.
The Volume Mixer feature allows you to adjust the speaker audio volume for separate audio applications while recording.
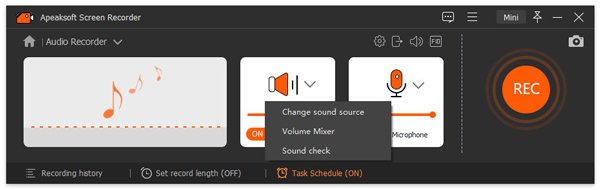
The drop-down option next to Microphone will help you enhance audio quality and remove audio noise. You can also change the microphone recording source to choose the one you want to capture.
Finally, the Sound check option is a quick option to navigate the sound preferences in this software.

Click REC on the right side of this video screen recorder to begin recording.
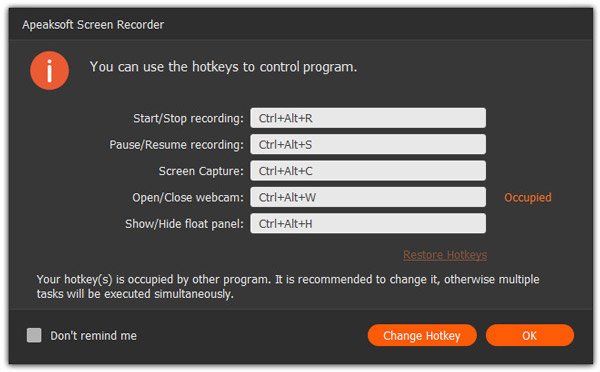
And it will show you the hotkeys. And you also can change them.
If you forget to set the sound or want to remove the window when recording, you can click the wheel button on the top right corner of the interface to accomplish it.
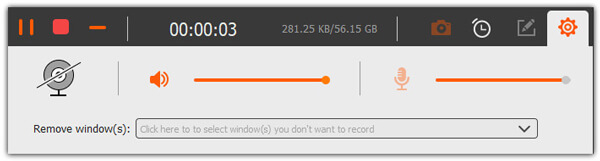
You also can click the clock button to set the length of the target audio.
Step 4: Save the recorded video
Click the red square on the top left corner to finish recording. It will show the video you record. And you can preview it immediately.
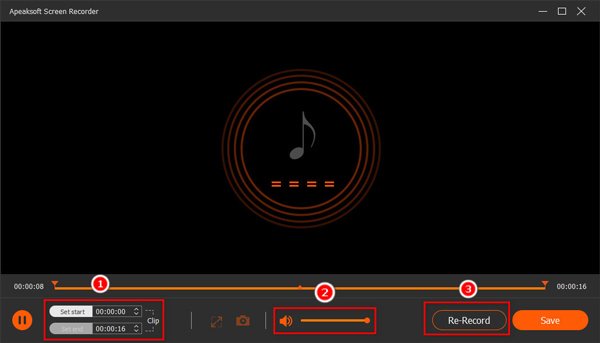
1. You can clip the video by inputting the number in bars.
2. Adjust the volume
3. Re-record and save the video.
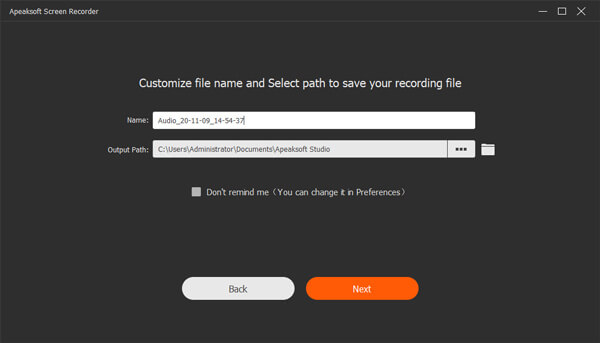
To save the video, it will remind you to select the save path. Make sure you choose the path you want.
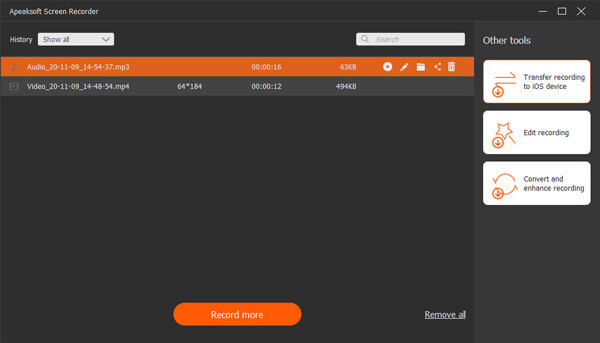
After that, it will show all recorded files to you. It also offers other tools on the right-side bar for you to edit files.
Record Game
Step 1: Launch Screen Recorder
After downloading this game recording tool, install and launch Apeaksoft Screen Recorder on your computer.
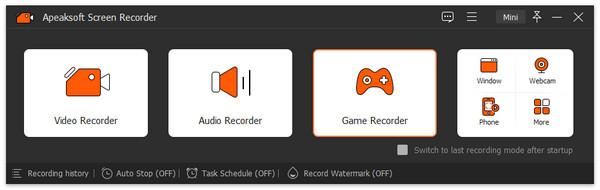
Step 2: Select Game Recorder
Choose the option Game Recorder from the main interface. This game recording feature can record all running games on your computer. Before starting a game recording, you need to make sure the game process is running.
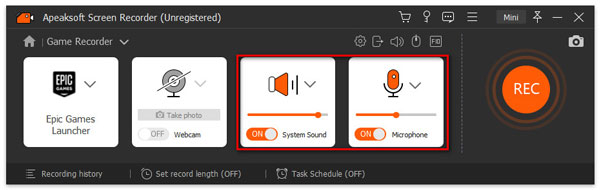
Step 3: Select the game
Click Select the game drop-down arrow to select the gameplay you want to record.
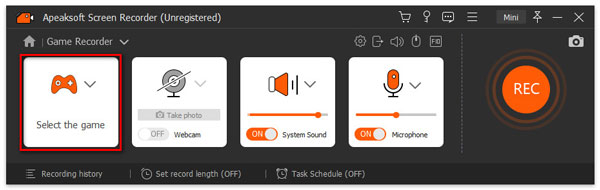
Step 4: Customize audio settings
If you want to record a game with game audio and voice, you need to enable both System Sound and Microphone options. During the recording, you can turn on Webcam to take a photo with your webcam.
Step 5: Record the game
If everything is set done, you can click REC button to start the game recording. During the game recording, you can make drawings to the recording and take a quick snapshot.
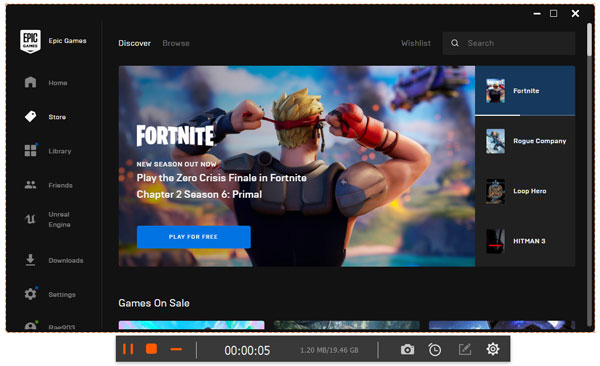
Step 6: Save the game recording
When the gameplay is over, click the Stop button to stop the game recording. Then you will be taken to the preview window. You can adjust the recording length by setting the start and end. Then click the Save button to save the game recording to computer.
Record Window
Step 1: Launch Screen Recorder
After downloading this game recording tool, install and launch Apeaksoft Screen Recorder on your computer.
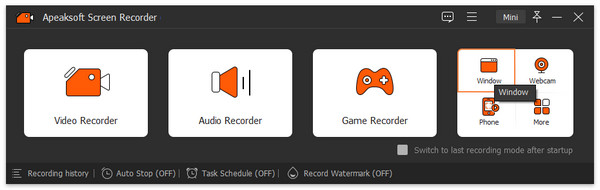
Step 2: Select Window Recorder
Choose the Window Recorder function from the drop-down list. You can use this feature to record only one specific window on your computer.
Step 3: Select the window
Click drop-down arrow next to Window Recorder to select the window you want to record.
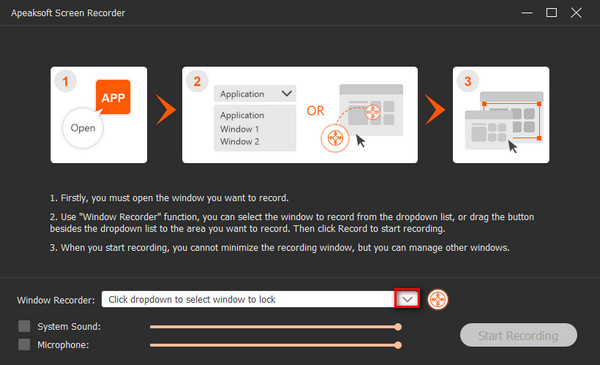
Step 4: Start recording window
Then you can click the Start Recording button to begin recording the window.

Record Webcam
Step 1: Launch Screen Recorder
After installing this screen recording software, you can run it on your computer.
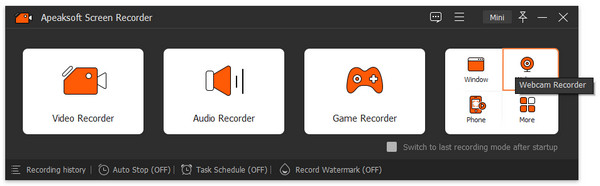
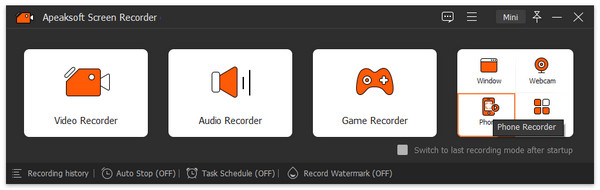
Step 2: Select Webcam Recorder
Select Webcam to enter the Webcam Recorder window. Before using this feature, you need to turn on Camera settings to allow apps to access your camera.
Step 3: Adjust webcam settings
Then you can move your camera and make sure it is at the correct angle to capture what you want. If you have several webcams, you can click the drop-down arrow to select the right webcam.
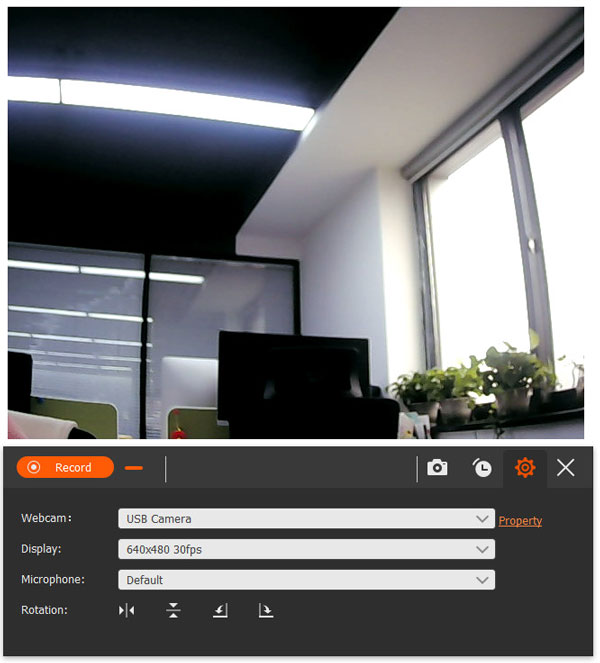
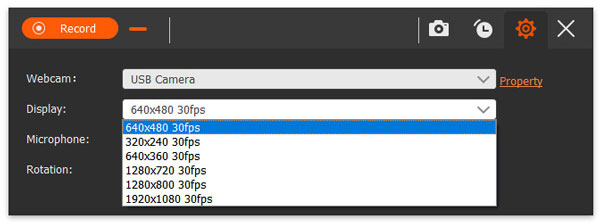
This webcam recorder provides several webcam display options. You can choose the displays from 640*480 30fps, 320*240 30fps, 640*360 30fps, 1280*720 30fps, 1280*800 30fps, 1920*1080 30fps.
You can also select the microphone, adjust the rotation, set the recording length, take a screenshot, etc. at the bottom area.
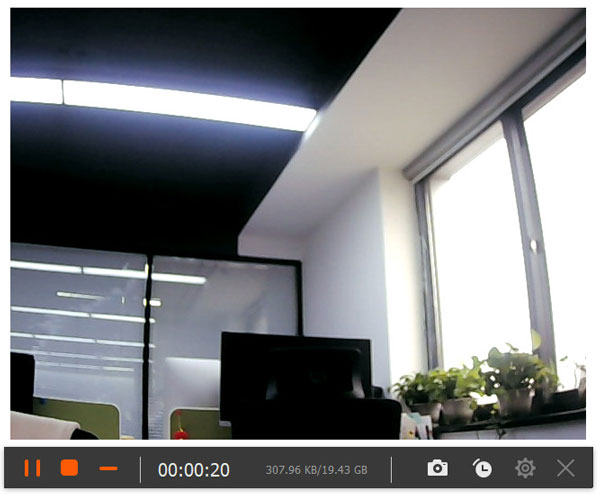
Step 4: Record webcam video
Click Record button to record your webcam video. If you want to stop the recording, you can click the Stop button to stop it.
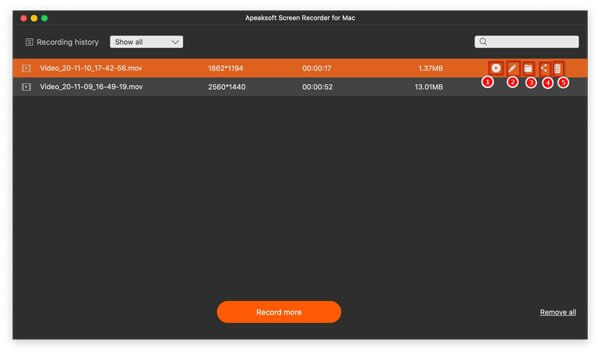
Step 5: View all recordings
When the webcam recording is finished, it will be shown in the recording list. You can preview the webcam recording, rename or delete it, or share the webcam recording on popular social networking platforms.

Record Phone
Step 1: Install Screen Recorder
Download the software Screen Recorder from the official website and install it, then you can use it on your computer.
Step 2: Choose Phone Recorder
Click the Phone Recorder option from the drop-down list on the main interface.
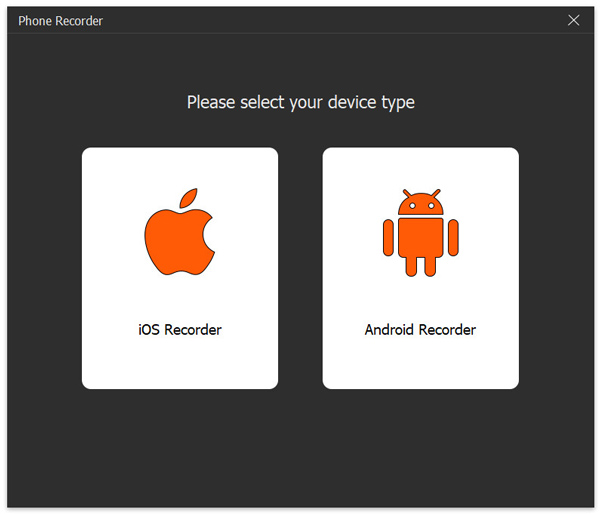
Step 3: Select device type
After entering the Phone Recorder window, you can select the device type as iOS Recorder or Android Recorder according to your phone type.
iOS Recorder
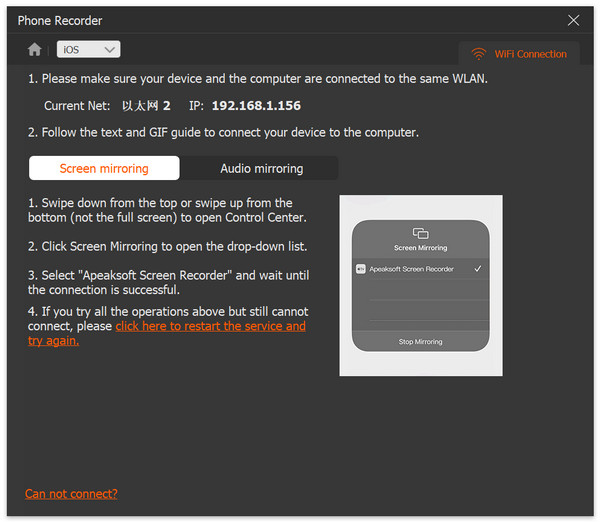
Step 1: Connect the device
Before connecting your device to the computer, please make sure that the computer and your device are connected to the same WLAN/LAN.
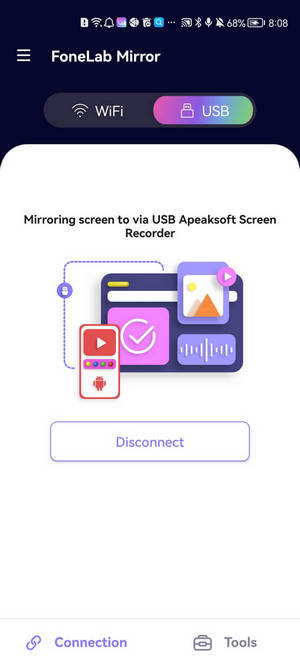
Later, operate your phone based on the on-screen text or GIF guide to connect your phone to the computer.
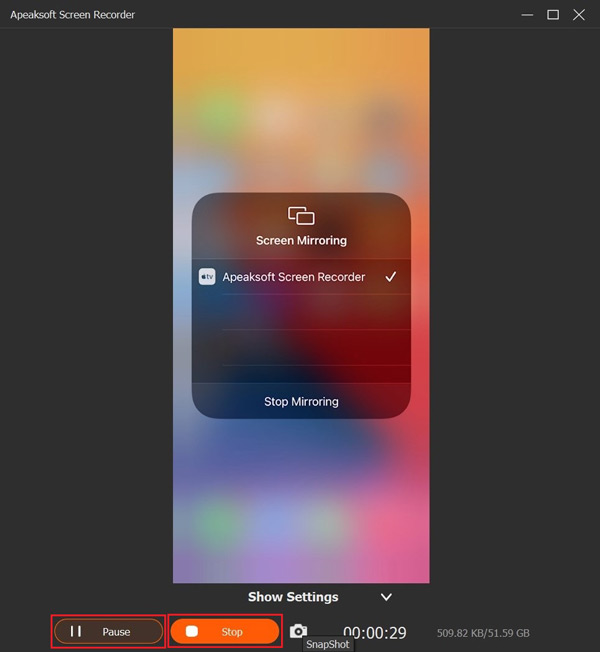
If you want to record the screen of your phone, choose the option Screen mirroring and then operate your phone with following steps: swipe down from the top right or swipe up from the bottom (not the full screen) of your phone to open the Control Center, then click the Screen Mirroring button usually located at the lower left of the phone to open the drop-down list, and select Apeaksoft Screen Recorder.
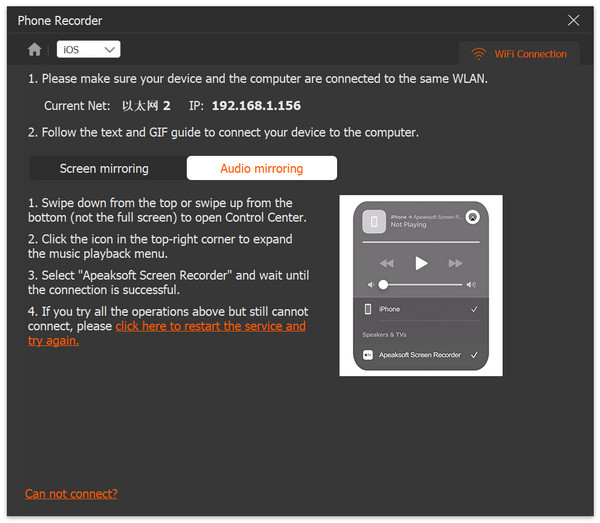
Or if you want to record the audio of your phone, choose the option Audio mirroring and then operate your phone: swipe down from the top right or swipe up from the bottom (not the full screen) of your phone to open Control Center, click the little white button at the top-right corner to expand the music playback menu, and select Apeaksoft Screen Recorder.
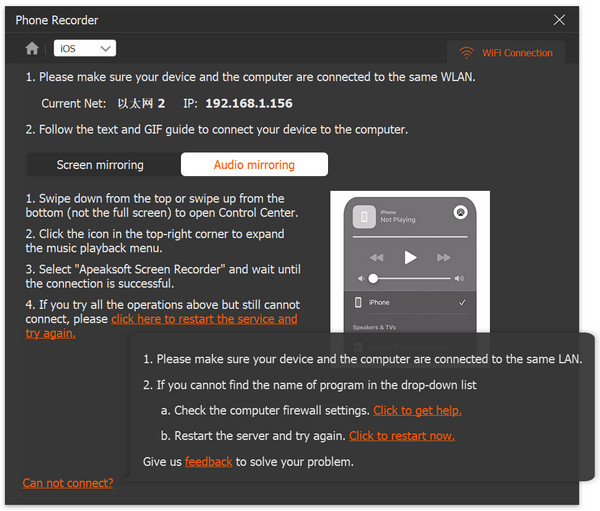
Note: When you still have trouble connecting, click Can not connect? located at the lower left, and then you can find ways to solve it.
Step 2: Screen recorder settings
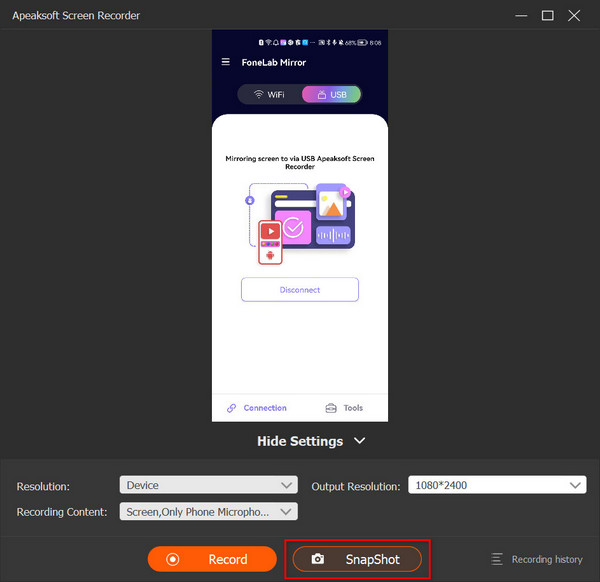
After connecting successfully, you are allowed to enter the screen-recording window and you can customize some settings here before recording your phone screen.
Click the pull-down next to the Resolution, you can adjust the resolution of your phone screen when it is presented in this software. There are 4K, 2K, 1080p, 720p, and so on for you to choose from. Click the pull-down next to the Output Resolution, you can select the output resolution of your screen-recording file.

You also can adjust the angle of your phone screen by using the Rotate feature.
Click the Horizontal Flip button, and then your phone screen will be flipped horizontally like this picture when it is presented in this software.
Click the Vertical Flip button, and then your phone screen will be flipped vertically like this picture when it is presented in this software.
Click the Left Rotate button, and then you can rotate your phone screen 90 degrees to the left like this picture when it is presented in this software.
Click the Right Rotate button, and then you can rotate your phone screen 90 degrees to the right like this picture when it is presented in this software.
You can decide to record both video and audio or only video/audio of your phone screen while you are using this function by clicking the pull-down next to the Recording Content.
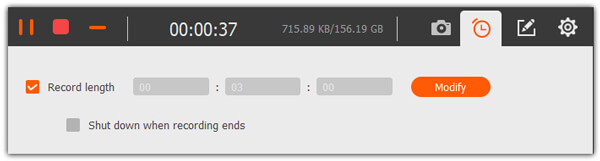
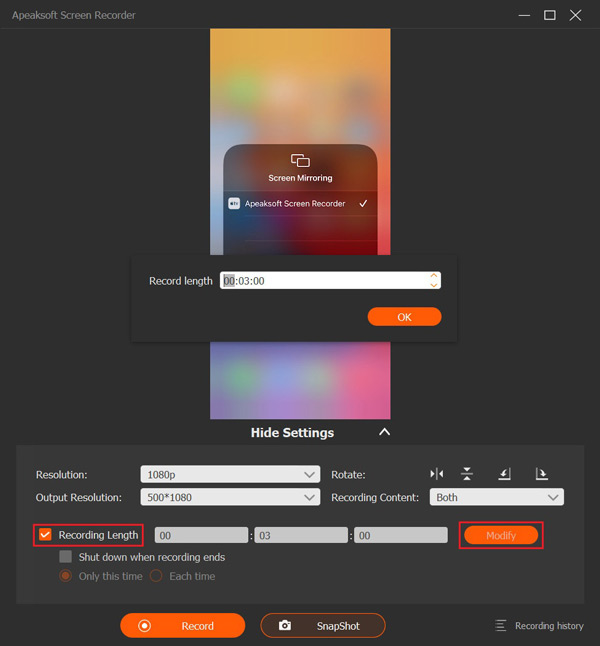
Check the box of Recording Length, you can decide how long the video you want to record will be by typing numbers. Besides, you can click the Modify button to adjust the recording length. And, if you only record the audio of your phone, you can set the recording length in the same way.
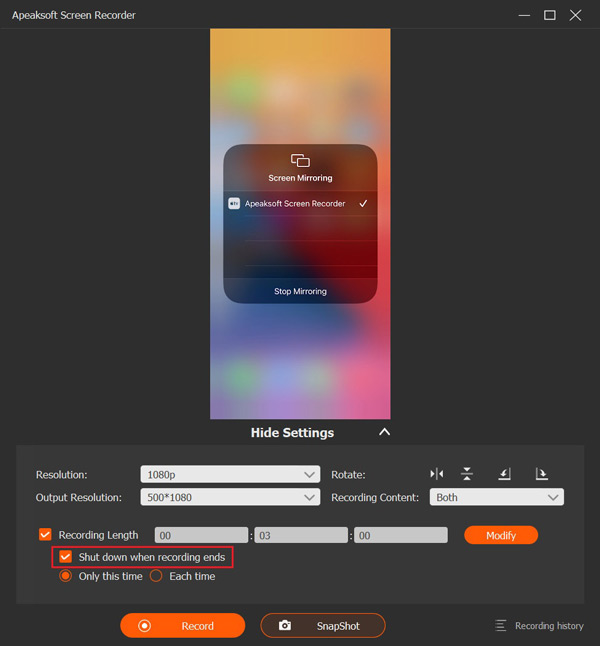
You can set the action after completing the recording by checking the box of Shut down when recording ends, and you can choose the frequency of this action by checking the Only this time or Each time. If you record the audio of your phone, you can also operate like that.
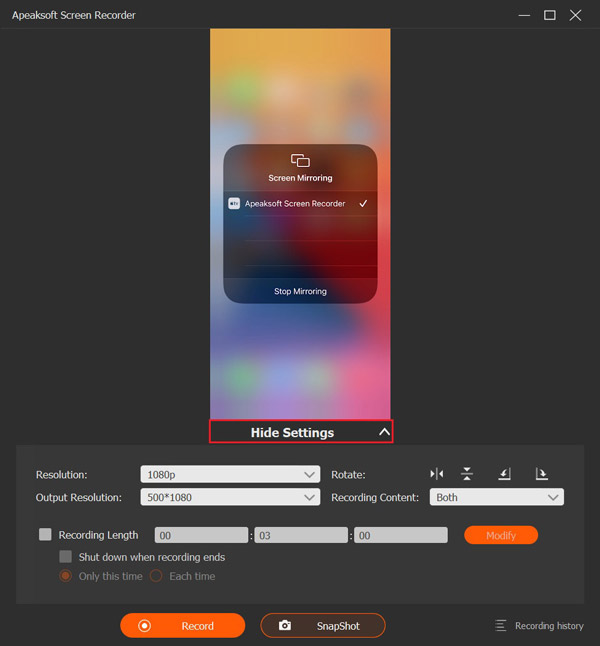
Besides, you can hide the setting table by clicking the Hide settings option under the phone screen.
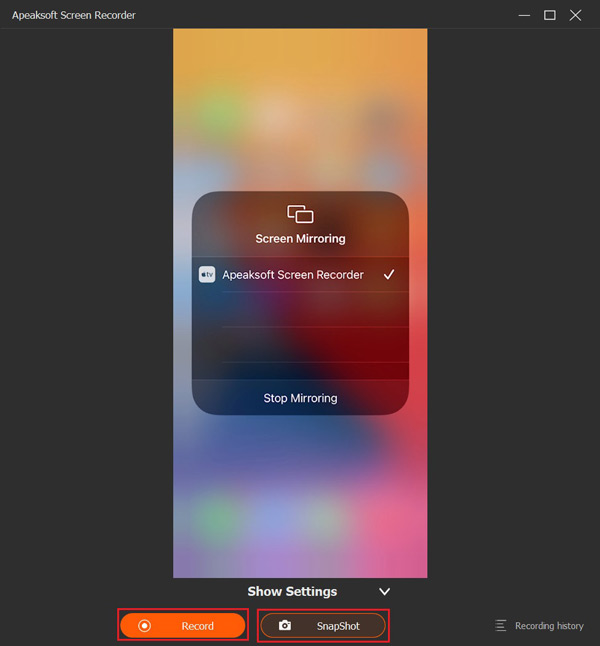
Step 3: Record the phone screen
When you have set it all down, click the Record button to start recording the phone screen. Additionally, you can take screenshots by clicking the SnapShot button before recording and during the process of recording. And if you want to only record the audio, you also can start it by clicking the Record button.
Step 4: Save the screen recording
When you want to suspend the process of screen recording, click the Pause button. When you finish recording the phone screen, click the Stop button, and then the video will be saved automatically. Recording the audio of your phone only can be operated in the same way.
Android Recorder
Step 1: Connect Android with Computer
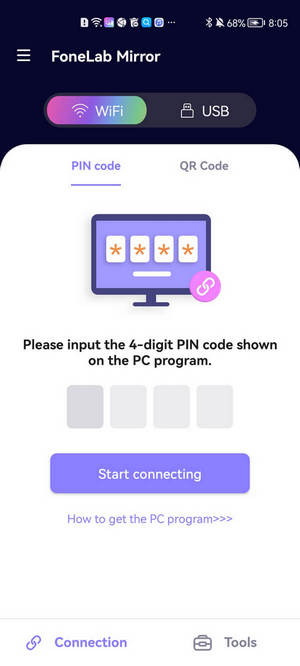
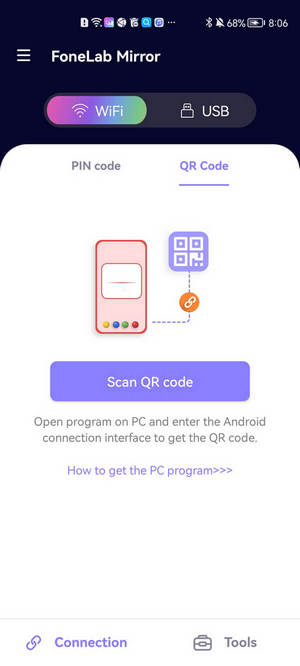
There are 3 ways for your choice. If you choose to use the WIFI connection, you can connect the two devices via PIN Code or QR Code.
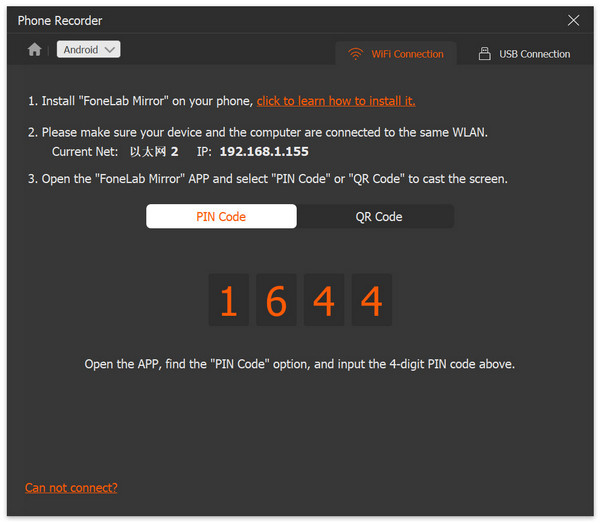
Method 1: Open FoneLab Open Mirror app on your Android phone and find PIN code. Input the number on Apeaksoft Screen Recorder and tap Start connecting on your Android phone.
Method 2: Click QR Code on Apeaksoft Screen Recorder and do the same on your Android phone. Tap Scan QR code and connect the two devices.
Method 3: If you prefer the USB connection, you can use a USB cable to connect the two devices. Tap OK for the Allow USB debugging on your Android phone.
Step 2: Set Recording Settings
At the bottom of the recording window, you can change the Resolution (display), Output Resolution, and Recording Content. When all settings are done, click Record to start recording.

During the recording, you can click the Camera button to take snapshots. Click Stop when you want to end the recording.
Step 3: Export Recorded Video
In the preview window, you can set the Start and end of the video. If you’re satisfied with the result, click Export.

Take Screenshot
Step 1: Download and install Screen Recorder
Free download, install, and run Apeaksoft Screen Recorder on your Windows 7/8/10/11 computer.
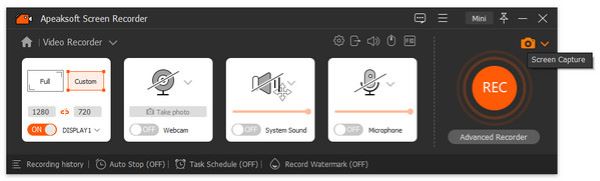
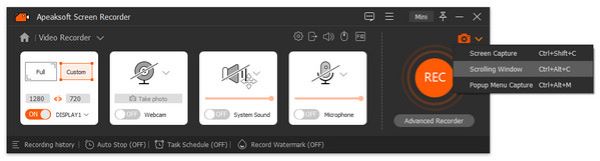
Step 2: Choose the screen capture feature
If you want to take screenshots on your computer, you can click the drop-down menu and click the Screen Capture button.
Then your mouse will be the shape of a cross. You can select the area you want.
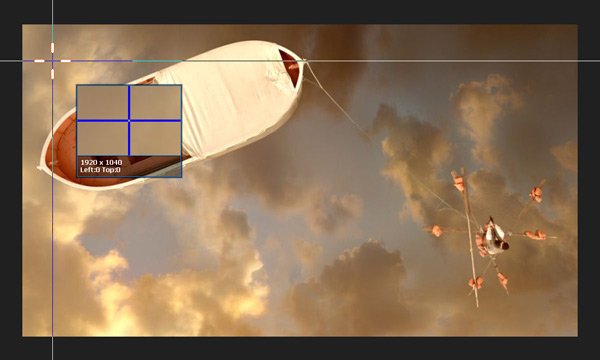
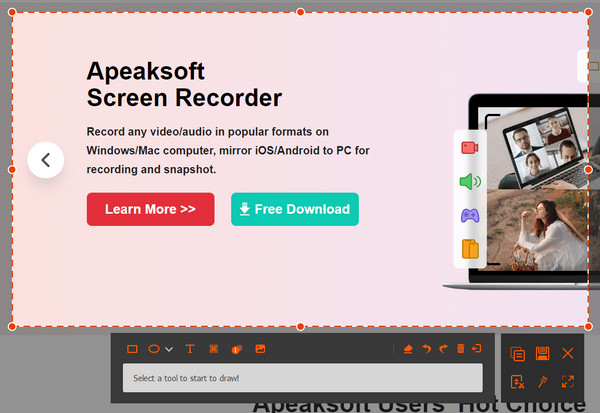
After selecting the area you want take screenshots, you can put texts, numbers, pictures, and more on your screenshots in this feature.
Choose Scrolling Window from the drop-down list of Snapshot.
Select the area you want to record and scroll down with the mouse, press the Space on your keyboard, or press the left click of the mouse. Tap esc if you want to end the process.
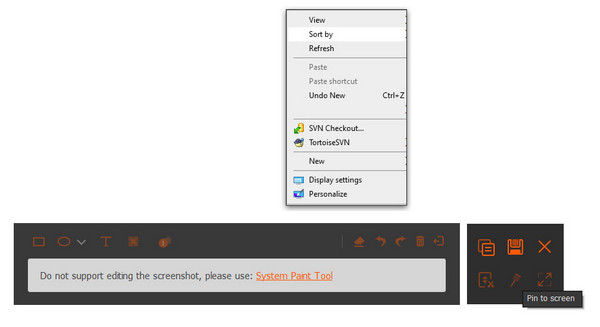
Choose Popup Menu Capture from the Snapshot.
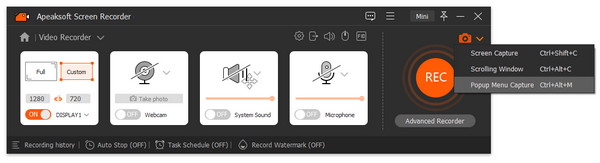
Move your mouse over the menu. It allows you to capture the menu window individually.
Step 3: Draw or annotate the capture
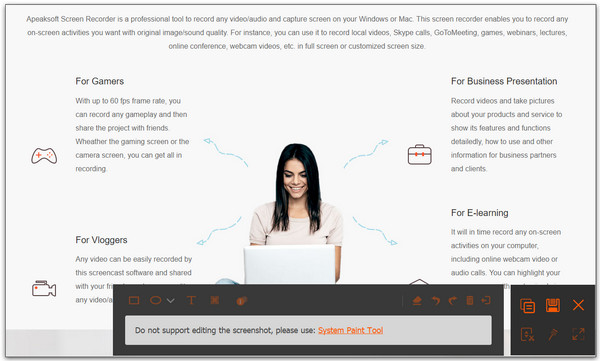
After you size the screen, it will automatically capture it for you. And you can see the next window.
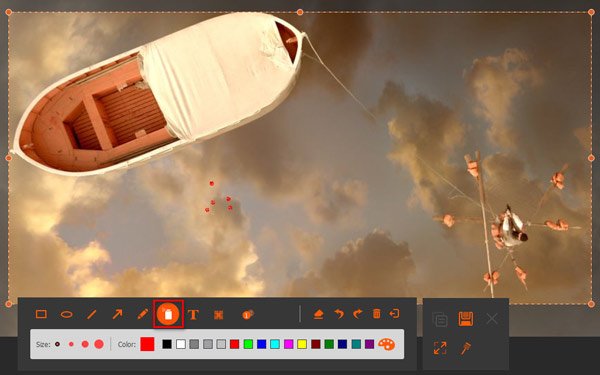
1. Draw the border, line, arrows and any shape you need. You can select the size and color of it. It always means emphasizing.
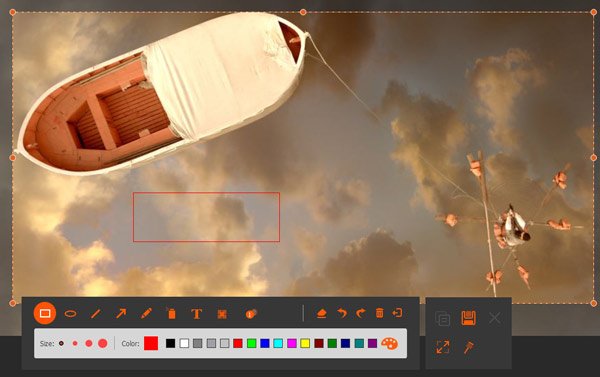
2. Air brush. You also can select the size and color of it. It would add powder effect to your recorded videos.
3. Text. By clicking the big T button, you can input the words you want into your videos.
4. Callout. Using this, you can mark the order of the content. Apart from the size and color, you also can set the color of the number and its background in color and select the next beginning number by clicking the up and down keys beside the callout.
5. Blur. By clicking four little squares, you can select the target area and set the degree of blurring by dragging.
If you make the wrong editing, you can click eraser button to clear the wrong effect or click the dustbin button to clear all items you add. You also can click undo and redo buttons to adjust the effect you add just.
In the right side, you also have choices to make.
1. Copy the screenshot to put it in another place.
2. Save the screenshot you made
3. Close the window to delete the screenshot
4. Full screen to preview the screenshot
5. Pin to screen.
Step 4: Save the screenshot
Click disk button to save picture you made. It will pop up a window for you to select the save path.
Recording Settings
For personal needs, we also offer various preferences.
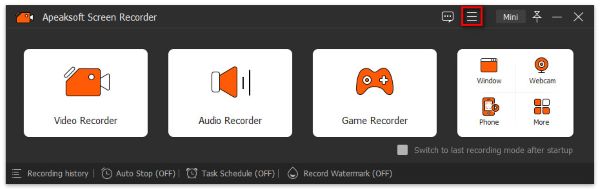
Click the Settings option on the interface of the video/audio recorder, and you will see the recording settings.
You can also find it in the menu option.
Recording
In this pop-up window, you have many choices. There are show countdown before recording, beep on start recording, show recording boundary, hide float bar when recording, allow to move the recording region when recording, hide desktop buttons when recording, auto hide the system taskbar when recording, hide main interface when you take screenshot and auto open preview window and library interface when end recording.
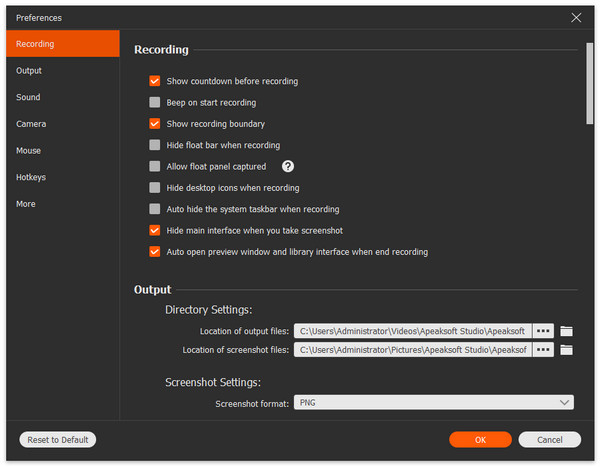
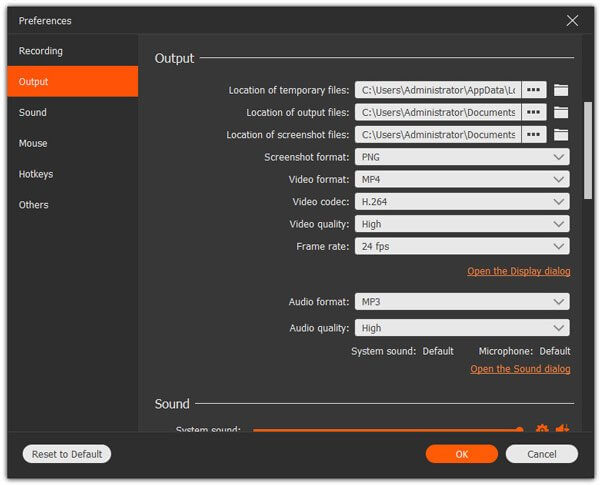
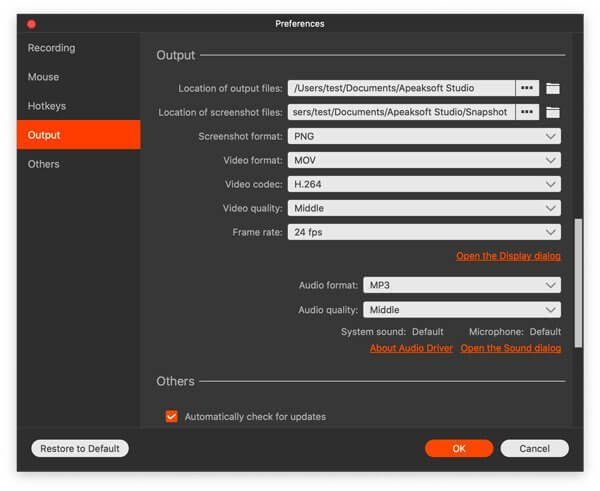
Output
To set output files, you can click the out button of the interface. In this part, you can set video format and codex, frame rate, etc.
Sound
The Sound setting enables you to customize the audio settings from the speaker and microphone in a quick way.
Move the slide bar to adjust the volume of computer system sound and microphone. The tick box of Microphone noise cancellation and Microphone enhancement can stop audio echo while recording to output a high-quality audio recording.
The Start sound check can test an audio recording, so that you can make a better adjustment before starting a video or audio recording.
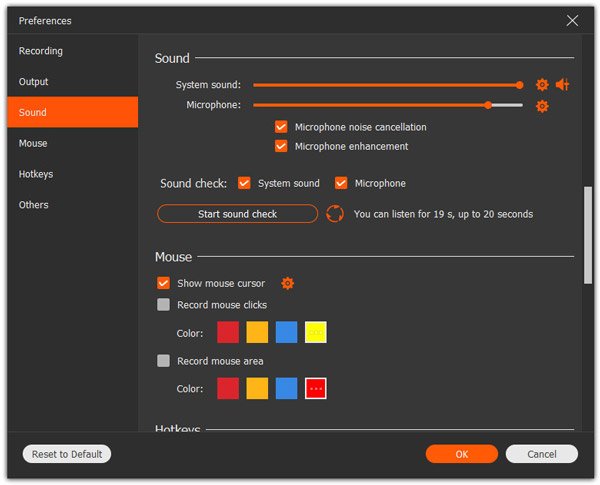
You can enable Microphone noise cancellation and Microphone enhancement here to create a microphone audio recording in high quality.
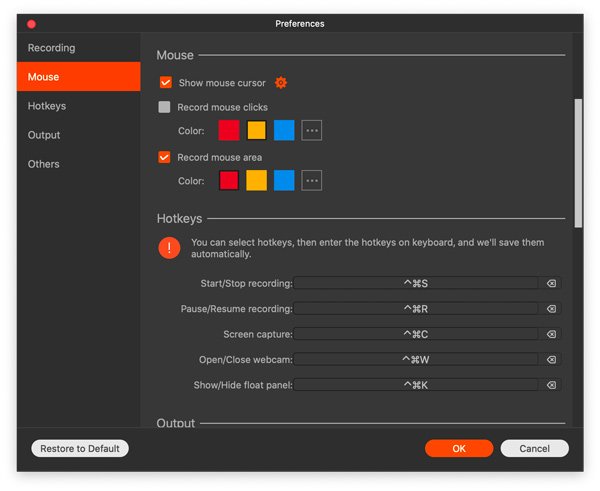
Mouse
By clicking the Settings option on the interface, you can see the mouse settings.

You can tick record mouse clicks and record mouse area, even the color.
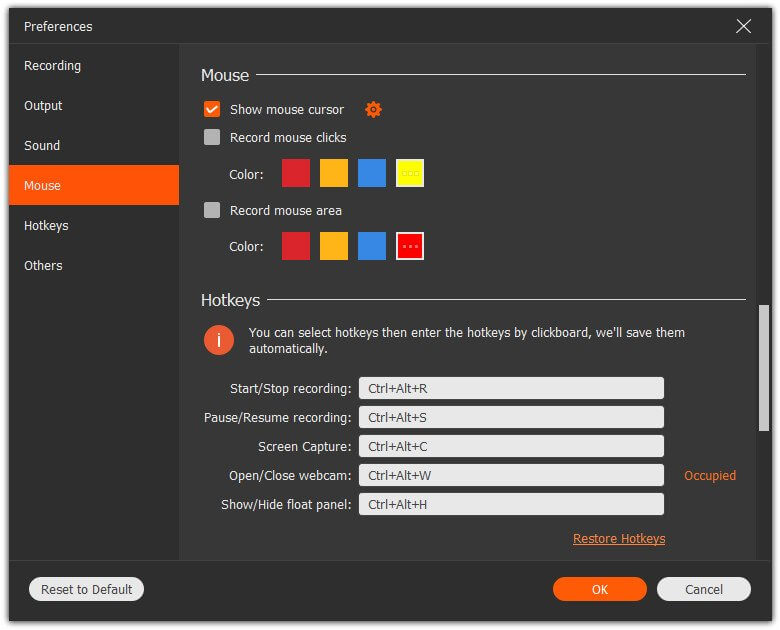
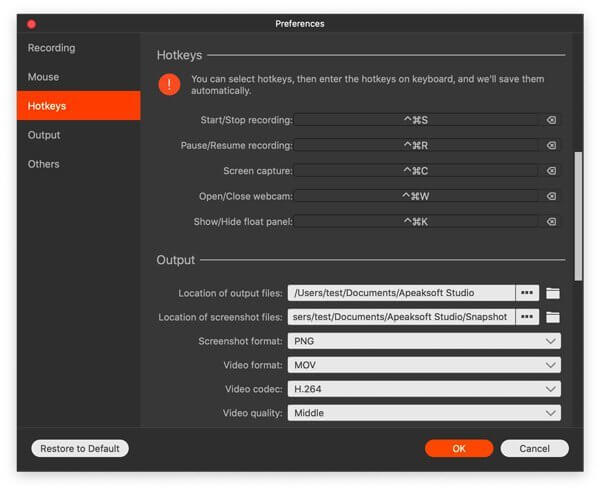
Hotkeys
To be easier to use, screen recorder also offers users the hotkeys settings to simplify your operation. What can you select?
Start/stop record
Pause/resume record
Screen capture
Open/close webcam
Show/hide float panel
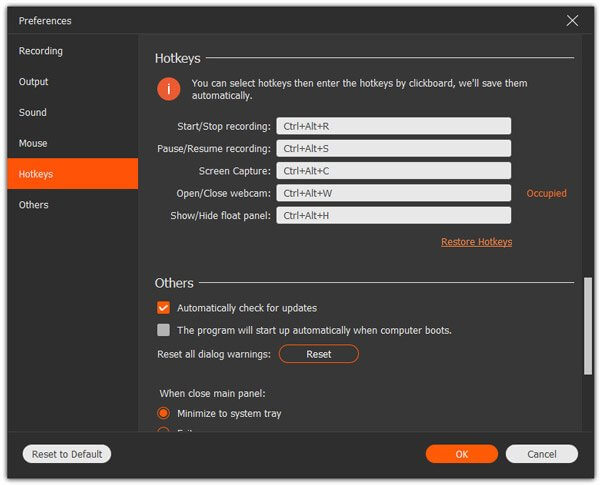
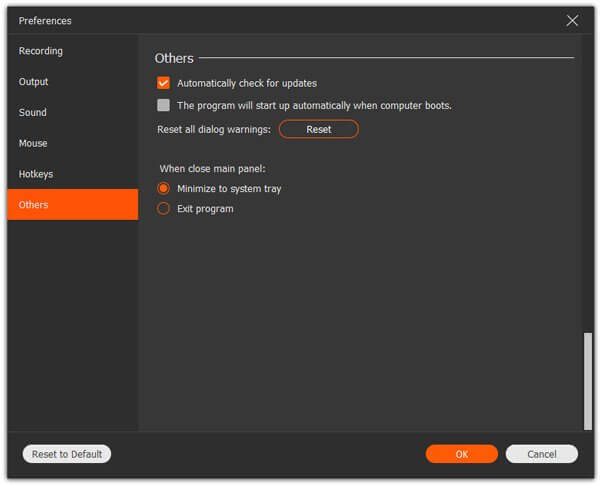
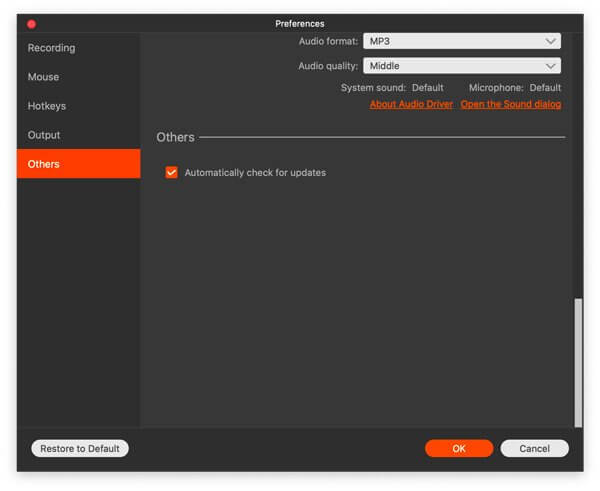
Others
To get in this part, you need open one of the other four preferences and click others.
Task Schedule and More
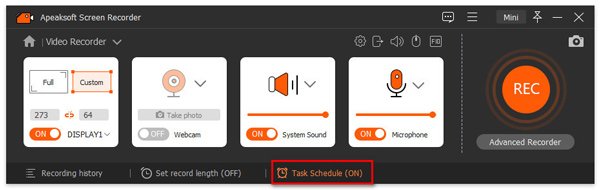
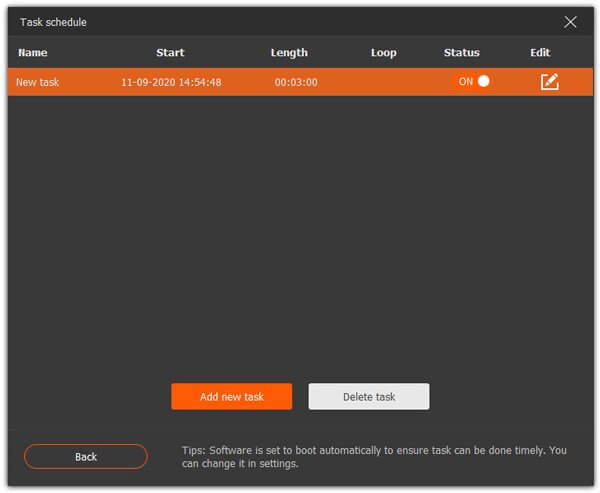
Task schedule
In each main interface of screen recorder, you can see the Task Schedule.
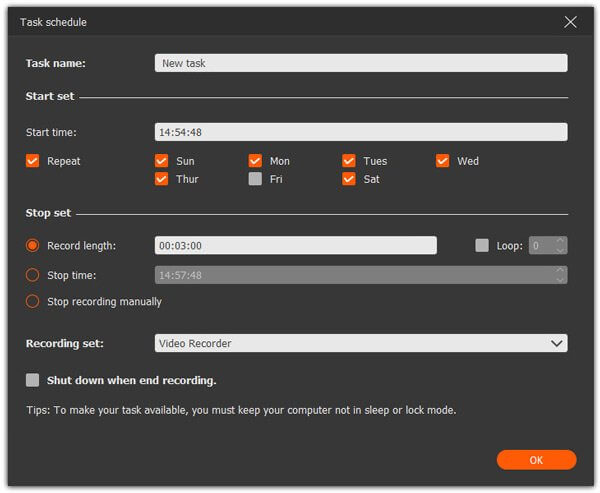
You can add new tasks and edit the settings of it.
Set the time of the beginning, record length and frequency, etc.
Then this software will record automatically for you according to your settings.
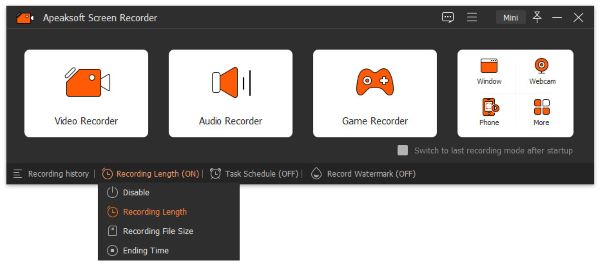
Set record length
By setting the length of recording, you do not need to compute when to stop. The software will automatically stop recording for you.
More preset
In the drop-down menu on the main interface, you can see here is a Custom module.
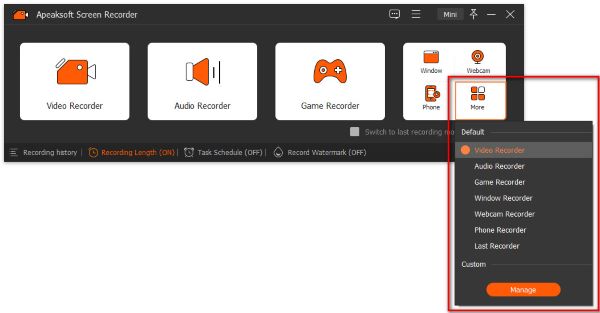
The Custom part would be useful to you. By clicking the Manage button, you will see the various options about your recorded videos as the following picture lists. After you set these, you can get your wanted videos quickly, without the need to convert and adjust.
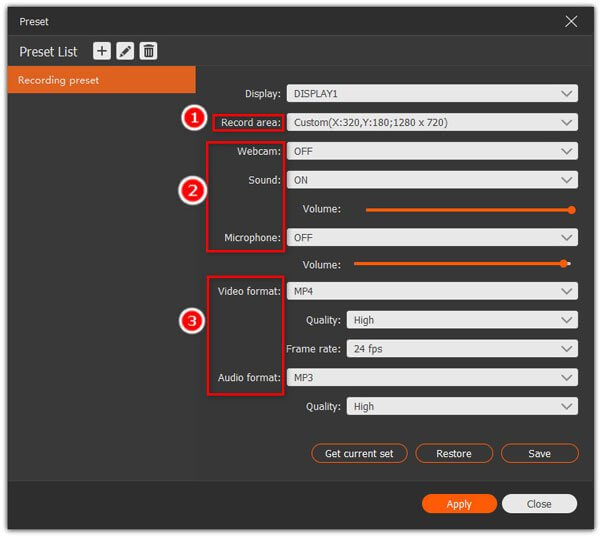
1. Record area
2. Webcam, sound and microphone
3. Format of videos and audio
Different Recording Solutions
For your different needs, we just list some specific solutions below. Click the one you need to check it. Hope it is useful for you!
Record video
Record calls
Record games
Record course
Screen capture
User Guide
- Introduction
- Install and Register
- Record Video
- Record Audio
- Screen Capture
- Set Record Length
- Various Recording Solutions
Try It Now!
Introduction
Apeaksoft Mac Screen Recorder is a professional screen recording application burn with multiple practical functions. With it, you will find it so easy and interesting to record any on-screen activities you like in original images/sound quality. It can record games smoothly with its 60 fps frame rate and capture screen in PNG/JPG/GIF/BMP/TIFF format. You also can use it to record webcam and take screenshots. Both videos and audio are easy for it to record. And you can save the recorded videos in various formats, like WMV, MP4, VOB, AVI, FLV and others. What’s more? You can add your favorite elements into recorded videos. Thank you for trusting and choosing us. Here are the details of Screen Recorder.
Install and Register
Install
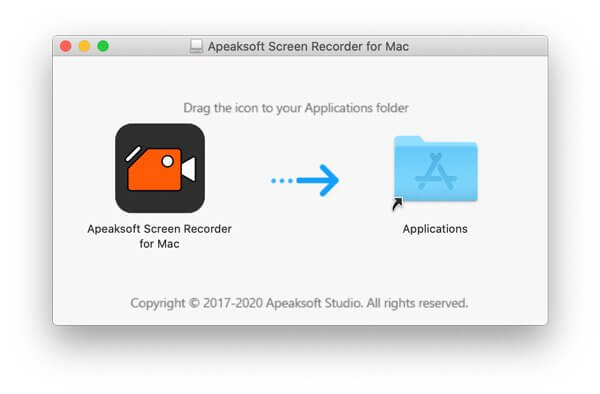
After you finished downloading the DMG file of Mac Screen Recorder, find it in the destination folder and open it. Double-click it and you just need to drag it to the Application folder on Mac.
Wait a second, and it will complete the installation.
Register
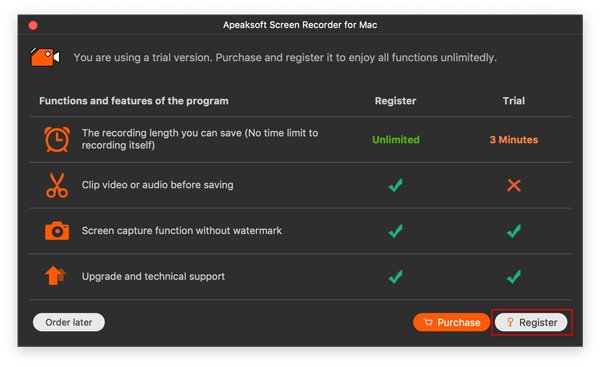
To register this screen recording software, you can click Register on the right bottom corner in the pop-up window which will appear every time you open the software.
After clicking the Register button, it will show you the little window to input your email address which you use to receive the registration code and registration code. Then click Register to register.
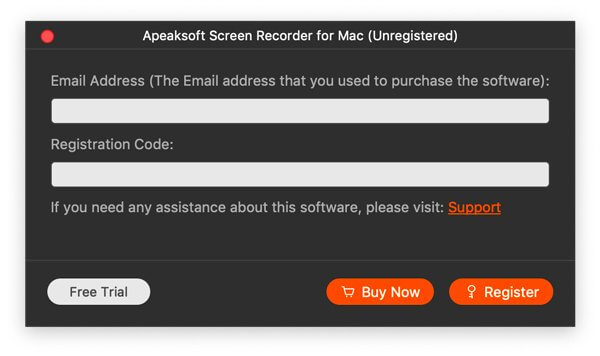
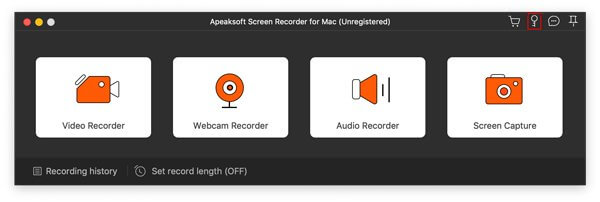
By the way, you also can click the key button on the top right corner of the main interface. Please input your email address which you use to receive the registration code and registration code, then click Register to register.
Note:
1. The registration code will be sent to you via email. If you have not received an email from us, please contact our support team.
2. The free trial version only allows you to save 3 minutes of your recordings. If you want to unlock the limitation, then please purchase If you want to unlock the limitation, then please purchased the full version here.
Email Address: The email address that you fill in the order form.
Registration Code: A string of characters marked as Activation key, license code or KEYCODE(S) in the order confirmation letter you received after the successful purchase.
Record Video
Step 1: Launch Screen Recorder
After installing this screen recording software, you can run it on your Mac.
Step 2: Recording area selection
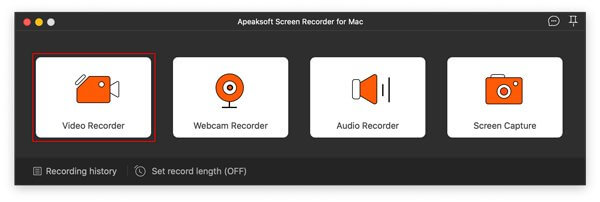
Choose the option Screen Recorder from the drop-down list of the main interface. Before recording gameplay, Skype chats, online meetings or streaming videos with this screen capturing software, you should choose the recording area at first.
After clicking Video Recorder, it will show you the red dotted line. It is used to delineate the recording area. You can select the size of the recording area by dragging the red point on the side. And you also can input the width and length on the bar to select the size.
Or click Custom to choose fixed region. It also has five types: 1920*1080, 1280*720, 854*480, 1024*768 and 640*480.
And you also can select region/window directly.
Step 3: Customize audio settings
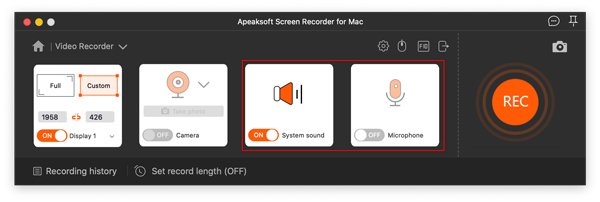
If you are going to record a video conference, or record the Skype chat, you may need to select both system sound and the microphone. Click the system sound and microphone to make sure the checkmarks appear. You also can open the inside camera and take photo.
Step 4: Set preferences
For personal needs, we also offer various preferences.
Recording
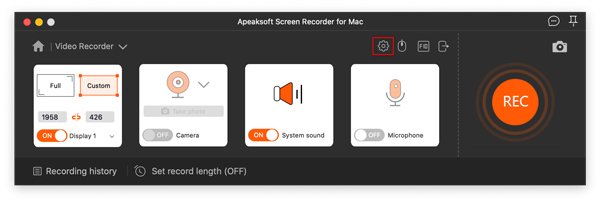
Click the gear button and you will see the recording settings.
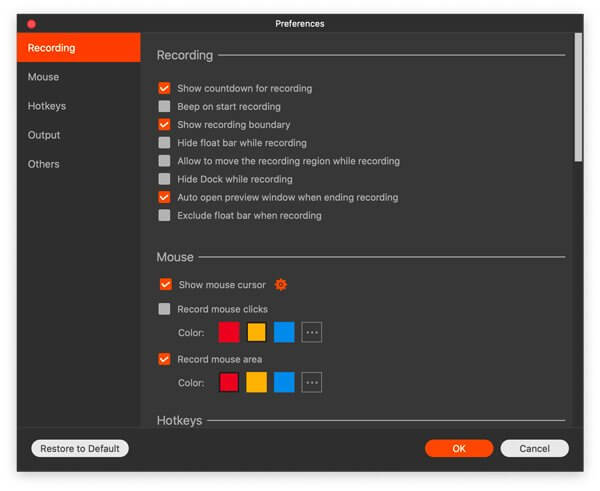
In this pop-up window, you have many choices. There are show countdown before recording, beep on start recording, show recording boundary, Hide float bar while recording, allow to move the recording region while recording, hide dock while recording.
Mouse
By clicking the mouse button on the interface or rolling your mouse on the preference interface, you can see the mouse settings.

You can tick record mouse clicks and record mouse area, even the color.
Hotkeys
To be easier to use, screen recorder also offers users the hotkeys settings to simplify your operation. What can you select?
Start/stop record
Pause/resume record
Screen capture
Open/close webcam
Show/hide float panel
Output
To set output files, you can click the out button of the interface. In this part, you can set video format and codex, frame rate, etc.
Others
To get in this part, you need open one of the other four preferences and click Others.
Step 5: Record computer screen
After setting the recording area and audio, click REC on the right side of this video screen recorder to begin recording.

Step 6: Save the recorded video
Click the red square on the left to finish recording.
It will show the video you recorded.

1. You can preview the video.
2. Rename the video.
3. Open the folder.
4. Share the video recording.
5. Delete the video.
Record Audio
Step 1: Launch Screen Recorder
After installing this screen recording software, you can run it on your Mac.
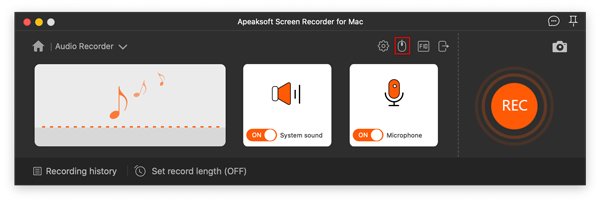
Step 2: Customize audio settings
Choose the option Audio Recorder from the main interface.
Click the system sound and microphone to make sure the checkmarks appear. You also can take photo by clicking the camera button on the top right corner.
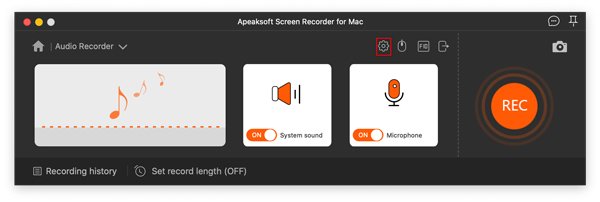
Step 3: Set preferences
For personal needs, we also offer various preferences.
Recording
Click the gear button and you will see the recording settings.
In this pop-up window, you have many choices. There are show countdown before recording, beep on start recording, show recording boundary, Hide float bar while recording, allow to move the recording region while recording, hide dock while recording.
Mouse
By clicking the mouse button on the interface or rolling your mouse on the preference interface, you can see the mouse settings.
You can tick record mouse clicks and record mouse area, even the color.
Hotkeys
To be easier to use, screen recorder also offers users the hotkeys settings to simplify your operation. What can you select?
Start/stop record
Pause/resume record
Screen capture
Open/close webcam
Show/hide float panel
Output
To set output files, you can click the out button of the interface. In this part, you can set video format and codex, frame rate, etc.
Others
To get in this part, you need open one of the other four preferences and click Others.
Step 4: Start to record
Click REC on the right side of this video screen recorder to begin recording.
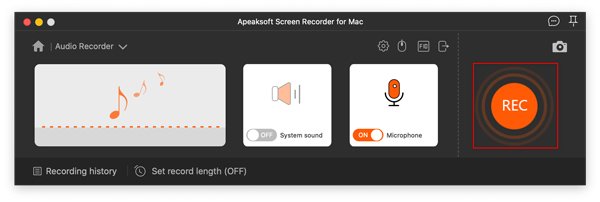
Then it will show you the recording bar.

Step 5: Save the recorded video
Click the red square on the left to finish recording. It will show the video you record. And you can preview it immediately.

1. You can preview the video.
2. Rename the video.
3. Open the folder.
4. Share the audio recording file.
5. Delete the video.
Screen Capture
Step 1: Launch Screen Recorder for Mac
Download, install and run Apeaksoft Screen Recorder for Mac on your MacBook Pro/Air or iMac.
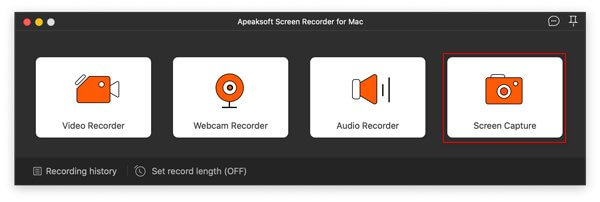
Step 2: Choose Screen Capture
Choose the option Screen Capture from the main interface.
Then your mouse will be the shape of a cross. You can select the area you want.

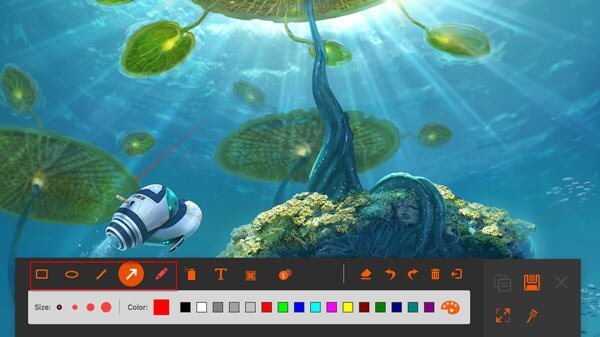
Step 3: Draw or annotate the capture
After you size the screen, it will automatically capture it for you. And you can see the next window.
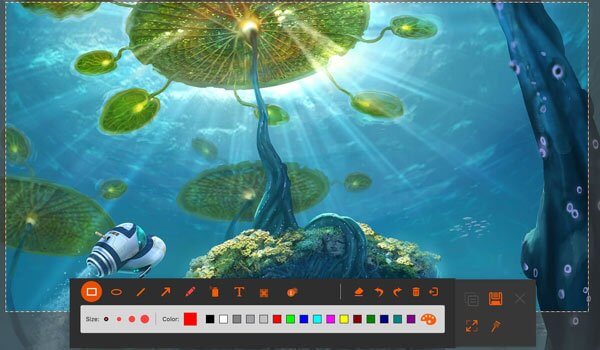
1. Draw the border, line, arrows and any shape you need. You can select the size and color of it. It always means emphasizing.
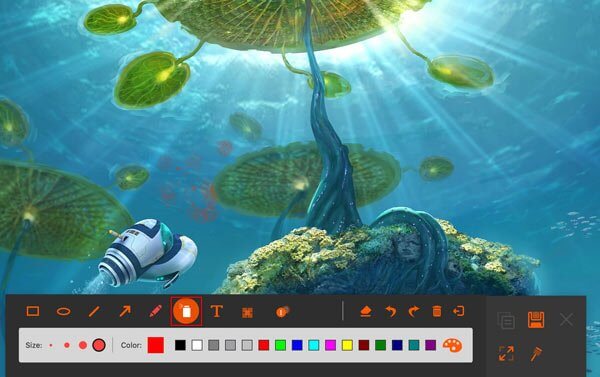
2. Air brush. You also can select the size and color of it. It would add powder effect to your recorded videos.
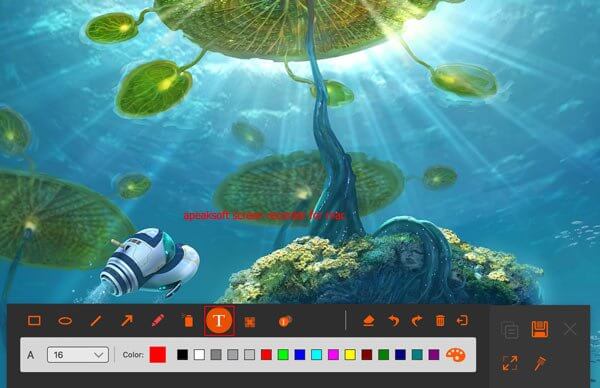
3. Text. By clicking the big T button, you can input the words you want into your videos.
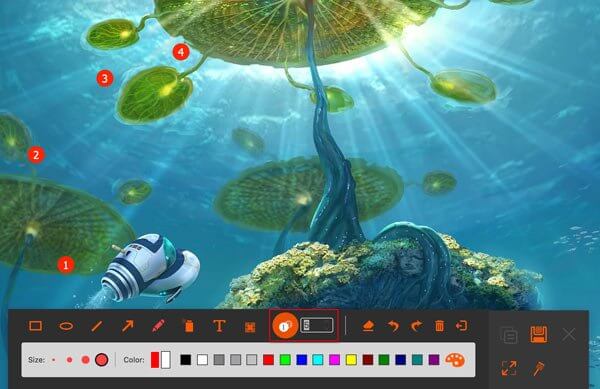
4. Callout. Using this, you can mark the order of the content. Apart from the size and color, you also can set the color of the number and its background in color and select the next beginning number by clicking the up and down keys beside the callout.
5. Blur. By clicking four little squares, you can select the target area and set the degree of blurring by dragging.

If you make the wrong editing, you can click eraser button to clear the wrong effect or click the dustbin button to clear all items you add. You also can click undo and redo buttons to adjust the effect you add just.
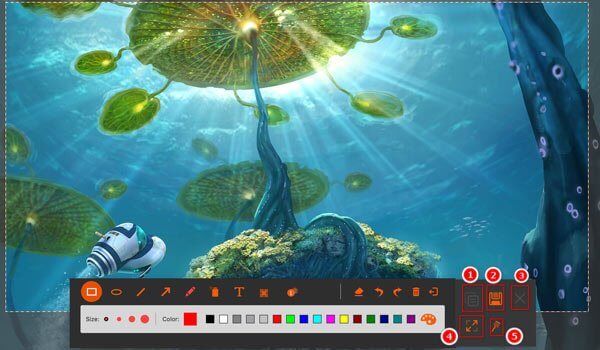
In the right side, you also have choices to make.
1. Copy the screenshot to put it in another place.
2. Save the screenshot you made
3. Close the window to delete the screenshot
4. Full screen to preview the screenshot
5. Pin to screen.
Step 4: Save the screenshot
Click disk button to save picture you made. It will pop up a window for you to select the save path.
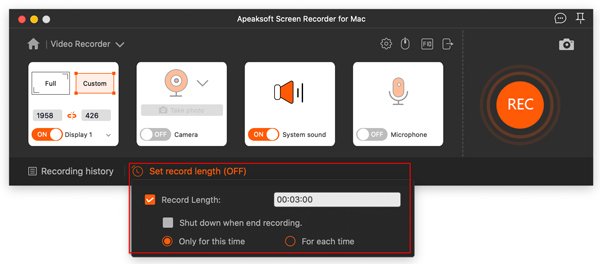
Set Record Length
In each main interface of screen recorder, you can see the Set Record Length.
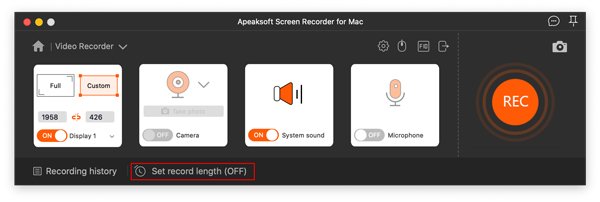
By setting the length of recording, you do not need to compute when to stop. The software will automatically stop recording for you.
Various Recording Solutions
For your different needs, we just list some specific solutions below. Click the one you need to check it. Hope it is useful for you!
