How to Record a Video of Minecraft on PC and Mac Computer

As one of the most creative and expressive games, Minecraft is prevalent around the world. Moreover, gameplay videos are popular on YouTube and TikTok. In fact, recording Minecraft in 1080p or 4K resolution is very difficult without the right tool. Minecraft includes a recording feature starting in version 1.12. Plus, you can use a third-party game recording application. This guide shares five proven methods and concrete workflows.
PAGE CONTENT:
Part 1: How to Record Minecraft with Built-in Recorder
The built-in recording feature is a simple way to screen-record in Minecraft. It can only produce videos up to 1080p. Moreover, it lacks custom options or bonus editing features. Here are the steps:
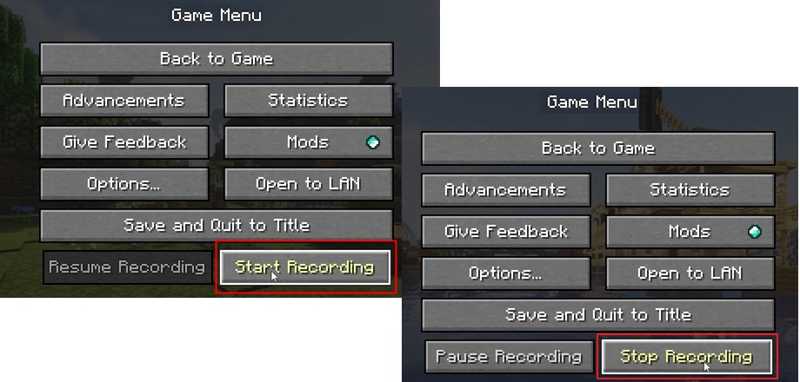
Step 1. Start your Minecraft game.
Step 2. Press the F10 key or the Record button in the game settings.
Step 3. Set Frame Rate, Video Quality, and Audio Settings.
Step 4. Click the Start Recording button to begin the process.
Step 5. When you want to stop, press the F10 key or click the Stop Recording button.
Part 2: How to Record Minecraft with OBS
For more customization and flexible settings, OBS Studio is a good way to screen-record in Minecraft. It can record gameplay up to 4K and produce MP4 video files. However, the configuration might be complex for beginners.
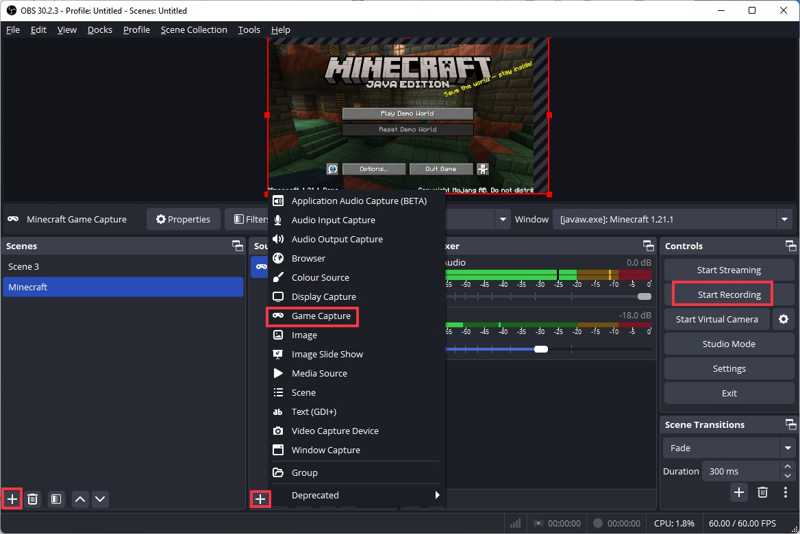
Step 1. Open Minecraft without starting a game.
Step 2. Run OBS.
Step 3. Click the Add button in the Scenes pane and name it.
Step 4. Next, click the Add button in the Sources pane, and choose Game Capture and Video Capture Device.
Step 5. Click the Settings button.
Step 6. Go to Audio, enable Desktop Audio and Mic/Auxiliary Audio, and click Apply.
Step 7. Now, play Minecraft and click Start Recording on OBS to record Minecraft.
Part 3: How to Record Minecraft with Game Bar
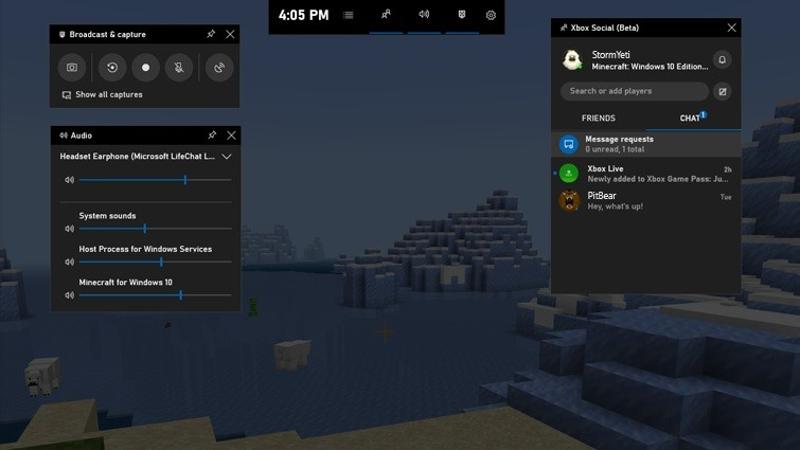
Previously, Game Bar was the built-in game recorder on Xbox. Since Windows 10, Microsoft has added Game Bar to PCs. Therefore, it is a simple way to record gameplay in Minecraft on a PC smoothly.
Step 1. Open Minecraft.
Step 2. Press Windows + G keys on your keyboard to run Game Bar.
Step 3. Turn on the microphone if you want to add your voice to the game recording.
Step 4. Adjust other options according to your preferences.
Step 5. Click the Record button and play Minecraft.
Step 6. When you want to stop, click the Stop button on the toolbar.
Step 7. Navigate to the Captures folder and play the MP4 file.
Part 4: How to Record Minecraft with QuickTime Player
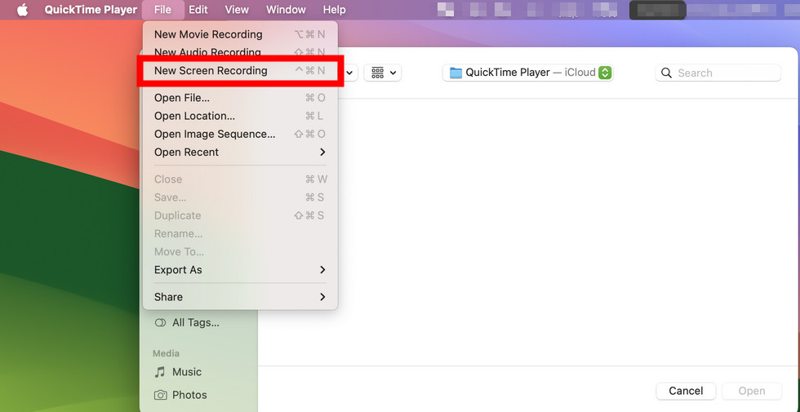
If you play Minecraft on a Mac, the built-in QuickTime Player includes the Screen Recording feature. Of course, it doesn't provide various custom options and isn't designed for game recording.
Step 1. Run Minecraft without playing.
Step 2. Next, open QuickTime Player.
Step 3. Go to the File menu and choose New Screen Recording.
Step 4. Click the recording area button and set the area according to Minecraft.
Step 5. Click the Options button and set the audio source.
Step 6. Start playing Minecraft and click the Record button.
Part 5: Ultimate Way to Record a Video in Minecraft
Apeaksoft Screen Recorder is a powerful Minecraft recorder. It supports a wide range of recording sources. The Game Recorder mode optimizes CPU and GPU usage while playing Minecraft. Moreover, the intuitive design simplifies the configuration process.

Downloaded by over 1,000,000 users
- Record Minecraft gameplay smoothly.
- Add your reactions to gameplay recording in real time.
- Save gameplay videos up to 4K with AI.
- Schedule gameplay recordings.
- Available on Windows 11 or earlier and macOS 10.13 or above.
Secure Download
Secure Download

How to Record a Video in Minecraft
Step 1. Install Minecraft recorder
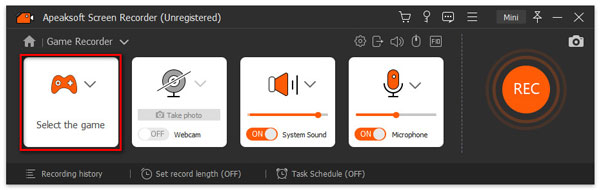
Run the Minecraft recorder after installing it on your computer. Choose the Game Recorder mode to continue. Open Minecraft, click Select the game, and select Minecraft.
Step 2. Record Minecraft
Turn on System Sound and adjust the volume. To add your actions, turn on the Webcam and Microphone options. Click the REC button and play Minecraft to begin recording the gameplay.
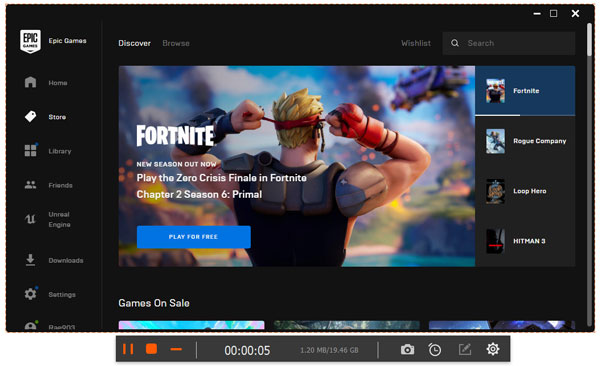
Tips: If you want to adjust options, like output format, click the Settings button.
Step 3. Export game recording
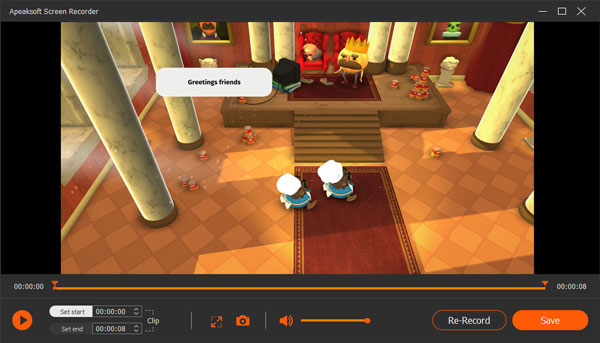
When you hope to stop, click the Stop button. Next, preview the recording with the built-in record player for Minecraft. Remove unwanted frames with the Clip button. Finally, click the Save button to export the recording.
Further Reading
Conclusion
This guide shared five ways to record Minecraft on Windows and Mac. The built-in game recorder in Minecraft is a simple option. OBS is an open-source tool for recording your screen, including gameplay. Game Bar and QuickTime Player are the native options to record gameplay on Windows 11/10 and Mac. Apeaksoft Screen Recorder is a powerful tool for producing high-quality gameplay recordings.
Related Articles