Audacity is an open-source audio recorder and editor. This popular multi-track audio editing tool can help to edit audio on Windows, macOS, and Linux computers. This post will show you how to split audio in Audacity step by step.

- Part 1: How to Cut Audio in Audacity
- Part 2: Best Audacity Alternative to Trim Audio
- Part 3: FAQs of Audacity Split Track
Part 1: How to Trim, Cut, or Split Audio in Audacity
When you edit an audio track, you probably need to cut or split it and remove some unnecessary parts. Audacity is an excellent option to trim audio as a free multi-track audio editor. It supports many commonly-used audio formats, such as MP3, AAC, M4A, WMA, WAV, AIFF, and more. You can free download it from the official website and take the following guide to cut audio in Audacity.
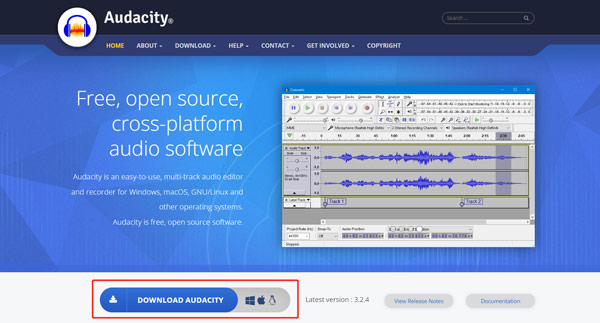
Step 1Go to the official website of Audacity and click Download Audacity to free install it on your computer. As mentioned above, this cross-platform audio editor is compatible with Windows, macOS, GNU/Linux, and other operating systems. You can pick the correct download version based on your system and follow the instructions to install it.
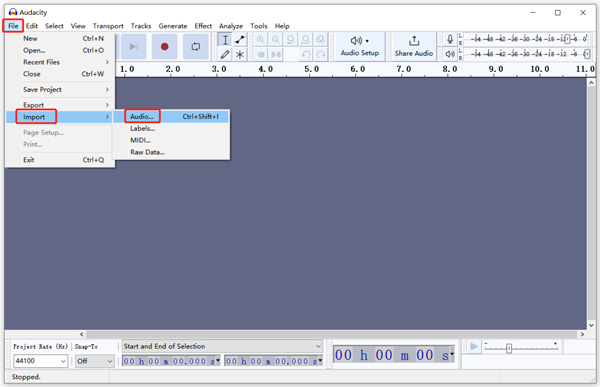
Step 2Click the File menu in the upper-left corner, choose the Import option, and then select Audio from its drop-down list. You can freely browse and add your audio file in the pop-up window. If you directly drag an audio track onto Audacity for adding, you may face the Importing error.
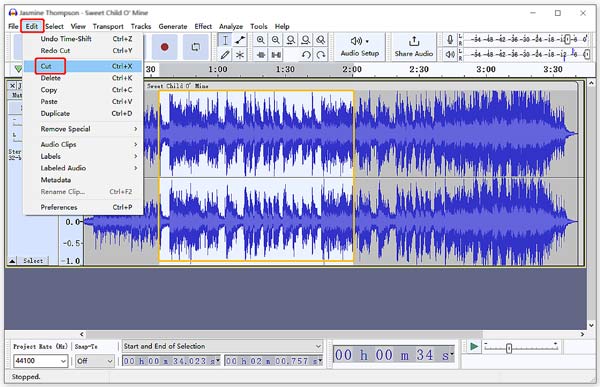
Step 3You can see a stereo waveform when your audio is loaded. You can click the Play button to listen to the audio track. When you locate the specific part you like to remove, you can select it, click the top Edit menu, and then choose the Cut option. The selected audio will be deleted. To cut audio in Audacity, you need to pause or stop the playing.
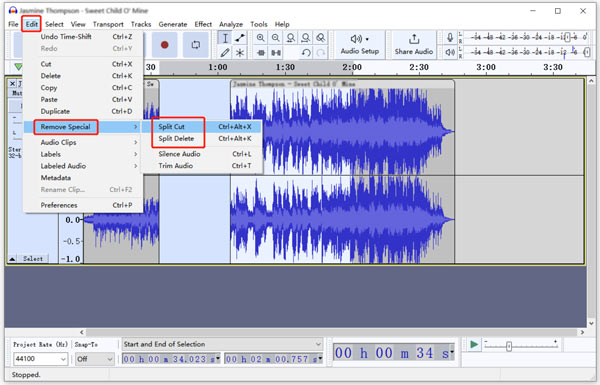
Step 4Select a specific duration of the audio track you want to split, click the Edit menu, go to Remove Special, and then select the Split Cut option.
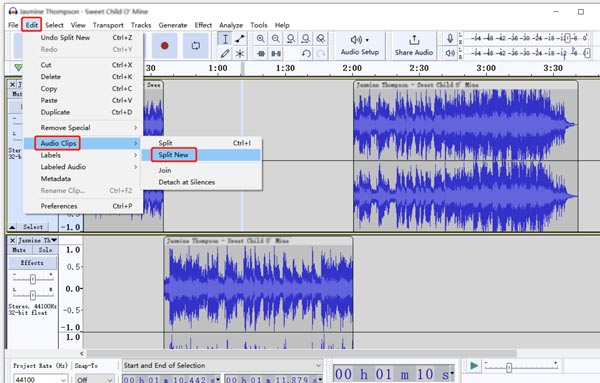
Step 5When you need to extract the useful part of your audio file, you can use its Split New feature in the Audio Clips section. You can click Edit, choose Audio Clips, and Split New to split audio in Audacity and extract the valuable audio as a new track.
If you want to combine several audio tracks into one, you can use its Join feature. You can select all the tracks you want to merge by pressing the Ctrl or Command key. Then choose Join under the Audio Clips section.
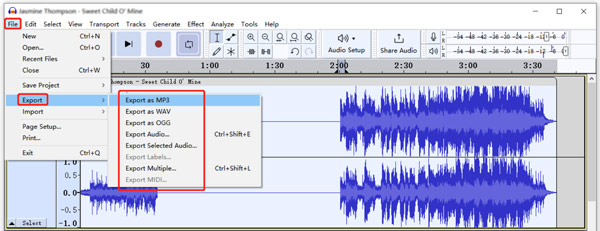
Step 6After you trim M4A, cut, or split audio in Audacity, you can click File, choose Export, and then save the edited audio file on your computer. In the Edit Metadata Tags window, you can add and edit various music tags based on your need.
Part 2: Best Audacity Alternative to Cut or Split Audio Without Losing Quality
Audacity is a bit complex for new users to access and use its editing features. If unsatisfied with the Audacity audio splitting or trimming experience, you can try using its best audio editor alternative, Video Converter Ultimate. Compared with Audacity, this recommended audio splitter carries more functions. Moreover, it offers a more straightforward way to cut audio.

4,000,000+ Downloads
Best audio splitter to trim an audio track into parts with high quality.
Offer audio sync, cut, join, compress, recorder, and other features.
Support all commonly-used lossless and lossy audio formats.
Design various video/audio editing and creating tools in Toolbox.
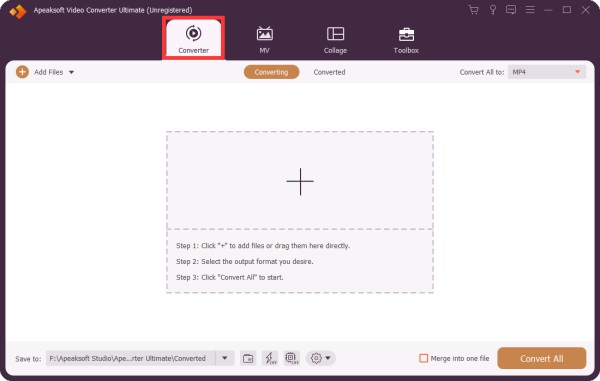
Step 1Free download and open this Audacity alternative on your computer. Under its Converter tab, you can click the + button to select and import your audio. You are allowed to cut and edit several audio tracks at a time.
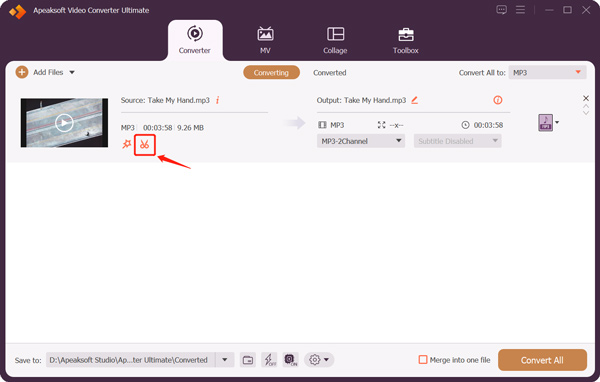
Step 2You can click the Cut button to enter the main audio trimming window when your audio file is loaded. You also can use this software as the WMA cutter.
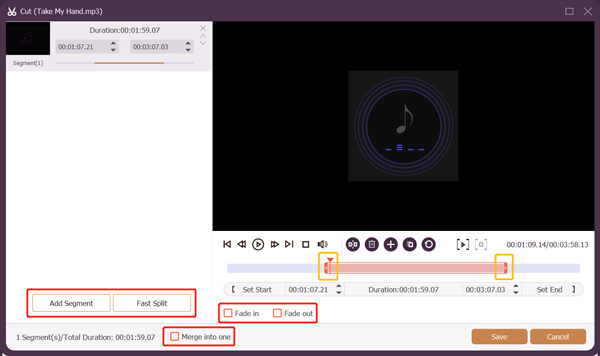
Step 3A built-in media player will start to play your added audio file. You can listen to and locate the specific audio content you like to remove. Move the left and right trimming bars to cut audio. As you can see, this Audacity alternative also offers Fast Split, Add Segment, Merge, and other features for you to trim or split audio quickly. During this step, you are also allowed to add audio fade-in or fade-out effects based on your need.
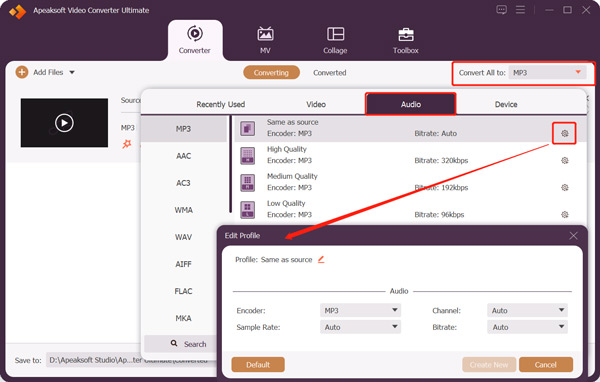
Step 4After you split the audio, you can click the Save button to back to the home window. Select a suitable output audio format from Convert All to. Click the Edit Profile button to customize audio settings, such as encoder, channel, sample rate, and bitrate. After all these operations, you can click the Convert All button to save this edited audio on your computer.
Part 3: FAQs of Audacity Split Track
Question 1. Why can't I choose a selection to cut in Audacity?
To select your audio track in Audacity, you need to click the Selection Tool button or press the F1 key first. After that, you can use your mouse to select the specific audio content.
Question 2. How do you record audio on Windows using Audacity?
Download and launch Audacity on your Windows computer. Click Edit and go to Preferences. Click the Devices menu from the left panel and choose Windows WASAPI from its dropdown. That will let Audacity recognize the computer microphone. You can click the Record button to capture audio using Audacity.
Question 3. How do you free split audio on Mac?
You can use iMovie to free split a video or audio file on your Mac. It is pre-installed on every Mac to deal with various editing works. You can open it, add your audio track, and then use its Split function to cut your audio into parts.
Conclusion
This post has mainly talked about how to cut audio in Audacity. You can download Audacity free and follow the detailed guide above to trim or split audio. If you still have questions about Audacity split track, you can message us in the comment section. Moreover, you can learn how to recover lost Audacity files if needed.