How to Back up iMessages Like a Pro to Secure Your Chats
Our digital conversations are more than just text on a screen; they are a living archive of our lives. From sentimental photos shared by family to critical business details sent by a colleague, your iMessage history is valuable. However, iPhones can be lost, damaged, or suffer from software glitches. Knowing how to back up iMessages effectively is a good way to ensure those memories and data points don't vanish into the digital void.
In this comprehensive guide, we will explore every method to back up iMessages, whether you prefer the seamless automation of the cloud or the physical security of a local hard drive.
PAGE CONTENT:
Part 1: Why You Should Back up iMessage Conversations Regularly
Many users assume that because their messages are in the cloud, they are permanently safe. Although Apple's ecosystem is robust, a simple accidental deletion or a syncing error can lead to data loss. Here is why a dedicated backup iMessage history strategy is essential:
Device Migration: When upgrading to a new iPhone, a proper backup ensures your threads carry over seamlessly.
Storage Management: If you need to clear space on your phone, you can back up iMessages to a computer and then delete them from the device.
Legal and Professional Records: Sometimes, you need a hard copy or a searchable PDF of a conversation for work or legal purposes.
Part 2: Back up iMessages Using iCloud
For most users, the most convenient method to back up iMessages on iPhone or iPad is the iCloud iMessage backup. This happens automatically in the background, provided you have enough storage space. There are two ways iMessages work with iCloud: iCloud Backups and Messages in iCloud.
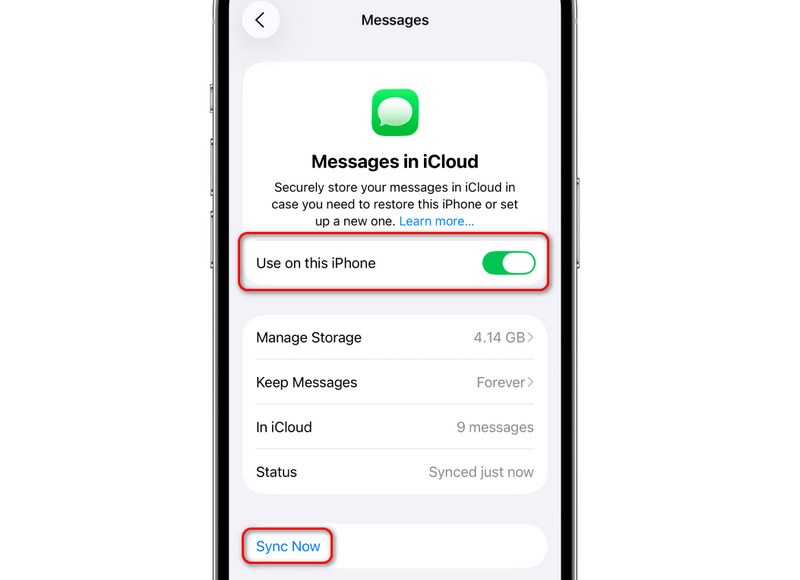
1. Enabling Messages in iCloud
This isn't a backup in the traditional sense, but rather a sync service. It keeps your messages updated across your iPhone, iPad, and Mac. If you delete a message on one, it vanishes on all.
Step 1. Go to Settings, and then tap your profile, and then select iCloud.
Step 2. Tap Show All, and then turn on Messages. Then, select Use on this iPhone. You can also tap the Sync Now button to back up your iMessages on iPhone right away.
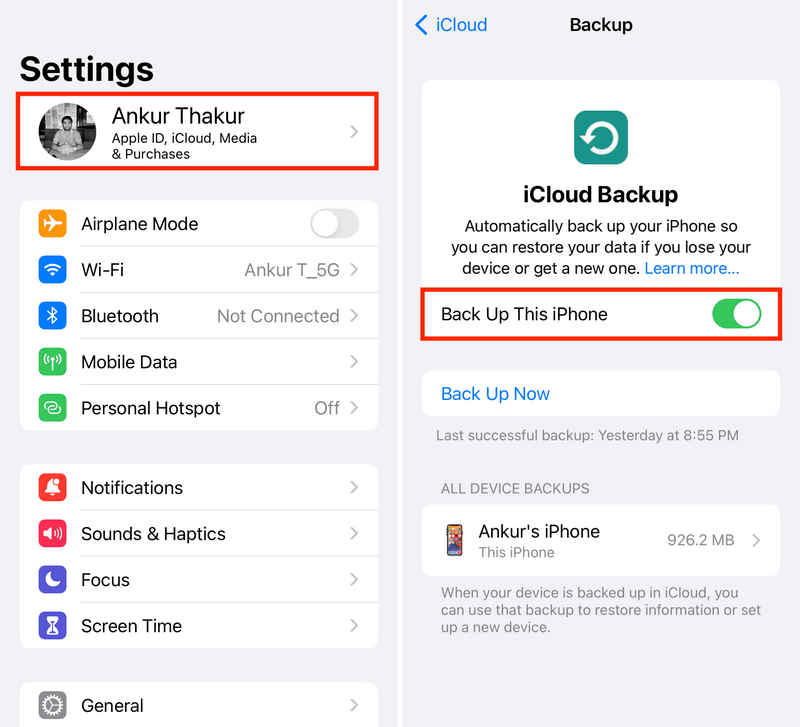
2. Standard iCloud Backup
You can also back up your entire iPhone data to iCloud so that your iMessages chats and media files like photos, videos, stickers, will also be backed up to iCloud. This is a true backup, not sync.
Step 1. Open Settings, and then tap your profile.
Step 2. Tap the iCloud button, and then select iCloud Backup.
Step 3. Turn on Back Up This iPhone and tap the Back Up Now button to backup iMessages to iCloud.
Part 3: Back up iMessages to PC or Mac
If you don't want to pay for a monthly subscription or prefer keeping your data off the web, you should back up iMessages to computer. This creates a physical copy of your data on your hard drive.
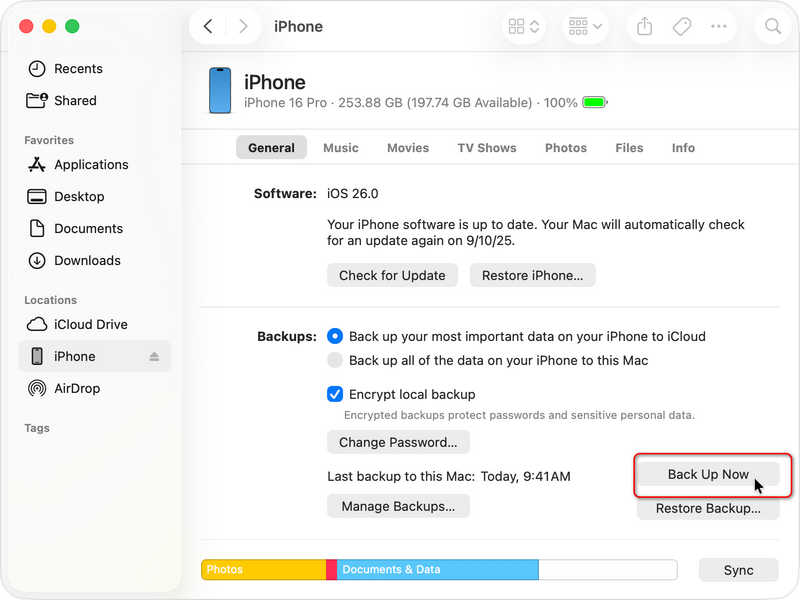
Backup iMessages to Finder on a Mac
Work on: macOS Catalina or later
Step 1. Connect your iPhone to your Mac via USB.
Step 2. Open Finder and select your iPhone from the sidebar.
Step 3. In the General tab, select Back up all of the data on your iPhone to this Mac.
Step 4. Click Back Up Now to back up your iMessages to Finder on Mac.
Further Reading
How to Backup iMessages to iTunes
Work on: Windows or macOS under Catalina
Since Windows doesn't have a native Messages app for iOS, you'll need to use iTunes or the Apple Devices app.
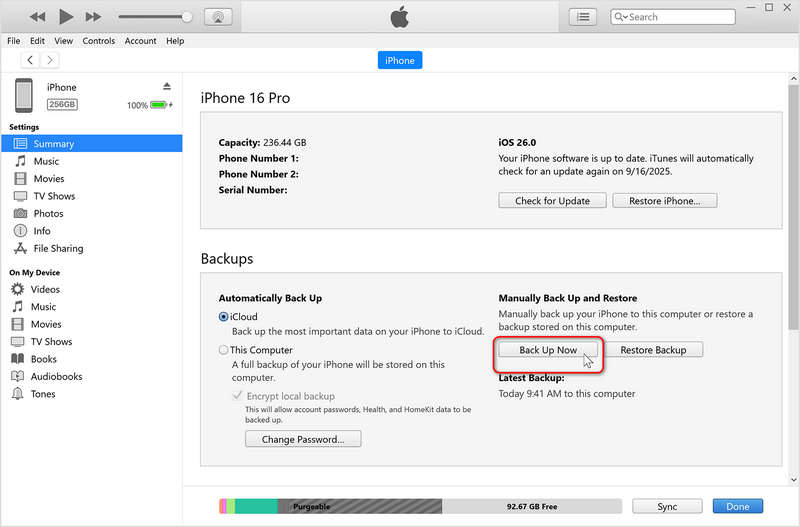
Step 1. Connect your iPhone to your PC. Open iTunes (or the Apple Devices app).
Step 2. Click the iPhone symbol near the top left.
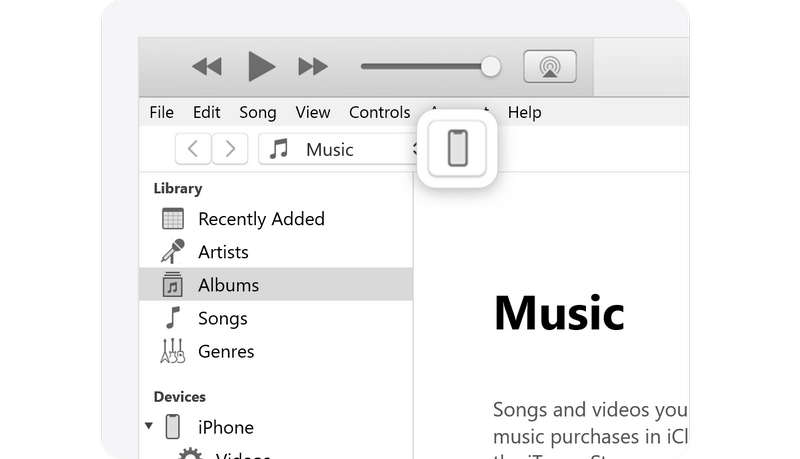
Step 3. Under the Backups section, choose This Computer.
Step 4. Click the Back Up Now button to back up your iMessages to your PC. You can also set up an iTunes password for your backup files.
Notes: You cannot easily open a single backup iMessage conversation from an iTunes file without specialized software or a full device restore.
Bonus: Backup iMessages with a Preview Feature
iTunes or Finder backup doesn't allow you to view each iMessage, how can you view them and even select desired iMessages to restore? Apeaksoft iOS Data Backup & Restore can help you. It can quickly back up your iMessages to your Windows or Mac computer. When you need to restore iMessages to a new iPhone, you can use this program again to view your iMessages and restore them selectively.
The Easiest Way to Backup iMessages
- Connect your iPhone or iPad to PC or Mac to backup iMessages.
- Quickly back up iMessages or other data and info on your iOS devices.
- Keep your iMessages backup files secure and safe.
- Selectively back up and restore iMessages.
Secure Download
Secure Download

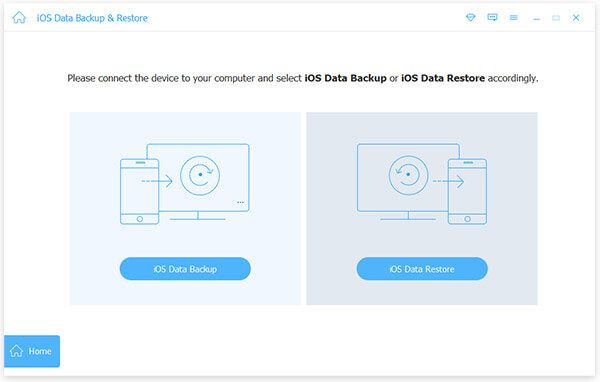
Step 1. Download, install, and launch Apeaksoft iOS Data Backup & Restore. Connect your iPhone to your PC or Mac. Then, click the iOS Data Backup button.
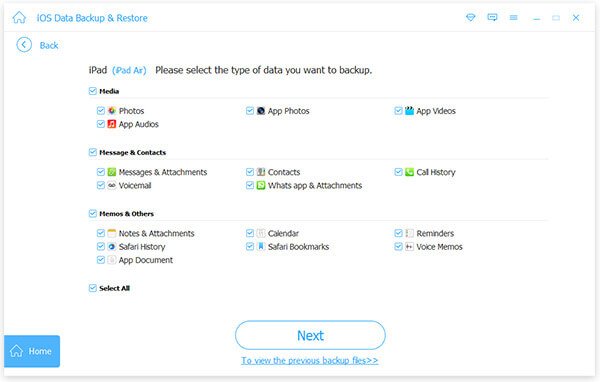
Step 2. Select your desired file types to back up. Here, you should select Messags & Attachments. You can also select other file types to back up. Then, click the Next button.
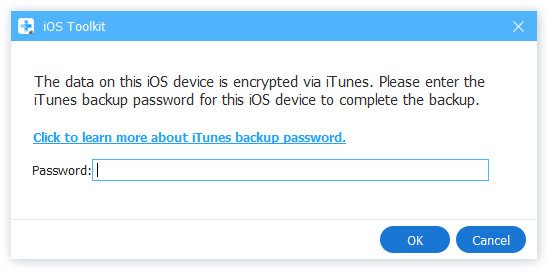
Step 3. If needed, you should enter your iPhone screen passcode and your iTunes backup password to back up iMessages to computer.
Conclusion
Learning how to backup iMessages is a very practical trick to protect your chats and media files on your iOS devices. For daily protection, backup iMessages to iCloud is your best bet. However, for long-term archiving or switching to a non-Apple device, knowing how to backup iMessages to computer provides an extra layer to protect your data. Apeaksoft iOS Data Backup & Restore is your best resort. It can selectively back up and restore your iMessages. Your iPhone backup will stay secure on your computer.
Related Articles
Does your iPhone keyboard not work right now? Don't panic. This article will help you solve this annoying issue quickly.
This comprehensive article tells you why an iPhone is not charging and how to fix this problem on your handset without data loss.
If you encounter the error saying unlock iPhone to use accessories, don't worry. You can learn our solutions to fix this issue.
If you wish to access someone's iOS device, you are lucky since this guide tells you three ways to unlock someone's iPhone.
