iPhone Notes Backup: How to Do with/Without Cloud Service
Notes for iPhone is a convenient built-in tool that is a simple and effective way to jot down ideas, create lists, and more. It makes your write-down contents more organized and lightweight because everything is in the device in your hand. With iCloud, you can also keep notes updated across all your devices, making it easier to browse important information. In addition to cloud services, are there other ways to back up notes on iPhone? The answer is yes.
PAGE CONTENT:
Part 1. Best iPhone Notes Backup Tool Without Data Loss
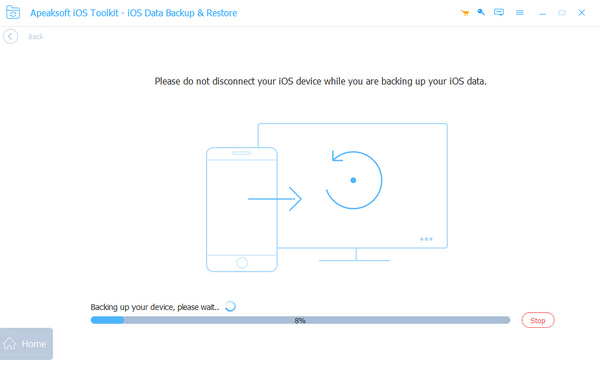
Instead of recovering iPhone notes after losing them accidentally, you'd better back up them in advance. Many people may feel that regular backup of data is too troublesome, or they do not trust those backup tools and are always worried about data loss. To eliminate all your worries, here is a recommendation for the best iPhone notes backup tool - Apeaksoft iOS Data Backup & Restore. It also helps you restore all your backups or all deleted files without a backup.
Best Method to Back up Your iPhone Notes
- Compatible with all iOS devices, including the latest version.
- Allow to preview before restoring all the backup data.
- The backup operation is straightforward and only requires a few clicks.
- Provide a set password for your data to guarantee user privacy.
- Support various iOS data types, such as photos, contacts, messages, etc.
Secure Download
Secure Download

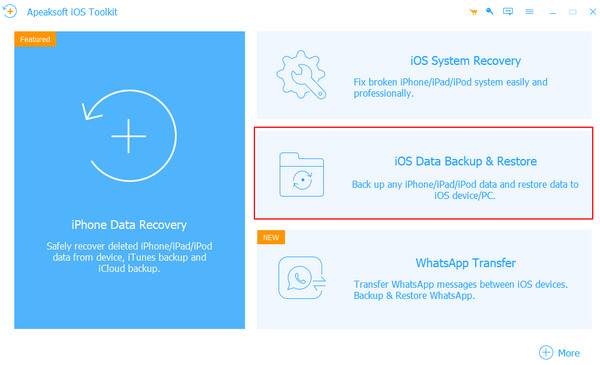
Step 1. Free download Apeaksoft iOS Data Backup & Restore from the secure link above and wait for it to install on your computer. Double-click to open it and choose iOS Data Backup & Restore from the home page.
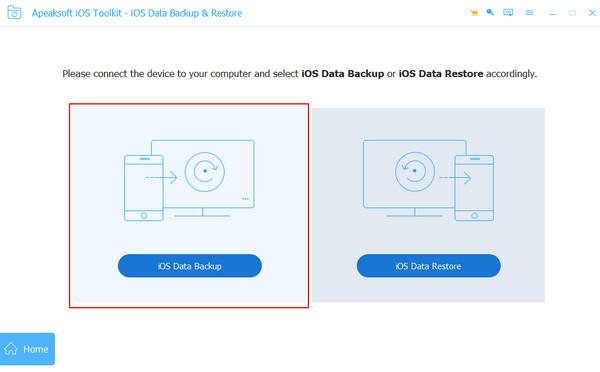
Step 2. Go to the iOS Data Backup section and plug your iPhone into your computer via a lightning USB cable.
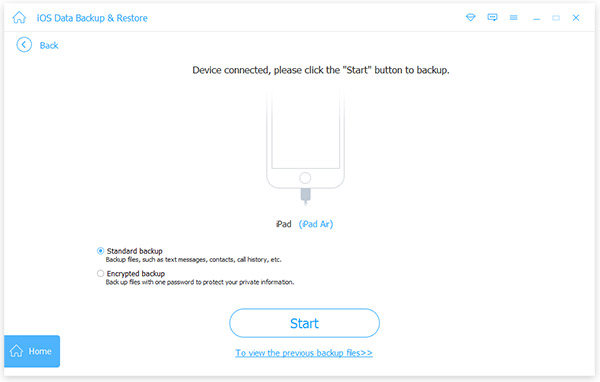
Step 3. Wait patiently for your two devices to connect successfully. This process won't take too long. Then, you can choose Standard backup or Encrypted backup. The latter can set a password to protect your files strictly.
Step 4. Then, a list of all the data types that can be backed up will be displayed; choose Notes & Attachments and others you need to backup from your iPhone.
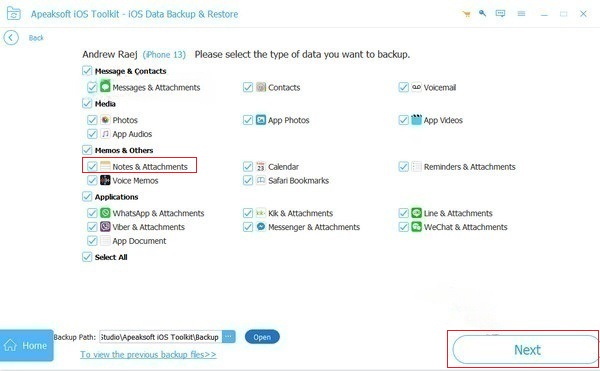
Step 5. Once ready, click the Next button to save the backup files to a specified folder. If you are iOS 13 or later, you'll be asked to enter your iPhone passcode to confirm and backup process.
Part 2. How to Backup Notes on iPhone to Mac Using Airdrop
If you are an iPhone and Mac user simultaneously, congratulations. You have the easiest way to back up your memos, which is to share them directly from iPhone to Mac through AirDrop without synchronizing any backup. Before using this method, you must turn on Wi-Fi, Bluetooth, and AirDrop on your iPhone and Mac.
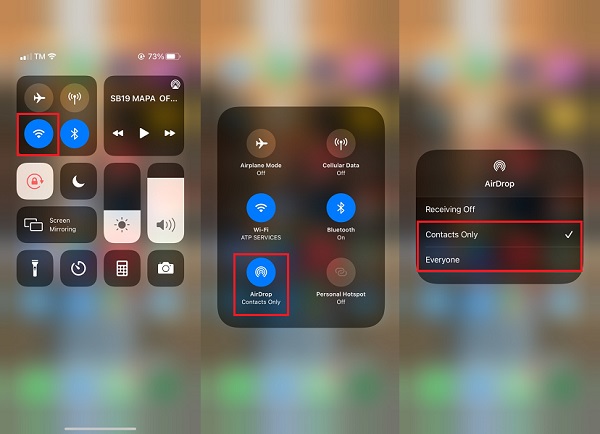
Step 1. Find the Notes app on your iPhone and select the notes you wish to back.
Step 2. Tap the Share button in the upper right corner, select AirDrop in the sharing method, then find your Mac and click to send.
Step 3. Then tap Receive on your Mac, and the notes will transfer automatically. Sometimes, the airdrop will get stuck on waiting.
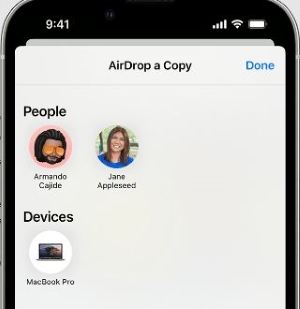
Airdrop is indeed a quick and easy way to back up iPhone notes, but as mentioned above, you cannot use this method if your computer is running the Windows operating system.
Part 3. How to Backup Notes on iPhone via Cloud Services
iCloud
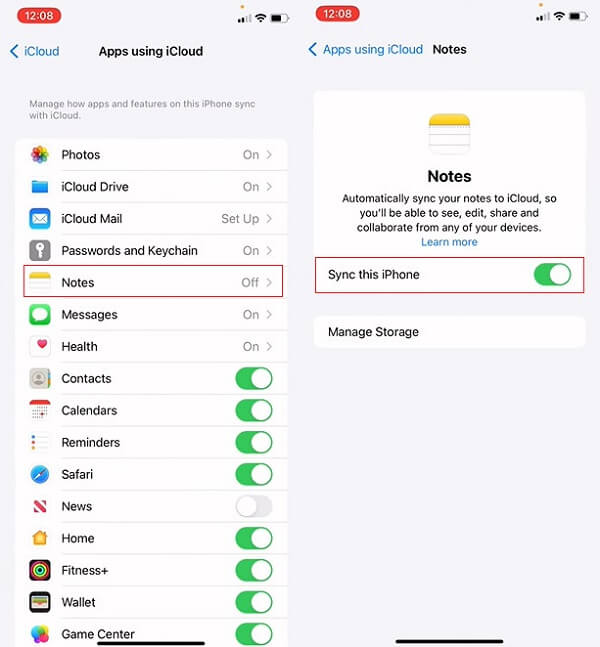
Step 1. Open Settings on your iPhone, click on your name at the top interface and choose iCloud. Then, you'll see apps using iCloud. Tap Show All to expand the whole list.
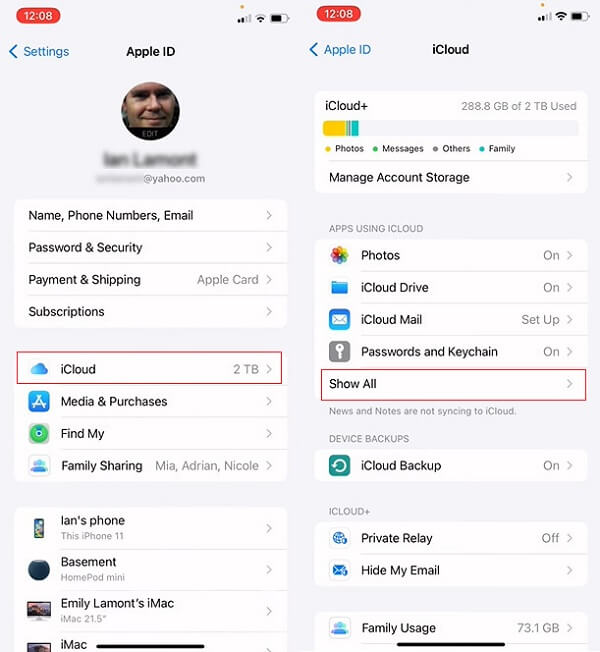
Step 2. Find Notes and tap in. If it says Off, just turn on the toggle of Sync this iPhone. Now, the notes on your Mac or other devices will start syncing to your iPhone and vice versa through iCloud.
iTunes
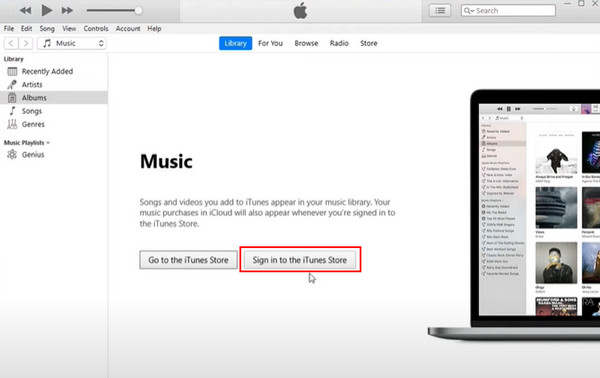
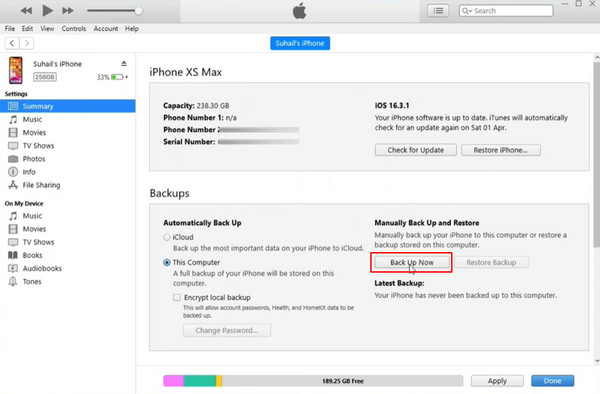
Step 1. Start by downloading iTunes on your computer. Once installed, open it and choose to Sign in to the iTunes Store. Enter your Apple account, which should be the same as on your iPhone.
Step 2. Now plug your iPhone into the computer via a USB cable, click Trust and enter the passcode on your iPhone if prompted. Then tap on the Phone tab in the upper left corner.
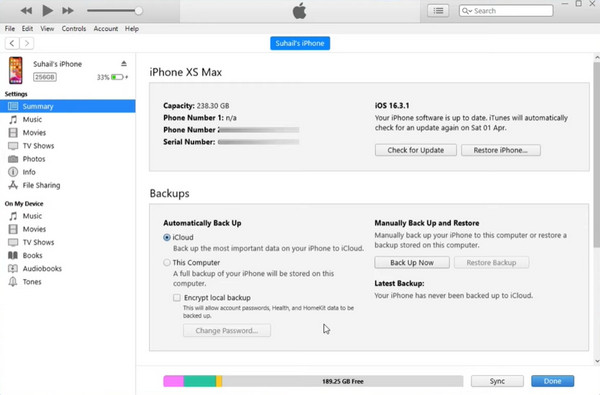
Step 3. Focus on the Backups section; if you want to save the backup on the computer directly, choose This Computer under the Automatically Back Up options.
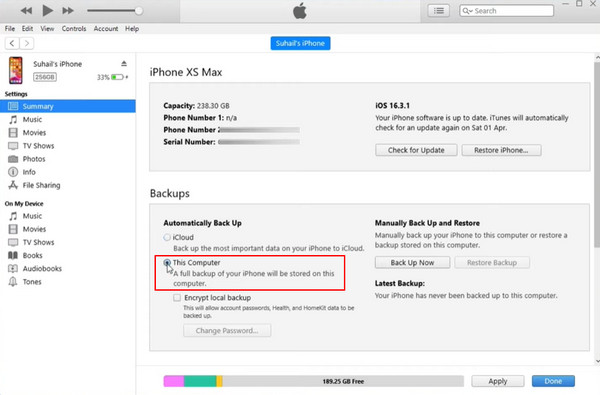
Here, you can check the box next to Encrypt local backup, a feature that allows you to set a password to protect your iPhone backup.
Step 4. Finally, hit Back Up Now to start the backup process. This method essentially backs up all the data in the iPhone. You cannot choose the data type independently, so the backup time will be slightly longer.
Part 4. Easily Backup iPhone Notes to Gmail
You can access the notes across devices as long as your Apple devices are logged in with the same Apple ID. However, if you are using a Windows computer or switching to an Android phone, you can turn on the notes backup function of your Google account. This way, your iPhone notes will automatically be backed up to your Gmail.
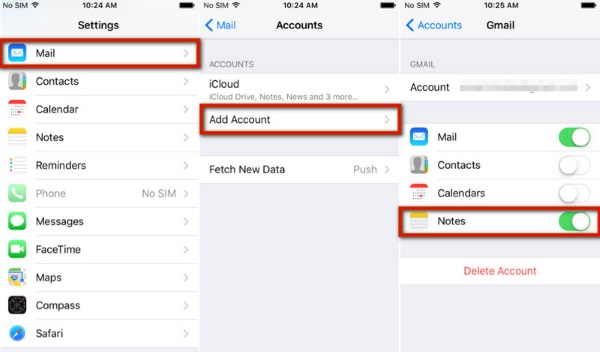
Step 1. Go to Settings on your iPhone, scroll down and select Mail > Accounts.
Step 2. Tap on the Add Account option and choose Google to add your Gmail address. Unfortunately, if you forgot your Gmail username, you need to recover it first.
Step 3. Make sure your Gmail account is right, and let the Notes option turn on.
Conclusion
Excellent! You have mastered five effortless ways to backup iPhone notes, but now it might bother you which one suits you best. Here's the last suggestion: just use Apeaksoft iOS Data Backup & Restore because no matter what device you use, you can simply achieve your goal. Next time, if people around you don't know how to back up backup notes on iPhone, don't forget to share this post with them!
Related Articles
You can back up photos on Mac to keep all precious photos and memories safe. You can learn 3 ways to do photo backup on Mac.
Want to know how to backup WhatsApp to Google Drive? Here is a concrete guide to save messages and media files from WhatsApp on iPhone and Android phone.
How to backup iPad to computer for space free-up or data backup? Here are 3 efficient ways to sync iPad to PC with or without iTunes in simple clicks.
Do you want to back up Samsung notes on Google Drive, Samsung, Windows PC, or Mac computer? This article covers them all.

