How to Back up Photos on iPhone to iCloud and Computer
Today, iPhones allow users to take ultra-high-quality photos. The downside is the large file size. While iPhones integrate larger and larger storage, it is still limited. Moreover, iPhones cannot expand storage with SD cards. It makes sense that you have to delete photos on your iPhone regularly. Before that, you’d better back up iPhone photos to avoid data loss. This guide shares four proven methods with details.
PAGE CONTENT:
Part 1: Ultimate Way to Back up iPhone Photos
One of the best ways to back up photos from iPhone to PC is Apeaksoft iOS Data Backup & Restore. It is able to back up all photos or specific images to your PC without losing quality. Moreover, the intuitive interface makes it easy to navigate and use.
Ultimate Way to Back Up iPhone Photos to PC Without Quality Loss
- Back up iPhone, iPad, or iPod with a single click.
- Support photos, videos, contacts, SMS, and other data types.
- Keep photo file quality and metadata.
- Protect your private photos with a password.
- Compatible with a wide range of iPhones, iPad, and iPod devices.
Secure Download
Secure Download

How to Back up iPhone Photos to PC
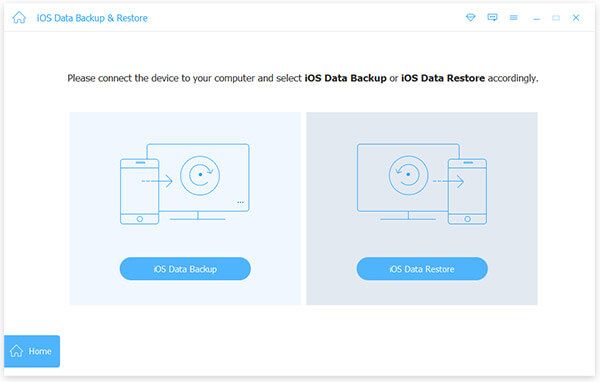
Step 1. Connect to your iPhone
Launch the best iPhone photo backup tool after you install it on your PC. There is also a version for Mac. Connect your iPhone to your PC with a Lightning cable. Choose iOS Data Backup & Restore and click the iOS Data Backup button. The software will detect your device automatically.
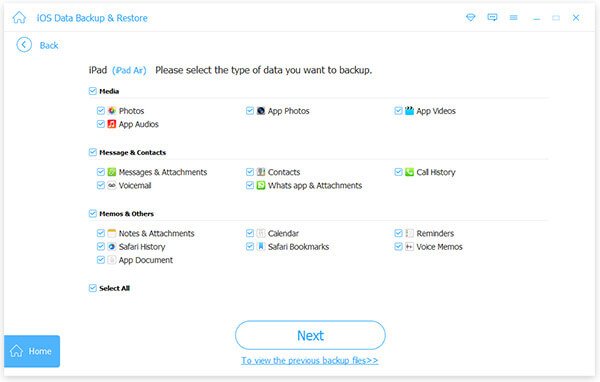
Step 2. Select the file type
If you want to protect your private photos, select Encrypted backup and leave a password. Otherwise, select Standard backup. Click the Start button to proceed. Next, check the boxes next to Photos, App Photos, and other desired data types.
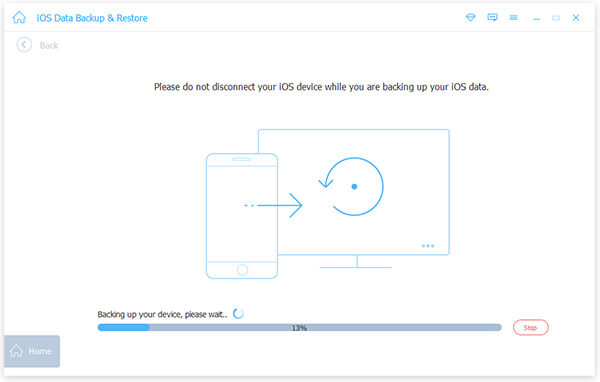
Step 3. Back up iPhone photos
Finally, click the Next button and choose the file folder to save the backup. Wait a few minutes, and you will find the backup of your iPhone photo on your hard drive.
Note: When you need to restore your photos, click the iOS Data Restore button, select a backup file, and restore your photos.
Part 2: How to Back up iPhone Photos to iCloud
Apple offers free 5GB of iCloud storage for each account, but you can pay more. That is enough to back up iPhone photos to iCloud. Moreover, it can sync iPhone photos to Mac and other Apple devices.

Step 1. Open the Settings app on your iPhone.
Step 2. Tap on your profile and go to the iCloud tab.
Step 3. Choose Photos and toggle on Sync this iPhone.
Step 4. If you want to delete the backup iPhone photos, select Optimize iPhone Storage. Otherwise, select Download and Keep Originals.
Note: Once your iPhone connects to an internet connection, your photos will go to iCloud.
Part 3: How to Back up iPhone Photos to iTunes/Finder
Another way to back up photos from iPhone to Mac or PC is through the iTunes or Finder application. This method doesn’t require an internet connection, but there are downsides, such as backing up the entire iPhone. Moreover, restoring the photo backup will overwrite the current data on your device.
Step 1. Link your iPhone to your computer with a compatible cable.
Step 2. Open the latest version of iTunes on Windows and macOS Mojave or earlier. On macOS Catalina or later, run the Finder app.
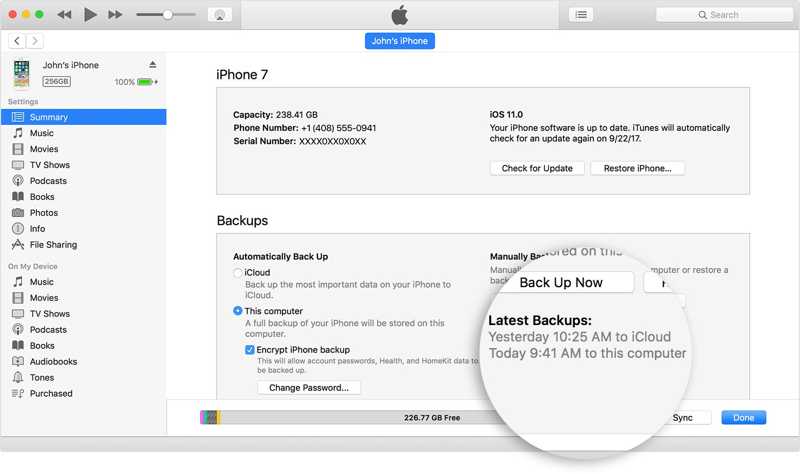
Step 3. In iTunes, click the Phone button at the top left side and go to the Summary tab.
In Finder, click your device name on the sidebar and go to General.
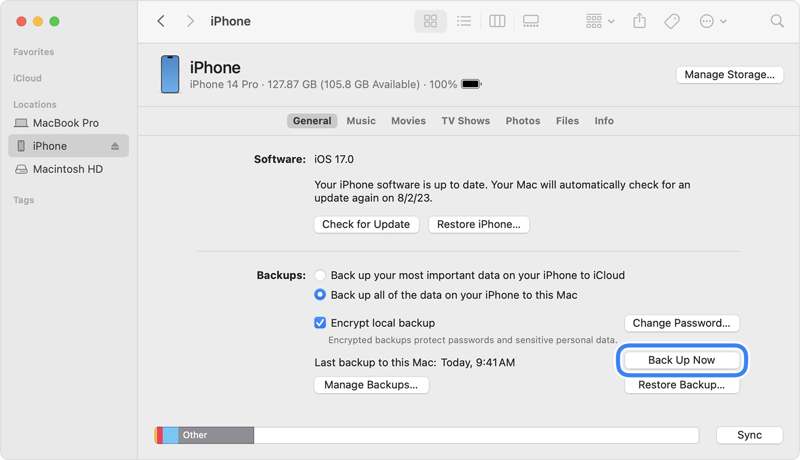
Step 4. Under the Backups section, select This computer or Back up all of the data on your iPhone to this Mac.
Step 5. Finally, click the Back Up Now button to initiate iPhone photo backup to PC or Mac.
Note: If you want to protect your iPhone photo backup with a password, check the Encrypt local backup box. Next, set your iTunes Backup password.
Part 4: How to Back up iPhone Photos via Photos
The built-in Photos application is available if you only want to back up photos from an iPhone to a PC or Mac. In fact, the Photos app on Windows 11/10 and macOS 10.10.3 or above allows you to import photos from your iPhone independently.
How to Back up iPhone Photos to Photos on Mac
Step 1. Hook up your iPhone to your Mac with a USB cable and unlock your device.
Step 2. Run the Photos app from the Applications folder or Dock bar.
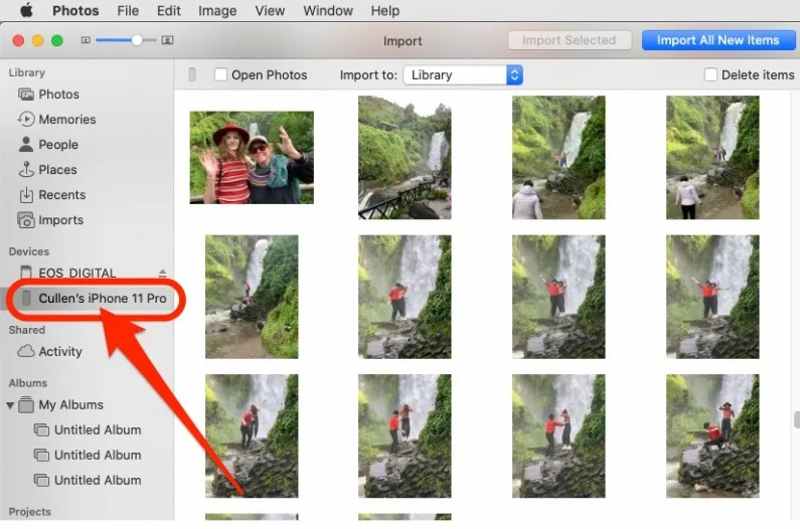
Step 3. Click your iPhone name under the Devices section on the sidebar.
Step 4. Select the photos you want to back up and click the Import [number] Selected button at the top.
Note: If you want to back up all iPhone photos to Mac, click Import All New Items instead. By default, your iPhone photos will go to the Library, but you can change it in the Import to option.
How to Back up iPhone Photos to Photos on PC
Step 1. Plug your iPhone into your PC with a USB cable and unlock your iPhone.
Step 2. Go to the Start button on your PC and click Photos to open the app.
Step 3. Click the Import button at the top ribbon and select Apple iPhone.

Step 4. Decide to back up Select new or Select all.
Step 5. Click the Add [number] Items to back up your photos to your PC.
Tips: If you want to save photos independently, click the Create folder button.
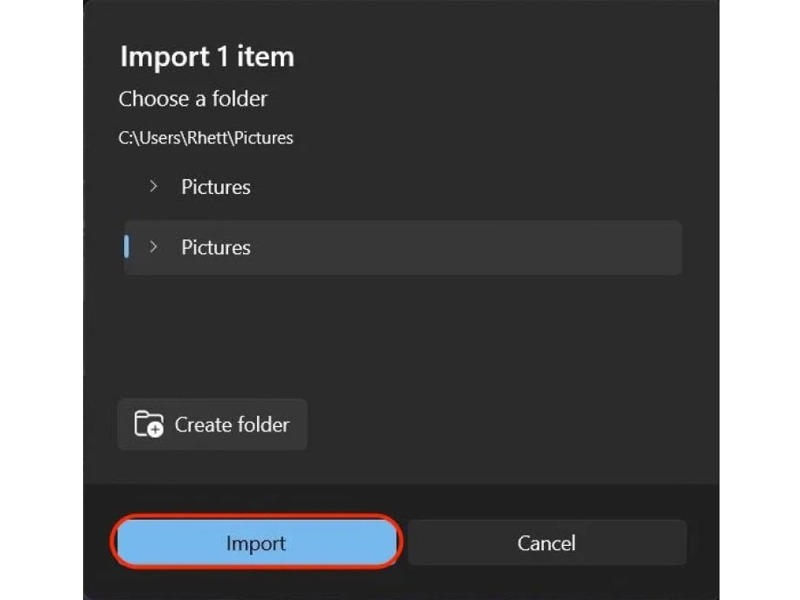
Step 6. Choose the destination folder and click the Import button.
Conclusion
Now, you should understand how to get your iPhone photo backup to cloud storage, PC, and Mac. You can pick an appropriate method and follow our steps to save your iPhone photos. Apeaksoft iOS Data Backup & Restore is the best option for ordinary iPhone users. If you have other questions about this topic, please feel free to leave a message below this post.
