Detailed Guide on How to Clear Bing Search History
Bing is a famous search engine developed by Microsoft. Over time, various search histories and associated data will be collected on Bing, including your inquiries, the dates of your searches, the websites you visited, and more. However, Bing search history may slow down your internet connection or threaten privacy.
Clearing Bing search history can help protect your privacy and personal information. Moreover, it can help prevent others from accessing your search and browsing history. This post will guide you to clear Bing search history on an iPhone or on the desktop.
PAGE CONTENT:
Part 1: How to Clear Search History in Bing
To delete your Bing search history within the Bing app, follow the steps below. This method lets you easily delete Bing search history, including your website history logs and previously-visited websites on iPhone and the desktop.
How to Clear Bing Search History on Your iPhone or iPad
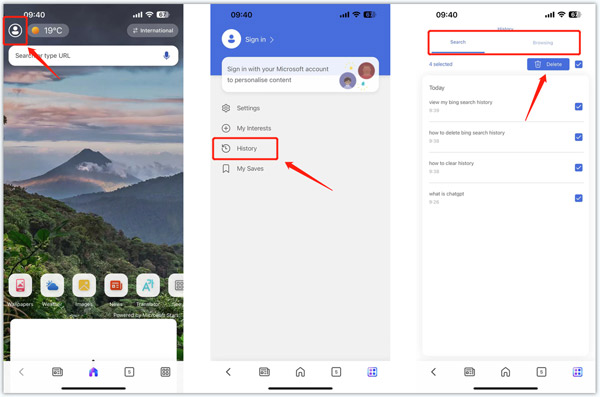
Step 1. Open the Bing app on your iPhone and tap your account profile in the upper-left corner.
Step 2. Tap History to check your search history and browsing websites. Tick the Select all box and then tap Delete to clear Bing search history with ease.
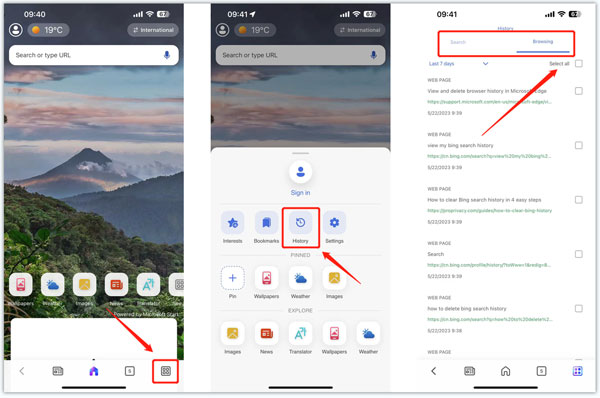
Step 3. When you open the Bing app, you can also tap the Menu button in the bottom-right corner, choose the History option, and then remove Bing search history from your iPhone.
How to Clear Bing Search History on the Desktop
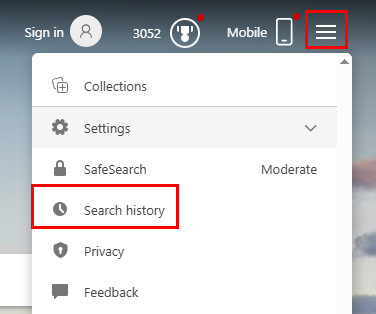
Step 1. Open the browser that you often use and enter the Bing interface. Go to Settings - Search history.
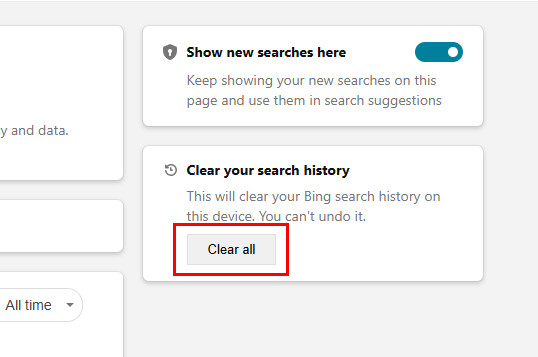
Step 2. Click Clear all on the following page.
Tips: If you have signed up with your Microsoft account, your Bing search history may be saved to the cloud. You can review this data by signing in to your Microsoft Privacy Dashboard, where your searches are organized and displayed to delete the Bing search history, or even disable search history collection altogether.
Part 2: How to Delete Bing Search History from Settings on iPhone
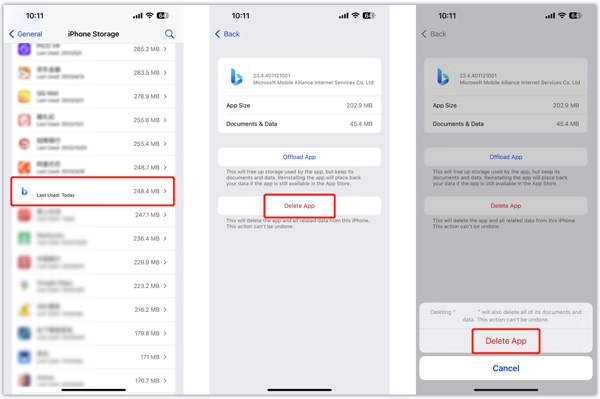
Step 1. Open the Settings app on your iPhone and choose the General option. Tap iPhone Storage and scroll down to select the Bing app.
Step 2. In the Bing interface, you can check the app size and its documents & data. Also, you get two options to manage the Bing app, Offload App and Delete App. You can tap the Delete App button to quickly clear Bing search history and browsing data. You can re-install Bing from App Store. The previous Bing search history won’t be restored.
Part 3: How to Remove Bing Search History Permanently
Suppose you prefer an easy way to quickly remove Bing search history, Safari browsing history, and other personal data to protect your privacy. In that case, you can rely on the powerful Apeaksoft iPhone Eraser. It can permanently erase your iPhone’s or iPad's iOS data and settings.
Clear Bing Search History on iPhone
- Clear Bing Search History on iPhone
- Clear Bing and Safari search history on iPhone and iPad.
- Delete app browsing history, caches, cookies, junk files, etc.
- Uninstall unwanted apps, remove unless data and compress large pictures.
Secure Download
Secure Download

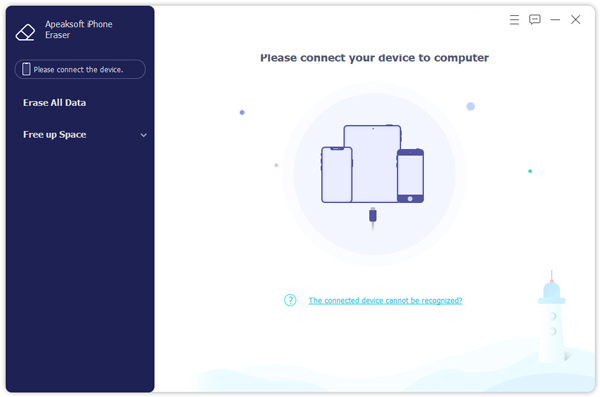
Step 1. Free download and launch this recommended iPhone Eraser on your computer. Connect your iPhone or iPad and build the connection successfully.
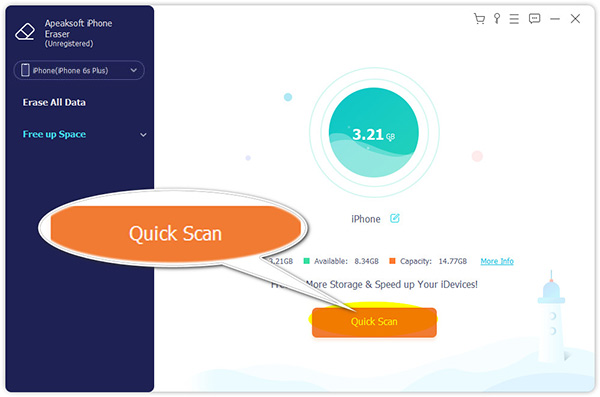
Step 2. Select Free Up Space from the left panel and click Quick Scan to scan various iOS files on this device.
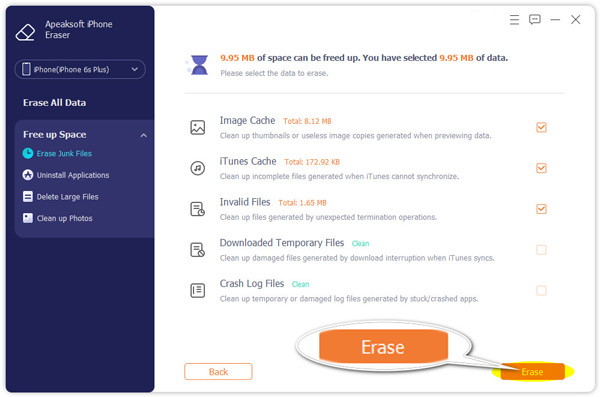
Step 3. You are offered four options to manage your iPhone or iPad storage, Erase Junk Files, Uninstall Applications, Delete Large Files, and Clean up Photos. These features can clear Bing search history and other useless files.
Part 4: Why Need to Delete Bing History
1. Protect personal privacy. Your search history records your most private information, such as your interests, personality, etc. Clearing it can prevent these sensitive data from being leaked, thus ensuring the security of your privacy.
2. Prevent others from snooping. On public devices, search history may expose your secrets or cause embarrassment. Regularly clearing the history can prevent others from peeping into your private life through your records, thus maintaining your personal boundaries.
3. Improve the search experience. Search engines will personalize the results based on your history, which may result in your always seeing similar content. Clearing your history can effectively reset these preferences.
4. Reduce ads' tracking. Advertisers will use your search history in any way. Deleting the records can interrupt this tracking.
Tips: How to Search in Private Mode in Bing
One effective way to avoid clearing Bing search history too often is to search in private mode. Below is a detailed guide on how to search in private mode in Bing:
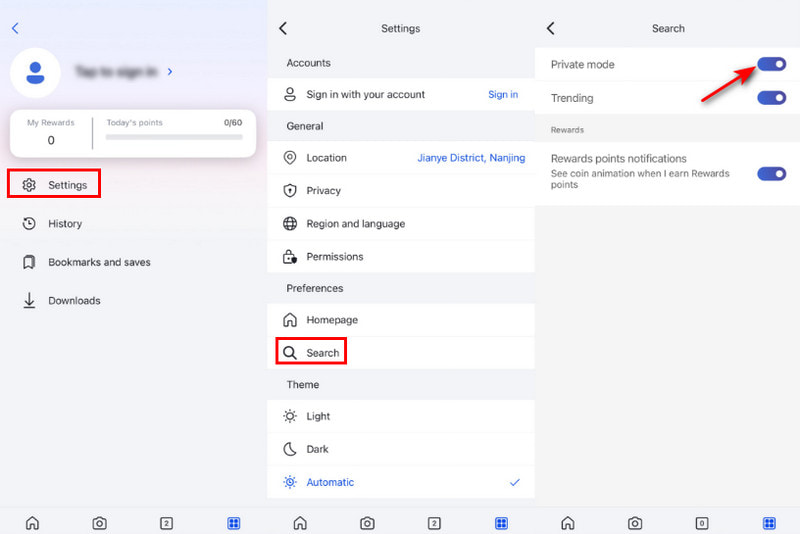
Step 1. Click your account profile in the upper-left corner and choose Settings.
Step 2. Choose Search on the following page.
Step 3. Toggle on Private mode.
Tips: If you are using the desktop version, you can use Bing through the privacy window of your browser. It does not save search records or Cookies.
Conclusion
Clearing your Bing search history can help protect your privacy, improve the performance of your browser, and free up storage space. This post shares three methods to easily delete Bing search history. With this guide, you can ensure that your Bing search history remains private and secure.
Related Articles
How to clear cache and cookies on Safari with/without clearing login status? This article will show you how-to on iPhone and Mac.
Do you want to recover Bing search history when you lost them? This post will give you three methods to do it on iPhone and Android.
Do you want to clear Google search history on iPhone? This article solves your problems no matter whether you are using Google or Safari browser.
Facebook keeps a record of everything you search for on its platform. Check out this guide for clearing Facebook search history on PC/Mac, iPhone and Android.
