How to Delete Unwanted Music from Your iPhone or iPad
If your iPhone becomes slower and slower, it means that you need to free up space immediately. While it is great to have your favorite songs and albums on your device, this can present storage issues, leaving you with insufficient space. Thankfully, you can delete music from your iPhone and improve your device's performance. This guide identifies the proven methods and demonstrates the workflows.
PAGE CONTENT:
Part 1: How to Delete Music from iPhone Without Recovery
Sometimes, you may need to delete all music from your iPhone and get rid of it permanently. From this point, we recommend Apeaksoft iPhone Eraser. It is able to erase all music on your device using advanced technology. As a result, no one can recover your data. More importantly, the intuitive interface makes it ideal for ordinary people.
A Quick Way to Delete Music from iPhone Without Recovery
- Erase music and other data on your iPhone in one click.
- Offer three levels for different purposes.
- Provide bonus features, like iPhone erasing.
- Support the latest models of iPhone and iPad.
Secure Download
Secure Download

How to Delete Music from Your iPhone Without Recovery
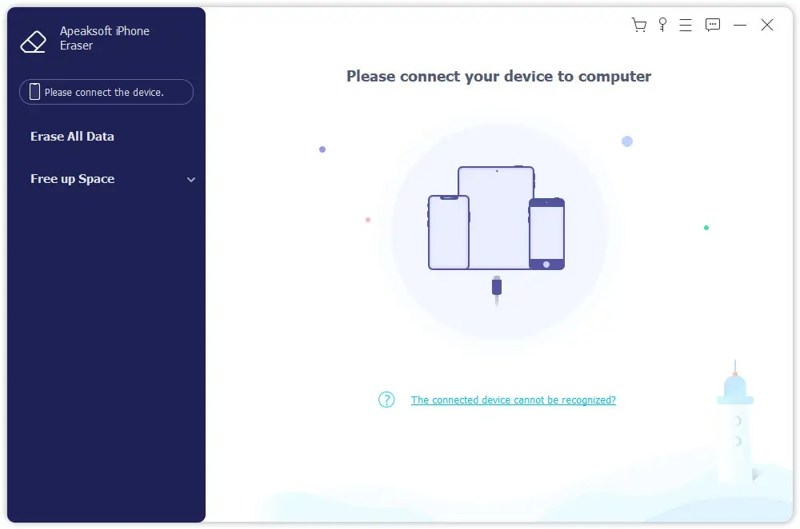
Step 1. Connect to your iPhone
Download and install the music removal software on your PC. There is another version for Mac. Launch it and connect your iPhone to your PC with a Lightning cable. If prompted, tap Trust on your screen to trust this PC.
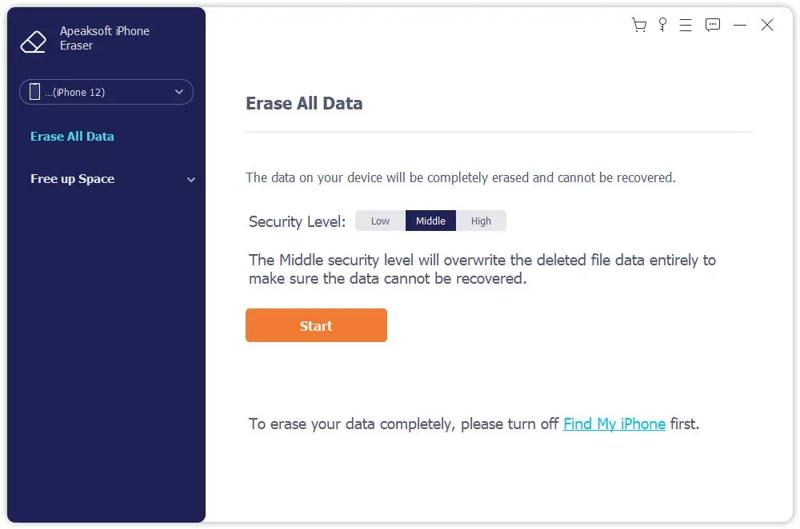
Step 2. Select a level
Click the Erase All Data button once your device is recognized. Next, choose an erasing level: Low, Middle, or High. The higher the level, the more advanced the erasing technology. Click the Start button to move on.
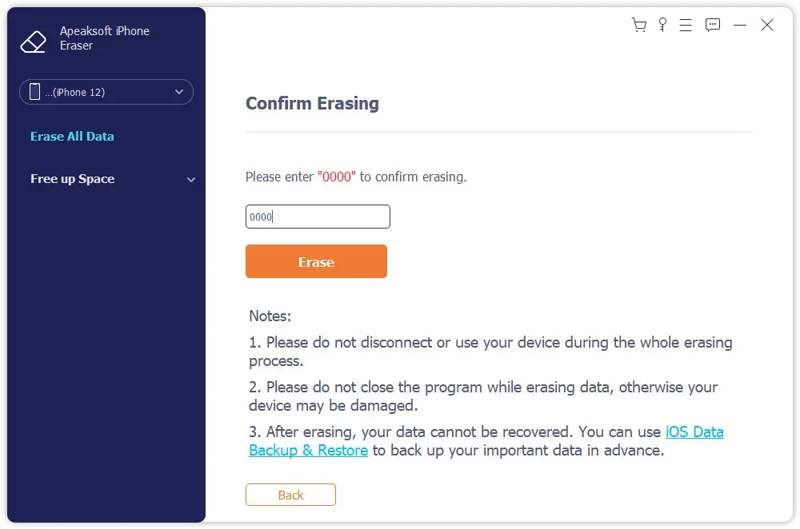
Step 3. Erase iPhone music
Then, type 0000 into the field and click the Erase button to begin erasing all songs on your iPhone immediately.
Part 2: How to Delete Music from iPhone's Apple Music
Apple Music is the built-in music player on iOS devices. Moreover, it keeps your music library and downloaded songs. Of course, it lets you remove downloaded music from your iPhone quickly.
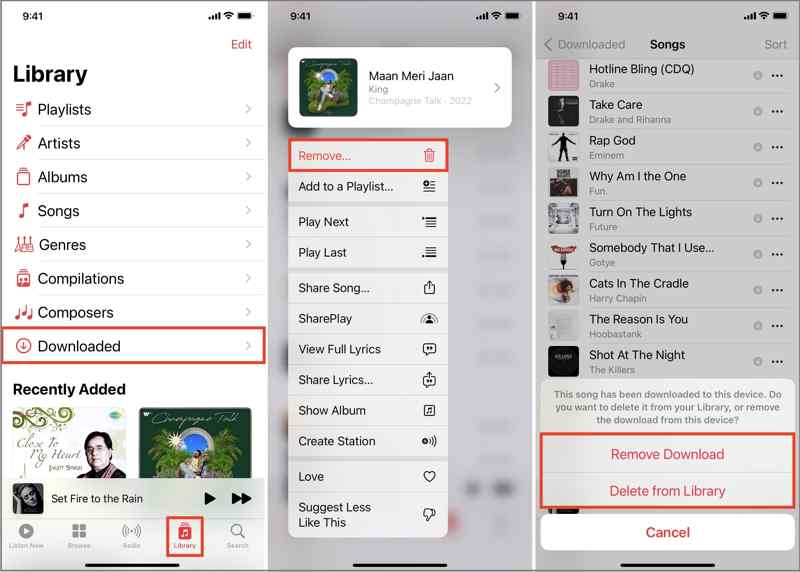
Step 1. Run the Music app from your home screen.
Step 2. Go to the Library tab, and tap Downloaded.
Step 3. Head to the Songs list, find and hold an unwanted song.
Step 4. Tap Remove on the context menu.
Step 5. If prompted, choose Only Remove Download to remove it from your memory. The Delete from Library option will erase the song from all your devices associated with the same account.
Tips: If you want to delete the entire album, go to the Albums list, long-press an album, and tap Delete.
Part 3: How to Delete Music from iPhone's Settings
The Apple Music app is a simple way to erase one song or a few music files. If you want to delete all songs from Music on iPhone, you‘d better complete the job in the Settings app. Here are the steps to free up your music library:
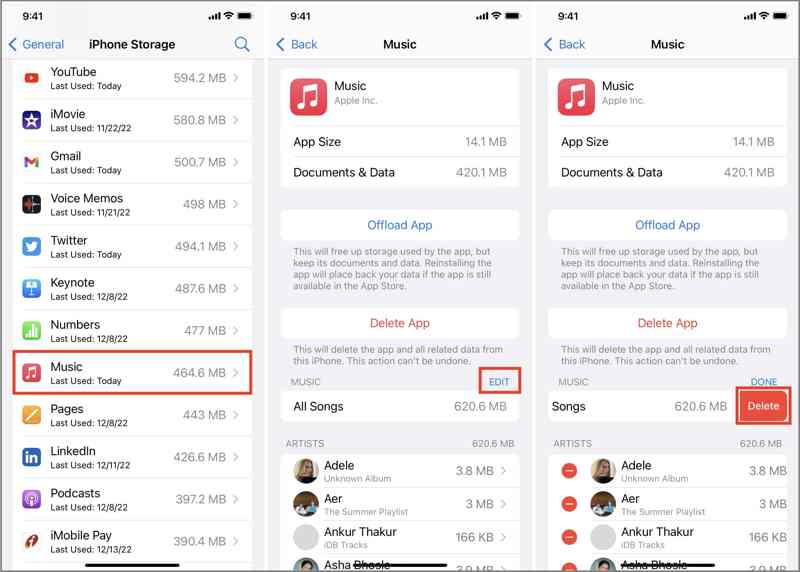
Step 1. Open the Settings app on your iPhone
Step 2. Navigate to General, iPhone Storage, and Music.
Step 3. Tap the EDIT button.
Step 4. If you want to delete all music from your iPhone, tap the Delete button next to All Songs.
If you need to remove multiple songs, tap the Delete button in front of each unwanted item.
Part 4: How to Remove Music from iPhone via iTunes/Finder
In addition to the downloaded music, you can also remove music on your iPhone synced from your Mac or Windows. However, this method requires your computer and the latest version of Finder or iTunes.
How to Erase Music from iPhone by Finder
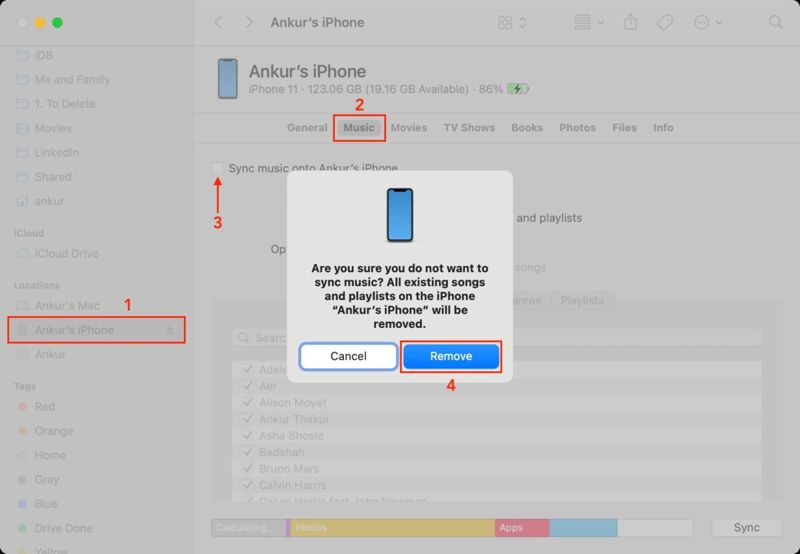
Step 1. Plug your iPhone into your Mac with a compatible cable.
Step 2. Open the Finder app, and click your iPhone name on the sidebar.
Step 3. Go to the Music tab and uncheck Sync music onto iPhone.
Step 4. When prompted, click Remove on the pop-up dialog to confirm it.
How to Remove Music on iPhone from iTunes
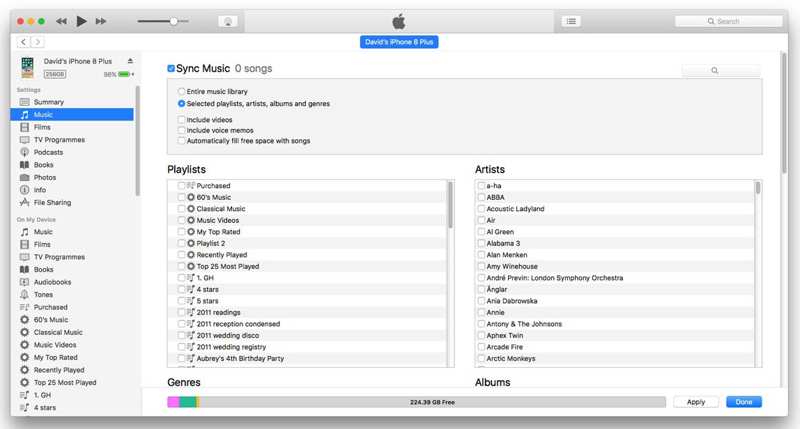
Step 1. Hook up your iPhone to your PC or macOS Mojave and older with a USB cable.
Step 2. Run the latest version of iTunes.
Step 3. After your device is detected, click the Phone button at the top left corner.
Step 4. Go to the Music tab under Settings.
Step 5. Uncheck Sync Music and click the Apply button.
Step 6. If prompted, confirm the change.
Conclusion
This guide shared multiple ways to remove music from your iPhone. You can remove specific songs from the Music app on your device quickly. To erase all or multiple songs, go to the Settings app and do it on the Music Settings screen. Moreover, you are able to remove the synced music on your iOS device. Apeaksoft iPhone Eraser enables you to get rid of all music without recovery. Plus, it is easy to use.
