How to Delete Photos from Your iPhone But Not iCloud
iCloud Photos is a cloud service release by Apple. It lets users store and sync photo and video libraries across Apple devices and the web. Once iCloud Photos is enabled, iPhone photos will go to Apple’s cloud servers. However, some users reported that their photos in iCloud were lost after they free up space on their devices. This guide explains how to delete photos from your iPhone, but not iCloud.
PAGE CONTENT:
- Part 1: How to Delete Photos from iPhone But Not iCloud
- Part 2: How to Delete iPhone Photos But Not iCloud with Another Account
- Part 3: How to Remove Photos from iPhone But Not iCloud with Google Photos
- Part 4: How to Delete Photos from iPhone After Downloading to Another Device
- Part 5: How to Delete All Photos from iPhone But Not iCloud Using iPhone Eraser
Part 1: How to Delete Photos from iPhone But Not iCloud
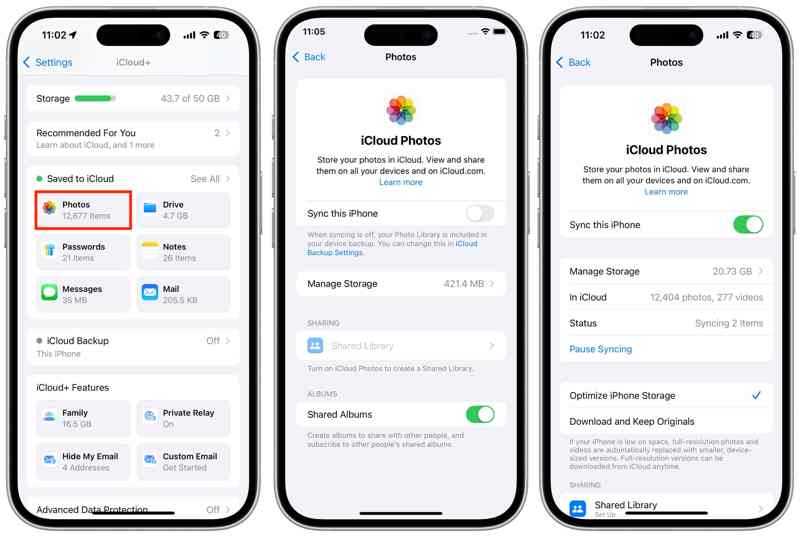
Can you delete photos from iPhone but not iCloud? The answer is yes. The straightforward way is to disable iCloud Photos. That cuts off the connection between your iPhone and iCloud. As a result, all your actions on your device won’t interrupt photos and videos in iCloud.
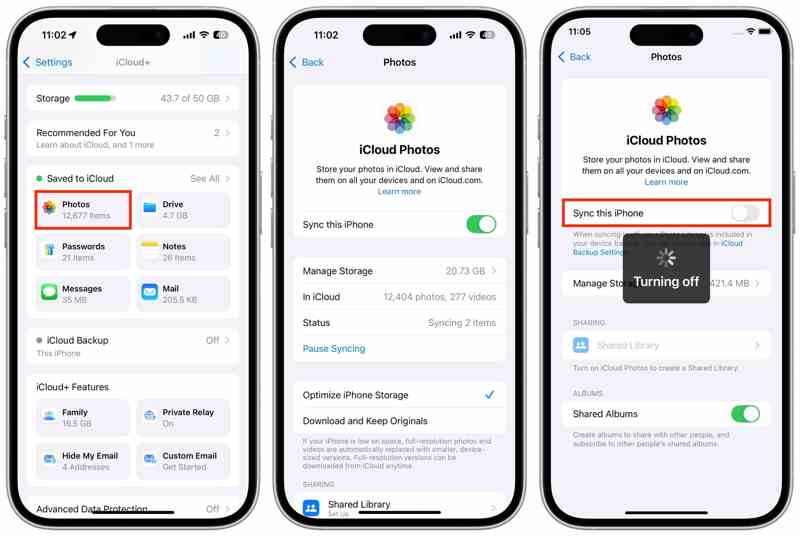
Step 1. Open the Settings app on your iPhone.
Step 2. Tap on your profile and choose iCloud.
Step 3. Choose Photos under the Saved to iCloud section.
Step 4. Toggle off the Sync this iPhone option.
Step 5. If Optimize iPhone Storage is selected, you will be asked to transfer a copy of iCloud Photos to your iPhone.
Step 6. Choose Remove from iPhone if you intend to remove photos from iPhone but not iCloud.
Note: If you choose Download Photos & Videos, manually delete your photos in the Photos app.
Part 2: How to Delete iPhone Photos But Not iCloud with Another Account
It is well known that iCloud Photos must work with an iCloud account. If you wish to delete all photos from your iPhone but not iCloud, you can use another iCloud account and keep your photos in the original account.
Step 1. Run the Settings app and tap on your profile.
Step 2. Connect to a stable internet connection.
Step 3. Tap on your profile, choose iCloud, and pick Photos.
Step 4. Toggle on Sync this iPhone to sync your photos.
Step 5. When it is done, go back to the profile screen.
Step 6. Scroll down and tap the Sign Out button.
Step 7. If prompted, enter your Apple ID password or iPhone passcode.
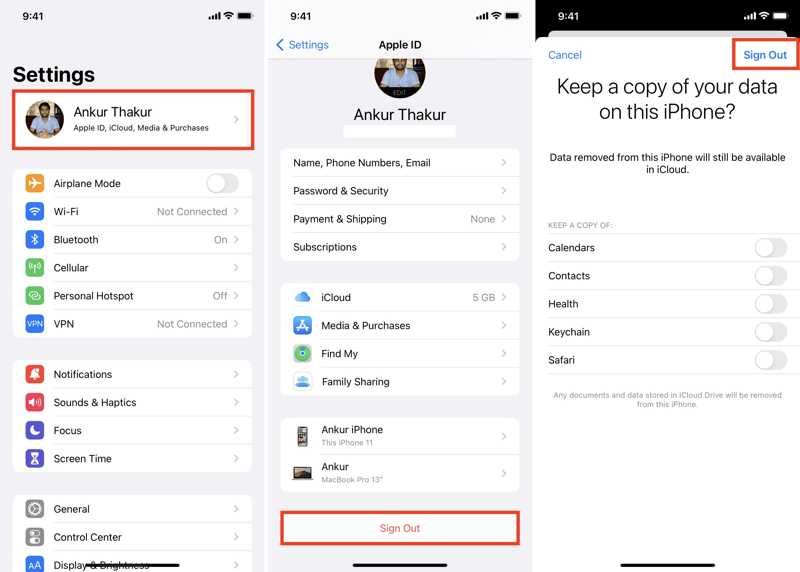
Step 8. Tap Turn Off, select the data types you want to keep, and hit Sign Out again.
Step 9. Next, tap Apple Account in the Settings app.
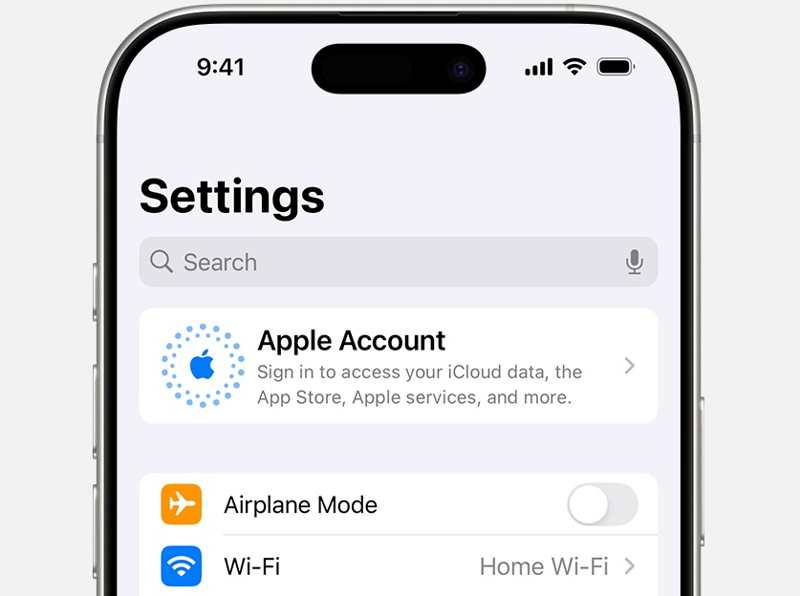
Step 10. Choose Sign in Manually, and enter another Apple ID and password.
Step 11. Now, turn to the Photos app and delete all photos.
Further Reading
Part 3: How to Remove Photos from iPhone But Not iCloud with Google Photos
While iCloud Photos is a convenient way to back up your iPhone photos, it is not the best option. It only provides 5GB of free storage. Moreover, your photo deletion may be synced to iCloud. If you hope to delete pictures from iPhone but not iCloud, use another cloud service to back up your photos, such as Google Photos.
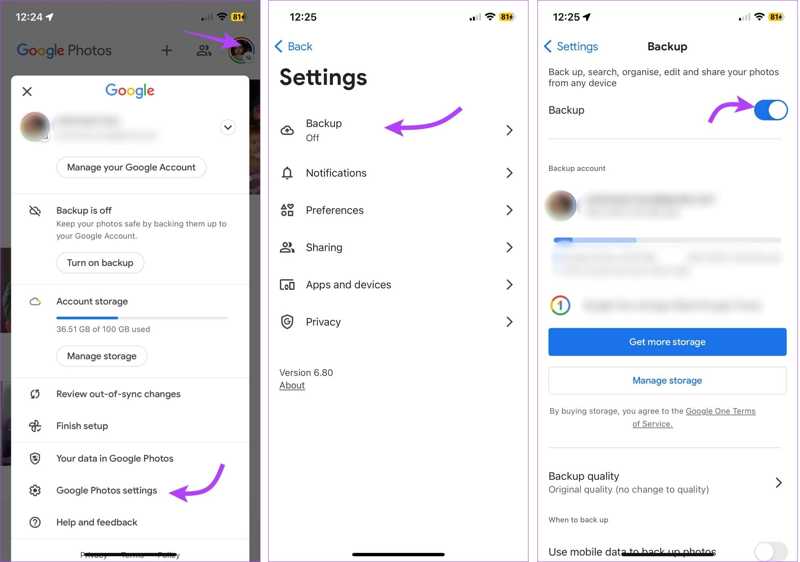
Step 1. Install the Google Photos app from your App Store.
Step 2. Open the app and log in with a Google account.
Step 3. Tap on your profile picture and choose Google Photos settings.
Step 4. Choose Backup, and toggle on Backup.
Step 5. Then, scroll down and tap Backup quality.
Step 6. Choose Storage saver or Original quality.
Step 7. After your photos are backed up to Google Photos, you can delete them in the Photos app.
Part 4: How to Delete Photos from iPhone After Downloading to Another Device
Another way to remove photos from iPhone but not iCloud is downloading your photos to an external device before you erase them. All you need is a USB-C/Lightning cable and an external drive with enough storage.
Step 1. Run your Settings app and tap on your profile.
Step 2. Go to iCloud, Photos, and select Download and Keep Originals.
Step 3. Open the Photos app, go to Albums, and tap Select.
Step 4. Select all desired photos.
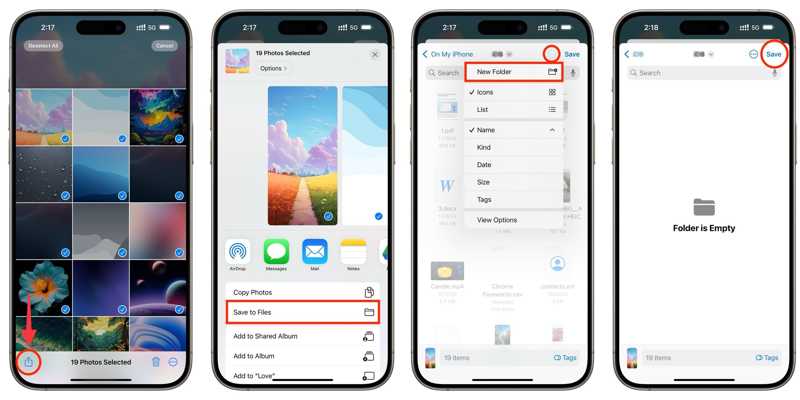
Step 5. Tap the Share button, and choose Save to Files.
Step 6. Create a new folder or select an exist folder, and tap Save.
Step 7. Next, connect the external drive to your iPhone with a compatible cable.
Step 8. Then, turn to the Files app, go to Browse, and locate the folder.

Step 9. Tap the More button with a three-dot icon, and pick Select.
Step 10. Select all photos, tap the Folder button, choose the external drive under Locations, and tap Copy.
Part 5: How to Delete All Photos from iPhone But Not iCloud Using iPhone Eraser
As a photo eraser for iOS devices, Apeaksoft iPhone Eraser allows you to delete all photos from your iPhone, but not iCloud. It lets you quickly manage iPhone photos using a computer without Wi-Fi.
A Fast Way to Delete All Photos from iPhone But Not iCloud
- Delete all or multiple photos from iPhone in one click.
- Preview iPhone photos on your computer.
- Free up space and improve performance.
- Support the latest editions of iOS and iPadOS.
Secure Download
Secure Download

How to Delete All Photos from iPhone But Not iCloud
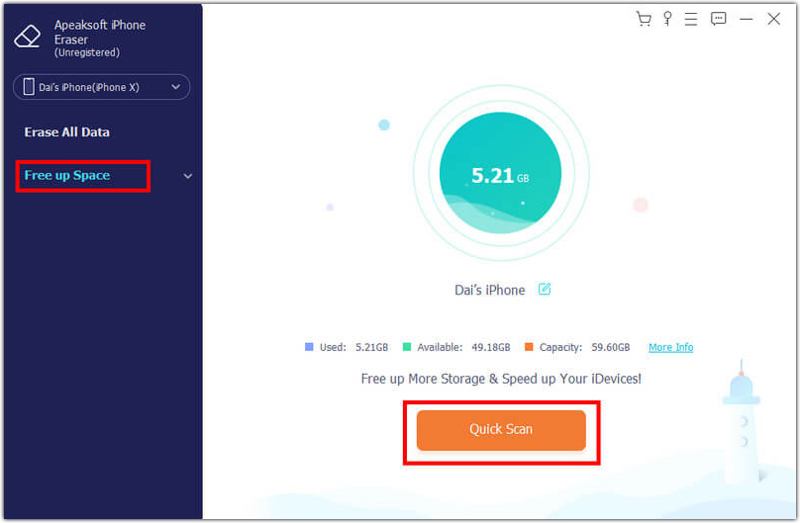
Step 1. Scan your iPhone
Launch the photo eraser for iPhone once you install it on your computer. Plug your iPhone into your computer with a Lightning cable. Click Free up Space, and hit Quick Scan to scan your device.
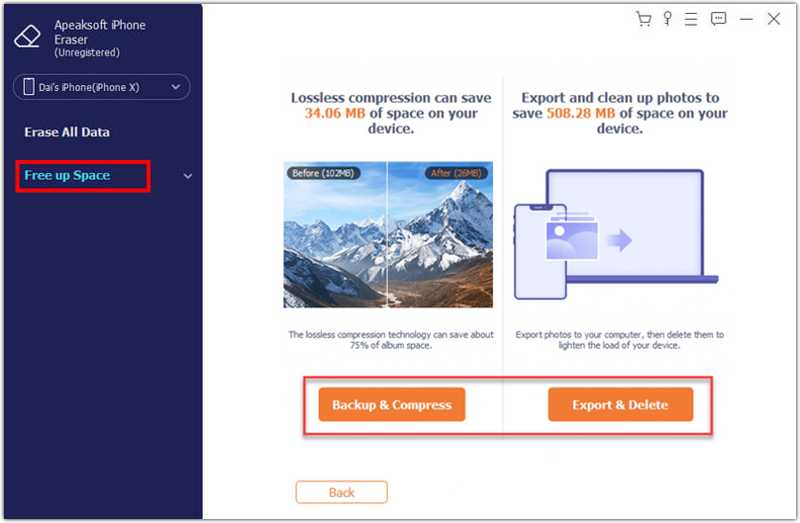
Step 2. Preview photos
Next, click the Erase button next to Clean up Photos, and choose Export & Delete. Browse your photos and select unwanted items.
Step 3. Delete iPhone photos
Optionally, click the Export button to back up your photos to your hard drive. Then, click the Delete button to remove selected photos.
Conclusion
This guide told you how to delete photos from your iPhone, but not iCloud. You can turn off iCloud Photos and delete your photos on your iPhone. Or sign in to another iCloud account and then remove your photos. Back up your photos to another cloud storage or an external drive is available. Apeaksoft iPhone Eraser is a one-stop solution to back up your iPhone photos and erase them from your handset quickly.
Related Articles
Do you know how to remove duplicates in iTunes or delete multiple contacts on iPhone? Just read this article and get these best ways.
Have you been wondering about how to remove Documents and Data stored on your iPhone/iPad? Here's how to clear documents and data on iPhone 17/16/15/14/13/12.
Before trading in your iPhone, our guide tells you the whole process to clear your iPhone to sell without losing your data.
Here we list you best 6 iPhone data cleaner apps to help you erase data completely on iPhone 16/15/14/13/12/11/XS/XR to free up space and boost speed.
