Delete Cache on Your iPad: App & Browser [Expert Guide]
As you use the iPad daily, you'll notice that the device may slow down over time, apps may load slowly, or even stutter or crash. This situation is largely due to the large number of cache files and useless data accumulated on the device. Cached files include browsing history, website data, temporary files, and application caches. While they can speed things up to some extent, uncleaned caches can take up valuable storage space and affect the overall performance of the iPad. Clearing your iPad cache regularly is an important step to staying productive. Let's take a look at how to clear your cache.
PAGE CONTENT:
Part 1. How to Clear Cache on iPad at One Time
Regular cache cleaning and device optimization can improve operational efficiency, but manual operations can sometimes be tedious and do not always delete all data completely. At this time, an efficient and safe cache cleaner for iPad is particularly important. Apeaksoft iPhone Eraser is a recommended tool that can clear all cache and redundant data on the iPad at once, freeing up storage space and optimizing performance.
Clear All Cache on iPad at One Time
- Allows the complete deletion of all cached data on the iPad to optimize the device's speed.
- Provide with three different data erase levels to meet diverse needs.
- 100% security to ensure that personal information is not recovered or leaked.
- Only take a few simple steps to complete the comprehensive cleaning of your iPad.
Secure Download
Secure Download

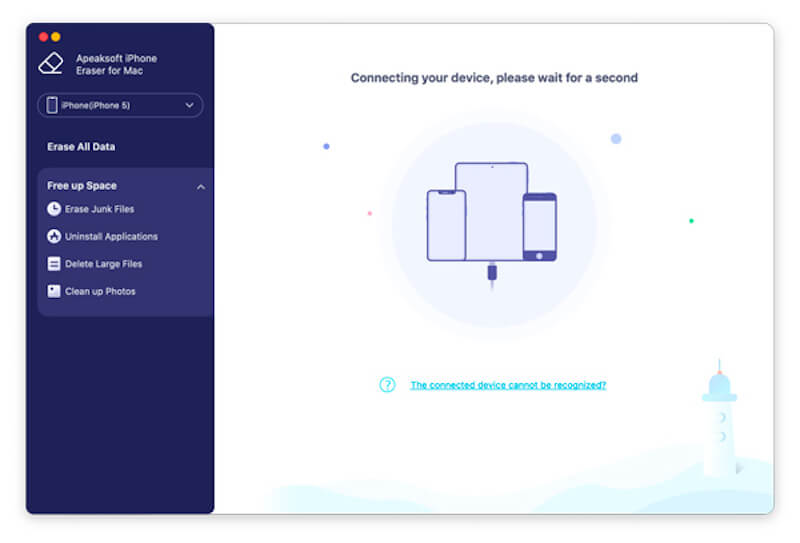
Step 1. Before you are ready to clean up, install the Apeaksoft iPhone Eraser on your computer and click to launch the program. Then, connect your iPad to the computer.
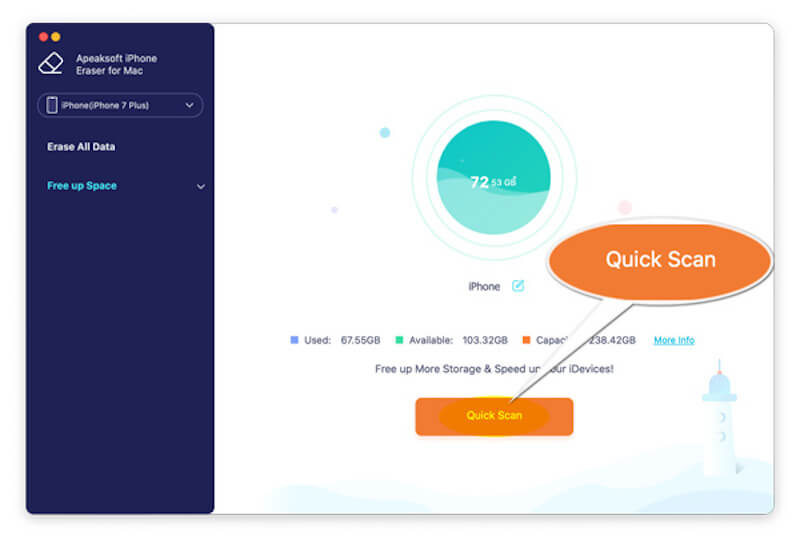
Step 2. There are two options on the left. The first will erase all data on your iPad, so choose Free up Space here. Click the Quick Scan button in the center of the screen.
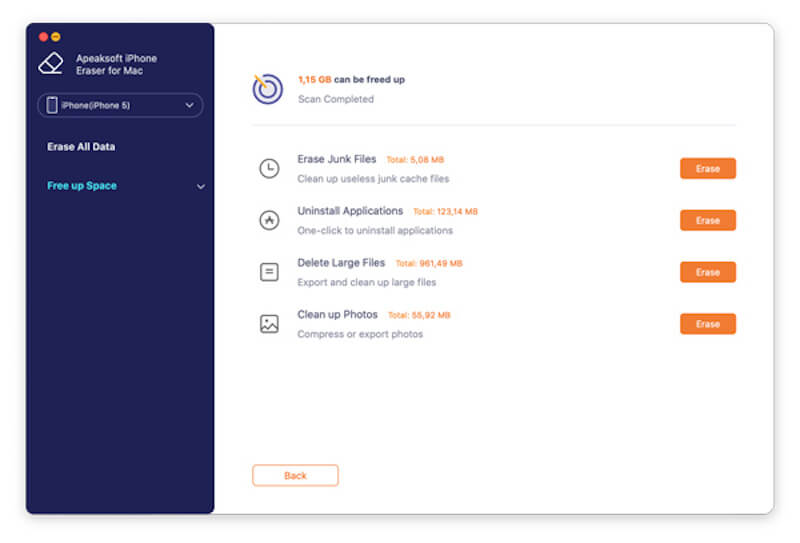
Step 3. After the system finishes scanning, all useless data will be automatically classified and presented on the screen. Cache data is included in the Erase Junk Files category. If there are others that you want to clear together, click the corresponding Erase button on the right.
Part 2. Delete App Cache on iPad
The cache files generated by the application are the largest proportion of all data. Some apps will have a built-in tool to clear the cache, which can be found in the Account > General section. If there is no built-in cache cleanup function, refer to the following methods.
Step 1. Open Settings on your iPad, select General on the left and tap into iPad Storage. If your iPad already uses too much space, it may take longer to load.
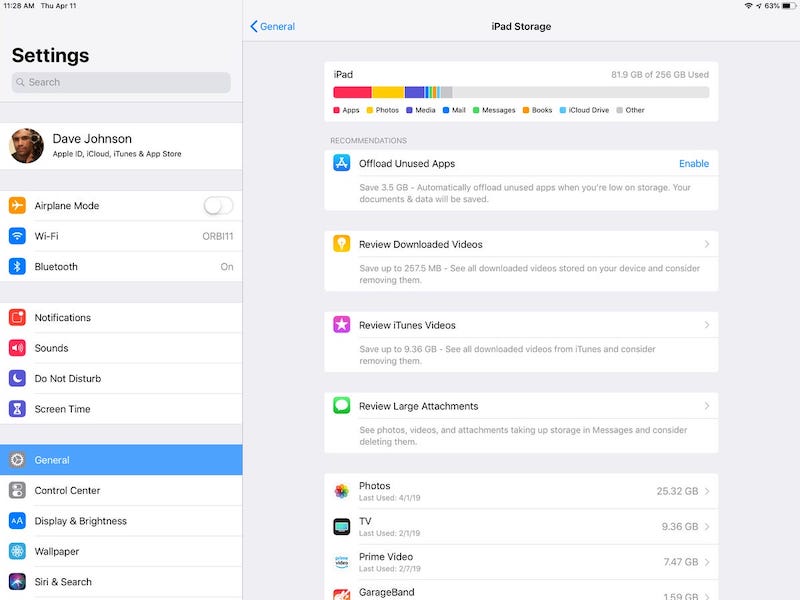
Once loaded, your iPad may suggest at the top that you offload some of the apps you don't normally use to free up more space, depending on your needs.
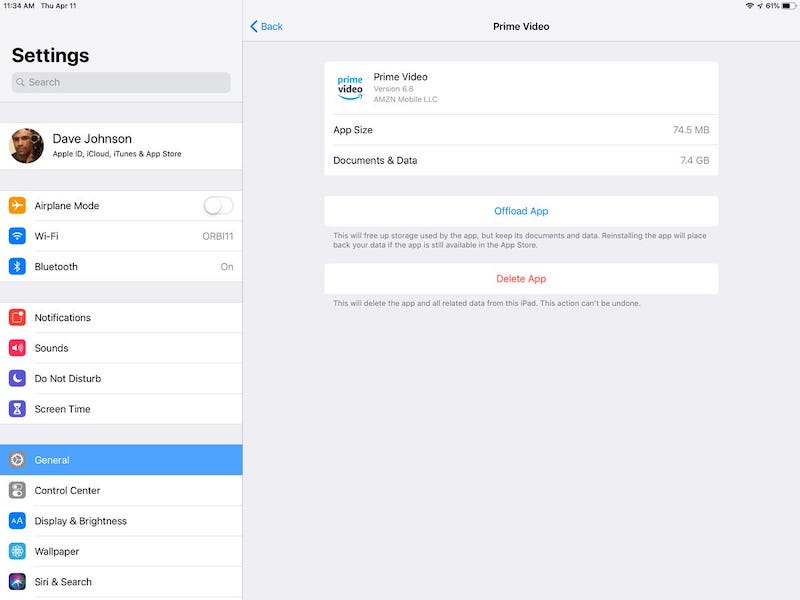
Step 2. All the apps on your iPad will be arranged below in proportion to the space they take up. Tap on any software, and you can see the App Size of itself and the size of the Documents & Data you produce as you use it.
Step 3. After selecting the application, you can choose the Offload App option to remove all the cache while preserving important basic information. You can also choose Delete App if you don't need them anymore or remove apps from the iPad directly if there are too many.
Part 3. Delete Browser Cache on iPad
Browser cache includes website data, images, cookies and other information; although it can improve the loading speed of web pages, too much accumulation may cause performance problems. In addition, regularly clearing your browser cache will protect your privacy and prevent others from accessing your browsing history. Here's an example of how to clean up the iPad's Safari browser.
Step 1. Open Settings, scroll down, find Safari, and tap to enter.
Step 2. On the Safari settings page, choose Clear History and Website Data.
Step 3. In the pop-up confirmation window, click Clear. This will delete all browsing history, cookies and cached data.

After clearing the cache, you will log out of some of the sites you have logged in to and may need to re-enter your login information.
Bonus Tip: How to Backup iPad to Computer
Before deleting the cache on your iPad, you may want an extra layer of security to keep your data safe and prevent unexpected things from happening after the device is cleaned or reset. The best way is to back up your iPad data on your computer. With a backup, you can save all your important information, and here's how to do it through iTunes, whether you're a Windows user or a Mac user.
Step 1. Firstly, if you don't have iTunes on your computer, go to the official website and download and install the latest version.
Step 2. Then, connect your iPad to your computer using a USB cable. If prompted to trust this computer, tap Trust on your iPad and enter your password.
Step 3. After entering the iTunes interface, click the iPad button in the top left corner to select your device.
Step 4. On the Summary page, find the Backups section. Select This Computer as the iPad backup location, and check the option Encrypt Local Backup (if you want to back up health data and passwords).
Step 5. Click Back Up Now, and iTunes will start backing up your iPad data on your computer. After the backup is complete, you can view the date and time of the backup under Latest Backup.

Conclusion
All in all, how to clear the cache on the iPad is the key to keeping your device running smoothly. If you want to clean more thoroughly and efficiently, Apeaksoft iPhone Eraser is your best choice! This powerful tool can wipe out all useless data with one click, protect privacy, improve performance, and keep your device in the best condition. Try it now!
