Spotlight is a search feature that Apple launched for iOS and Mac OS operating systems. It is a selection-based search system allows you to quickly locate a variety of items on your device. It cannot be denied that this feature is very handy. But when you accumulated a lot of stuff in the Spotlight search history, you may discover that there is no way to delete them.

Of course, Apple designed this feature for iPhone and iPad, including the way to delete Spotlight search history. The problem is how to do it. In this tutorial, you can learn about how to delete Spotlight search history.
- Part 1: Clean Spotlight Search from iPhone directly
- Part 2: Erase Spotlight Search History on iPhone permanently
Part 1. Clean Spotlight Search from iPhone directly
In this part, we will tell you multiple methods to delete Spotlight search history from your iPhone simply and quickly.
Way 1: Delete Spotlight search from iPhone via Settings
When you want to delete something on iPhone, the iOS Settings app always could meet your demands, like delete apps. But you cannot find any option titled deleting Spotlight search or similar in the Settings app. Does that mean you cannot delete it via Settings? Luckily, the answer is yes.
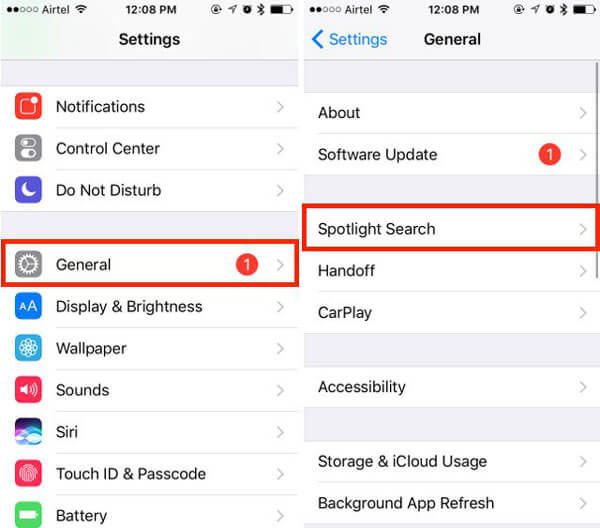
Step 1. Open the iOS Settings app from your home screen; tap your name and head to "General" > "Spotlight Search".
Step 2. On the screen, put the switch of "Siri Suggestions" to "OFF" position to disable it, and then turn it back on.
This way could delete Spotlight search history and give you a clear Spotlight search screen. Actually, Apple does not allow you to customize a lot of things related to the Spotlight search on your iPhone, and even not offer a dedicated deleting option for this feature. The procedure above is able to clear Spotlight search history from the screen, but not really remove it from your device.
Way 2: Delete Spotlight search by resetting iPhone
The more drastic method to delete Spotlight search history on your iPhone is to reset entire device. iOS users may be familiar with factory reset, partly because it is an effective way to fix various software problems on iPhone and iPad. It is able to erase all content and personal data on your iPhone, including the Spotlight search history.
Step 1. Make a backup for your iPhone using iCloud or iTunes before deleting Spotlight search history.
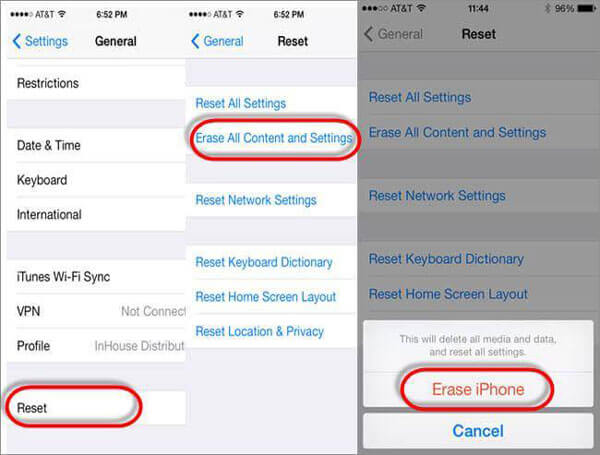
Step 2. Run the iPhone Settings app from the home screen, tap your name and navigate to "General" > "Reset".
Step 3. Select "Erase All Content and Settings" on the Reset settings screen and tap "Erase iPhone" again to perform factory reset on your iPhone.
Step 4. When it is done, your iPhone will restart and display the welcome screen. Next, you can restore important files from iCloud or iTunes backup.
Part 2. Erase Spotlight Search History on iPhone permanently
While there is no actual option to delete Spotlight search history on iOS devices, you can use the indirect methods whenever you want to get rid of the search history that Spotlight displays.
Actually, Spotlight search history records a lot of things, your preferences and privacy. So, you may need a professional tool to erase Spotlight search history on your device.
From this point, we recommend Apeaksoft iPhone Eraser. Its main features include:
- 1. It has the capacity to delete Spotlight search history and other data on your iPhone in one click.
- 2. And you can erase all privacy, accounts and other private information on iOS device permanently.
- 3. It works on all data types on iPhone, including Spotlight search history, contacts, call history, videos, photos, music, and app data.
- 4. The iPhone Eraser supports almost all iOS devices, like iPhone 16/15/14/13/12/11/X, etc., iPad Pro/Air/mini, and iPod Touch.
- 5. It is available to Windows 11/10/8/8.1/7/XP and macOS.
In short, it is the easiest way to delete Spotlight search history for your iPhone.
How to delete Spotlight search on iPhone in one click
Setp 1. Connect iPad to the iPad erasing application
iPhone Eraser has two versions, one for Windows PC and the other one for Mac OS. You can download the right version according to the operating system, double click the installation file and follow the onscreen instructions to install it to your computer. Next, connect your iPhone to your computer via the Lightning cable came with your device.
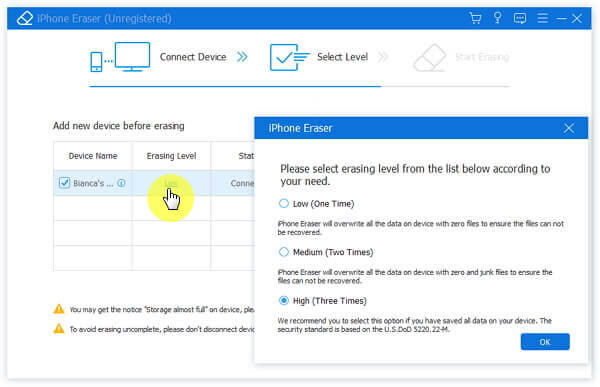
Setp 2. Choose a proper erasing level
Launch the best iPhone erasing software and it will recognize your iPhone automatically. When the alert pops up on your iPhone, unlock it and tap Trust to continue. Then the software will show you three options related to erasing level. The Low level erases your iPhone via overwriting once. The Medium level overwrites your device twice and the High level repeats it for three times.
The higher the erasing level, the more times the application overwrites your iPhone.
If your iPhone does not show up in the software, you should try another USB cable and update iTunes to the latest version.
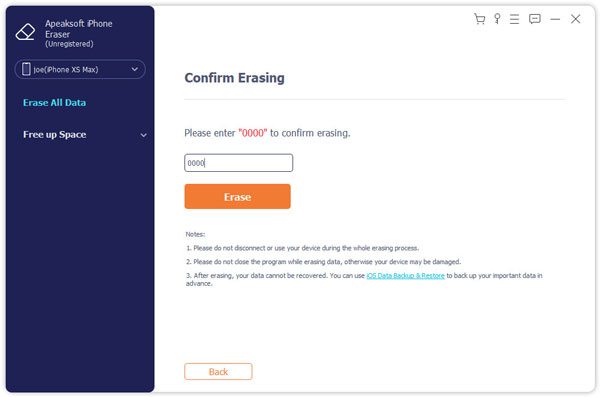
Setp 3. Delete Spotlight search in one click
After selecting a proper erasing level, you will be directed to the next window. Click the Start button if you are ready. Then the best iPhone erasing program will start doing its job and deleting Spotlight search history on your iPhone at one time.
Note: You should understand that iPhone Eraser not only deletes Spotlight search history, but also removes other data on your iPhone, like contacts, videos, photos, etc. If you do not want to lose these files, you'd better make a backup for your entire smartphone. In addition, after being erased, you can restore the backup to your device.
Conclusion
The Spotlight is a handy feature on iPhone and iPad, and allows you to quickly access what you want. However, Apple does not offer any way to delete Spotlight search history. Fortunately, you might understand how to delete Spotlight search history on your iPhone based on our guides above. If you are searching for a professional method to clean up the Spotlight search screen, Apeaksoft iPhone Eraser could meet your requirements. It is not only easy to use, but able to wipe up your device permanently. We hope that our guides and suggestions are helpful.