Comment transférer des photos d'un ordinateur vers un iPhone
Apple a publié plusieurs façons de transférer des photos iPhone vers un ordinateurPour transférer des photos d'un ordinateur vers un iPhone, plusieurs méthodes s'offrent à vous. Chacune convient à des situations différentes. Choisir la méthode appropriée simplifie le processus et préserve la qualité de vos photos. Ce guide présente les méthodes éprouvées, leurs prérequis et les étapes à suivre. Vous pourrez ainsi ajouter des photos à votre appareil iOS sans perte de qualité.
CONTENU DE LA PAGE :
- Partie 1 : La méthode rapide pour transférer des photos d’un PC vers un iPhone
- Partie 2 : Comment transférer des photos d’un ordinateur vers un iPhone via iCloud Drive
- Partie 3 : Comment transférer des photos de votre ordinateur vers votre iPhone à l’aide d’iCloud Photos
- Partie 4 : Comment synchroniser des photos de votre Mac vers votre iPhone via AirDrop
- Partie 5 : Comment transférer des photos de son ordinateur vers son iPhone par e-mail
- Partie 6 : Comment transférer des photos de votre PC vers votre iPhone avec iTunes
Partie 1 : La méthode rapide pour transférer des photos d’un PC vers un iPhone
Si vous avez besoin d'un moyen rapide d'exporter des photos de votre PC vers votre iPhone, Apeaksoft iPhone Transfer est une bonne option. Elle vous permet d'ajouter n'importe quelle photo de votre disque dur à votre appareil iOS. Plus important encore, le logiciel transcode automatiquement les photos pendant le processus.
Un moyen rapide de transférer des photos de votre PC vers votre iPhone ou iPad
- Ajoutez rapidement un nombre illimité de photos de votre PC vers votre iPhone.
- Prévisualisez et gérez les photos de votre iPhone.
- Réencodez les fichiers photo pendant le processus.
- Préservez la qualité de vos photos grâce à une technologie de pointe.
- Prend en charge les dernières versions d'iOS et d'iPhone.
Téléchargement sécurisé
Téléchargement sécurisé

Comment transférer des photos d'un PC vers un iPhone
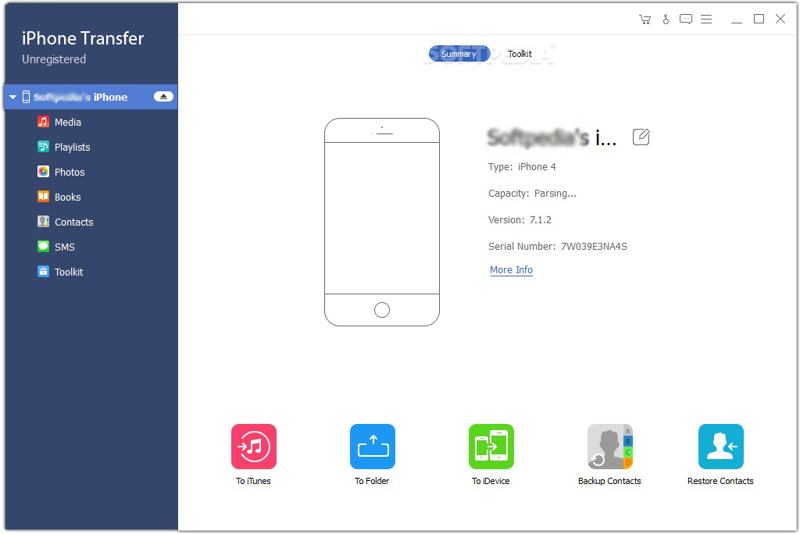
Étape 1 : Détectez votre iPhone
Lancez iPhone Transfer une fois installé sur votre PC. Une version pour Mac est également disponible. Connectez votre iPhone à votre PC à l'aide d'un câble Lightning. Si vous y êtes invité, appuyez sur Confiance sur votre écran pour faire confiance à ce PC. Le logiciel détectera alors immédiatement votre appareil.
Étape 2 : Aperçu des photos de l'iPhone
Rendez-vous dans la section Photos L'onglet dans la barre latérale permet d'afficher toutes les photos de votre iPhone. Si votre iPhone ne dispose pas de suffisamment d'espace de stockage, sélectionnez les photos indésirables et cliquez sur l'icône correspondante. effacer bouton pour libérer de l'espace.
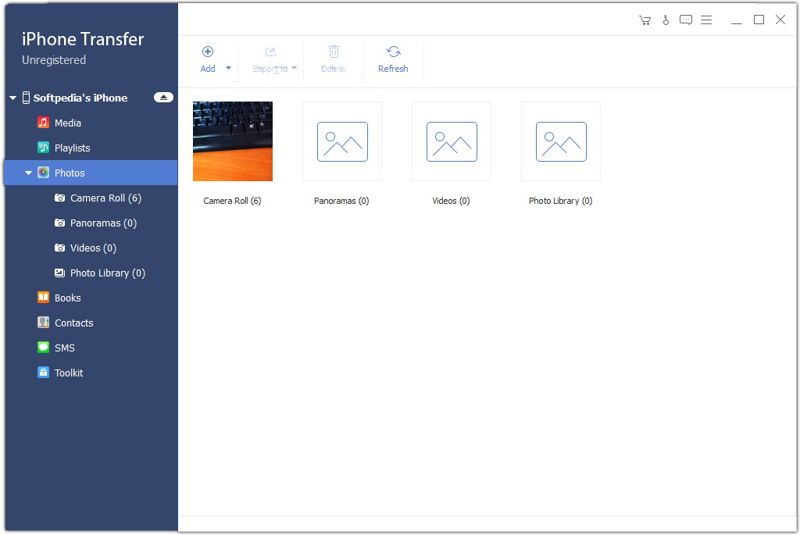
Étape 3 : Exporter des photos de mon PC vers mon iPhone
Accédez à l'album souhaité et cliquez sur Ajouter bouton dans le ruban supérieur. Repérez les photos que vous souhaitez transférer, sélectionnez-les et cliquez dessus. Ouvrez. Vous pouvez également Transférer les livres iBooks de l'iPad vers l'ordinateur avec ce programme.

Partie 2 : Comment transférer des photos d’un ordinateur vers un iPhone via iCloud Drive
iCloud Drive est un moyen simple de transférer des photos d'un ordinateur vers un iPhone sans fil. Cette méthode nécessite une connexion internet stable. Notez qu'elle n'est pas recommandée pour transférer de nombreux fichiers image volumineux.
Étape 1 : Ouvrez un navigateur et rendez-vous sur www.icloud.com et connectez-vous avec votre compte Apple.
Étape 2 : Choisissez icloud lecteur.
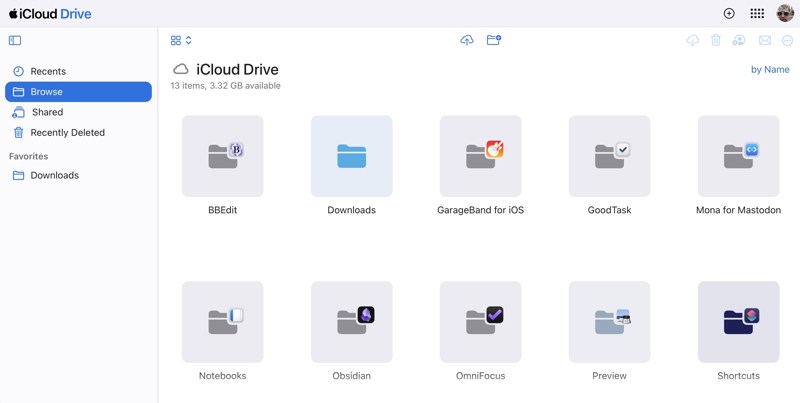
Étape 3 : Rendez-vous dans la section Explorer languette.
Étape 4 : Cliquez sur Télécharger une présentation Cliquez sur le bouton, sélectionnez les photos souhaitées et téléchargez-les.
Étape 5 : Prenez votre iPhone, lancez l'application Documents officiels application et choisissez icloud lecteur pour charger les photos.
Partie 3 : Comment transférer des photos de votre ordinateur vers votre iPhone à l’aide d’iCloud Photos
Photos iCloud est une méthode sans fil permettant de transférer des photos d'un ordinateur vers un iPhone et inversement. Elle fonctionne via une connexion Internet. Cependant, elle synchronise toutes les photos sur votre iPhone sans prévisualisation.
Sur un ordinateur :
Étape 1 : Installez l'application iCloud, ouvrez-la et connectez-vous avec votre compte Apple.
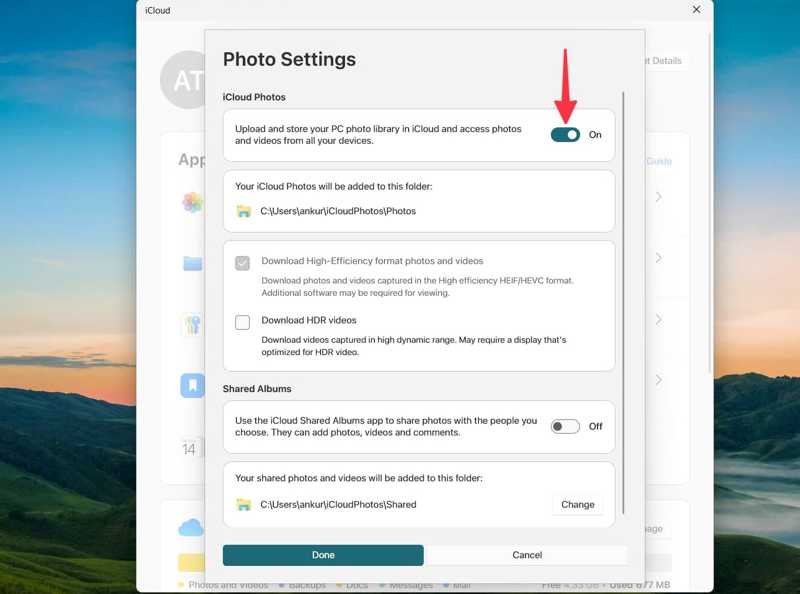
Étape 2 : Cliquez à nouveau icloud Photos et allumez-le.
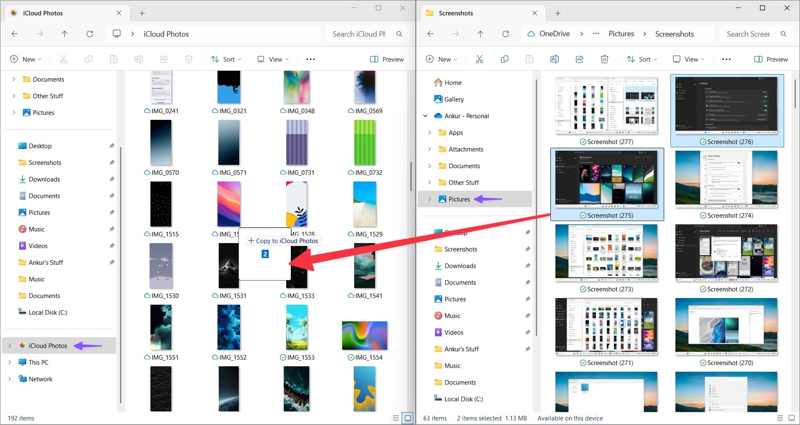
Étape 3 : Ouvrez l'explorateur de fichiers et ajoutez les photos souhaitées au icloud Photos dossier.
Sur un Mac:
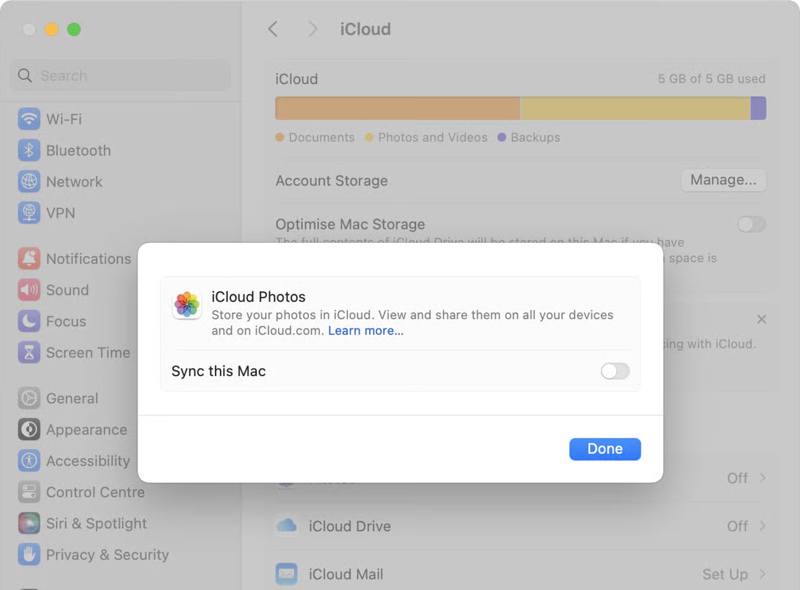
Étape 1 : Cliquez sur Apple menu et choisissez Les paramètres du système.
Étape 2 : Cliquez sur votre identifiant Apple, puis choisissez iCloud.
Étape 3 : Sélectionner Photos, activez Synchroniser ce MacEt cliquez OK.
Transférer des photos de l'ordinateur vers l'iPhone
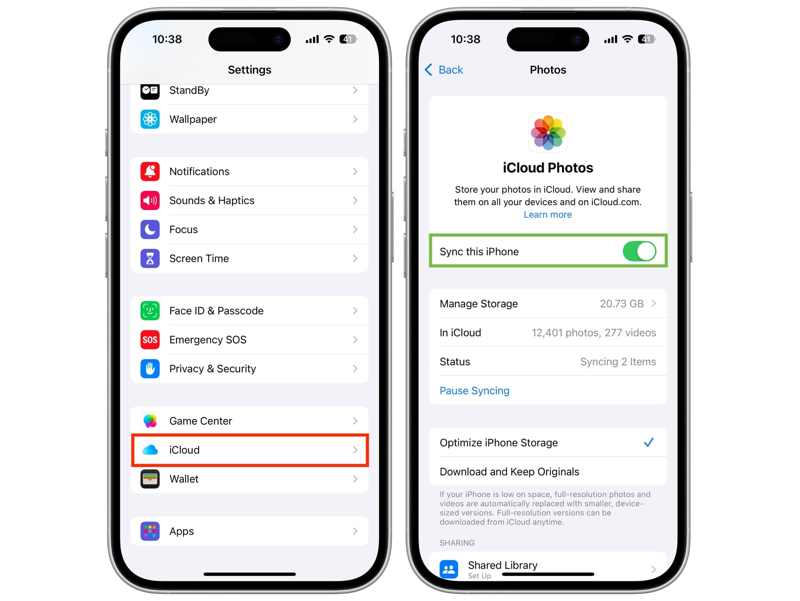
Étape 1 : Appuyez sur votre profil dans votre Paramètres app.
Étape 2 : Connectez votre iPhone au Wi-Fi ou aux données cellulaires.
Étape 3 : Choisissez iCloud, robinet Photos, et activez Synchroniser cet iPhone.
Partie 4 : Comment synchroniser des photos de votre Mac vers votre iPhone via AirDrop
Si vous utilisez un MacBook, AirDrop est un moyen rapide de synchroniser sans fil vos photos de votre Mac vers votre iPhone. Cette méthode ne nécessite aucun logiciel ni matériel supplémentaire, mais elle n'est pas adaptée à la synchronisation d'un grand nombre de photos. Cependant, si votre version de macOS est ancienne, AirDrop peut ne pas fonctionner.
Étape 1 : Allumez votre iPhone et accédez à la Control Center.
Étape 2 : Exploiter Wi-Fi et Bluetooth pour les activer.
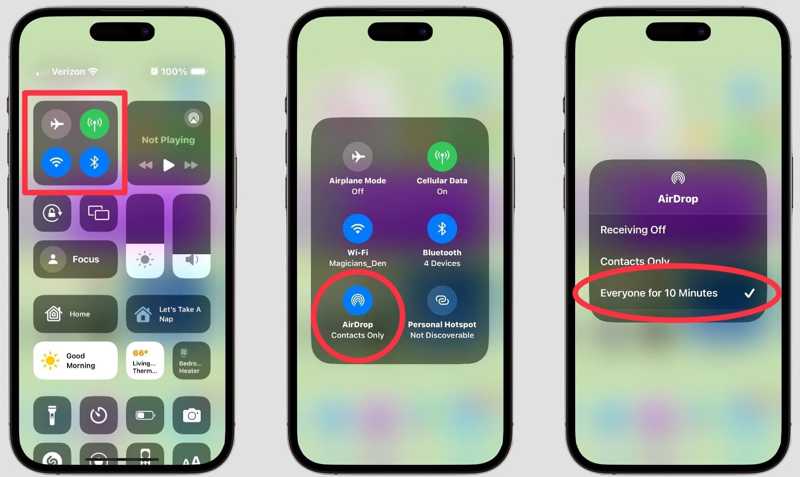
Étape 3 : Appuyez longuement sur le panneau réseau et appuyez sur parachutage.
Étape 4 : Choisissez Everyone or Tout le monde pendant 10 minutes.
Étape 5 : Ouvrez Finder sur votre Mac, et choisissez parachutage sur la barre latérale.
Étape 6 : Choisissez Everyone à partir de Permettez-moi d'être découvert par.

Étape 7 : Exécutez votre Photos Dans l'application, faites glisser et déposez les photos souhaitées sur votre iPhone, puis nommez-les sur l'application. parachutage avec l'écran du tableau des commandes prêtes.
Étape 8 : Ensuite, appuyez sur Accepter sur votre iPhone pour recevoir les photos.
Partie 5 : Comment transférer des photos de son ordinateur vers son iPhone par e-mail
Si vous souhaitez simplement transférer plusieurs photos de votre ordinateur vers votre iPhone, l'e-mail est une autre solution. Cette méthode ne nécessite aucun service, hormis une adresse e-mail. Toutefois, vous devez utiliser un format compatible avec iOS.
Étape 1 : Créez un nouveau courriel dans un navigateur ou une application de messagerie sur votre ordinateur.
Étape 2 : Ajoutez les photos en pièces jointes et envoyez l'e-mail.
Étape 3 : Tournez-vous vers votre iPhone.
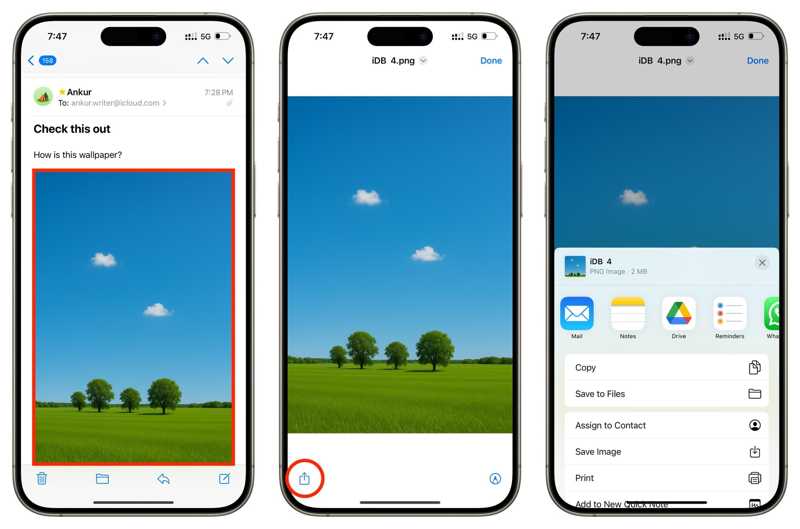
Étape 4 : Ouvrez l'application Mail et lisez le nouveau courriel.
Étape 5 : Appuyez sur une pièce jointe image, puis appuyez sur Share bouton, et choisissez Enregistrer l'image.
Partie 6 : Comment transférer des photos de votre PC vers votre iPhone avec iTunes
Une autre façon de transférer des photos d'un PC vers un iPhone via USB est d'utiliser iTunes. Ce logiciel permet de synchroniser un dossier photo de votre disque dur avec votre iPhone sans connexion réseau. Cette méthode nécessite la dernière version d'iTunes.
Étape 1 : Branchez votre iPhone à votre PC à l'aide d'un câble USB.
Étape 2 : Ouvrez iTunes et cliquez sur le bouton Téléphone bouton une fois votre appareil détecté.
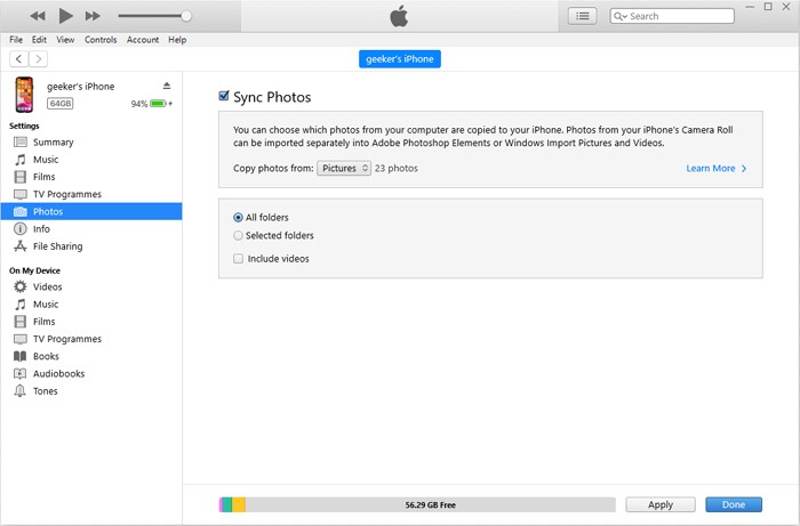
Étape 3 : Rendez-vous dans la section Photos onglet sous Paramètres .
Étape 4 : Vérifiez Photos Sync.
Étape 5 : Tirez le Copier des photos à partir de puis sélectionnez cette option et choisissez le dossier qui contient les photos souhaitées.
Étape 6 : Enfin, cliquez sur le Appliquer bouton pour le confirmer.
Conclusion
Vous devriez maintenant apprendre au moins 6 méthodes pour Transférer des photos de PC et Mac vers iPhone Avec un câble USB ou sans fil, choisissez la méthode qui vous convient le mieux en suivant nos instructions et les étapes indiquées pour transférer rapidement vos photos sur votre iPhone. Apeaksoft iPhone Transfer est un moyen rapide de terminer le travail sans perte de qualité.
