How to Solve Unable to Activate Touch ID on iPhone/iPad
"Recently, I received the message saying Unable to activate Touch ID on this iPhone after restarting my device. How can I fix this problem?" Touch ID is a biometric technology with fingerprints. However, it may be working abnormally due to software glitches or hardware damage. This article explains why the error occurs and provides verified solutions to fix it on your iPhone or iPad quickly.
PAGE CONTENT:
Part 1: Why Unable to Activate Touch ID on iPhone
The Unable to Activate Touch ID on This iPhone or iPad error can be frustrating, but it is a common issue with a few potential causes. That prevents you from unlocking your device with fingerprints. The common causes include:
1. Software glitches.
2. Dirty or wet sensor.
3. Conflict settings.
Part 2: How to Fix Unable to Activate Touch ID on This iPhone/iPad
Solution 1: Clear Touch ID Sensor
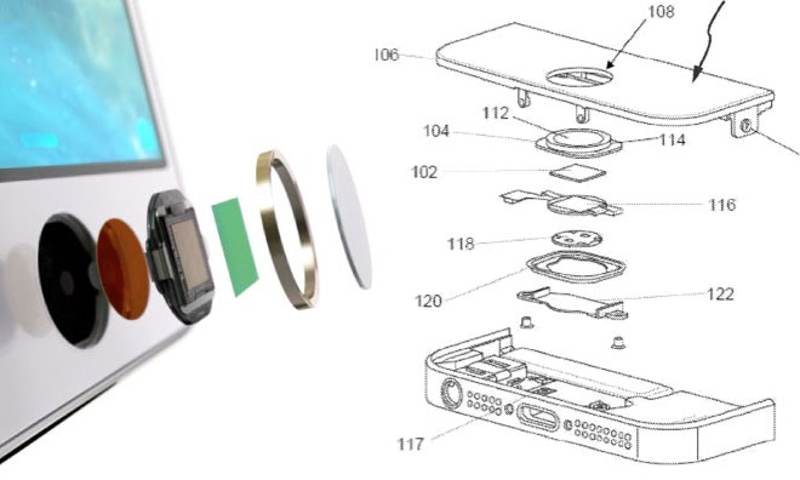
Touch ID comes with a fingerprint identity sensor that is built into either the Home button or Power button on your Apple device. If it is covered with water or dirt, you may encounter the error: Unable to activate Touch ID on this iPhone. The solution is clearing your Touch ID sensor with a clean, lint-free cloth. Plus, make sure that your finger is clean and dry.
Solution 2: Activate Touch ID
Incorrect actions when adding your fingerprint may result in Unable to activate Touch ID on this iPad or iPhone. We demonstrate the right workflow to activate Touch ID on your device.
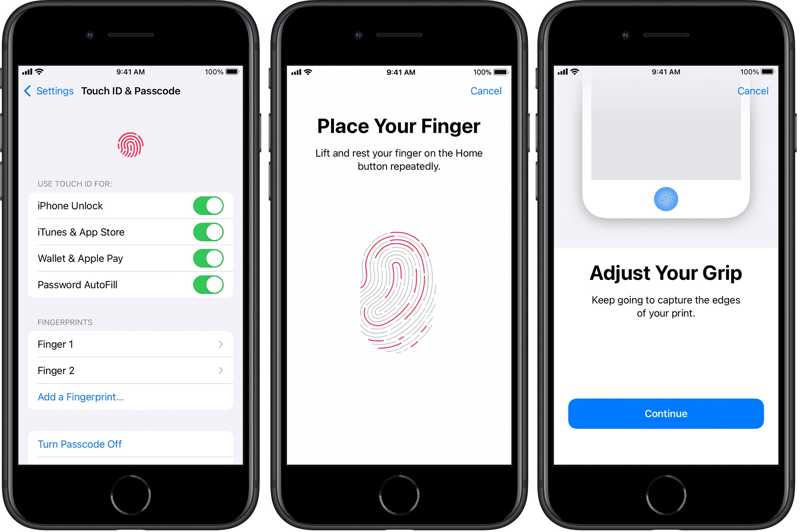
Step 1. Open the Settings app on your device.
Step 2. Go to the Touch ID & Passcode tab.
Step 3. Enter your passcode when prompted.
Step 4. Tap Add a Fingerprint.
Step 5. Follow the instructions to touch the Touch ID sensor with your finger.
Step 6. Back to the Touch ID & Passcode settings screen and toggle on iPhone Unlock.
Step 7. If you want to use Touch ID for other features, toggle on them under the USE TOUCH ID FOR section.
Solution 3: Force Restart Your Device
If your device gets stuck on the Unable to activate Touch ID error, you can get rid of it by force restarting your iPhone or iPad. The button combination is different depending on your device model.
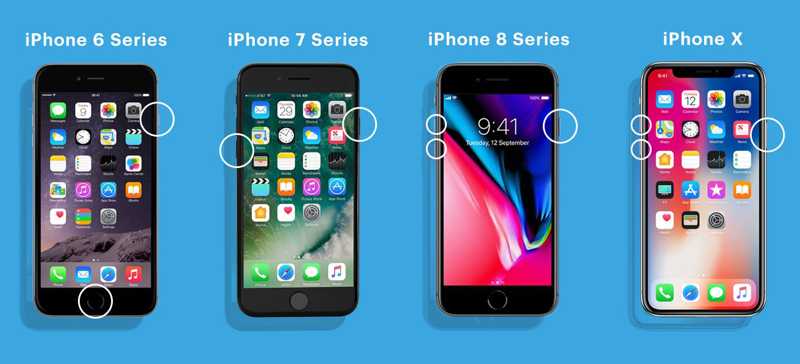
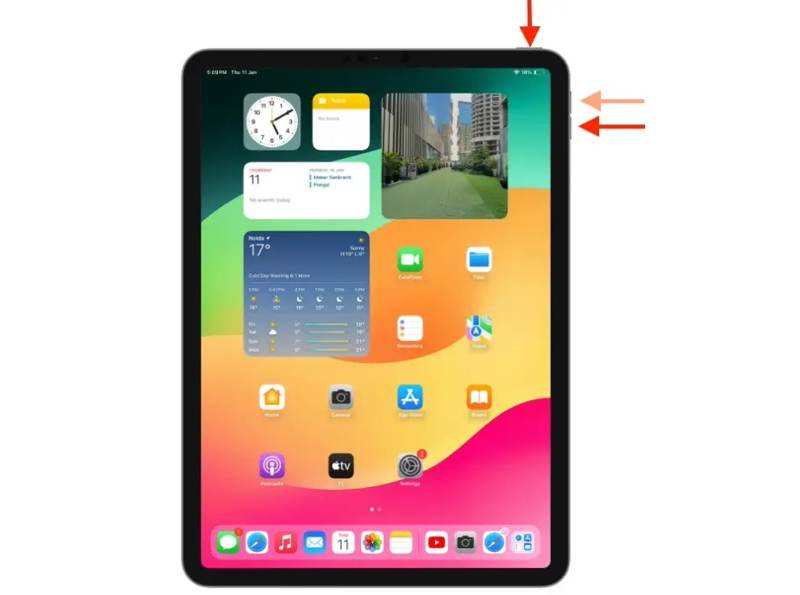
On an iPhone 8 or Later, an iPad Without a Home Button
Quickly press and release the Volume Up button.
Do the same thing with the Volume Down button.
Hold the Side button until the Apple logo appears.
On an iPhone 7/7 Plus
Hold the Volume Down + Side buttons simultaneously.
Release the buttons until you see the Apple logo.
On an iPhone 6s or Earlier, an iPad with a Home Button
Hold the Home + Sleep/Wake buttons together.
When you see the Apple logo, release the buttons.
Solution 4: Reset Touch ID
Another solution to get rid of the error message stating Unable to activate Touch ID on iPhone or iPad is to reset this feature. You can delete all saved fingerprints and add new ones on your device.
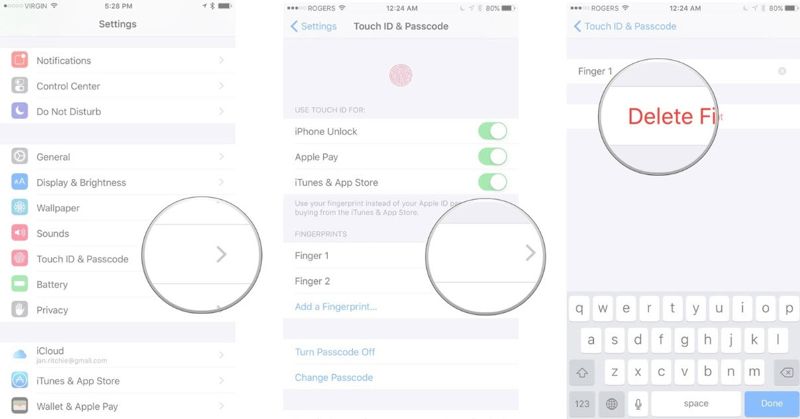
Step 1. Run your Settings app.
Step 2. Go to Touch ID & Passcode and input your passcode.
Step 3. Tap Finger 1 and hit Delete Fingerprint. If prompted, confirm the deletion.
Step 4. Repeat the step above to delete other fingerprints.
Step 5. Then restart your device.
Step 6. Go to Touch ID & Passcode in the Settings app.
Step 7. Tap Add a Fingerprint and follow the prompts to scan your fingerprint.
Solution 5: Reset All Settings
If the conflict settings trigger the Unable to activate Touch ID error, you have to reset all settings on your device. That brings the settings to the factory status. This solution won’t interrupt existing data on your device.
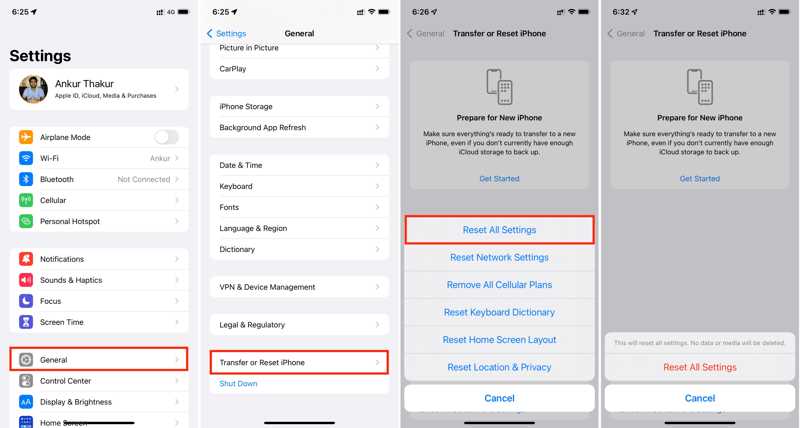
Step 1. Start your Settings app.
Step 2. Go to the General tab.
Step 3. Select Transfer or Reset iPhone.
Step 4. Tap Reset and choose Reset All Settings.
Step 5. Enter your passcode or Apple ID password if prompted.
Step 6. Finally, hit Reset All Settings on the alert box to confirm it.
Part 3: How to Bypass Touch ID and Unlock iPhone/iPad
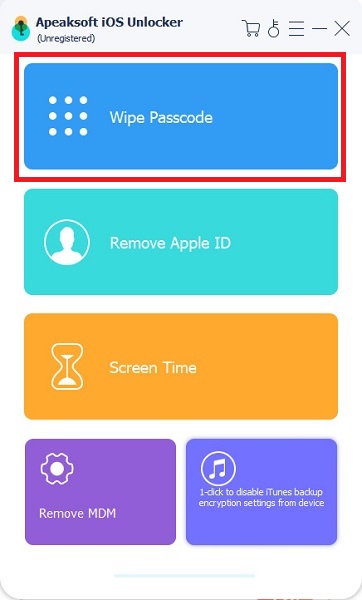
The Unable to activate Touch ID error locks your device. As a result, you cannot unlock your iPhone or iPad. Fortunately, Apeaksoft iOS Unlocker is able to solve this problem. It removes all screen locks on your iPhone or iPad without any restrictions.
The Simplest Way to Remove Touch IDs on Your iPhone or iPad
- Erase screen locks from an iPhone/iPad with three steps.
- Available to digit passcodes, Touch IDs, and Face IDs.
- Don’t require your Apple ID password or passcode.
- Offer bonus features, like Screen Time bypass.
- Compatible with the latest models of iPhone and iPad.
Secure Download
Secure Download

How to Remove Touch IDs and Unlock Your iPhone
Step 1. Link your devices
Launch the best Touch ID removal tool after you install it on your computer. Link your iPhone or iPad and the computer with a Lightning cable. Choose the Unlock iOS Screen mode and click the Start button.
Step 2. Download the firmware
Once your device information is loaded, check each item. Then, click the Start button to confirm the information and download the firmware package.
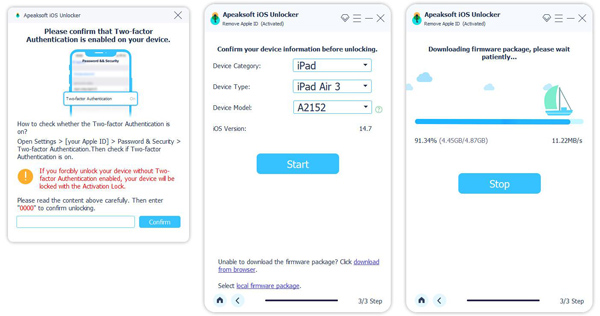
Step 3. Unlock your iPhone
When the download finishes, click OK and then press the Confirm Again buuton to begin wiping your Touch IDs. When it is done, you can unlock your device without any block.
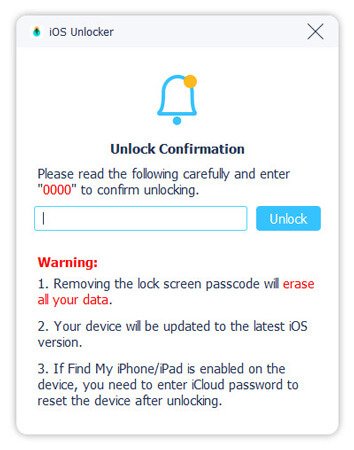
Tips: The software erases your data during the process. Therefore, you’d better back up your device first.
Conclusion
This guide explained why the message saying Unable to activate Touch ID on this iPad/iPhone occurs and how to resolve this error. You can follow our solutions one by one to get rid of the error and regain access to your device. Apeaksoft iOS Unlocker can remove your Touch IDs from your iPhone or iPad without any password. If you have other questions about this topic, please feel free to write them down below this post.
Related Articles
This article explains why Touch ID failed and is not working, as well as the proven solutions to help you get rid of the error.
What if you forget the Touch ID passcode or the Touch ID doesn't work? Check the best way to remove the Touch ID passcode.
Have you met the ghost touch? Do you know how to fix ghost touch on Android phones? This post will give you everything you want to know.
Do not panic when your Samsung touchscreen is not working! This post will tell you why you meet this issue and how to solve it with five methods.
