A factory reset is often a last resort for iPhone users facing various issues, such as forgotten passwords, unresponsive software, or the need to wipe the iOS device before selling or giving it away. However, performing a factory reset on an iPhone typically requires the passcode, which can pose a significant challenge if the password is forgotten. This article will share three simple ways to factory reset an iPhone without a password, giving you options to regain control of your device.

- Part 1. Best Way to Factory Reset iPhone
- Part 2. Factory Reset iPhone Using iCloud
- Part 3. Factory Reset iPhone Through iTunes
- Part 4. FAQs of How to Factory Reset iPhone Without Password
Part 1. Best Way to Factory Reset an iPhone Without a Password
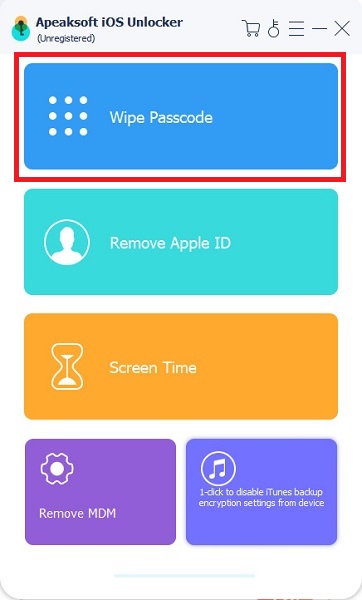
You cannot know how to factory reset a locked iPhone if you don't know the current iPhone lock screen or iCloud password. In that case, you can use the powerfu iOS Unlocker to reset your iPhone to its factory settings without a password.

4,000,000+ Downloads
Wipe your iPhone lock screen password, Face ID, and Touch ID.
Remove the forgotten iCloud and Apple ID passwords safely.
Bypass Screen Time restrictions and erase the iTunes backup passcode.
Factory reset your iPhone without the iCloud password.
Step 1 To factory reset an iPhone and wipe all content, download the iOS Unlocker on your computer first. When you enter it, choose the Unlock iOS Sreen feature. Connect your iOS device to your computer and click the Start Now button.
Step 2 To understand how to factory reset an iPhone when locked, you have to check the device information and download the associated firmware package from the Apple server. It's essential to reset an iPhone when you don't know the passcode.
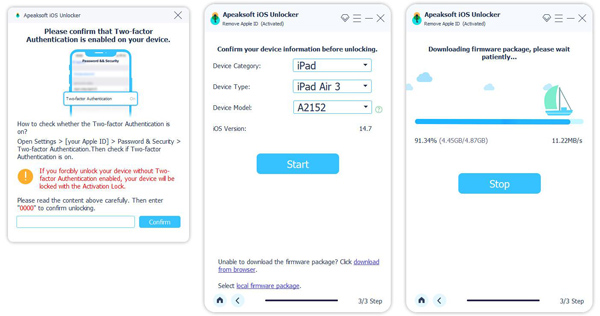
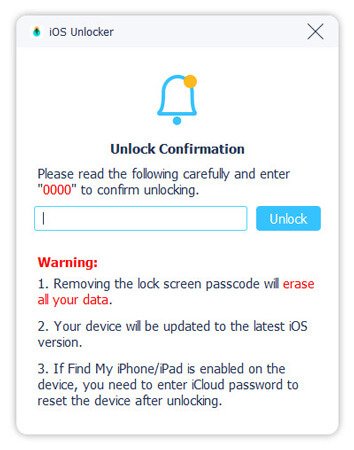
Step 3 When the firmware downloading process is finished, click OK and Confirm Again to factory reset your iPhone without a password or iTunes. This operation will remove the current iPhone screen lock, Touch ID, and Face ID. The iPhone will reboot itself and return to its brand-new condition.
Part 2. How to Factory Reset Your iPhone Without a Password Using iCloud
In case you need to reset your iPhone but have forgotten your password, iCloud provides an effective solution for performing a factory reset. This method will teach you how to reset an iPhone to factory settings without a password. If you have enabled the Find My iPhone feature and linked your iPhone to iCloud, follow the guide to factory reset your iPhone remotely.
Step 1 Open a web browser on any device and navigate to the official iCloud website. You need to sign in to your iCloud account using your Apple ID and password.
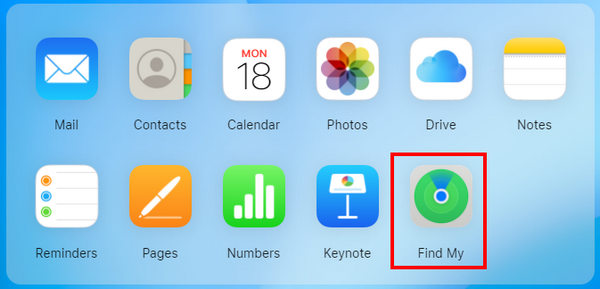
Step 2 After signing in, you will see various iCloud services. Locate and click the Find iPhone button. This service lets you remotely access and control your iPhone.
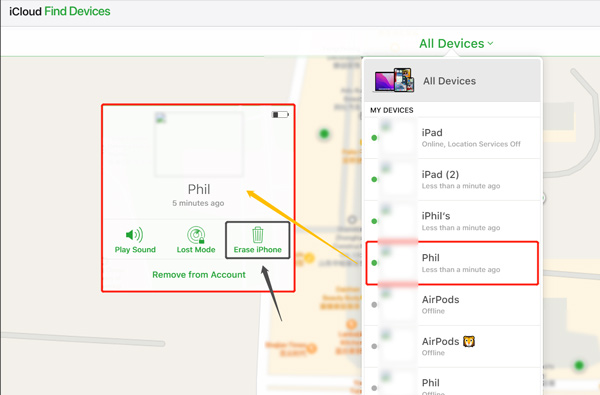
Step 3 In the top center of the screen, you will find a dropdown menu labeled All Devices. Click it and select the iPhone you want to factory reset. Click the Erase iPhone button and confirm your decision to proceed.
After initiating the erase command, iCloud will begin remotely resetting your iPhone. iCloud Find can factory reset an iPhone without iTunes, but you still have to set up your iPhone with iTunes or iCloud backups. Ensure your iPhone is under a stable WiFi connection throughout the process. The factory reset process may take a few minutes to complete, depending on your internet connection speed.
Part 3. How to Factory Reset Your iPhone Without a Password Through iTunes
Another reliable way to factory reset an iPhone without a password is using iTunes. This method requires you to have previously synced your iPhone with iTunes on a computer.
Step 1 Before proceeding with the factory reset, ensure you have the newest iTunes installed on your computer. You can update your iTunes or download the latest version from the official Apple website. Once installed, launch iTunes and connect your iPhone to the computer using a USB cable.
Step 2 To initiate the factory reset process, you need to put your iPhone into Recovery Mode. The steps to do this vary depending on the iPhone model.
For iPhones with a Home button, follow these steps:
1. Disconnect your iPhone from the computer and power it off.
2. Press the Home button while connecting your iPhone to the computer with the official lightning USB cable.
3. Keep pressing the Home button until the Recovery mode screen appears on your device.
For iPhones without a Home button, iPhone X and later, follow these steps instead:
1. Disconnect your iPhone from your computer.
2. Power off your iPhone by holding the Side button and either volume button until the slider displays, then slide it to power off.
3. Press and hold the Side or top button until the recovery mode screen shows on your iPhone.

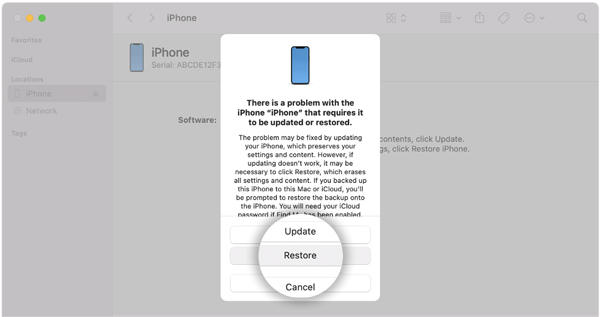
Step 3 Once your iPhone enters the Recovery Mode, iTunes will detect it and display a message indicating that your iPhone has a problem. Click the Restore iPhone button. Click Restore to proceed with the factory reset process.
iTunes will download the latest iOS software for your iPhone. After it resets the iPhone without a password, your iPhone will be restored to its factory settings. You will need to set it up as a new device or restore it from a previous backup.
Part 4. FAQs of How to Factory Reset iPhone Without Password
Is hard reset the same as factory reset?
Yes, hard reset and factory reset are often used interchangeably, but their exact meaning may vary slightly depending on the context. Generally, both terms refer to the process of restoring a device to the original factory settings and erasing all files and configurations.
What happens to iCloud if I factory reset my iPhone?
After you factory reset your iPhone, it will remove all the iOS data, settings, and accounts from the device, including your iCloud account. However, the data stored in your iCloud account will not be deleted. After resetting your iPhone, you can sign in to your iCloud account again and access these files from other devices or restore them to your iPhone if needed.
Can I hard reset my iPhone without losing data?
A hard reset or factory reset on an iPhone usually erases all the data on the device. If you want to keep your data safe, it's important to back up your iPhone before performing a reset. You can do this through iCloud or by connecting your iPhone to a computer and using Finder or iTunes.
How do you factory reset a locked iPhone?
To factory reset a locked iPhone, you can guide your device into Recovery mode and then use Finder or iTunes to restore it. Also, you can use the popular iPhone Eraser to do that.
Conclusion
Performing a factory reset on your iPhone without a password may seem daunting. Still, with the three methods above, you can handily reset your device and start fresh, resolving any issues you may have been experiencing. Remember to back up your important data before proceeding with the factory reset.