FaceTime is an Apple's video calling feature. It provides a very convenient way to make video or audio calls with other iOS users. However, many users complain the issue that FaceTime not connecting.
Do you know how to fix FaceTime not connecting?
In this tutorial, we are going to show you common tips and ultimate ways to fix this FaceTime not connecting problem. Just check out the reasons that may cause this error and effective ways to get rid of it from this page.

- Part 1: Facetime not connecting? Why?
- Part 2: Common ways to fix FaceTime not connecting
- Part 3: An ultimate way to fix facetime not connecting
Part 1: Facetime not connecting? Why?
There are many factors could lead to FaceTime not connecting, such as:
- 1. Poor Wi-Fi connection.
- 2. Outdated software or FaceTime app.
- 3. Incorrect configuration settings.
- 4. Conflict with third party apps.
- 5. Lack space on iPhone.
- 6. Unexpected errors.
According to our survey, this problem is usually caused by software errors but not hardware, so we will focus on these aspects when troubleshooting.
Part 2: Common ways to fix FaceTime not connecting
The FaceTime feature works on iPhone, iPad, iPod and Mac. When encountering the problem that FaceTime not connecting, follow the tips below to fix it simply.
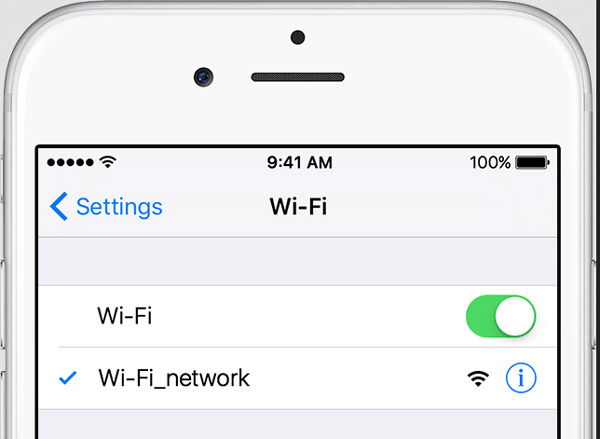
Tip 1: Cellular/Wifi
Video chatting needs a good Internet connection, so does FaceTime. Make sure that your iPhone is connecting to a good Wi-Fi network. Or you can use FaceTime through cellular data plan on iPhone 4s or later and iPad 3rd generation or above.
This solution also works when FaceTime with a group of contacts does not work on iPhone.
Tip 2: Airplane mode
It will disconnect all wireless connection if you have turned on Airplane mode accidently. Open your "Control Center" and touch the "Airplane" button if it is enabled. You can try to turning on and off the Airplane mode to confirm it.

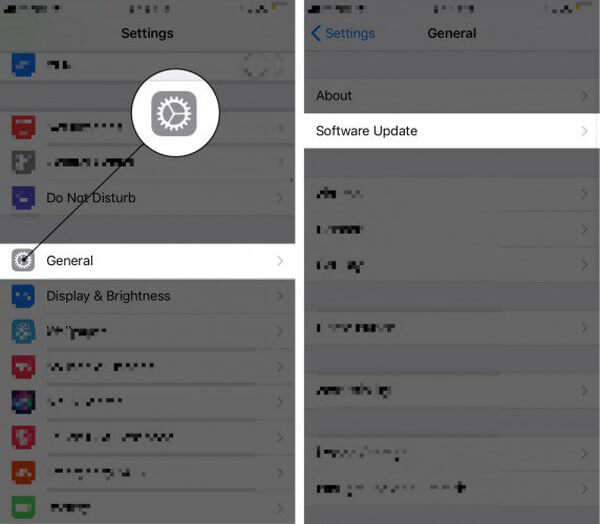
Tip 3: Update iOS
Software update is always an important troubleshooting for iPhone, including fix the FaceTime not connecting problem.
Step 1. Head to "Settings" >"General" >"Software Update" and tap "Download and Install" button if there is new update.
Step 2. Follow the onscreen instructions to complete iOS update, and then try FaceTime again.
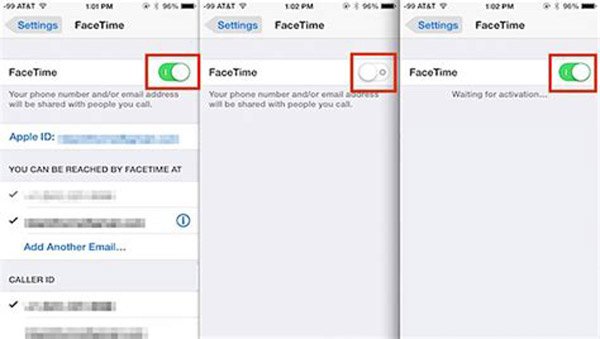
Tip 4: Reactivate FaceTime
When FaceTime not connecting happens, reactivating the feature is another effectively for troubleshooting.
Step 1. Open the "Settings" app, you can go to FaceTime.
Step 2. Move the switch to "OFF" and then slide it to "ON" again.
Step 3. Run FaceTime app to test if it works normally.
Tip 5: Reset network settings
If FaceTime not connecting persists after reactivating, try resetting network settings directly.
Step 1. Locate to "Settings" >"General" >"Reset" and select "Reset Network Settings".
Step 2. After network resetting, start FaceTime app and chat with your friends.

Tip 6: Reset all settings
Another tip when FaceTime not connecting is to reset all settings.
Step 1. Run iPhone Settings app, go to "General" >"Reset" and tap "Reset All Settings".
Step 2. Wait for the process to complete and try FaceTime again.
Part 3: An ultimate way to fix facetime not connecting
If the problem that FaceTime not connecting persistently happens, you can learn about more drastic method to solve it in this part.
Way 1: iOS System Recovery
Apeaksoft iOS System Recovery is a simple way to fix various problems on iPhone, like FaceTime not connecting. It has the capacity to diagnose why FaceTime feature is abnormal and fix it automatically. Moreover, it will not damage existing data on your device when fixing bugs.
- Fix various iOS system problems in one click, including FaceTime not connecting on iPhone/iPad/iPod.
- Recover disabled iOS device in Recovery mode or DFU mode.
- Repair disabled iPhone/iPad/iPod without erasing or damaging current data.
- Support all iOS devices, including iPhone 17/16/15/14/13/12/11, etc. iPad Pro, Air, mini 6/5/4/3/2/1 and earlier models.
- Work well on Windows 11/10/8/8.1/7/XP and Mac OS.
How to fix FaceTime not connecting problem on iPhone
Step 1. Connect iPhone to iOS System Recovery
Get the right version of iOS System Recovery installed on your computer based on the operating system. Connect your iPhone to the computer via Lightning cable and launch the FaceTime fixing tool.
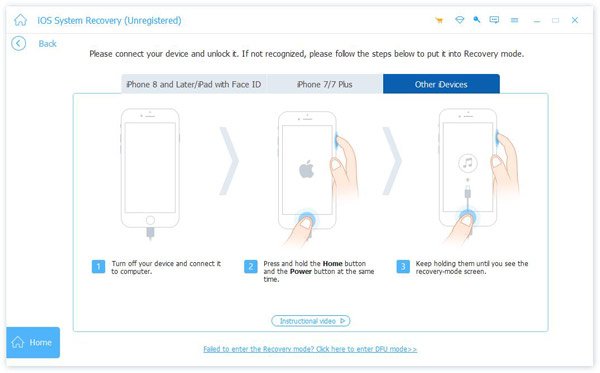
Step 2. Put your iPhone to DFU mode
On the home interface, you can click "Start" to move on. Press the "Question" button and then follow the customized guide to put your iPhone to DFU mode.
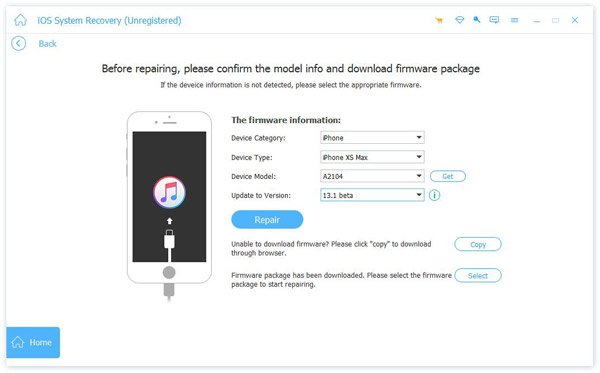
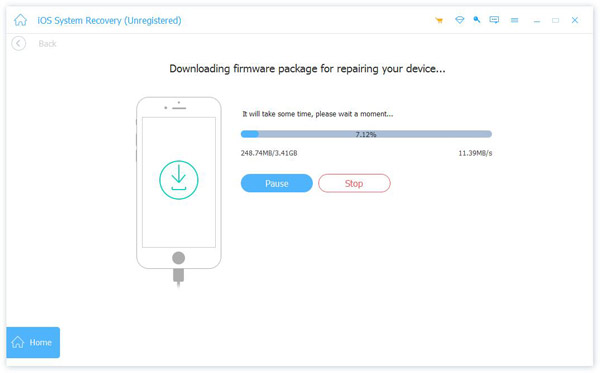
Step 3. Fix FaceTime in one click
When taken into Info window, fill it based on your iPhone model, and then click "Download" button to get the firmware. The FaceTime fixing tool will do its job after downloading automatically. Now, your FaceTime app should work normally.
Besides fixing FaceTime not connecting issue, this powerful iOS System Recovery also enables you to other errors like iPhone stuck on Apple logo, various iTunes errors like iTunes error 14, 17, 4014 and more.
Way 2: Soft reset iPhone
Soft rest iPhone could solve many problems on iPhone, such as FaceTime not connecting or app crashing.
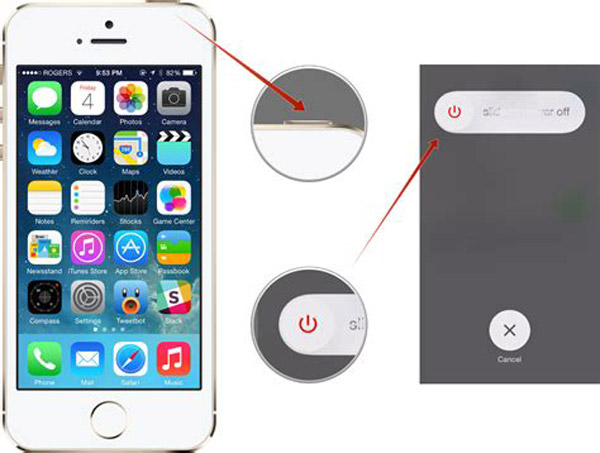
Step 1. Press the "Sleep/Wake" button for a while until power off screen pops up.
Step 2. Slid the switch to shut down your iPhone.
Step 3. A few seconds later, press the "Sleep/Wake" button to turn your iPhone back on. Then try FaceTime again.
Way 3: Clean up iPhone
If your iPhone lacks space, FaceTime cannot work as usual. To free up iPhone storage, you can follow the tips below:
1. Go to "Settings" >"General" >"Storage & iCloud Usage" and select "Manage Storage" under Storage. Here you can look at which apps take up more storage. You can decide to delete some unnecessary apps.
2. Clear cache data in each large app. Navigate to "Settings" >"Privacy" >"Clear Browsing Data" and clean browsing history in Safari.
3. Delete old photos and videos on your iPhone.
Way 4: Restore iPhone
A drastic solution to fix FaceTime not connecting is to restore your device using iTunes.
Step 1. Back up your iPhone to iTunes or iCloud first.
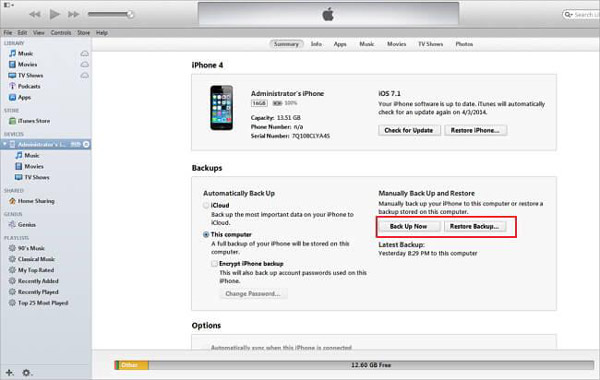
Step 2. Connect your device to your computer via USB cable and start iTunes.
Step 3. Click the "Device" button, go to "Summary" tab and hit "Restore iPhone" to restore iPhone immediately.
Now, restart FaceTime app to test if it works normally.
Way 5: Factory reset iPhone
Another way to fix FaceTime not connecting is to perform factory reset on iPhone
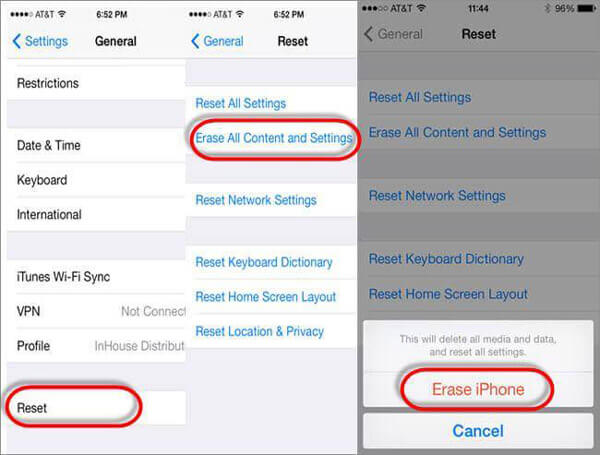
Step 1. Open the iPhone Settings app, head to "General" >"Reset" and tap the option titled "Erase All Content and Settings".
Step 2. Enter your PIN code and tap "Erase iPhone" on the warning message.
Step 3. When it is done, your device restarts and you can access it with your password.
This time you can chat with your friends via FaceTime.
As it said, factory resetting feature erases all content from your device, including personal files, photos and more. You'd better create a backup for your iPhone before resetting.
Conclusion
In this tutorial, we have talked about what you should do when FaceTime not connecting happens. Actually, this problem is more common than you thought, there are many people complained cannot chat with friends via FaceTime in a variety of situations. If your iPhone is able to boot into DFU mode, we suggest you to use Apeaksoft iOS System Recovery, because it supports lossless fixing iPhone. We hope the tips and suggestions above are helpful to you.