How to Organize and Find Photos on iPhone with 7 Tips
iPhone users are more likely to take photos on their handsets, partly because of the excellent lens. However, photo organization is a big challenge for many users. Of course, Apple has realized the problem and introduced a few features to help users manage their photos. Furthermore, Apple has added AI technology to the built-in Photos. This single guide tells you multiple tips for organizing photos on iPhones and iPad devices.
PAGE CONTENT:
Part 1: How to Organize iPhone Photos on iPhone
How to Organize iPhone Photos by Recently Added
All photos you take on your iPhone are saved in the Photos app. Moreover, it can organize photos on your iPhone according to the date by the EXIF data. It lets you view the recent photos on your device.
Step 1. Open the Photos app on your iPhone.
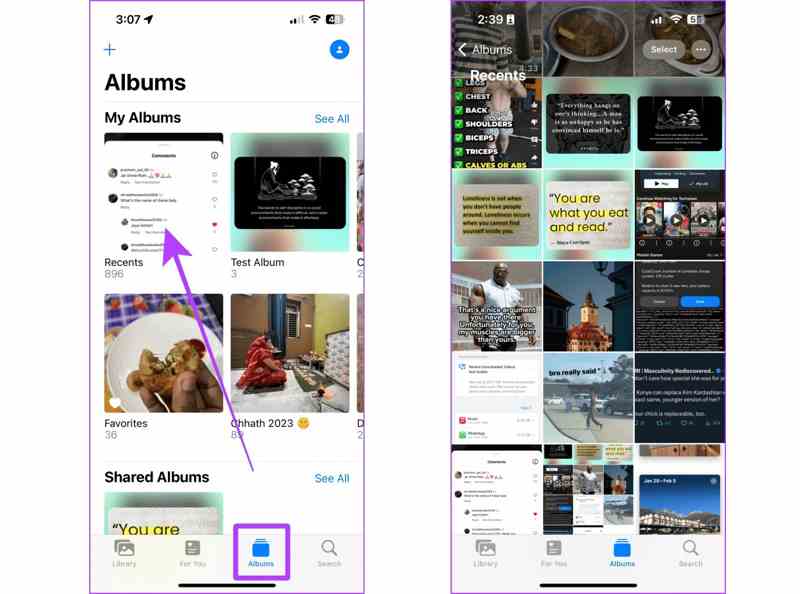
Step 2. Go to the Albums tab at the bottom.
Step 3. Tap Recents to view photos in order of recently saved.
How to Organize iPhone Photos via Albums
The album is the best way to organize photos on your iPhone. In addition to the preset albums, you can create new albums and add photos to the right album. Here are the steps to manage your photos via albums.
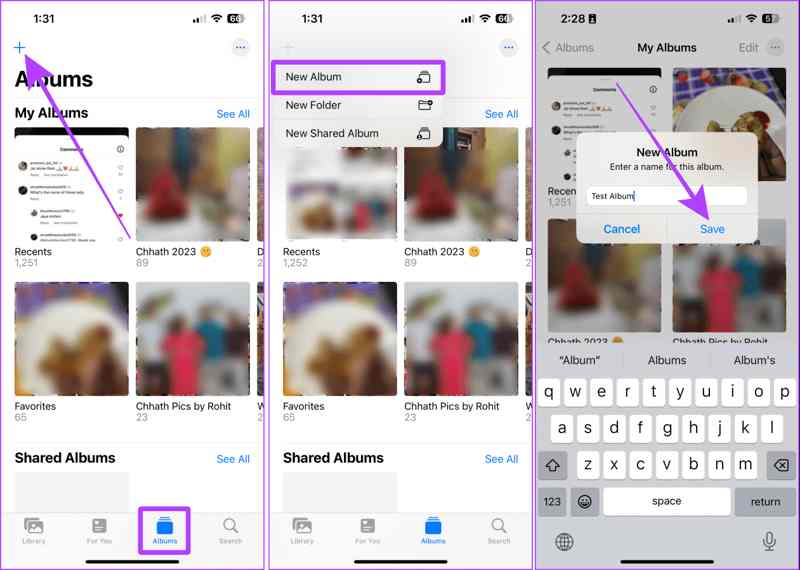
Step 1. Switch to the Albums tab from the bottom of your Photos app.
Step 2. Tap + and choose New Album.
Step 3. Type a name in the field and tap Save.
Step 4. Select the photos you want to organize.
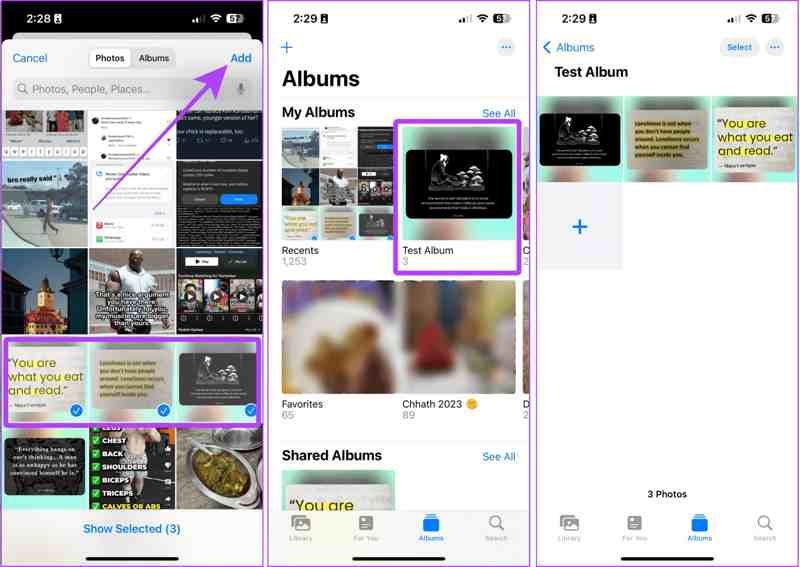
Step 5. Tap the Add button and choose the new album.
How to Organize iPhone Photos by Date, Location, or People
As mentioned previously, the iPhone can organize photos by date, location, or people using AI technology, EXIF data, and face recognition. These features help you manage photos quickly.
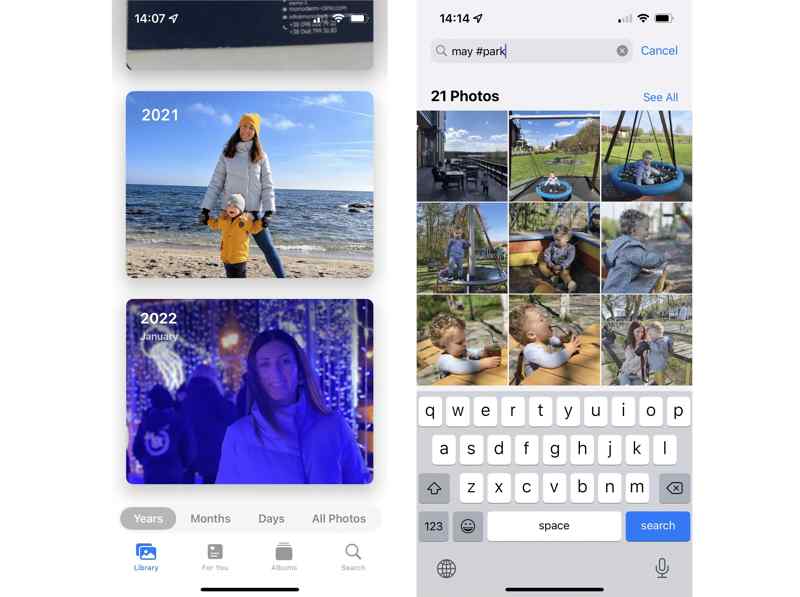
Go to the Library tab at the bottom of your Photos app and choose Years, Months, or Days to organize photos by date.
Head to the Albums tab, tap Places under the People & Places section, and you will see the photos on the Map.
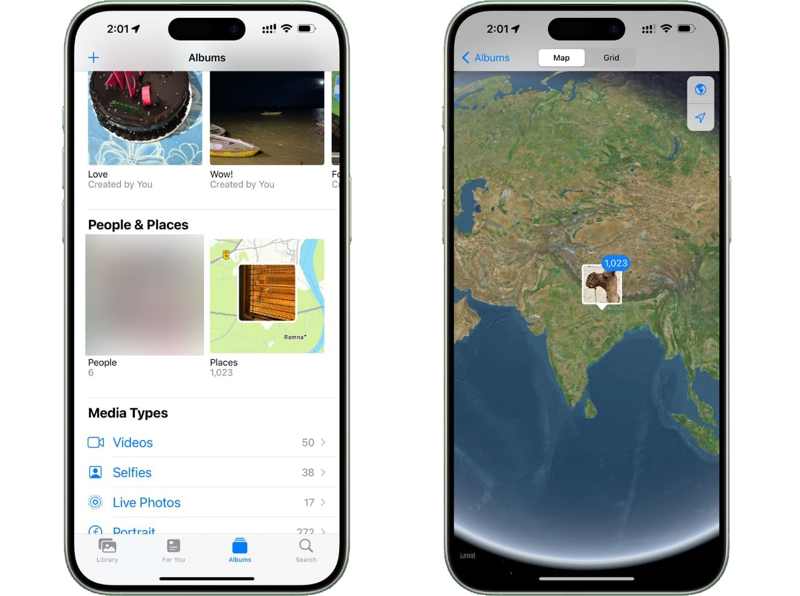
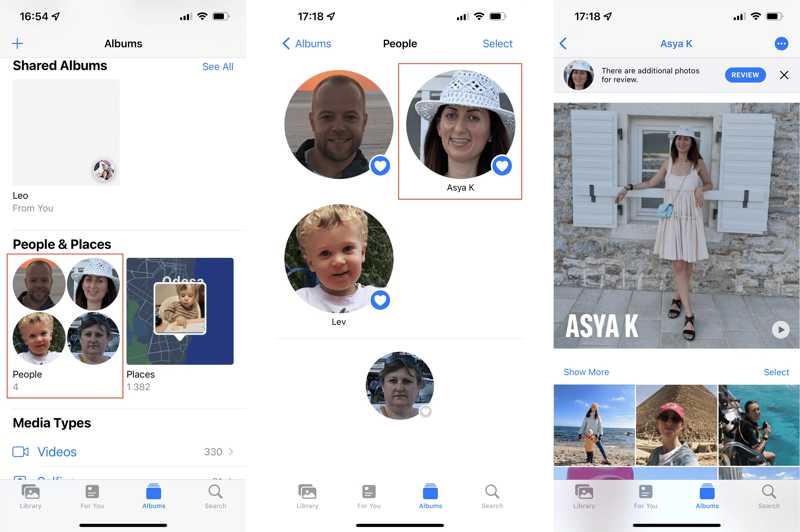
Tap People under the People & Places section if you want to organize photos on your iPhone by people, and choose the desired face.
How to Organize iPhone Photos Saved by Other Apps
When you save photos from other apps on your device, the Photos app will create a specific album. In other words, you can also organize photos on your iPhone saved by other apps, like WhatsApp.
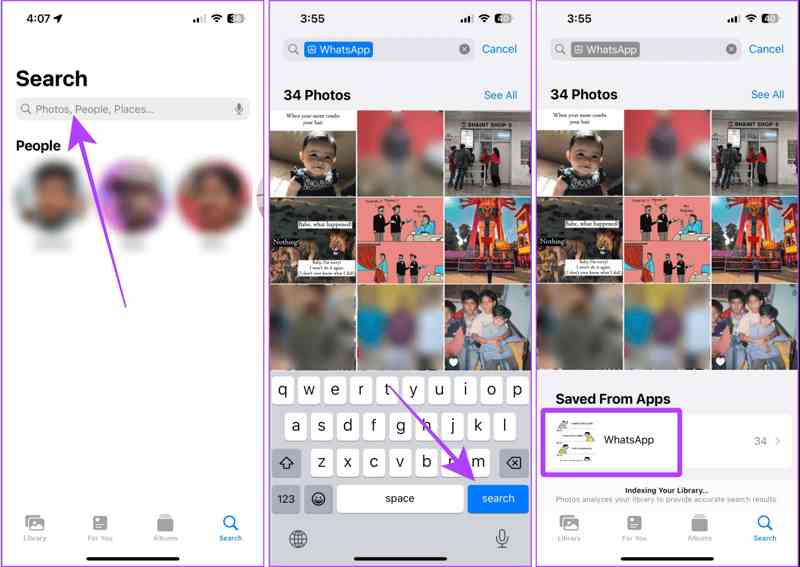
Step 1. Go to the Search tab in your Photos app.
Step 2. Type the app name in the search bar and hit search.
Step 3. Tap the app name under Saved From Apps.
How to Organize iPhone Photos Without Duplicates
If you save a lot of photos, you can organize photos on your iPhone without duplicates. Furthermore, iOS is able to identify similar or duplicate images so that you can merge or delete copies.
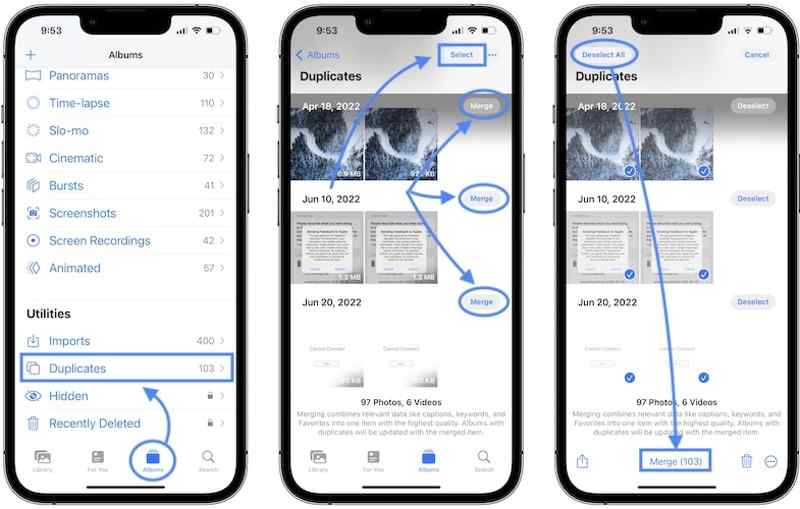
Step 1. Go to the Albums tab in your Photos app.
Step 2. Choose Duplicates under the Utilities section.
Step 3. Then, you can view the duplicate photos and merge them.
Part 2: How to Hide Private Photos on iPhone
To protect your privacy, you can organize photos on your iPhone with the built-in Hidden album. This album can only be unlocked with your iPhone passcode, Face ID, or Touch ID. Here are the steps to add photos to the Hidden album.
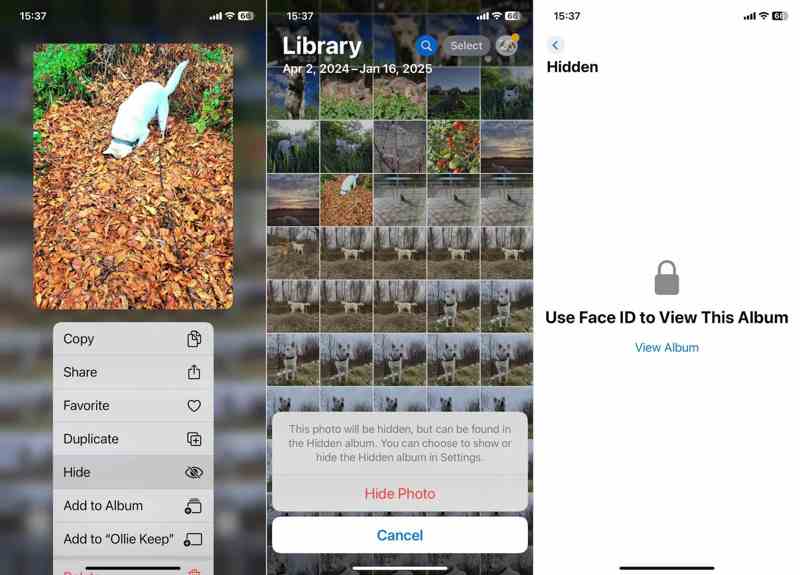
Step 1. Run the Photos and open the photo you want to protect.
Step 2. Tap the More button with a three-dot icon and choose Hide.
Step 3. When prompted, tap Hide Photo to confirm it.
Step 4. Go to the Albums tab and choose Hidden.
Step 5. Unlock the album with your Face ID.
Part 3: How to Rearrange Photos in iPhone Albums
Besides, you can rearrange photos in iPhone albums using the Sort and Filter features. They allow you to quickly find and organize new and old photos on your device. Here you can learn how these features work.
Step 1. Go to the Albums tab and choose the desired album.
Step 2. Tap the More button with a three-dot icon.
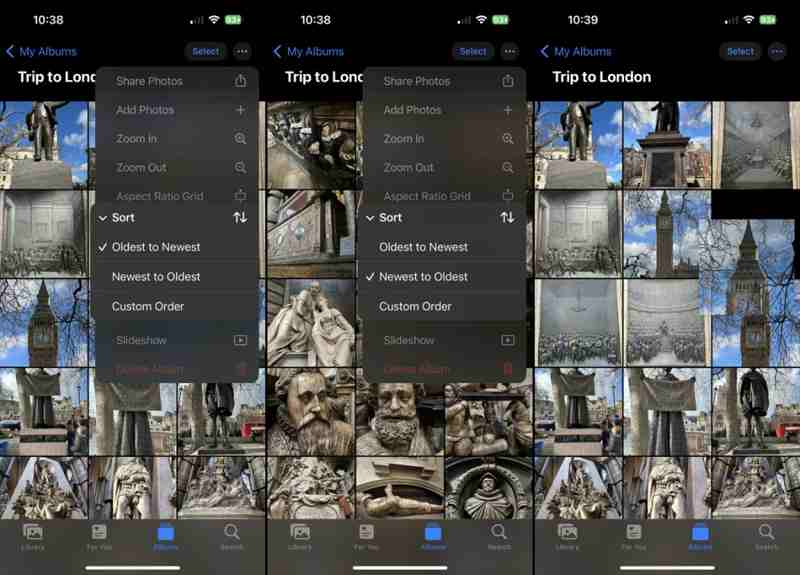
Step 3. Choose Sort and pick the right order, like Oldest to Newest or Newest to Oldest.
Step 4. If you want to view specific photos, choose Filter instead.
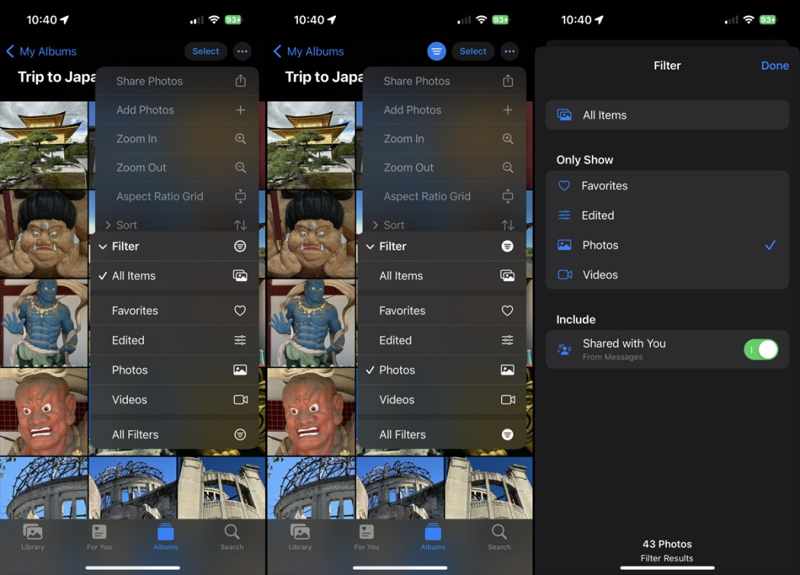
Step 5. Then, pick Favorites, Edited, and more.
Note: On iOS 18 beta, tap the Double-Arrow button at the bottom to access Sort or Filter.
Part 4: How to Organize iPhone Photos with a Computer
If you wish to organize iPhone photos on a PC, Apeaksoft iPhone Transfer is the best option. It enables you to browse, manage, and transfer photos on your iPhone with a computer. Moreover, it comes with a user-friendly interface.
The Best Option to Organize iPhone Photos on a PC
- Manage iPhone photos on a computer.
- Support photos, videos, documents, and more.
- Transfer photos between an iPhone and a computer or another phone.
- Compatible with the latest versions of iOS and iPadOS.
Secure Download
Secure Download

How to Organize iPhone Photos on a PC
Step 1. Connect to your iPhone
Launch the best app for organizing photos on iPhone after installing it on your PC. There is another version for Mac. Connect your iPhone to your PC with a Lightning cable.
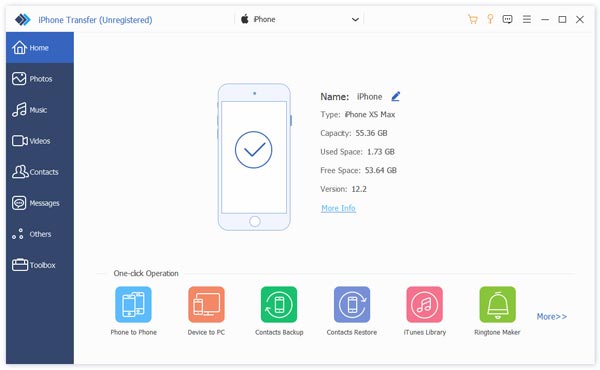
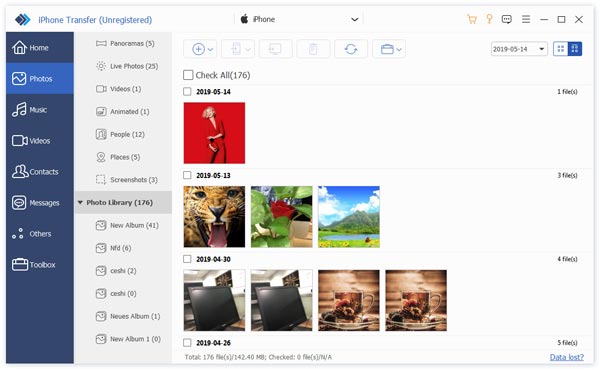
Step 2. View iPhone photos
After your iPhone is detected, go to the Photos tab. Then, organize iPhone photos by date. Plus, you can view photos by thumbnail. Moreover, you can create albums, add photos to an album, and more.
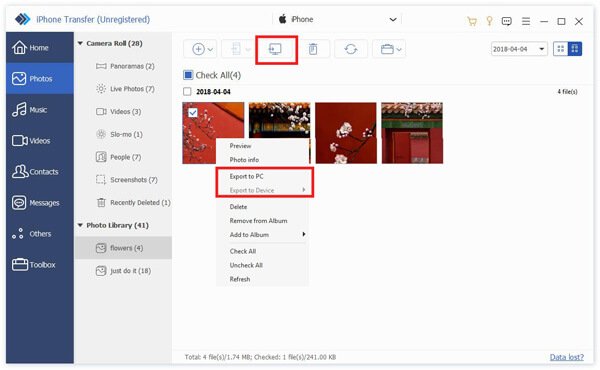
Step 3. Transfer iPhone photos
To transfer your photos, select them, right-click on a selected one, and choose Export to PC. If you want to add photos to your iPhone, click the Add button. You can also transfer ringtone from iPhone to iPhone.
Conclusion
This article explained how to organize photos on your iPhone. You can browse, manage, range, sort, and filter photos on your handset. Moreover, the preset albums let you hide and manage private photos. Apeaksoft iPhone Transfer is the best option to organize your photos with a computer. If you have other questions about this topic, please write them down below this post.
