iPhone/iPad iTunes Restore Not Working - Causes & Troubleshooting
It is quite common to restore your iPhone or iPad using iTunes, but sometimes things don’t go as planned. If you’re seeing messages like "There was a problem restoring your iPhone" or your device gets stuck in Recovery Mode or DFU Mode, it means your iTunes restore is not working properly.
Why does this iTunes restore error occur, and how can you fix it? Read more to find answers!
PAGE CONTENT:
Part 1: What Is iTunes Restore Error
The iTunes restore error refers to an error that happens when you try to restore an iPhone, iPad, or iPod to its original or updated iOS state using iTunes software (or Finder in macOS Catalina and later versions).
It occurs during the iOS restore process, either when restoring from a backup or updating the device’s firmware. Depending on the specific error code, it can happen at any stage - beginning, middle, or final.
This error indicates the failure of the recovery process due to errors from iTunes or your devices, such as communication interruptions, firmware verification failure, etc. However, it doesn’t mean your device is permanently damaged. You can read our further illustration to troubleshoot accordingly.
The forms of errors
Typically, you will see an interface similar to the following (in iTunes or Finder):
- A dialog box pops up in iTunes/Finder, indicating There was a problem restoring your iPhone, iTunes could not restore the iPhone because an error occurred, etc.
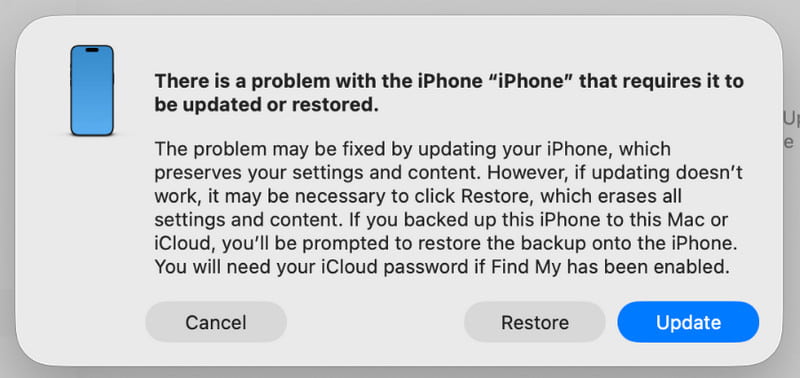
- The dialog box will contain a specific error code, such as Error 9, Error 4013, Error 14, etc.

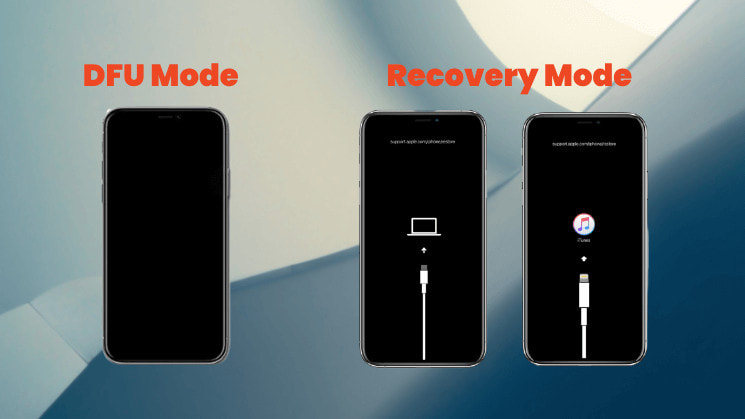
- Your device itself may get stuck in recovery mode (showing a black screen with a USB cable and iTunes icon) or on a black screen in DFU mode (black screen), unable to start normally.
Common iTunes Recovery Error Codes and Their Meanings
| Error | Description |
| Error 2, 4, 7 | iTunes failed to install or start |
| Error 9, 14, 2001, 2002 | The device cannot be recognized, or the connection is interrupted |
| Error 21, 3194 | Firmware verification or server error |
| Error 50, 13010, 1671 | Backup or sync failed |
| Error 53 | Restore failed due to Touch ID or hardware restriction. |
| Error 4013, 4014 | Restore or update failed |
| Error 1630–1641, 3000–3999 | Firmware installation or iOS restore error |
| Error 13014 | iTunes cannot read the device |
| Error 14xx | Failed ommunication with Apple servers |
Part 2: Common Causes of iTunes Restore Error
1. USB Connection Issues (Most Common)
It is the most common cause of iTunes restore errors. These issues may include:
- A damaged/non-original/not MFi-certified data cable.
- A loose, dirty, or unstable USB port on the computer.
- Using the USB port on the front of the computer case (it is recommended to use the rear USB port directly on the motherboard).
2. Computer Software Issues
iTunes restore errors can also result from software-related problems on the computer, including:
- An outdated iTunes version that is not compatible with your device.
- Your computer‘s operating system (Windows/macOS) needs to be updated.
- Security software like firewalls or antivirus software interferes with the communication between iTunes and the server.
- The hosts file of the computer has been modified.
3. Device Hardware Issues
In some cases, iTunes restore errors also have something to do with hardware problems with the device, including:
- The device was water-damaged or dropped, resulting in internal component damage.
- Physical failure of the storage chip (NAND flash memory), which is more common in older devices.
- Previous unofficial repair and replacement of incompatible components.
4. Network and Server Issues
Network-related problems can also trigger iTunes restore errors, such as:
- An unstable network connection interrupts the firmware download.
- Apple servers are temporarily busy or under maintenance.
5. Software Conflicts
Sometimes, software conflicts can also prevent the restore process from completing successfully, including:
- Modified system files (usually after a jailbreak) make the device incompatible with the official restore process.
- You‘ve downgraded your iPhone to an older version that is no longer verified or signed by Apple.
Part 3: How to Fix iTunes Restore Error
1. Check USB Connection:
- Try replacing an original or MFi-certified data cable.
- Plug the data cable into the rear USB 2.0 port of your computer (usually the black one).

- Make sure the USB port and the data cable connector are clean and not loose.
2. Update Software:
- Update your iTunes to the latest version.
- Update your computer operating system (Windows or macOS) to the latest version.
- Update your computer operating system (Windows or macOS) to the latest version.
Windows:
Step 1. Click the Start menu in the bottom-right corner, and choose Settings.
Step 2. Go to Update & Security, then click Check for updates.
Mac:
Step 1. Click the Apple logo in the top-left corner of the screen and select System Settings (or System Preferences on older macOS versions).
Step 2. Go to General > Software Update, then click Update Now and follow the prompts to install the latest macOS version.
3. Restart Device:
Sometimes, you can also try performing a force restart of the device.
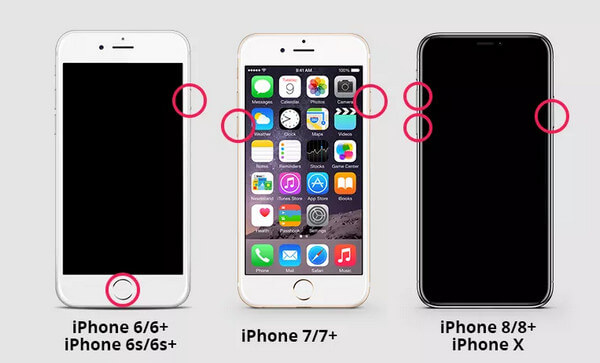
iPhone 8 and Later
Step 1. Quickly press and release the Volume Up and Volume Down buttons one by one.
Step 2. Press and hold the Side button until the Apple logo appears.
iPhone 7/7+
Step 1. Press and hold the Volume Down and the Side button at the same time.
Step 2. Release both buttons when the Apple logo appears.
iPhone 6/6+
Step 1. Press and hold the Home button and the Side (or Top) button simultaneously.
Step 2. Release both buttons when the Apple logo appears.
4. Reboot into Recovery Mode/DFU Mode for Restoration:
Instead of directly clicking Restore, manually put the device into Recovery Mode or DFU Mode, and then iTunes will prompt you to proceed with the restoration. This provides a cleaner restoration environment.
5. Use Professional Software
If you have tried all the methods above but still failed, you can seek help from professional software like Apeaksoft iOS System Recovery to fix iTunes restore errors. It is designed to fix iOS system issues and can help you resolve restore errors easily and quickly.
Best Tool to Fix iTunes Restore Errors
- Fix iTunes Restore errors with one click.
- Provide a free fix feature to quickly repair your device.
- Repairs the iOS system without erasing existing data.
- Support all iOS devices and the latest iOS 26/27 Beta.
- User-friendly interface.
Secure Download
Secure Download

Step 1. Download this software from the button above. Launch the software and choose iOS System Recovery.
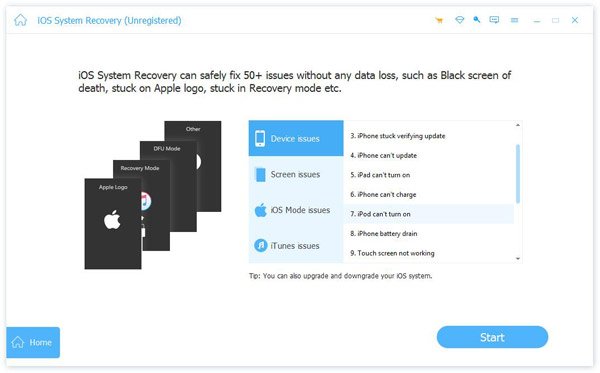
Step 2. Press the Start Now button from the System Repair option.
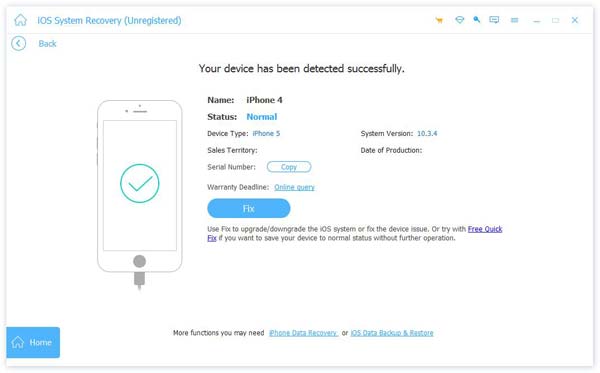
Step 3. Click the Start button to continue.
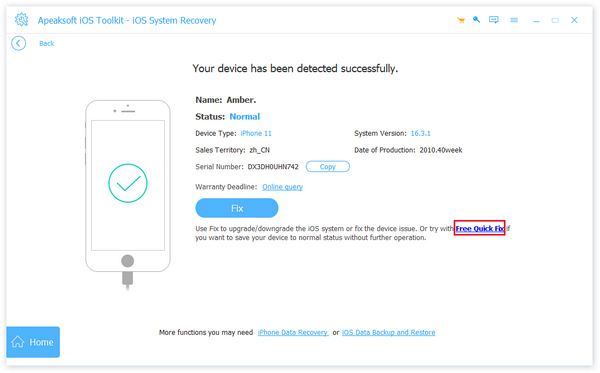
Step 4. You can click the Free Quick Fix link to have a quick fix.
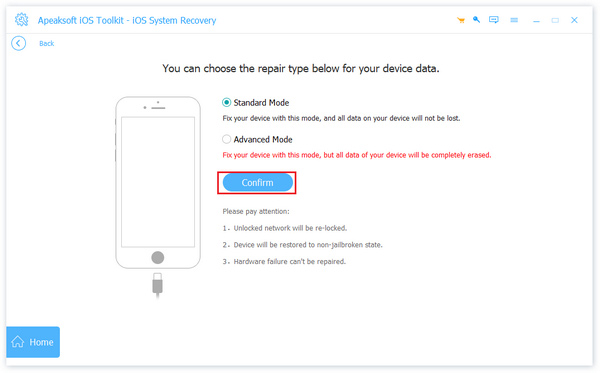
Step 5. If the iTunes restore error still exists, you need to press the Fix button and choose a Standard/Advanced Mode to continue.
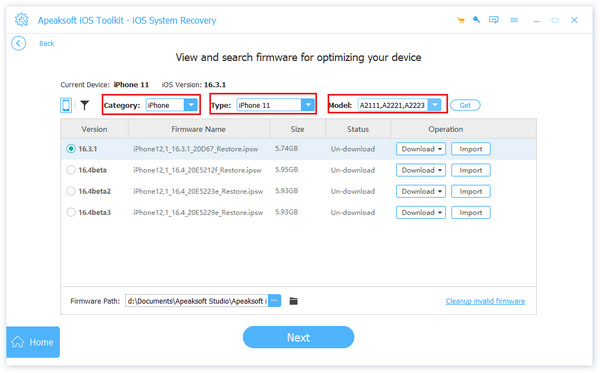
Step 6. Set the corresponding firmware of your device.
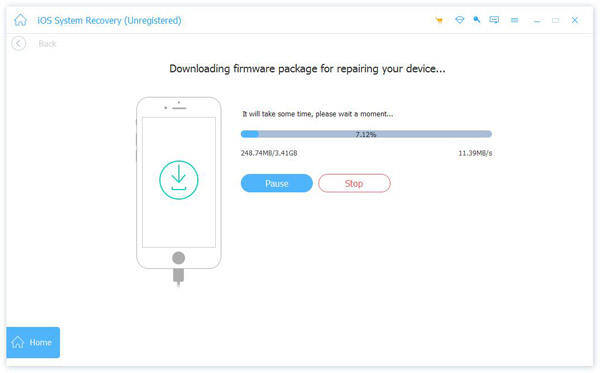
Step 7. Wait for the software to download the firmware to fix your device.
Conclusion
iTunes could not restore the iPhone because an error occurred? Don‘t worry! We believe that after following the steps and troubleshooting methods outlined in this guide, you can successfully fix the issue and restore your device to normal.
