Suppose you are hatching a project, and you will find the timeline is a useful utility. It visualizes the major tasks and activities in chronological order. So that your teammates, manager, and other stakeholders can view the entirety of the project plan in one place. Plus, the horizontal bar chart can be used for various industries and purposes. Anyway, this article will introduce what a timeline is and more knowledge you should know about the chart.

- Part 1: What Is Timeline
- Part 2: Timeline Examples
- Part 3: How to Make a Timeline
- Part 4: FAQs about Timeline
Part 1: What Is Timeline
As mentioned previously, a timeline is a diagrammatic illustration that displays the events and activities that occur in a period chronologically. It can represent important dates, activities, tasks, or even people for a project. Besides, it reveals the events that have already happened as well as upcoming events of your project.
happened as well as upcoming events of your project. As a useful diagram, timelines have been in practice from as early as the 17th century B.C. Today, timelines can be in the form of graphs or charts to represent anything that happened during a period. It can document any type of development, offering an easy-to-understand history, past, and ongoing trends.
Unlike other diagrams and charts, a timeline is pretty simple. A chart includes a horizontal line to indicate the date, and the relative items about the project, topic, or subject.
The Usage of Timelines
Most diagrams and charts are mainly used in business; however, the timeline has a wider range of uses. It serves the sequential structures of any events:
1. Education. Timelines are the best way to study history for students. It can be used to describe a history event, the lives of famous people in history, the dynasties of a country, and more.
2. Business. As one of the leading business graphics, a timeline makes the process more effective. It illustrates a series of actions within a given time. Although you can add pictures, data, figures, and more, the timeline is pretty easy to read and understand. That makes it a nice choice to display any process in business.
3. Project management. If you are performing a project, a timeline can help you monitor the progress, deadlines, complete events, and unfinished events. Moreover, it allows users to break the project into phases and execute them according to the plan. Plus, you can mark the team members assigned to a task on the timeline.
Part 2: Timeline Examples
Now, you should understand what a timeline is and when to use it. There are a variety of types of timelines that you can use. To help you understand these types, we display the timeline examples below.
1. Chronology Timeline
That is the most commonly used type of timeline. It displays events in chronological order. The oldest event is placed on the starting point and the latest event is on the end side.
2. Gantt Chart
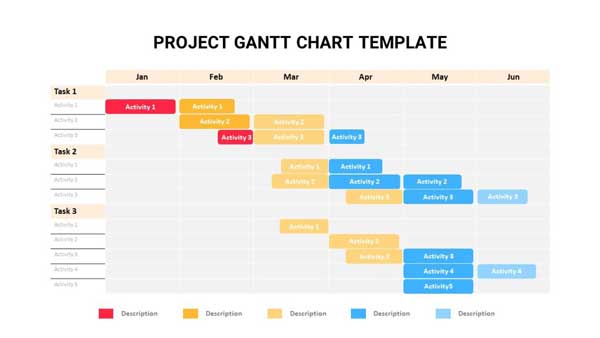
This type of timeline was developed by Henry Gantt, a pioneer in scientific management. It is used to display project schedules in a table. The X-axis represents the date of each task, and the Y-axis represents the tasks. So that you can identify and prioritize critical tasks.
3. Interactive Timeline

The interactive timeline, also known as the dynamic timeline, is used to large data into a single timeline. Once you click or zoom in on an event, the hidden details will reveal. This type of chart allows users to add a lot of items, such as links, images, photos, videos, graphics, etc. However, the main timeline is clear and concise.
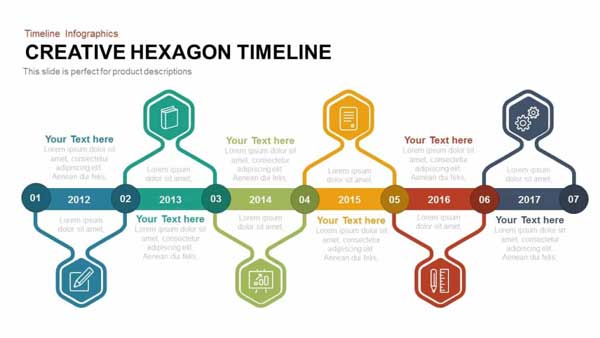
4. Horizontal Timeline
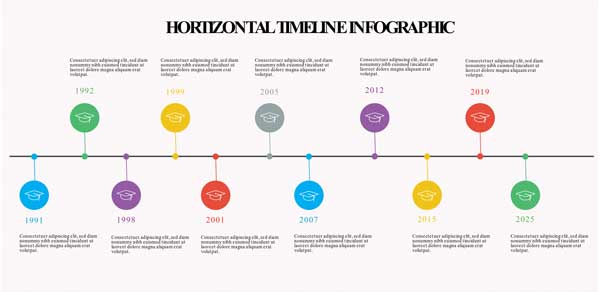
Briefly speaking, a horizontal timeline draws the timeline horizontally. It is the easiest way to display a small set of events.
5. Vertical Timeline
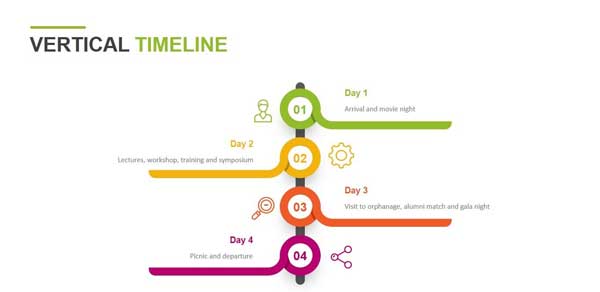
A vertical timeline is similar to a horizontal timeline. The difference is the organization of the vertical timeline is from the top to the bottom.
6. Roadmap Timeline
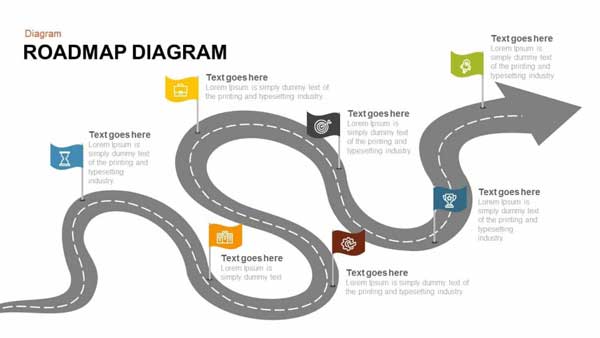
As the roadmap timeline example shows, it is used to indicate a project’s duration and the activities required to be taken. The timeline is usually divided into sections according to the actions. Therefore, a roadmap timeline is commonly used to represent complex projects that last a long time.
7. Biographical Timeline
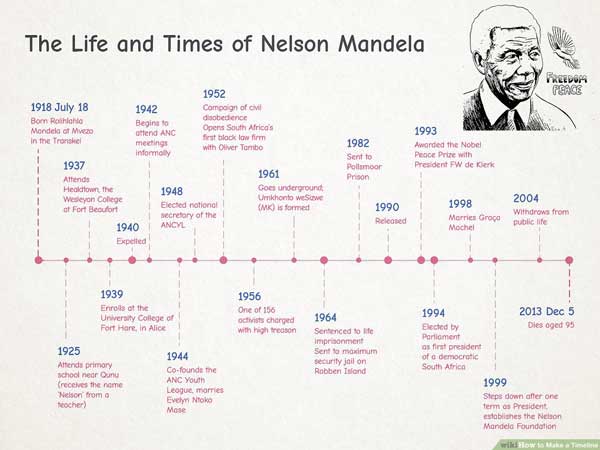
A biographical timeline can describe the history of a person and illustrate the life stories clearly. That is the easiest way to learn about famous people.
8. Historical Timeline
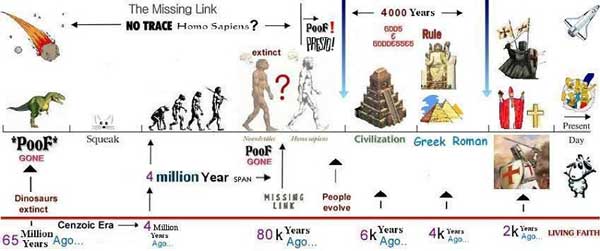
If you are learning or displaying a period in history, a historical timeline is a nice option. It illustrates the history events and their times effectively.
Part 3: How to Make a Timeline
Way 1: The Easiest Way to Make a Timeline Online
Although the timeline is very simple, beginners may still feel confused when making a timeline. Fortunately, some tools can help you simplify the job. MindOnMap, for example, is a free web-based timeline maker. It comes with a lot of timeline templates for beginners to start their job quickly. Moreover, it completely works online and does not ask you to purchase or install anything. Here are the steps to make a timeline online.
Step 1 Access https://www.mindonmap.com/ in a web browser, and log into your account. If you do not have an account, sign up one for free.

Step 2 Press the Create Your Mind Map button to enter the home page. Then go to the New tab from the left side, and pick an appropriate template on the right panel or create a blank chart.

Step 3 Add an event by hitting the Node button on the top menu bar. Double-click on the node, and write down the label. Do the same to add other events. Then arrange the events according to your timeline.
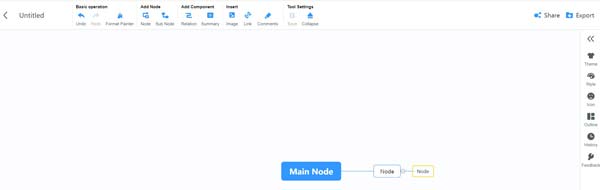
Step 4 Next, click and expand the right toolbar, and go to the Style tab to customize the colors, borders, text, and other aspects according to your preference. You can add icons, stickers, links, and images to the timeline.
Step 5 At last, click on the Export button, choose an appropriate format, and download the timeline. Alternatively, hit the Share button to share the chart on the internet.
Way 2: How to Make a Timeline in Office Word
Word is a document maker, but it includes the basic features to make a timeline. Moreover, there are timeline templates for Word online. We demonstrate how to make a timeline in Word quickly.
Step 1 Create a new document in your Word. Change the page from Portrait to Landscape if you need more space for the timeline. You can get it in the Layout tab on the top menu bar.
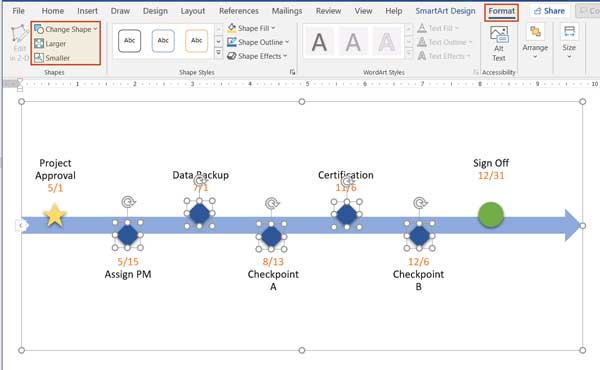
Step 2 Turn to the Insert tab on the top ribbon, and click the SmartArt button in the Illustrations section. Then you will get the Choose a SmartArt Graphic dialog.
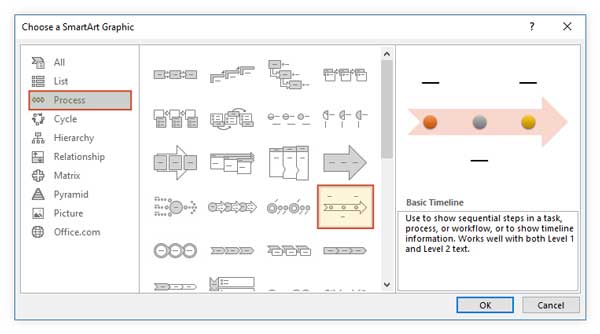
Step 3 Head to the Process tab from the left list, and you will see dozens of layouts. Pick an appropriate one according to your timeline. Here we select the Basic Timeline. Click the OK button to add the layout to your document. Click a sizing handle on the border, and drag it to resize the layout to the desired size.
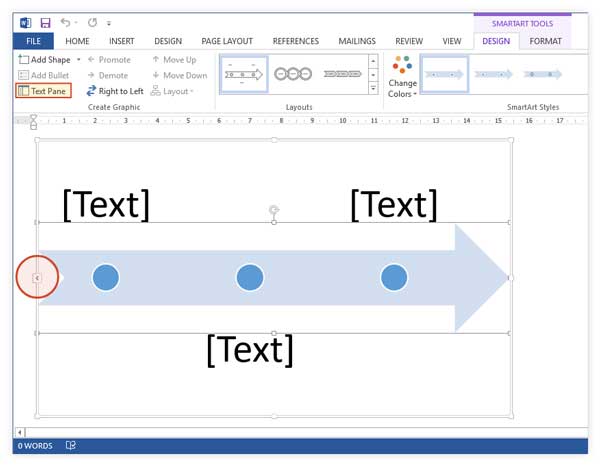
Step 4 Click on the Text button on the layout to open the Text Pane. Place your cursor inside a Text Pane, and enter the event. Next, enter other text panes.
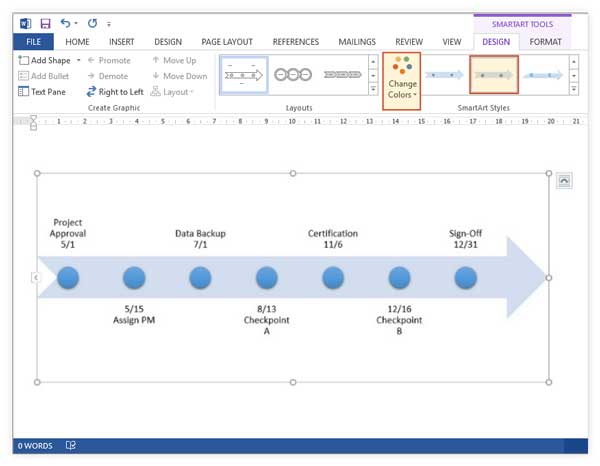
Step 5 If you do not like the style of the timeline, go to the SmartArt Tools menu on the top ribbon, and click the Change Colors button on the Design tab. Then modify the color according to your preference. To reset the color and style of a single text pane, right-click on it and you will get the context menu bar. You can change the icon of the milestone in the Format tab.
Step 63 Different Ways to Make Fishbone Diagrams
Further Reading:Tips for Creating a Timeline
1. Clarify the purpose of your timeline. You make a timeline start with a title. Writing the title down at the top of the document can remind you of the purpose.
2. Choose a proper type of timeline. We have listed the types of timelines above. They are used for different situations and purposes. You can pick the right one according to your need.
3. Decide the milestones or events. There are segments on a timeline. Firstly, place the start and end dates on your timeline. Then adding other dates will become easy.
4. Determine the scale of your timeline. First of all, determine how long your timeline is. Then decide to use the horizontal orientation or landscape. That determines the space of your page. Then calculate the segments and divide the timeline into equal.
5. Collect all items. The timeline can include not dates and events but also links, images, icons, videos, and more. You’d better collect and save these items in a single folder. So that you can add them to your timeline without data loss.
6. Find a timeline template. Some timeline makers do not provide templates. The alternative solution is websites. In fact, Microsoft offers timeline templates online.
Part 4: FAQs about Timeline
When to use a timeline?
Here are the cases where you can use a timeline:
To present historical reports with important years and their dates.
For the presentation of an agenda or schedule before a meeting.
To present the reports of ongoing work with dates and deadlines.
To mark the important dates in the life of an individual.
For presenting the process of photosynthesis in plants.
How long is a timeline?
The answer is depending on your purpose. If your timeline includes several dates, the horizontal or vertical timeline is a good choice. To draw a timeline with lots of milestones, you can use a roadmap timeline. Therefore, there is no limit to the length of a timeline. It is completely determined by your need and tool.
Who created the timeline?
385 million B.C. During the Middle Devonian Period of the Paleozoic Era, a prehistoric fern adds a new growth ring to its trunk, creating the world’s first timeline. A trilobite third-grade teacher immediately assigns it to her class as busy work.
Conclusion
This post has introduced one of the important charts, the timeline. Now, you should understand what a timeline is, its history, benefits, and types. To help you learn it, we also provided an example for each type of timeline. Office Word is a nice tool to make timelines if you have the software on your desktop. MindOnMap is the best choice to do it online for free. Now, you can start drawing your first timeline. If you have other questions about this chart, please feel free to contact us by leaving a message below this post and we will reply to it quickly.