Full Guide about System Recovery Options on Windows 10/8/7
System Recovery Options are a significant part of the Windows system to repair errors and restore your files to a previous recovery point. Though it plays a vital role in computers, few people know exactly what it is and how it works.
In order to ensure the normal operation goes well, you need to start System Recovery Options as well as learn the related information.
Thus, this article just explains everything you need to know about System Recovery Options. Read on to learn the details.
PAGE CONTENT:
Part 1. What Are System Recovery Options
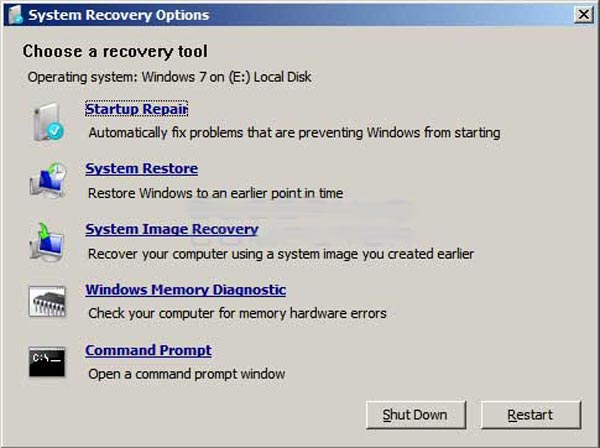
As mentioned before, System Recovery Options are a group of repair and diagnostic tools of Windows operation system, which can be used to recover the Windows system from errors, restore important settings and files to a previous restore point, or test your computer's memory, etc. Additionally, it is also referred to as Windows Recovery Environment or WinRE for short. As a System Recovery Options menu, it certainly has many recovery options like Startup Repair, System Restore, Windows Memory Diagnostic Tool, and so on. Each of them has different functions, which are listed as follows.
• System Restore: Restore your computer to a previous restore point.
• Complete PC Restore or System Image Recovery: Restore images and system for Windows 7 System.
• Command Prompt: This allows you to access Command Prompt and run various command-line-specific commands, such as bootrec or diskpart.
• Windows Memory Diagnostic Tool: Scan your computer's memory to find errors.
Part 2. How to Start System Recovery on Windows 10/11
How to Enable System Restore on Windows 10/11
The prerequisite for system recovery is to enable the system restore feature on Windows. Follow the below steps to make it:
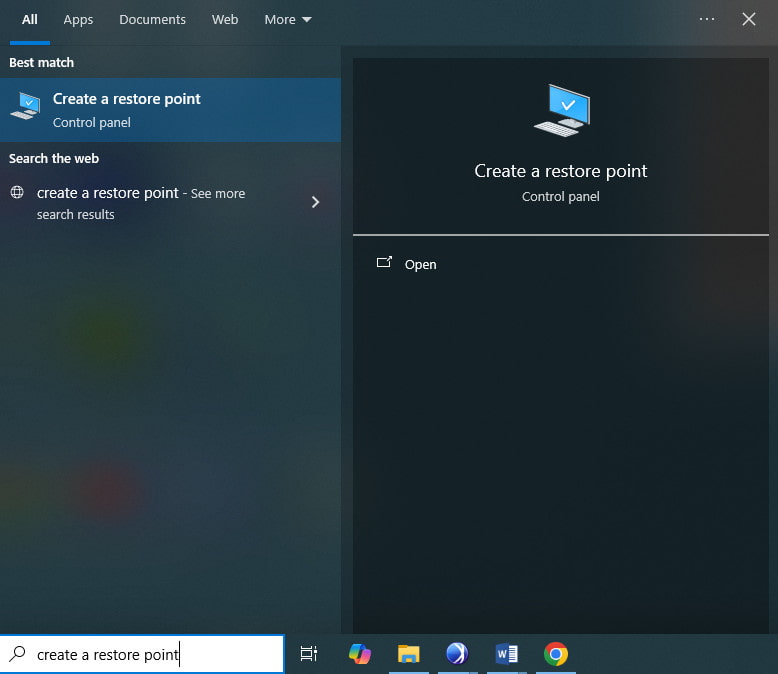
Step 1. Click the Start menu and enter Create a restore point in the search box.
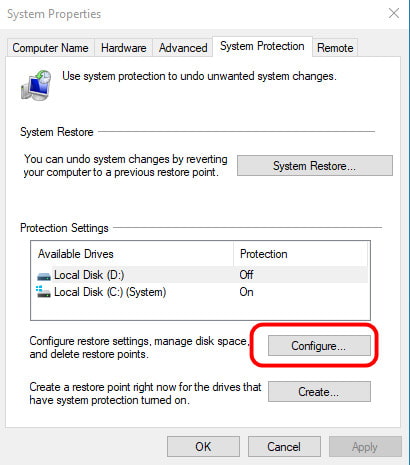
Step 2. Select your primary system and click the Configure button.
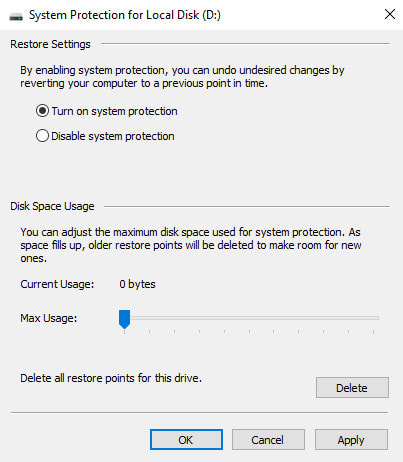
Step 3. Choose the Turn on system protection option. And then press the Apply button. Click OK to finish.
How to Create a System Restore Point on Windows 10/11
Actually, when the system restore is enabled, it will automatically create a checkpoint once it detects any system changes. Nevertheless, you can still set a system restore point manually to recover system more conveniently.
Here are detailed steps:
Step 1. Head to the Start interface and search for Create a restore point, which is the same as the previous method.
Step 2. Choose your desired system and click the Create button.
Step 3. Create a specific name for the restore point and then click the Create button.
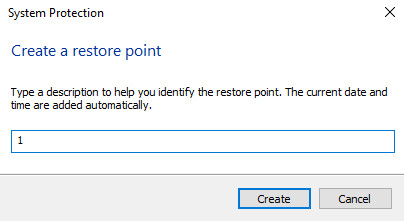
Step 4. Close the current window and click OK.
How to Recover System Using the System Restore Point
Now, you can recover system freely after you have created a system restore point.
Follow the steps below to recover data from crashed systems or other situations:
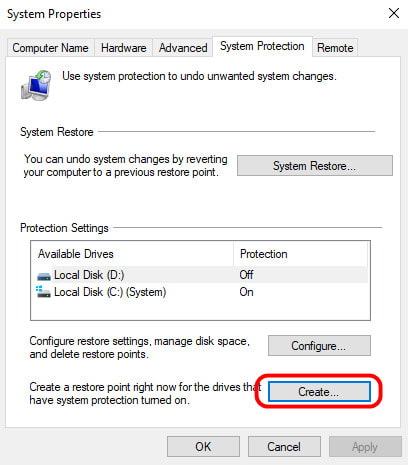
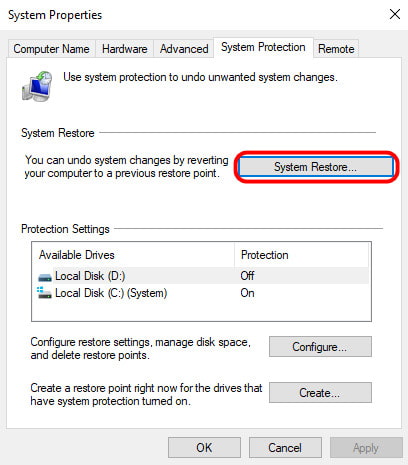
Step 1. Open the Create a Restore Point window following the steps above.
Step 2. Press the System Restore button.
Step 3. Follow the on-screen instructions to move on. Choose your desired restore point and then click Next.
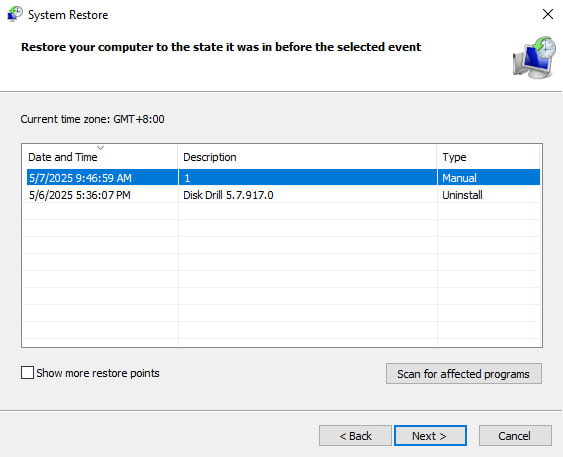
Step 4. Click Finish to start the system recovery.
Tips: How long does the system restore take?
Usually, a Windows System Restore will take between 20-60 minutes. It mainly depends on the size of the file at the restore point. Also, the speed of your hardware has something to do with the recovery speed.
Part 3. How to start System Recovery on Windows 7
This part provides a full guide on how to start System Recovery on your computer. There are two different ways according to your situation. The first method is opening your System Recovery Options on your computer via the Repair Your Computer option on the Advanced Boot Options menu. If you cannot access the System Recovery Options on your computer for many reasons, you may need to use a Windows 7 installation disc, a USB flash drive, or a system repair disc if you have created one before. And these two ways will be explained in detail.
How to Start System Recovery Options on Your Computer
Step 1. Restart your computer
Remove all CDs, DVDs, or other disks from your computer and close all running programs on your computer first. After that, restart your computer using the computer's power button.
Step 2. Enter Advanced Boot Options
When you restart your computer, you need to do one of the operations as follows: If you have installed only one system, click, press, and hold the F8 key until the Windows logo appears. And if you miss a specific time, you need to restart your computer and wait again.
If your computer has more than one system, you need to highlight the operating system you want to repair by using the arrow key. Then press and hold F8. After that, you are allowed to enter the Advanced Boot Options.
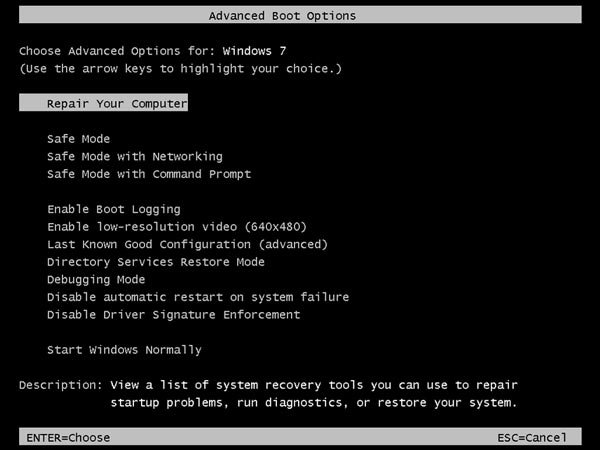
Step 3. Start System Recovery Options
On the Advanced Boot Options screen, highlight Repair your computer using the arrow keys. Then press Enter. After that, you are allowed to choose a keyboard layout and click on the Next button. Then you are on the System Recovery Options menu and choose a tool you want to use.
How to Start System Recovery Options Using Windows Setup Disc or Using a System Repair Disc
Step 1. Restart your computer
Insert the Windows 7 installation disc, USB flash drive, or a system repair disc on your computer, and then restart your computer using the power button. (Disk boot failure?)
Step 2. Choose your preference
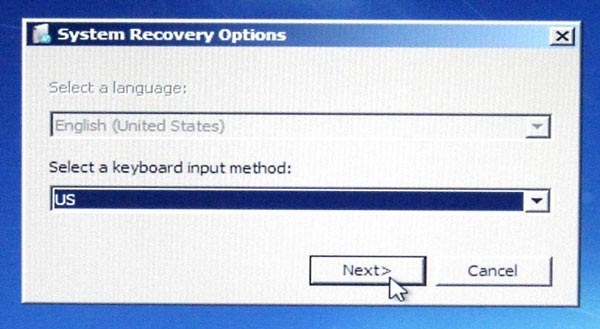
When it promotes, press any key. You can find some instructions which you need to follow. On the Install Windows page or on the System Recovery Options page, choose your preferred language and other preferences, and then click on the Next button.
Step 3. Start System Recovery
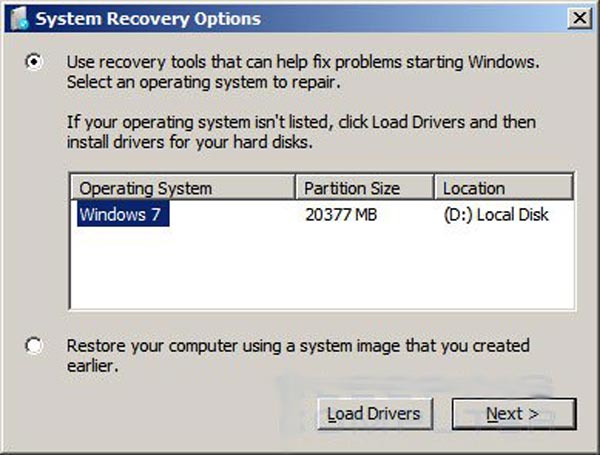
If you use the Windows installation disc or USB flash drive, click the Repair your computer option. Then choose the installed system you want to repair and click on the Next button. After you enter the System Recovery Options menu and choose a tool, start it.
Part 4. How to Recover Data Lost During System Recovery
As mentioned above, system recovery will restore your computer to a previous point, which means all the data you edit after the point will be lost. It is a pity to lose the important data.
Is there any way to recover data from the restored computer?
Yes exactly.
Apeaksoft Data Recovery is the tool that enables you to recover lost data.
Recover Data in One Click
- Recover data on Windows 11/10/8.1/8/7.
- Restore lost data after deletion, empty trash, formatted drive, etc.
- Recover photos, videos, music, system files, documents, emails, etc.
- Support deep scan and quick scan to get data recovery efficiently.
Secure Download
Secure Download

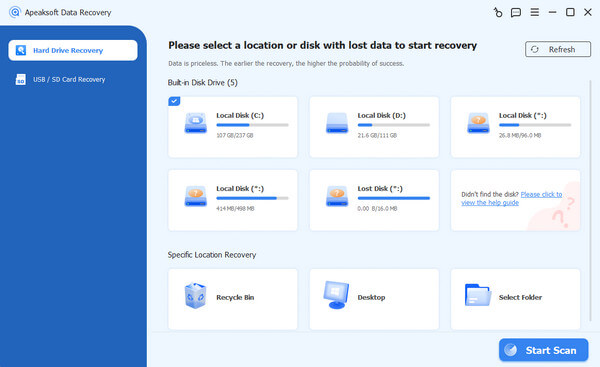
Step 1. Scan Windows computer drive
Free download this Windows data recovery tool on your computer. In the main interface, you need to checkmark your Hard Drive. You need to decide which hard disk to scan and restore.
Then click Scan to start to scan your computer drive for data recovery.
Step 2. Recover data from the computer
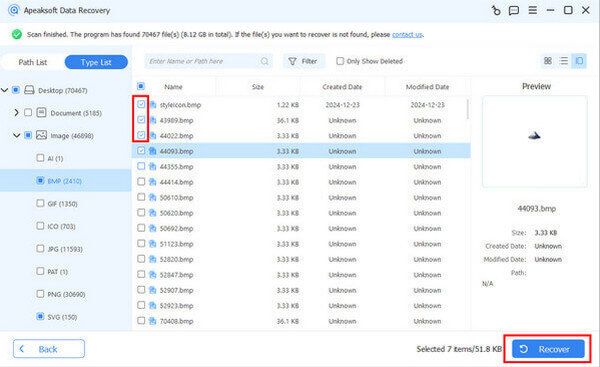
After the scan is complete, the result will be shown in the type list or path list.
Click the data folder from the left sidebar, and view the detailed files on the right window.
Confirm the data you want to recover, and click Recover All to save the lost or deleted data to your computer safely.
Conclusion
Windows System Recovery gives you much help with repairing and restoring Windows operating systems. It is a useful and powerful tool menu, which may be ignored by many users. From this article, you will have a better understanding of what it is and how to recover system. When your data is lost due to system recovery operation, you can use Apeaksoft Data Recovery to get data back easily.
Related Articles
Whatever the reason, here's how to factory reset Android phone through the built-in settings menu or under the recovery mode quickly and effectively.
This page collects the overview of the best video recovery software, Disk Drill Pro, and how to use it to recover the deleted videos on iOS/Android/Windows/Mac.
Are your confused about Android Recovery Mode? This article introduces the Recovery Mode in detail, including the ways of booting and exiting.
Are you still confused when your computer stops working or you want to go back to the previous version you like best? You need System Restore now!
