What is Intel Quick Sync Video? Intel Quick Sync Video is Intel's hardware video encoding and decoding technology that is integrated into some Intel CPUs with the built-in HD Graphics. Intel has put into the graphics processor circuitry quickly encode and decode digital video rather than relying on the computers processor.
This tech is extremely beneficial for those who need to create DVDs or Blu-ray discs, create and edit 3D videos, convert 2D video files into 3D, and convert video for your portable media player and for uploading to your favorite social networking sites as it can save a lot of time.
Like other hardware accelerated video encoding technologies, Quick Sync gives lower quality results than with CPU only encoders. Speed is prioritized over quality. Tested by our programmers, the converting speed of the software with Intel Quick Sync Video technology is 2.5X faster than the old software. The graphic below shows all data in details.
| Durations (sec) | Without Intel Quick Sync Video (sec) | Intel Quick Sync Video (sec) | |
|---|---|---|---|
| AVI to HD MP4 | 290 | 272 | 90 |
| M2TS to HD MP4 | 148 | 148 | 59 |
| MKV to HD MP4 | 452 | 405 | 162 |
| TS to HD MP4 | 1382 | 1335 | 512 |
How to set up Intel Quick Sync Video on Desktop PC with PCI-E graphics card?
If you own a desktop computer with Intel® processors supporting Intel® Quick Sync Video technology and additional NVIDIA or AMD PCI-E graphics card installed, then you are able to set up Intel® Quick Sync Video on desktop PC without need to connect a monitor to Intel HD graphics card. Follow the step-by-step guide shown as below.
Step 1. Enable Intel graphics card in BIOS & Install drivers
Check your PC BIOS User Manual or instructions to see how to enable Intel integrated graphics (iGPU). Enable Intel graphics and save BIOS changes.
Please install the latest Intel graphics drivers available for your Intel HD graphics card model.
Step 2. Open Windows Screen Resolution settings
The steps to open Windows Screen Resolution settings differ slightly according to windows systems.
For Windows 7/8:
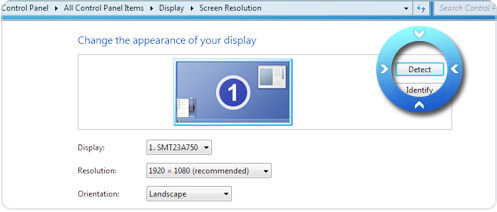
Right-click in the empty space of the desktop to show menu and select Screen Resolution, click Detect button to detect inactive video outputs.
For Windows 10:
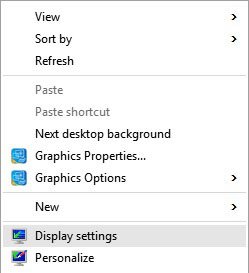
1. Navigate to your Desktop, and right-click the mouse to go to Display Settings.
2. From the new panel, click Advanced Display Settings. And here, you can find more options about screen resolution.

3. Click the option of Detect button.
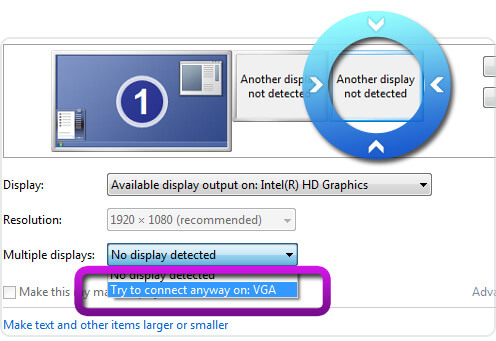
Step 3. Force display on Intel® HD Graphics output
Taking Windows 7 as an example, select detected display output for Intel® HD Graphics output Graphics and select "Try to connect anyway on VGA" from Multiple displays dropdown.
Click Apply button before making any additional changes.
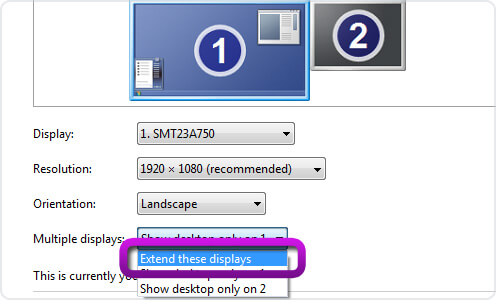
Step 4. Extend display
Select your main display and select Extend these displays from Multiple displays dropdown. Click Apply button and Keep changes.
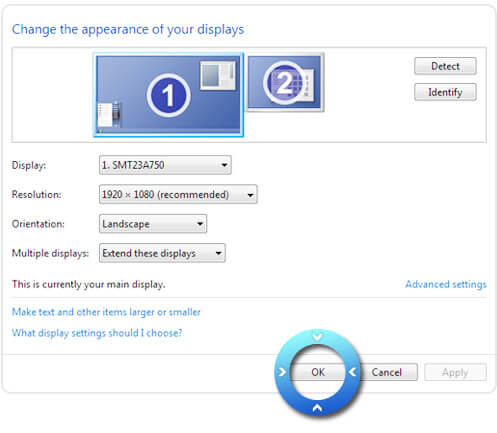
Step 5. Close Screen Resolution settings
Your displays setup should look similar like on the picture below. Click OK button to close Screen Resolution settings.
Step 6. Restart our program
Now start our program and you can apply the Intel acceleration.