How to Remove Audio from Video on PC and Mobile Device
When taking videos on a mobile device or using a digital camera, the background audio is captured automatically. It cannot be denied that background audio can enhance the engagement of videos; however, the noises might be a distract. Thankfully, removing audio from video is not a difficult job if you have the right tool. This tutorial shares the best methods on Windows, macOS, iPhone, and Android, as well as the workflow.
PAGE CONTENT:
Part 1: An Easy Way to Remove Audio from Video
If you have multiple videos with noise background audio, Apeaksoft Video Converter Ultimate is a good option to delete audio from video. It is able to process hundreds of videos at the same time. Moreover, it uses advanced technology to protect your video quality during the process.
An Easy Way to Delete Audio from Multiple Videos Without Quality Loss
- Delete audio from videos quickly.
- Keep your video quality using advanced technology.
- Batch handle multiple videos once.
- Support almost all video formats, like MP4, MOV, AVI, etc.
- Offer bonus features, like noise removal and video compression.
Secure Download
Secure Download

How to Remove Background Audio from Videos
Step 1. Import videos
Launch the audio removal software once you install it on your PC. There is another version for Mac users. Click the Add Files menu at the top left side, and open the videos you want to mute.
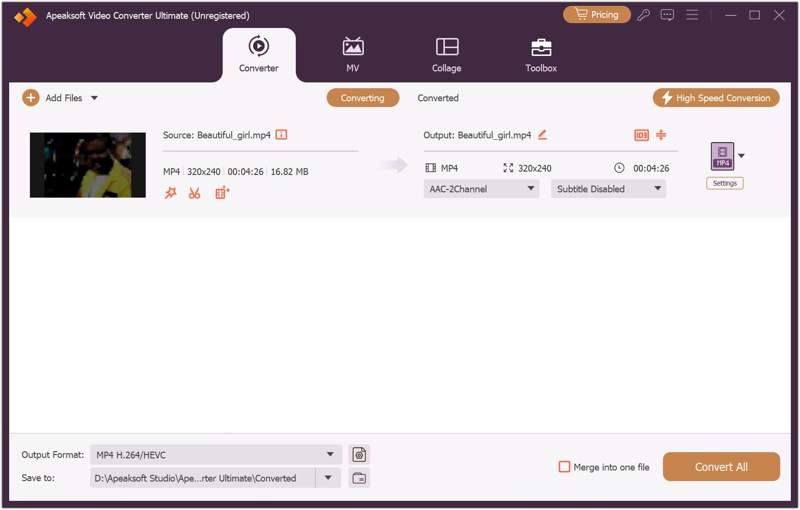
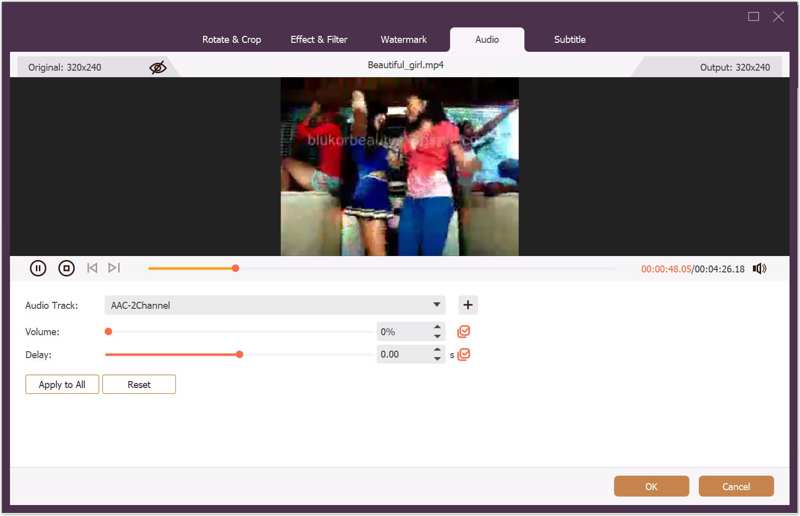
Step 2. Remove audio from videos
Click the Edit button under a video to open it in the video editor. Switch to the Audio tab on the top ribbon. Then, move the Volume option to 0. If you want to mute all videos, click Apply to All. Click OK to confirm the changes.
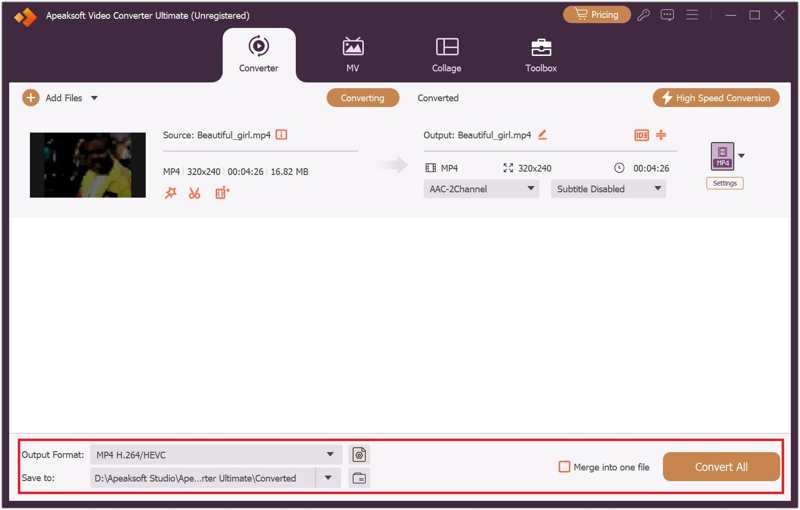
Step 3. Export mute videos
Click the Output Format option at the bottom and set a video format. Click the Folder button and set an output folder. Finally, click on the Convert All button to save the mute videos.
Part 2: How to Remove Audio from Video on PC
On Windows 11/10, Microsoft has added a built-in video editor. In other words, you can separate audio from video using the built-in video editor directly, although it is a little simple and doesn't provide advanced features. Remember that it can handle one video at a time.
Step 1. Fire up the Video Editor app from your Start menu.
Tips: Or you can open it from the MS Photos app.
Step 2. Click the New video project button to create a new project.
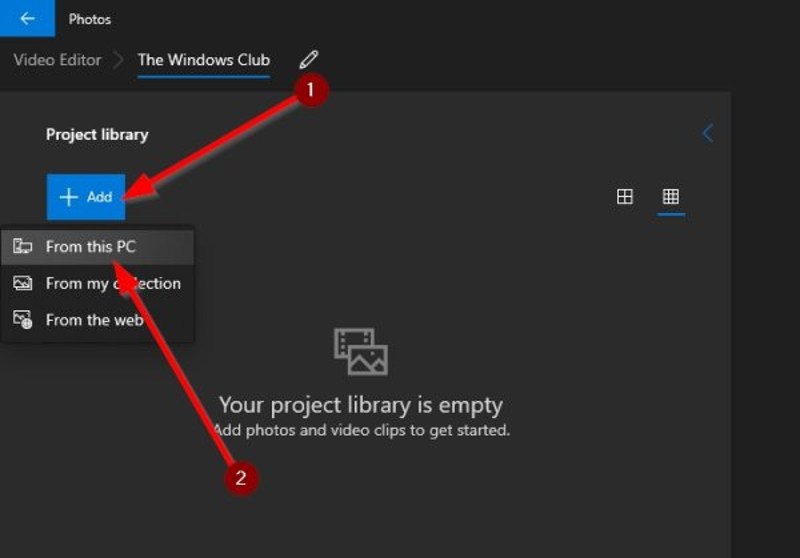
Step 3. Click the Add button and select From this PC.
Step 4. Open the video you want to mute from your hard drive, and drag it to the storyboard.
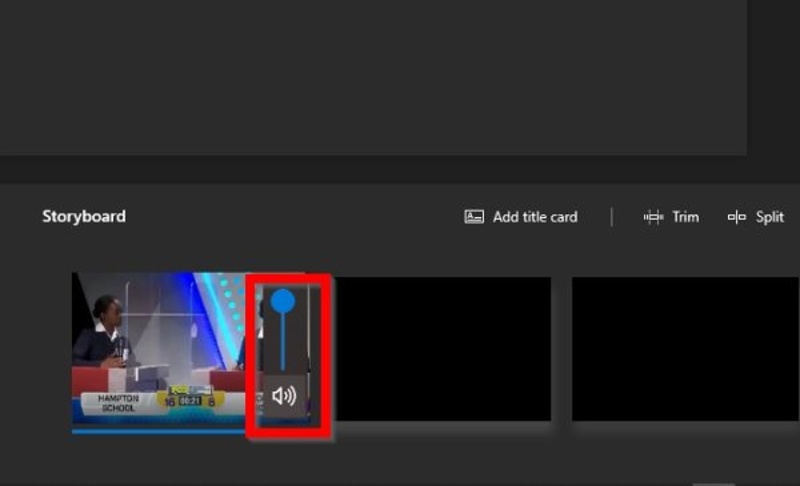
Step 5. Click on the Audio button and decrease the volume until it becomes mute.
Step 6. When it is done, click Finish video at the top right side.
Step 7. Then, set the preferred video quality and click Export.
Part 3: How to Remove BG Audio from Video on Mac
A simple way to remove background audio from video on a Mac computer or laptop is the iMovie app, which is the built-in video editor. Similar to the Video Editor on Windows, iMovie can only process one video file at a time.
Step 1. Run iMovie from the Applications folder on your Mac.
Step 2. Go to the Project tab and click Create New to make a new project.
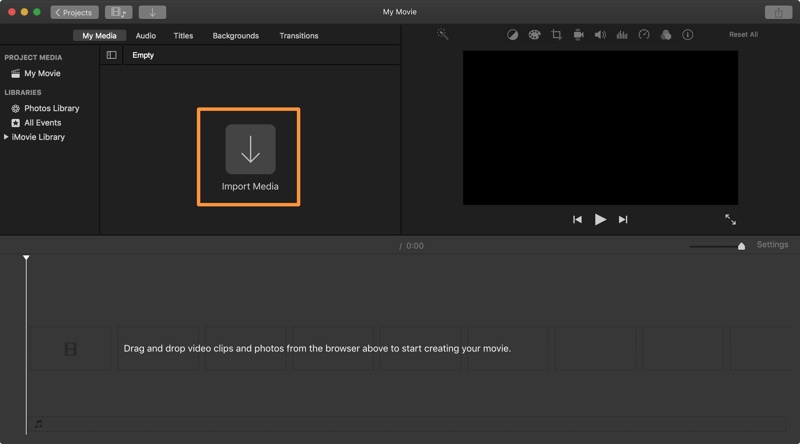
Step 3. Next, click the Import Media button, select the desired video file, and click Import Selected.
Step 4. Click and drag the clip into the timeline.
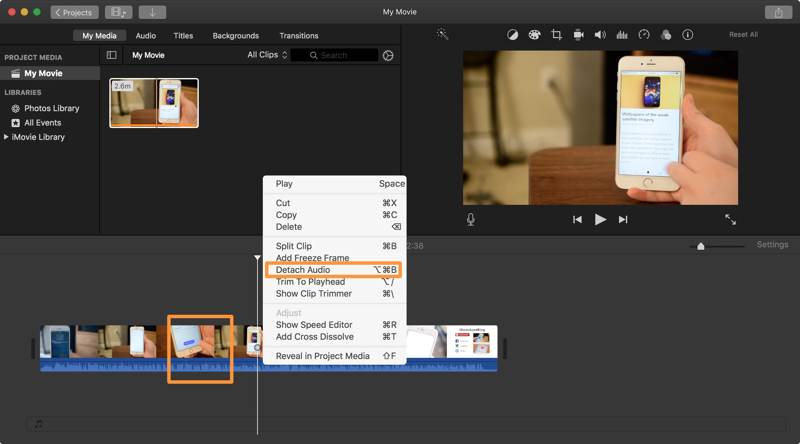
Step 5. Control-click the video and choose Detach Audio. The audio track will become green.
Step 6. Control-click the audio track and choose Delete.
Step 7. Play the video to check if it is muted.
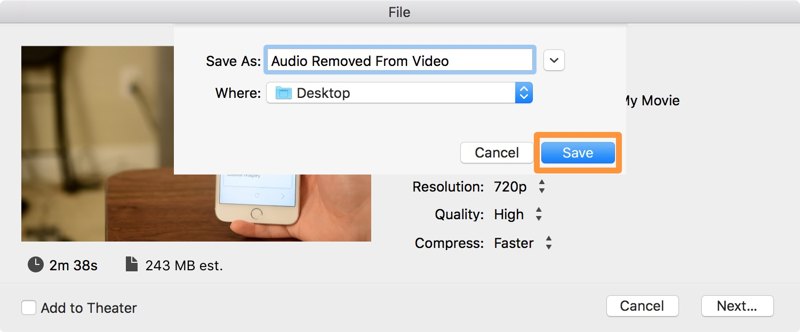
Step 8. Go to the File menu, choose Share, and pick File.
Step 9. Set the resolution, quality, and more. Click the Next button.
Step 10. leave a filename, set an output folder, and click Save.
Part 4: How to Remove Audio from iPhone Video
If you want to remove background audio from an iPhone video, the built-in Photos app can meet your needs. It can mute the video that you take on your iPhone. Here are the steps to complete the job.
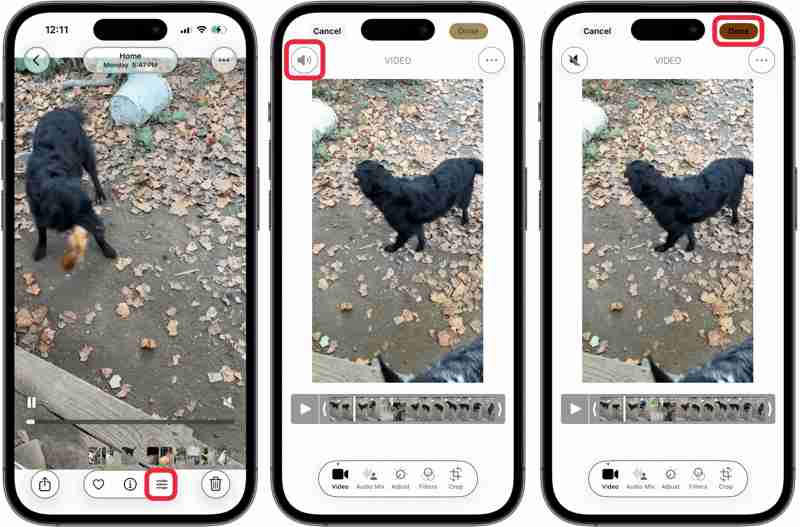
Step 1. Run the Photos app on your iPhone.
Step 2. Find and tap the video you want to process.
Step 3. Tap the Edit button at the bottom.
Step 4. Press the Speaker button at the top left corner.
Step 5. Finally, tap the Done button to confirm the change.
Step 6. Find the muted video and play it to check if the audio track is removed.
Part 5: How to Separate Audio from Video on Android
By default, Android doesn't have a built-in video editor or related feature. However, the Google Photos app allows you to separate audio from video on your Android device. The prerequisite is that you have backed up your videos to Google Photos.
Step 1. Open the Google Photos app and sign in with your Gmail account.
Step 2. Find the video you want to mute. If you haven't backed up the video, tap the Upload button, and upload it.
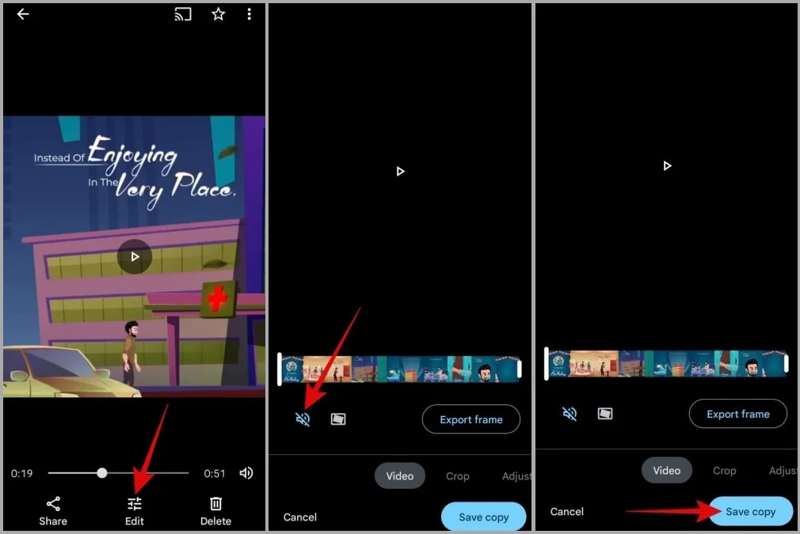
Step 3. Tap the Edit button at the bottom to open it in the video editor screen.
Step 4. Go to the Video tab and tap the Speaker button to mute it.
Step 5. Play the video on the timeline to check if the audio track is removed.
Step 6. At last, tap the Save copy button to confirm it.
Note: Google Photos will save the video without audio as a separate file.
Conclusion
Now, you should understand how to delete audio from video on Windows, macOS, iPhone, and Android devices. You can use the built-in video editor to mute your video file on Windows 11/10, macOS, and iPhone. Google Photos is a simple option on Android devices. Apeaksoft Video Converter Ultimate is a quick way to mute multiple videos in batch on a computer. Plus, it can produce excellent video quality.
Related Articles
Read the Kapwing Video Trimmer review and get more details. You can learn the software's pros, cons, features, and alternatives from this post.
The review of CapCut is a comprehensive analysis and evaluation of its features. And this post will give you 2 alternatives to CapCut.
Has your YouTube load slowly recently? It takes some time to fix the YouTube loading slow problem based on different situations.
If you want to trim an MP4 video but don't know how to do it, just spend a few minutes reading this post, and you can solve your problem.
