How to Fix Touch ID Not Working on iPhone, iPad, or Mac
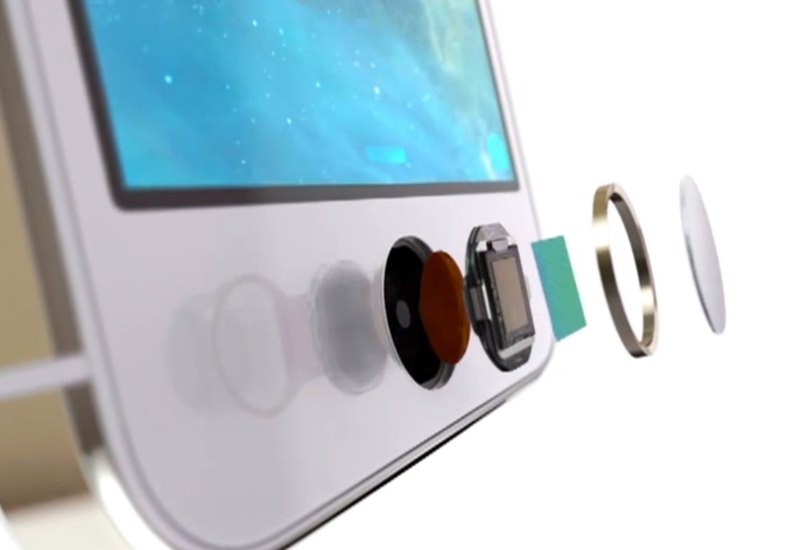
"Touch ID is suddenly not working on my iPad, and it says I am unable to activate Touch ID. How can I fix this problem?" Touch ID is a biometric authentication feature on specific Apple products. It recognizes your fingerprint to verify your identity and unlock your iPhone, iPad, or MacBook without repeatedly entering the passcode. This article explains why Touch ID fails and how to fix this problem on your Apple product quickly.
PAGE CONTENT:
Part 1: Why Touch ID Not Working
Touch ID is available on iPhone 5s through 8 and iPhone SE, iPad 5 and later, iPad Air 2 and later, iPad mini 3 and newer, MacBook Air 2018 and later, MacBook Pro 2016 and later. The main reasons why is your Touch ID not working include:
1.The Touch ID sensor is blocked or dirty.
2.Touch ID is disabled on your device.
3.Your finger is too dry or wet.
4.Your touch screen is freezing and unresponsive.
5.The software is outdated.
6.Conflict settings.
Part 2: How to Fix Touch ID Failed
Solution 1: Clean Your Fingerprint Sensor
If Touch ID does not work on your device, the first thing you should do is clean the fingerprint sensor and your finger. Remove all blocks from the Touch ID button on your device, like screen protector, phone case, and more. Use a cotton swab to clean the Touch ID button. At the same time, Touch ID cannot recognize your fingerprint if your finger is dry or wet.
Solution 2: Turn on the Touch ID
By default, the Touch ID is disabled for Apple products. Plus, you may accidentally turn off this feature. If your Touch ID is not working on a Mac or iPhone, you can follow the steps below to turn on the feature.
On an iPhone or iPad
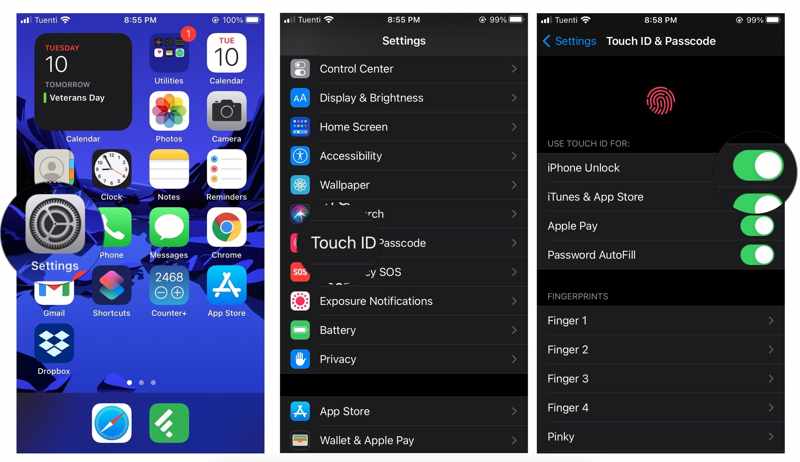
Step 1. Step 1: Open the Settings app on your iOS device.
Step 2. Step 2: Choose Touch ID & Passcode and type your iPhone or iPad passcode.
Step 3. Step 3: Toggle on iPhone Unlock and other desired services under the USE TOUCH ID FOR section.
On a Mac
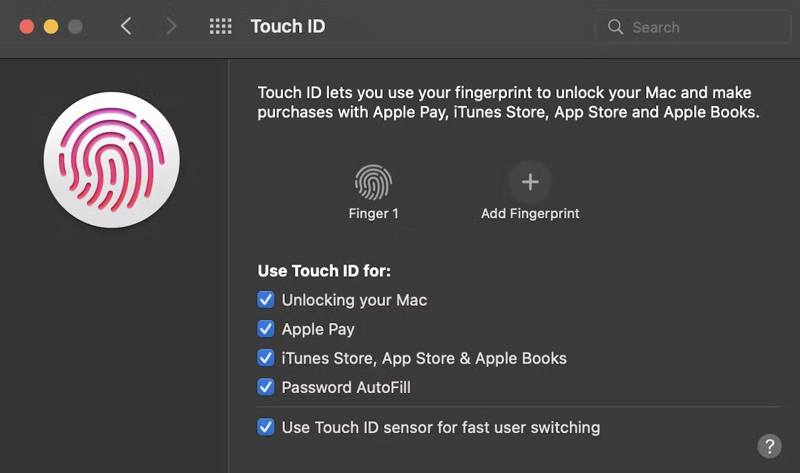
Step 1. Step 1: Go to the Apple menu and choose System Preferences or System Settings.
Step 2. Step 2: Click the Touch ID feature on the panel.
Step 3. Step 3: Check the boxes next to Unlocking your Mac and other options under the Use Touch ID for section.
Solution 3: Force Restart Your Device
iPad Touch ID is not working if the touch screen is freezing. In such a case, you can force restart your device. That will force your iPad, iPhone, or MacBook to restart the login screen. Then, you can unlock your device with a passcode.
On an iPhone or iPad
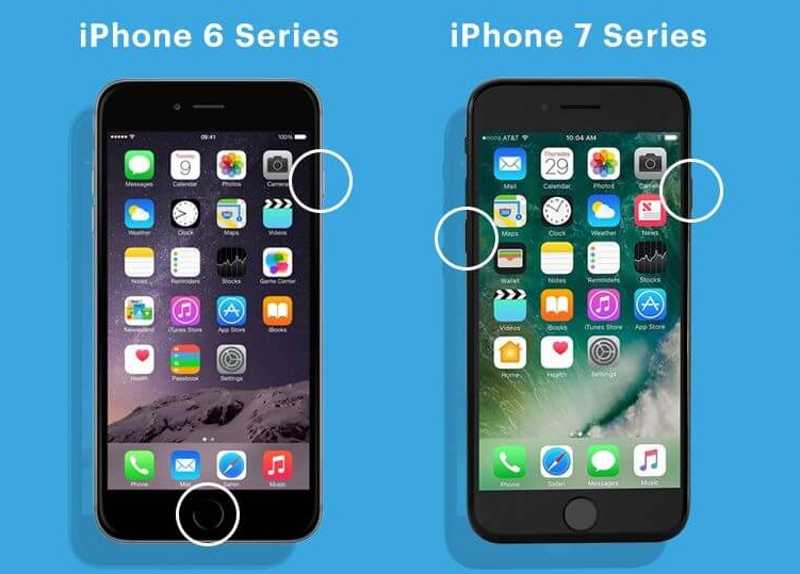
On an iPhone 7/7 Plus, long-press the Volume Down + Side buttons simultaneously until the Apple logo appears.
On an iPhone 6s or earlier and an iPad with a Home button, hold down the Home + Sleep/Wake buttons until the Apple logo pops up.
On a Mac
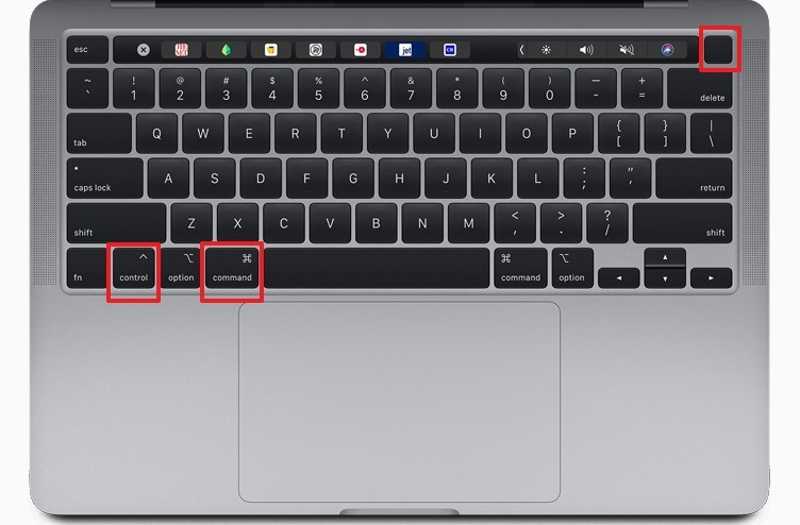
Press and hold the Command + Control + Power buttons until the screen goes blank and restarts.
Solution 4: Add a New Fingerprint
If something is wrong with the existing fingerprint, the iPhone Touch ID will not work. Fortunately, you can add ten fingerprints to your Apple device. Therefore, adding another fingerprint can fix this problem.
On an iPhone or iPad
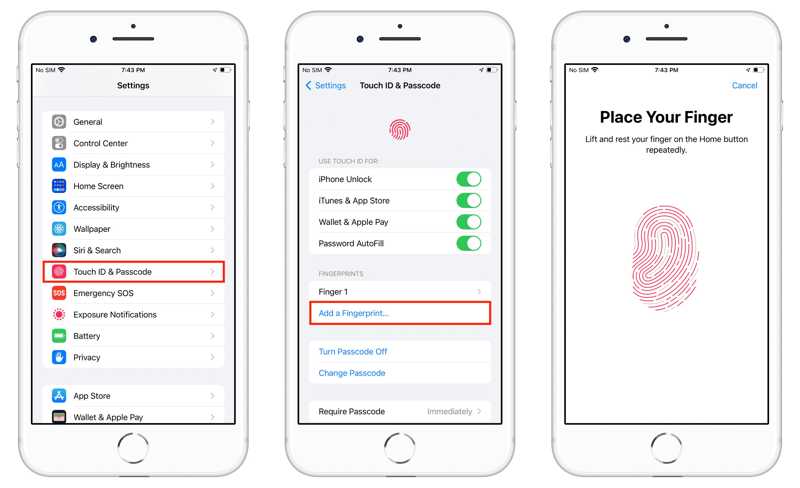
Step 1. Step 1: Go to the Touch ID & Passcode in your Settings app.
Step 2. Step 2: Tap the Add a Fingerprint button.
Step 3. Step 3: Follow the on-screen instructions to scan your fingerprint.
On a Mac
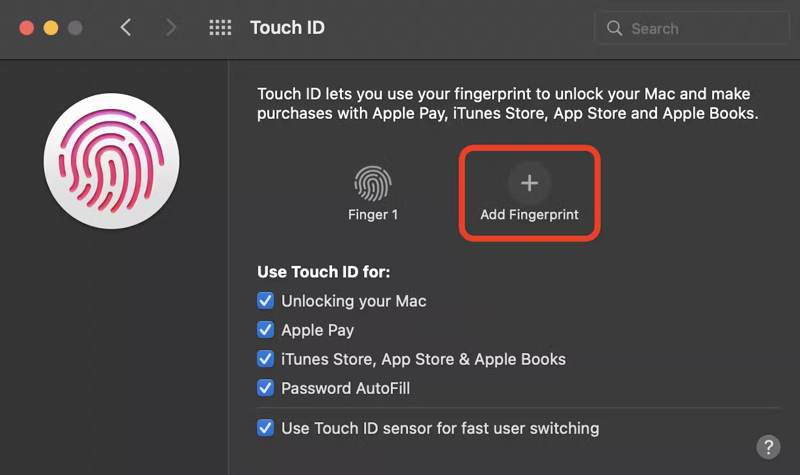
Step 1. Step 1: Choose System Preferences from the Apple menu.
Step 2. Step 2: Click Touch ID to open the Touch ID settings window.
Step 3. Step 3: Click Add Fingerprint and follow the instructions to add a new fingerprint.
Solution 5: Update Software
Outdated software may be responsible for the magic keyboard Touch ID not working. Apple regularly introduces updates to add new features and fix bugs. Therefore, you’d better keep your software up to date.
On an iPhone or iPad
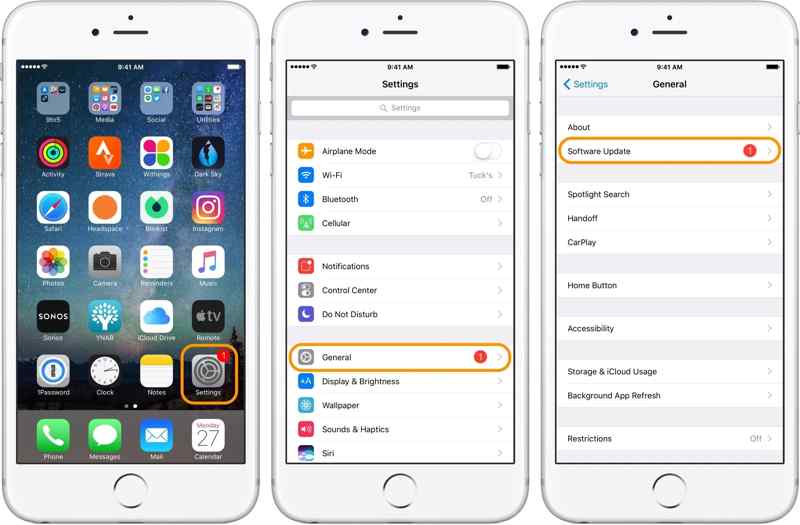
Step 1. Step 1: Go to the General tab in your Settings app.
Step 2. Step 2: Tap Software Update to search for updates.
Step 3. Step 3: If an update is available, tap the Download and Install button and follow the instructions to install the update.
On a Mac
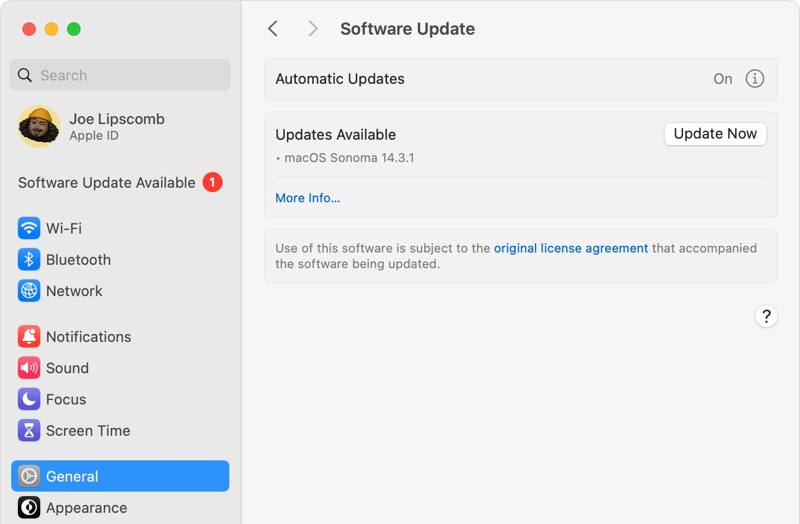
Step 1. Step 1: Go to the Apple menu, choose System Settings, and click General, or choose System Preferences in earlier versions of macOS.
Step 2. Step 2: Click Software Update to check for new software.
Step 3. Step 3: If an update is available, click the Update Now button to install the update.
Part 3: How to Unlock iPhone Without Touch ID
If you have tried the solutions above but Touch ID is still not working, you will be locked out of your iPhone and data. Apeaksoft iOS Unlocker is the best solution for regaining access to your iOS device. Moreover, it simplifies the iPhone unlocking workflow.
Best Solution to Unlock an iPhone or iPad Without Touch ID
- Remove Touch IDs from an iOS device easily.
- Bypass your lock screen without a passcode.
- Offer bonus features like Screen Time bypass.
- Compatible with the latest models of iPhone and iPad.
Secure Download
Secure Download

How to Unlock an iPhone When Touch ID Is Not Working
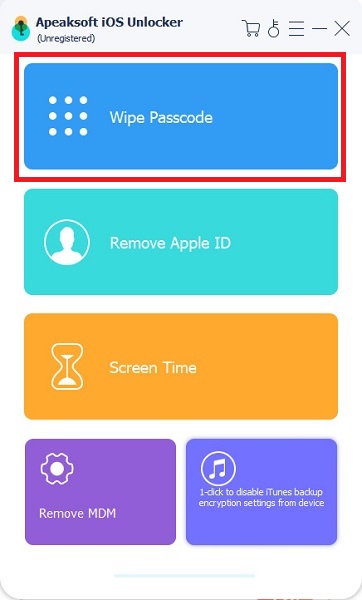
Step 1. Step 1: Link your iPhone and PC
Run the best Touch ID removal software after installing it on your computer. It is available on Windows 11/10/8/7/XP/Vista and Mac OS X 10.7 or above. Choose the Unlock iOS Screen mode. Link your iPhone to your computer with a Lightning cable.
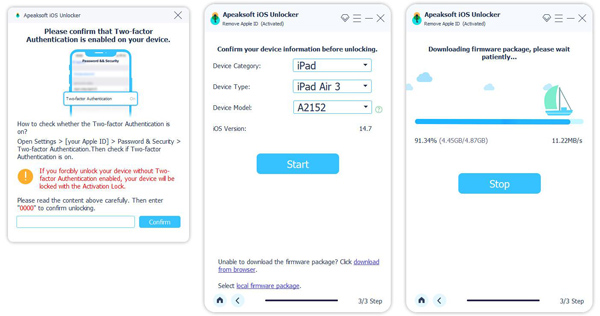
Step 2. Step 2: Download the firmware
Click the Start button to load the device information. Check them and click the Start button to download the necessary firmware.
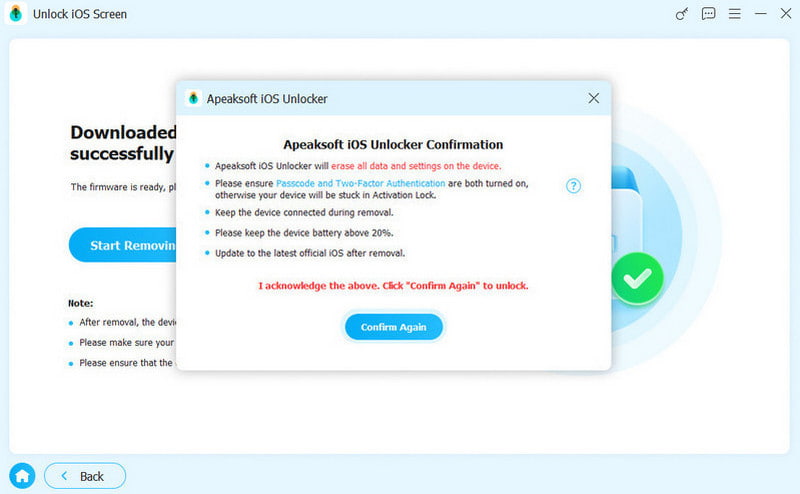
Step 3. Step 3: Unlock your iPhone
After downloading the firmware, click the OK button to begin unlocking your iPhone. When prompted, click Confirm Again and confirm the action. You can also unlock iPad with it.
Conclusion
Now, you should understand what you can do when Touch ID is not working on your Mac, iPhone, or iPad. We explained the main reasons. Furthermore, you can follow our solutions one by one to get rid of the issue. Apeaksoft iOS Unlocker enables you to unlock your iPhone without a Touch ID. If you have other questions, please write them down below.
