How to Transfer Contacts from iPhone to iPad or vice versa
While iPad devices don’t have a built-in Phone app like iPhones, users can still make and receive phone calls on their tablets using a few different methods, like FaceTime and third-party phone call apps. It makes sense that you need to transfer contacts from an iPhone to an iPad or vice versa. This article lists four proven methods and demonstrates a concrete workflow for each method to share contacts on your devices.
PAGE CONTENT:
Part 1: The Easiest Way to Transfer Contacts from iPhone to iPad
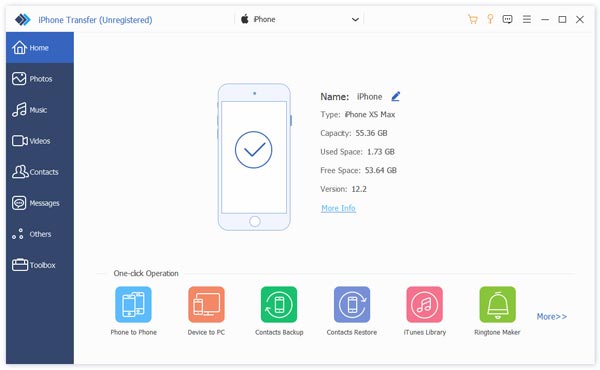
The easiest way to transfer your iPhone contacts to your iPad is Apeaksoft iPhone Transfer. It allows you to sync contacts between an iPhone and iPad through a physical connection on a computer. You can transfer the entire phone book or specific contacts. Furthermore, the intuitive interface is easy to navigate for beginners.
The Easiest Way to Transfer Contacts between iPhone and iPad
- Transfer contacts from iPhone to iPad or vice versa.
- Manage and edit iPhone contacts on a computer.
- Organize contacts by group.
- Back up iPhone contacts to your computer.
- Support the latest versions of iOS and iPadOS.
Secure Download
Secure Download

How to Transfer Contacts from Your iPhone to an iPad
Step 1. Link your iPhone and iPad
Download and install the best contact transferring software on your computer. Connect both your iPhone and iPad to your computer with compatible cables. Launch the software, and it will detect your devices immediately. Pull down the top option and choose the source device.
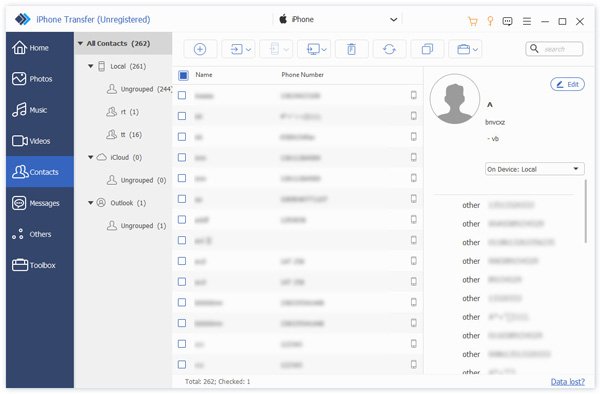
Step 2. Preview iPhone contacts
Go to the Contacts tab on the sidebar and view all contacts on your iPhone. If you want to sync all contacts, tick the checkbox in front of Name. Otherwise, mark the contacts you want to transfer.
Step 3. Transfer iPhone contacts to iPad
Then, click the Phone button on the top ribbon and choose the target device, such as your iPad. The software will begin transferring iPhone contacts to the iPad. When it is done, disconnect the two devices.
Part 2: How to Transfer Contacts from iPhone to iPad via iCloud
Is it possible to transfer contacts from an iPhone to an iPad wirelessly? The answer is yes, and all you need is an Apple ID account. Apple gives 5GB of free iCloud storage for each account. If you sync or back up your iPhone contacts to iCloud, you can download them to your iPad after signing in with the same account. This method requires a stable Wi-Fi network.
Step 1. Make sure both the iPhone and iPad connect to a Wi-Fi network.
Step 2. Turn on the source device.
Step 3. Open the Settings app and tap on your profile.
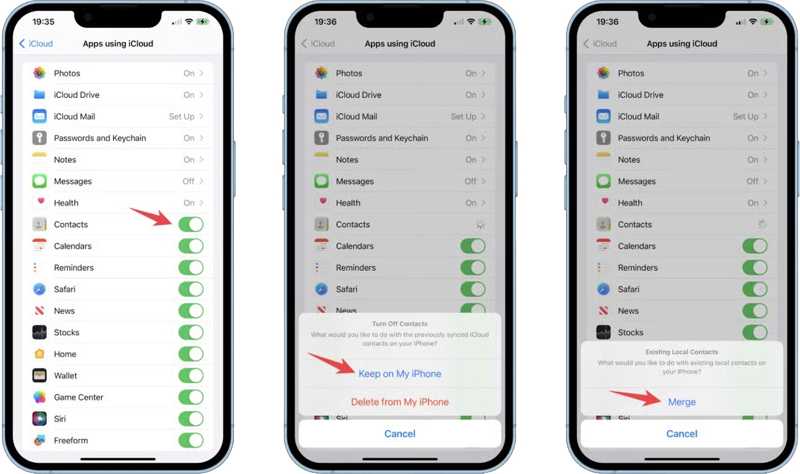
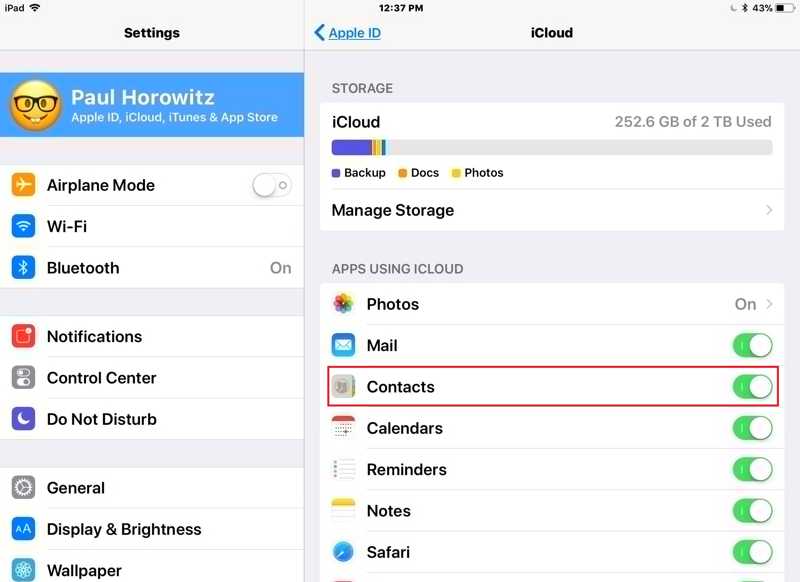
Step 4. Go to the iCloud tab and toggle on Contacts.
Step 5. Choose Keep on My iPhone if you want to keep your contacts.
Step 6. Turn on the target device. To transfer contacts from iPhone to iPad, for example, turn on your iPad.
Step 7. Run the Settings app and sign in with the same Apple ID account.
Step 8. Tap on the profile, choose iCloud, and enable Contacts.
Step 9. Wait for a while, and your contacts will appear on your iPad.
Part 3: How to Transfer Contacts from iPhone to iPad by AirDrop
If you just need to transfer a contact from iPad to iPhone or vice versa, AirDrop is a quick option. As a wireless connection between Apple devices, it allows you to sync a variety of data types. For contact transferring, AirDrop is suitable for a specific contact.
Step 1. Turn on Wi-Fi and Bluetooth on both your iPhone and iPad.
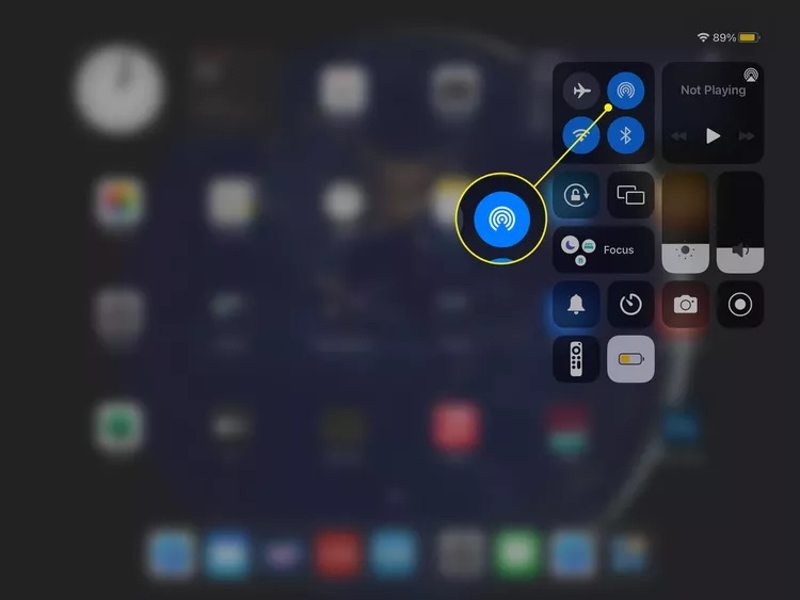
Tips: You just need to enable the wireless connections and don’t need to connect to a Wi-Fi network.
Step 2. Enter the Control Center, tap the AirDrop button, and choose Everyone.
Step 3. Open the Contacts app on the source device. Or run the Phone app and go to the Contacts tab.

Step 4. Find the desired contact and tap it.
Step 5. Tap the Share Contact option and choose AirDrop on the pane.
Step 6. Pick the target device to begin transferring the contact.
Part 4: How to Transfer Contacts from iPhone to iPad Using iTunes
Another option to transfer the contact list from your iPhone to iPad is iTunes. This way is used to transfer entire contacts or specific groups. You need a PC, USB cables, and the latest version of iTunes.
Step 1. Plug the source device into your PC with a USB cable.
Step 2. Open the latest version of iTunes and click the Phone button at the top left side after your device is detected.
Step 3. Choose the Info tab under the Settings section on the sidebar.
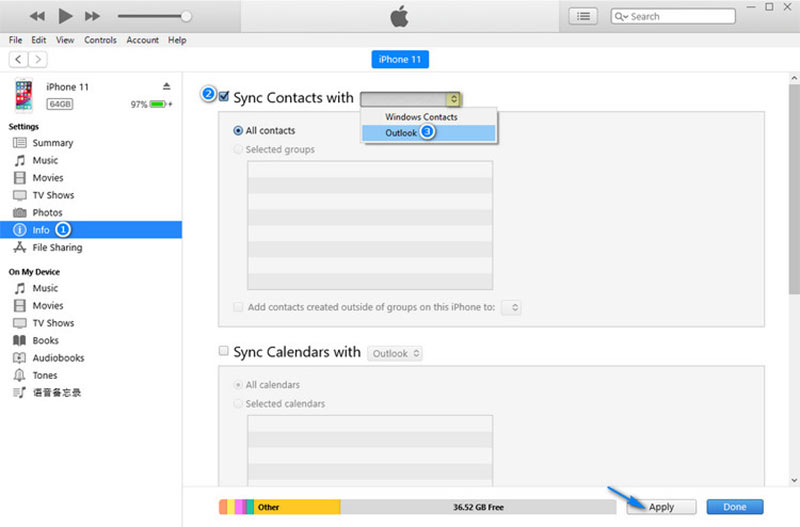
Step 4. Tick the box next to Sync Contacts with. Choose Windows Contacts or Outlook, depending on your condition.
Step 5. Select All contacts or Selected groups according to your needs.
Step 6. Click the Sync or Apply button to transfer your contacts to iTunes.
Step 7. When it is done, disconnect the source device. Then, hook up the target device to your PC with a cable.
Step 8. Click the Phone button, go to the Info tab, mark Sync Contacts with, and select All Contacts.
Step 9. Make sure to select the same place from the drop-down list next to Sync Contacts with.
Step 10. Finally, click the Sync or Apply button to transfer iPhone contacts to your iPad.
Step 11. When it finishes, disconnect the target device and check if the desired contacts appear on your iPad.
Conclusion
Now, you should learn at least four ways to transfer a contact list from an iPhone to an iPad. iCloud lets you sync all contacts between Apple devices signed in with the same Apple account wirelessly. AirDrop is used for syncing a specific contact. iTunes is a good option to transfer contacts using cables. Apeaksoft iPhone Transfer is the best option for average people. If you have other questions about this topic, please feel free to write them down below this post.
