


How to Transfer iPad Data to Another Wirelessly or via Cable

Upgrading to a new iOS device is exciting, but transferring from iPad to iPad can be quite troublesome. Due to the excellent performance and wonderful screens, users store their iPad devices in the workplace, at home, on the road, and anywhere. It makes sense that they save work documents, files for school, important memories, and much more on their devices. This tutorial identifies the proven methods and demonstrates the workflows with steps.
PAGE CONTENT:
- Part 1: Which Method to Choose to Transfer iPad Data to Another
- Part 2: A Quick Way to Transfer Data from iPad to iPad
- Part 3: How to Transfer iPad to New iPad with Quick Start
- Part 4: How to Transfer iPad Data to Another via iCloud
- Part 5: How to Transfer Stuff from iPad to iPad Using a Computer Backup
- Part 6: FAQs About iPad Data Transfer
Part 1: Which Method to Choose to Transfer iPad Data to Another
The best way to transfer data from one iPad to another depends on your devices and how you want to move your data. Check the table below to quickly find the method that fits your situation.
| Your Situation | Recommended Method |
| Your new iPad is still being set up | Quick Start |
| You want to transfer data through the cloud | iCloud |
| You have a computer and a backup | Finder, Apple Devices, or iTunes |
| You only want to transfer selected data | Apeaksoft iPhone Transfer |
Part 2: A Quick Way to Transfer Data from iPad to iPad
If you only want to transfer selected data from one iPad to another, Apeaksoft iPhone Transfer provides a direct way to move your files without an internet connection. It lets you preview and select the data you want to transfer, and works for both a new iPad and a used iOS device. Moreover, it doesn't require any technical skills. The intuitive interface makes it easy to navigate, especially for ordinary people.

Downloaded by over 1,000,000 users
- Transfer data from iPad to iPad quickly.
- Migrate data between iOS devices in one click.
- Compatible with a wide range of data types.
- Preview iPad files for selective data transferring.
- Offer bonus features, like a ringtone maker.
- Support the latest models of iPad.
Secure Download
Secure Download
How to Transfer Data from iPad to iPad
Step 1. Link your devices
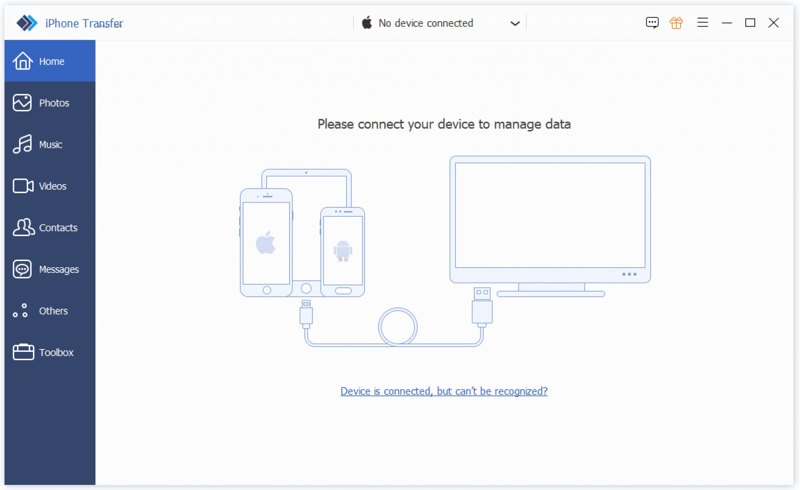
Launch the iPad transferring software once you install it on your computer. It works on Windows 11/10/8/7/XP/Vista and macOS 10.7 or above. Link both source and target devices to your computer with Lightning cables. The software will detect your devices immediately.
Step 2. Transfer data from iPad to iPad
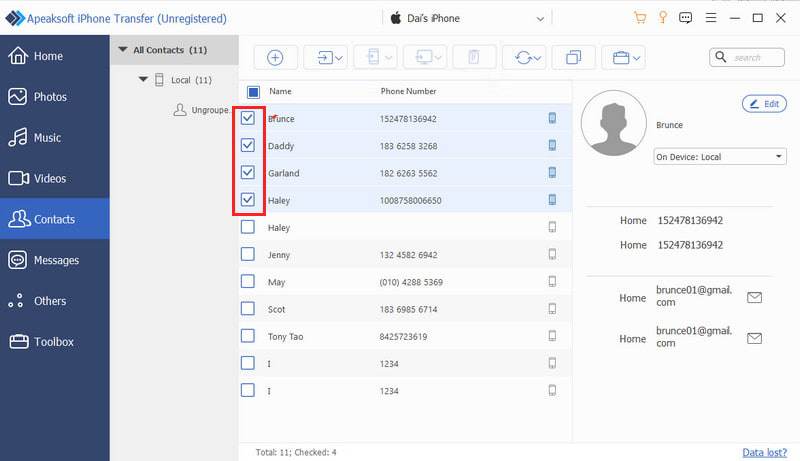
Choose the source iPad from the top drop-down option. Then, you can preview your data, like Photos, Music, Videos, Contacts, and more. Select the files and items you want to move. Click the Phone button on the top ribbon, and choose your target iPad. Then, the iPad transfer will start automatically.
Part 3: How to Transfer iPad to New iPad with Quick Start
If you just get a new iPad, you can transfer data from your old iPad to the new iPad when setting it up. Apple has released the Quick Start feature to help you set up a new iPad with an old device through an internet connection.
Requirements
- The two iPad devices.
- An internet network.
- Your devices must run iPadOS 13 or later.
Step 1. Turn on the old iPad, go to the Control Center, and turn on Bluetooth and Wi-Fi.
Step 2. Power on the new iPad, and follow the assistant to set it up.
Step 3. Make sure to select a Wi-Fi network and connect the new iPad to it.
Step 4. When the Quick Start screen pops up, place the old iPad next to the other.
Step 5. Then, the Set Up New iPad message will appear on the old iPad.
Step 6. An animation will display on the new iPad.
Step 7. Turn to your old iPad, open the Camera app, and scan the new iPad screen.
Step 8. If prompted, enter your old iPad's passcode on your new device.
Step 9. Next, set up Touch ID or Face ID, and choose Transfer from iPad to start transferring stuff from one iPad to another.
Part 4: How to Transfer iPad Data to Another via iCloud
Once you get an Apple device, you are asked to create an Apple ID and password. At the same time, you have 5GB of free iCloud storage. You can transfer data from one iPad to another through the same account. If you want to transfer data from your old iPad to another iPad without connecting the devices to a computer, you can use iCloud to back up your old iPad and restore the backup to the other iPad.
Requirements
- An Apple ID and password.
- A stable internet connection.
- Enough iCloud storage.
Step 1. Back Up Your Old iPad to iCloud
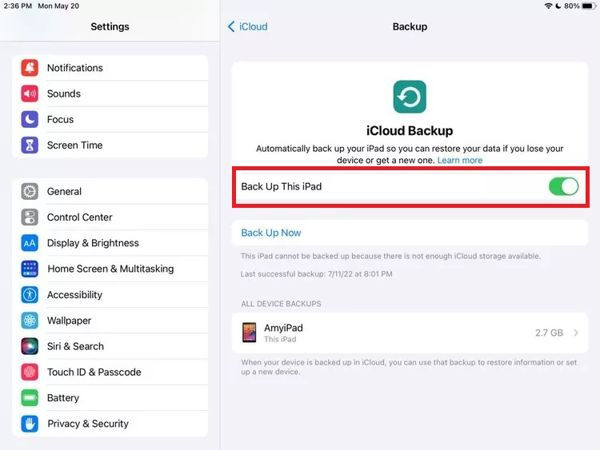
Go to Settings on your old iPad. Choose iCloud > iCloud Backup, then toggle on Back Up This iPad. Tap Back Up Now.
Step 2. Set up Your New iPad
Follow the on-screen instructions to set up your new iPad. When you reach the Apps & Data screen, choose Restore from iCloud Backup. Sign in with the same Apple Account used on your old iPad.
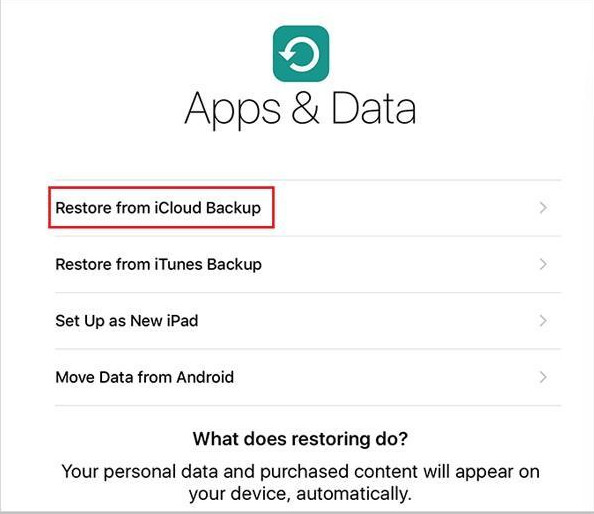
Step 3. Select the Backup
Choose the latest backup and wait for the restore process to finish.
If you only want to sync specific data, such as photos, contacts, or notes, you can turn on the corresponding iCloud sync options instead of restoring an entire backup.
Step 1. Turn on the old iPad and run the Settings app.
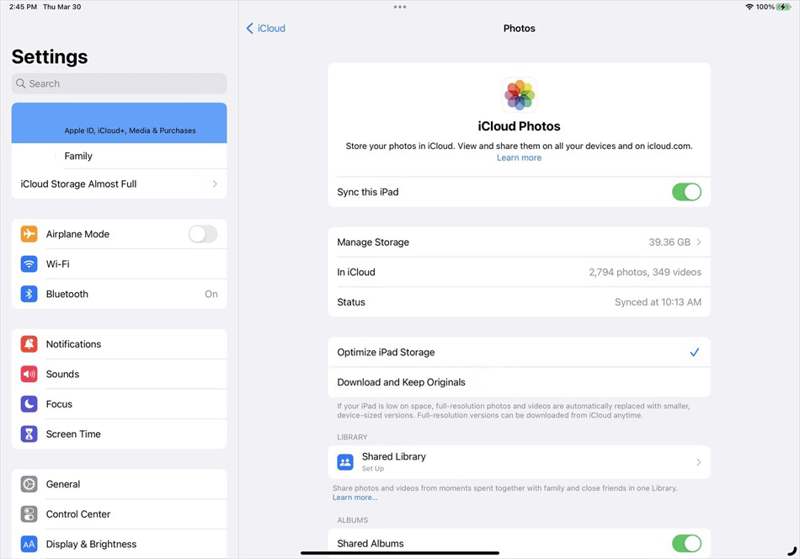
Step 2. Tap on your profile and choose iCloud.
Step 3. Choose Photos, and toggle on Sync this iPad.
Step 4. Next, sync Notes, Messages, Contacts, and other available data types to iCloud.
Step 5. When it finishes, turn on the other iPad. To transfer the iPad to a new iPad, set it up.
Step 6. Run the Settings app, and connect to a Wi-Fi network.
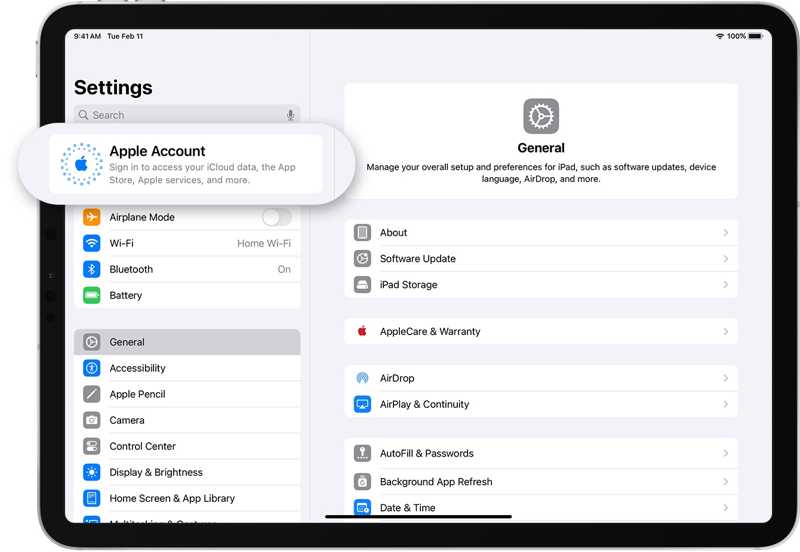
Step 7. Tap Apple Account, and choose Sign in Manually.
Step 8. Enter the Apple ID and password associated with the old iPad.
Step 9. Next, tap on your profile and choose iCloud.
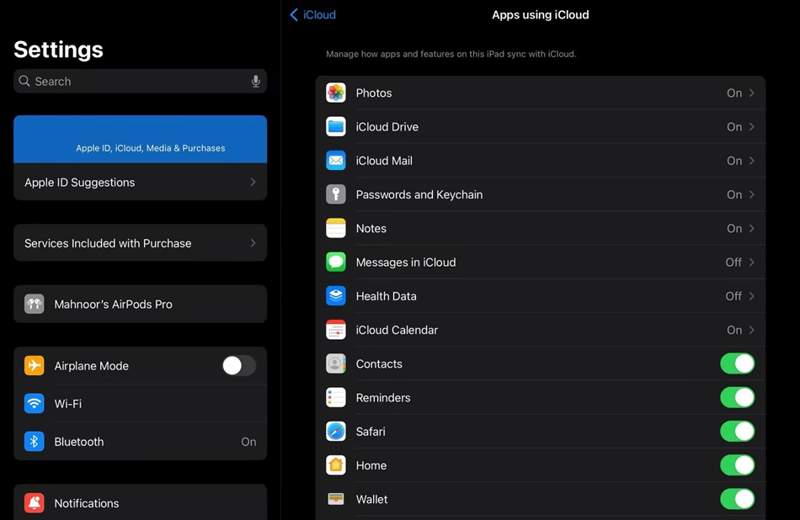
Step 10. Turn on iCloud Photos, iCloud Drive, Messages, and other data types.
Further Reading
Part 5: How to Transfer Stuff from iPad to iPad Using a Computer Backup
Another way to transfer stuff from one iPad to another iPad is to use a computer backup. This way is available if you don't have an internet connection and prefer not to use iCloud. However, you must have a computer and a cable.
Requirements
- A computer and a USB cable.
- The latest version of iTunes or Finder.
Step 1. Connect the old iPad to a computer with a USB cable.
Step 2. Open iTunes on Windows and macOS Mojave or earlier. Or run Finder on macOS Catalina or later.
Step 3. Go to the Summary or General tab after your device is detected.
Step 4. Click the Back Up Now button to create a backup.
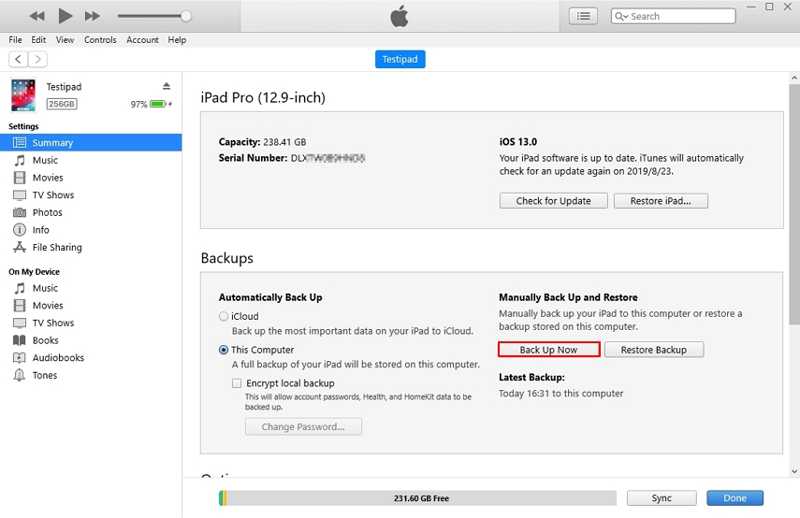
Step 5. When it is done, disconnect the old iPad, and plug the other iPad into the computer with a compatible cable.
Tip: If you are setting up a new iPad, choose Restore from Mac or PC on the Apps & Data screen.
Step 6. Then, click the Restore Backup button in the Summary or General tab.
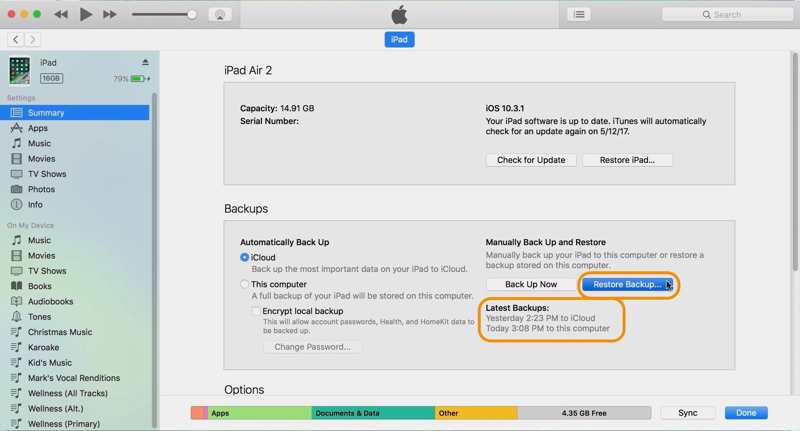
Step 7. Choose the latest backup and restore it to your iPad.
Part 6: FAQs About iPad Data Transfer
Can I transfer data from an old iPad to a new iPad after setup?
Yes. You can use Quick Start or an iCloud backup to transfer data from an old iPad to a new iPad. You can also use iTunes/Finder or a third-party transfer tool without erasing the new iPad.
Can I transfer data from iPad to iPad without iCloud?
Yes. You can use Quick Start, iTunes/Finder, or a third-party iPad transfer tool to transfer iPad data to another without iCloud.
How long does it take to transfer data from iPad to iPad?
It depends on the amount of data and the transfer method. Large amounts of data may take longer. A cable connection is generally faster than a wireless transfer.
Conclusion
This guide lists four ways to transfer an iPad to iPad wirelessly or with a USB cable. The Quick Start feature is a quick way of data migration from an old iPad to a new iPad when setting it up. iCloud enables you to complete the process wirelessly. iTunes backup allows you to finish the job with a computer. Apeaksoft iPhone Transfer is a fast method to transfer all data or specific files between iPad devices.
 Apeaksoft iPhone Transfer
 Transfer iOS data among iOS devices, computer and iTunes.
Secure Download
Secure Download
Related Articles