Whether you need to manage the videos, or sort out the desired photos from Google Photos on your iPhone or Android phone, you should take advantage of Google Photos albums. Once you have uploaded the media files to Google Photos, you can create albums, share with friends, embed to website, hide from other and more. Just learn more about the detailed process about managing albums of Google Photos with ease from the article.

- Part 1: How to Share a Google Photos Album
- Part 2: How to Create an Album in Google Photos
- Part 3: How to Download a Google Photos Album
- Part 4: How to Hide Albums for Google Photos
- Part 5: How to Embed Google Photos Albums
- Part 6: What are the Limitations for Google Photos Album
- Part 7: How to Upload Photos to Google Photo Album
Part 1: How to Share a Google Photos Album
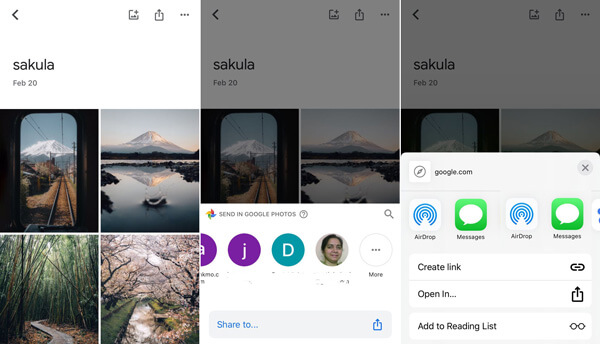
Step 1 Open the Google Photos app and login the account. Go to the album you want to share from the app.
Step 2 Tap the Share option, you can select the contact you want to share or choose desired app you want to share under the Share to apps window.
Step 3 Moreover, you can also create and share a link for the Google Photos album by tapping the Create link option.
Part 2: How to Create an Album in Google Photos
Step 1 Tap on the Google Photos app on your iPhone or Android phone. Sign into the account with your ID and password (Google Photos forgot? Just recover it now.).
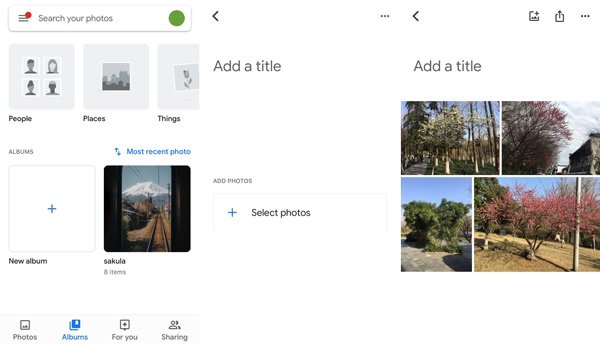
Step 2 Choose the Album button at the bottom and tap on the Plus + inside the New Album box to create an album in Google Photos.
Step 3 Enter the name of the album and tap the Select photos to select the images to Camera Roll or Gallery from your smartphone.
Part 3: How to Download a Google Photos Album
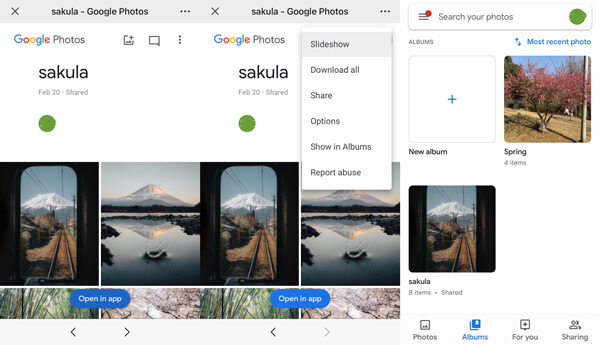
Step 1 When you get a shared Google Photos album via a link, you can open the share link within the Google Photos app via the Open in app button.
Step 2 In order to download the Google Photos album directly within the app, you can click the More options menu to choose the Download all option.
Step 3 After that, you can login the account with your ID and password, you should access to the shared Google Photos album within the program.
Part 4: How to Hide Albums for Google Photos
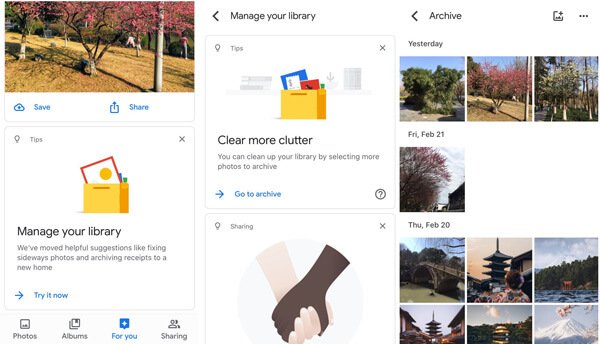
Step 1 Go to the Google Photos account and select the For you menu at the bottom of the app to hide albums for Google Photos.
Step 2 Click the Try it now link under the Manage your library menu to archive and hide the photo albums within the app.
Step 3 Tap on the Go to archive to select the photos from the album and clean up your library to hide albums for Google Photos.
Part 5: How to Embed Google Photos Albums
Step 1 You should share the selected Google Photos album with a link as the above process. Copy and paste the link to send it via an email or app.
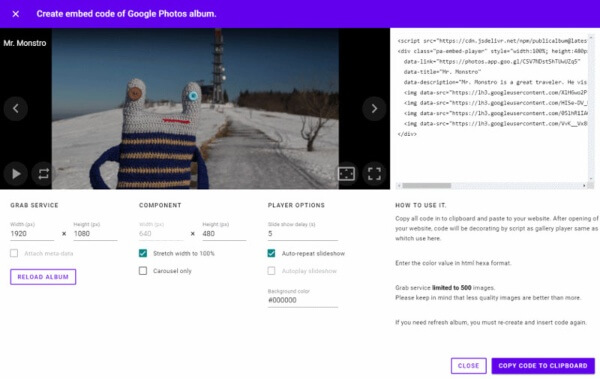
Step 2 Go to your website and insert to field and press the Create embed code option to turn the link into an HTML code for your website.
Step 3 If you need some changes for the embed Google Photos album, such as add new photos, you should customize the code before pasting code.
Part 6: What are the Limitations for Google Photos Album
It is convenient to use the Google Photos album, but there are some major restrictions you should know.
1. Number of photos: There is a limit of 2,000 photos per album in Google Photos, or else, you might not able to download the Google Photo album or upload large photos.
2. Upload restriction: The maximum upload size limit for each photo is 100 Megapixels and 75 MB while the maximum upload size limit for a single video is 10 GB. You can free up Google Photos if the space is full.
3. Upload method. When you turn on the automatic sync feature of Google Photos, all the photos will be synced to the account. You cannot choose the desired ones to the account.
Part 7: How to Upload Photos to Google Photo Album
What should you do if you just need to upload the desired photos to Google Photo? It should be difficult to create Google Photos albums or manage them with ease when you have a large amount of photos on your smartphone. In order to upload the desired photos to the album only, Apeaksoft MobieTrans is the ultimate solution to transfer, backup, and manage the photos for Google Photos with ease.

4,000,000+ Downloads
Transfer photos, videos, music and other files for your Google Photos.
Manage the photos between iOS device, Android phone and computer.
Create photo ablums, move images between the albums and more.
Support most of the iPhone, Samsung, HTC, Motorola devices.
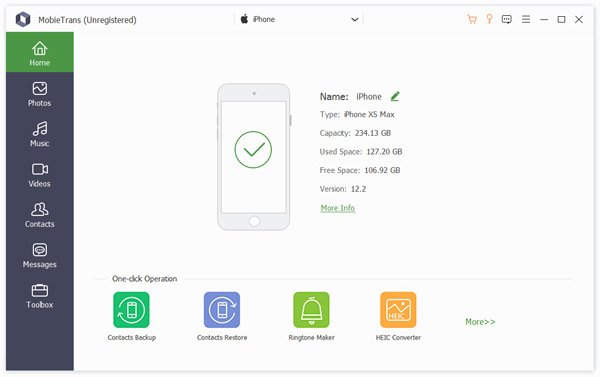
Step 1 Transfer desired photos to computer
Once you have installed the software, you can launch the program and connect the devices to your computer via a USB cable. It is able to detect the devices as well as the media files.
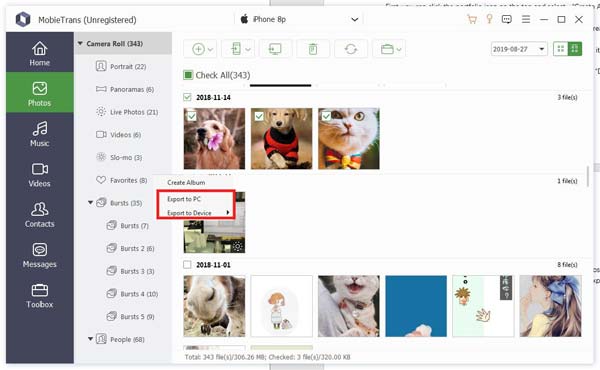
Step 2 Create albums for Google Photos directly
Tap the Photos menu from the left menu and select the desired photos you want to transfer for the Google Photos albums. If you want to export a whole photo folder, you can just right click the album and find Export options.
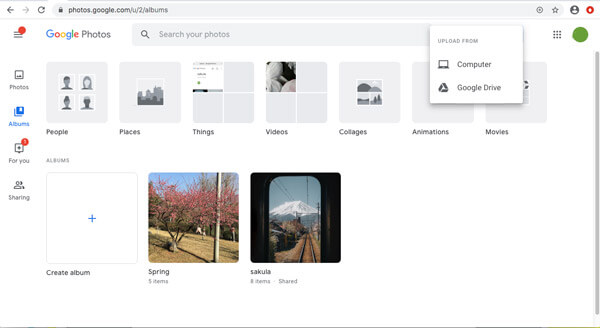
Step 1 Upload photos to Google Photos album
Access to the Google Photos account and select the Album option. After that, you can click the Upload From option to choose the Computer option. You can upload the photos to Google Photos album directly.
Conclusion
It is the ultimate guide about how to take full advantage of the Google Photos album. You can create a Google Photos album, share it to friends, embed it to your website, upload/download it from your computer, or even manage the photos.