How to Transfer Voice Memos from iPhone to PC with/Without iTunes
Voice memo transfer plays an important role in our daily lives. We need to get voice memos off iPhone especially when we want to edit audio on the computer, such as compressing an MP3, transcribing the content, etc.
So, do you know how to transfer voice recordings from iPhone? Follow us to have a detailed understanding.
PAGE CONTENT:
Part 1: Transfer Voice Memos from iPhone to Computer without iTunes
My iTunes doesn’t work on my computer. How can I get voice memos off iPhone to PC without iTunes? If it is the same problem that troubles you, don’t worry. Here, we will give you the method to transfer voice recordings from iPhone bypassing iTunes – Apeaksoft iPhone Transfer.
Apeaksoft iPhone Transfer is a powerful tool for data transfer. You can use it to transfer voice recordings from iPhone and sync files between two devices with just one click. What’s worth mentioning is that it supports the latest iOS devices and iOS versions.
With it, you can:
Export recordings from iPhone with no data loss.
Transfer voice memos selectively
Unlike other tools that can transfer only one or all of the recordings, it can transfer voice memos purposefully. You can select your desired recordings by checking them only.
Get started easily
To transfer recordings from iPhone, you simply need to follow some simple steps. Also, there are intuitive guiding buttons on the interface, unlike other tools where you may not find relevant buttons even with the tutorial.
Secure Download
Secure Download
Here are the steps you can refer to:
Step 1. Press the button above to download Apeaksoft iPhone Transfer to your computer.
Step 2. Connect your iPhone to the computer to manage data with a data cable.
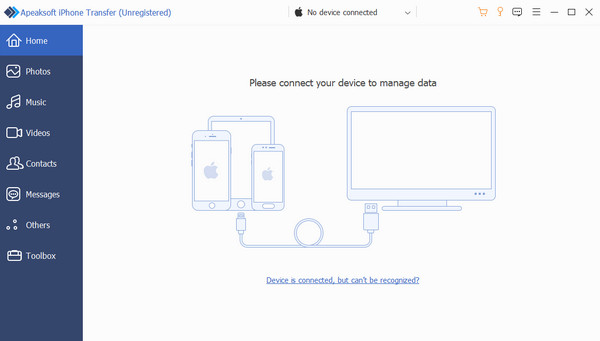
Step 3. After a successful connection, click Music in the left navigation bar to find Voice Memos. Then, you will see all your voice memos on the right interface.
Choose the recordings you want to transfer by clicking the box in the upper left corner of the file.

Step 4. If the recordings are already, press the computer-like button in the above navigation bar, select the save path, and then you can do something like converting voice memo to MP3, etc.
Part 2: How to Transfer Voice Memos from iPhone to PC in iTunes
When we talk about how to import voice memos from iPhone to computer, most of us may come up with iTunes. This article will also provide you with the steps. What you need to notice is that you must transfer your recordings all at once. Then you have to go to the library to download it selectively. It takes time.
Step 1. Open iTunes on your computer and connect your iPhone with a data cable.
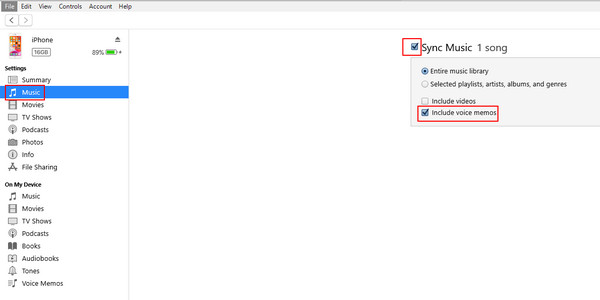
Step 2. Find your device, select Music on the left page, and then check Sync Music. Then, in the following options, check Include voice memos only.
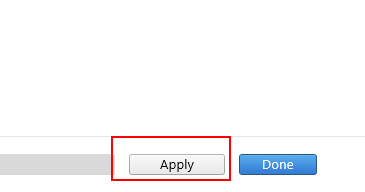
Step 3. Click Apply at the bottom of the page to start your transfer. Then, you can find your voice memos on iTunes.
Part 3: 3 Ways to Transfer Voice Recordings from iPhone with No Apps Download
If you find the methods above time-consuming, here are 3 ways to transfer voice recordings from iPhone via iCloud, AirDrop, and Mail, which is convenient and requires no apps.
1. iCloud
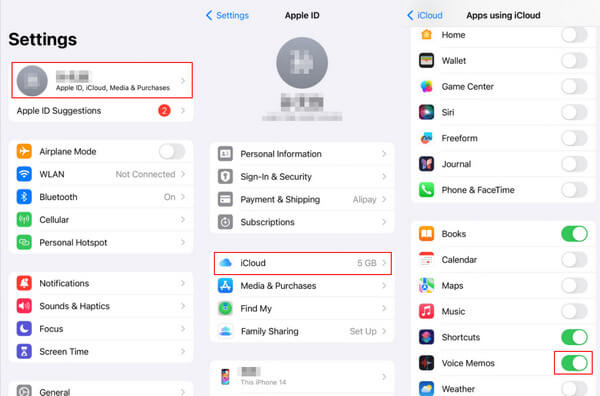
Step 1. Open Settings on your phone, click your name, choose iCloud, and then scroll down to find Voice Memos. Toggle it on.
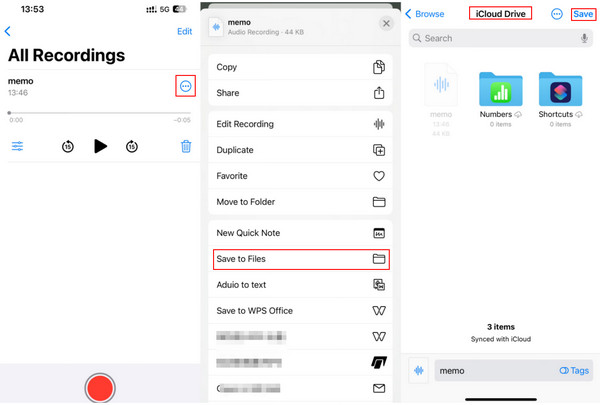
Step 2. Go to your Voice Memos, click the recording to be transferred, and click the button at the top right corner. Choose Save to Files a little bit down the page and save it to iCloud Drive.
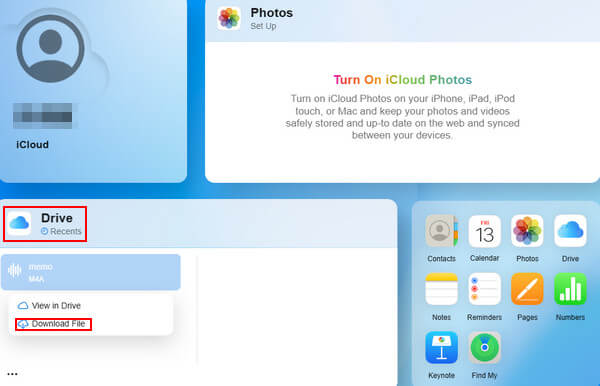
Step 3. Access your iCloud in your browser and log in with your Apple ID (the same as your iPhone). Then, you will see your files on the interface. Click it to download.
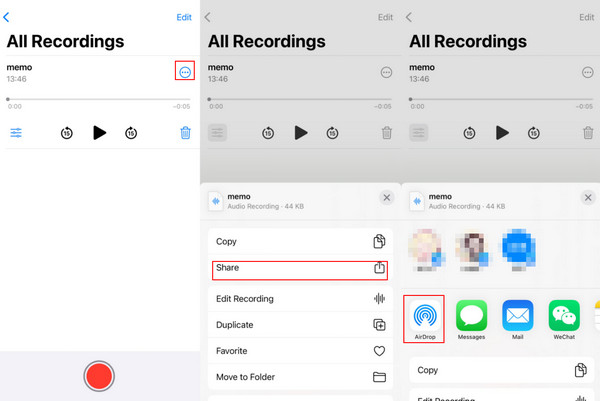
2. AirDrop
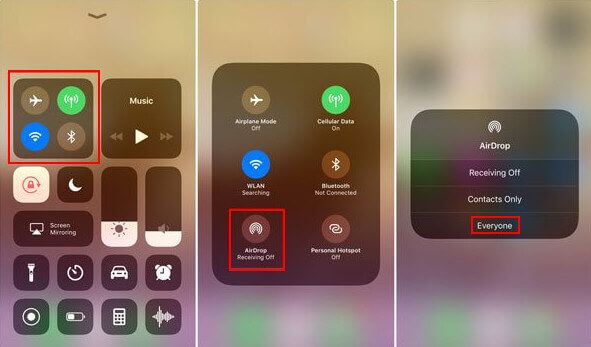
Step 1. First, you should pull down the menu bar from the top right of the phone screen, long press the first square, and you will find AirDrop. Long press the pattern, and there will be several options. Choose the last one - Everyone.
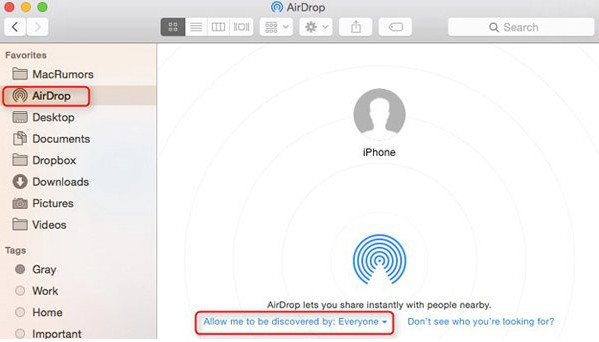
Step 2. Second, you should enable AirDrop on your Mac. Go to Finder to find AirDrop, and then adjust its permission to Everyone.
Step 3. Last, return to your phone and click the voice memo you want to transfer. Click the button on the upper right, choose Share, press the AirDrop sign, then find your Mac account and start the process with one click.
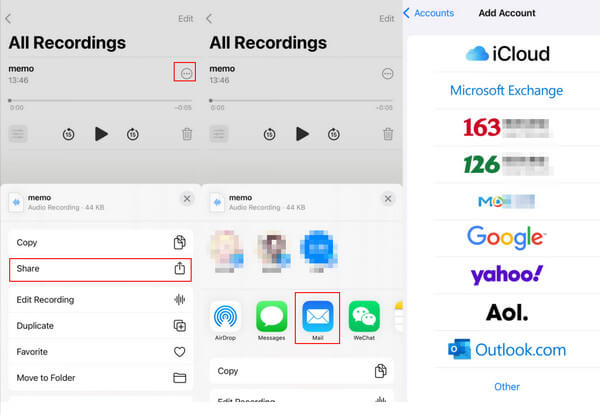
3. Mail
Step 1. Choose the targeted files first, then click the button with three dots.
Step 2. Click Share and choose Mail. Then, you will see a list of mail types available. Choose the most convenient one you like.
Step 3. Log in to the corresponding mail address to receive your recordings.
Conclusion
Now you know how to transfer voice recordings from iPhone. Frankly speaking, we recommend Apeaksoft iPhone Transfer as your first choice to get voice memos off iPhone because it is really comprehensive.Hope you can find the just solution to your current trouble.
