If you use iPhone to capture videos and pictures, you need to transfer from iPhone Camera Roll or elsewhere to Mac for iMovie editing. Since iMovie offers both the iOS and Mac versions, you can also transfer iMovie projects from iPhone to Mac. Be aware that you must be using iMovie for Mac 10.1.11 or later to transfer projects from iPhone to iMovie for Mac. Whatever, here is the complete tutorial to transfer iMovie from iPhone to Mac. Just read and check.

- Part 1: How to Transfer a Video from iPhone to iMovie on Mac
- Part 2: How to Transfer an iMovie Project from iPhone or iPad to Mac
Part 1: How to Transfer a Video from iPhone to iMovie on Mac
If you have a few videos need to be imported to Mac, you can transfer videos from iPhone to iMovie on Mac with the USB connection. As for transferring large videos, you can use third-party iPhone transfer software to get the ultrafast speed.
Method 1: Quickly Transfer Videos from iPhone to Mac or Reversely
If you want to transfer files cross platform, you should not miss Apeaksoft iPhone Transfer. You can transfer videos from iPhone to Mac, iPhone to PC, Mac to iPhone, PC to iPhone and iPhone to iPhone. Moreover, you can also sync video files between PC/iOS devices and iTunes safely.
The built-in video manager can help you save time on managing and transferring iPhone videos to Mac. Thus, you can spend less time on transferring iMovie to PC or Mac. Later, you can add videos to your new iMovie project easily.
- Transfer videos between iOS devices, PC/Mac and iTunes.
- Delete the unwanted iPhone videos.
- Preview any video or check the video information.
- Support the latest iOS 16/17/18/26 devices, including iPhone 17/16/15/14/13/12/11, etc.
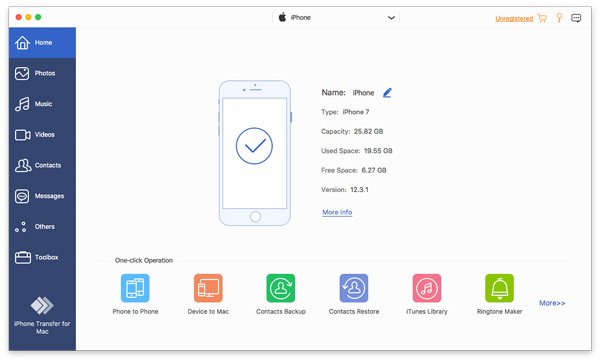
Step 1Free download, install and launch the iPhone transfer software. Connect iPhone to your Mac computer with a USB cable. Tap “Trust” on your iPhone to enable USB debugging.
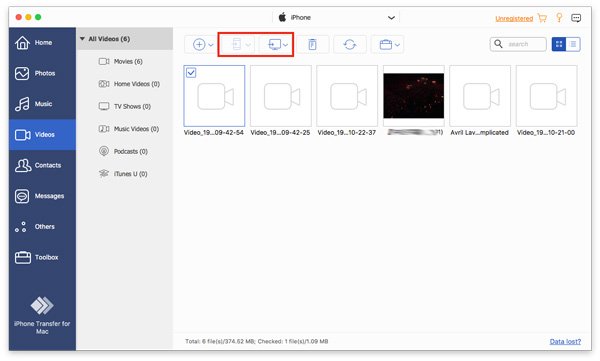
Step 2Click “Videos” in the left pane. You can see all iPhone videos displayed in category. Open a folder and choose your target video. If you are not sure, you can choose “Play” or “Video Info” from the “Folder” list to have a check.

Step 3After selecting videos, click the “Export to Computer” button on the top. Choose your computer and set the destination folder. Now you can transfer iMovie videos from iPhone to Mac.
Method 2: Transfer Videos from Camera Roll to iMovie for Mac
If your video clips are not large in file size, you can AirDrop from Mac to iPhone. Or you can transfer video clips captured by your iPhone to iMovie for Mac directly.
Step 1Plug iPhone into the computer with a lightning USB cable.
Step 2In the “Media” section, click “Import” to open the “Import” window.
Step 3Choose your iPhone’s name in the sidebar. You can see the thumbnails of all your video clips and photos.
Step 4Preview and choose which video file to import to iMovie.
Step 5In the “Import to” list, you can choose an existing event or create a new event to save the imported iPhone videos.
Step 6Click “Import All” or “Import Selected” to transfer iMovie from iPhone to Mac.

You may also want to know how to delete iMovie videos and projects here.
Part 2: How to Transfer an iMovie Project from iPhone or iPad to Mac
If you created a project in iMovie for iOS before, you can transfer the created project to iMovie for Mac to get a larger screen. The project will be saved as a single file. Thus, you can copy, transfer or archive iMovie projects easily. By the way, you can transfer iMovie projects from iPhone to Final Cut Pro X (10.4.6 or later) on Mac too. Well, here is the tutorial to transfer an iMovie project from iPhone to Mac.
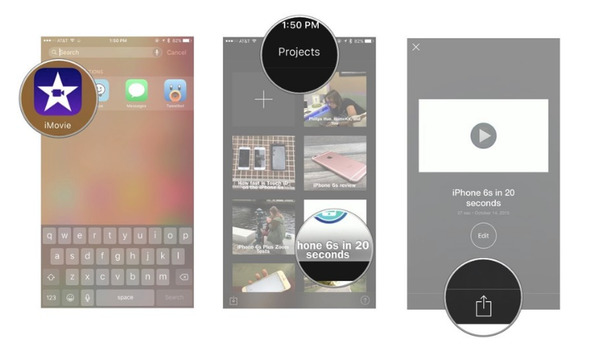
Step 1Open the iMovie app on iPhone. Choose the project you want to share to iMovie for Mac.
Step 2Tap “Share” in the iMovie project details screen. Then choose “Export Project” to get available iMovie transferring or sharing methods.
Step 3Transfer projects to iMovie for Mac
- Choose “AirDrop” to AirDrop iPhone to Mac. The iMovie project will be in the “Downloads” folder on Mac.
- Choose “iCloud Drive” to transfer iMovie project from iPhone to MacBook wirelessly. You can find the transferred iMovie project in the iMovie folder in iCloud Drive.
- If you choose “Save to Files” to export an iMovie project instead, you need to transfer iMovie to Mac manually.
Once you move iMovie project from iPhone to Mac, you have to edit the iMovie file on Mac all the time. It is not supported to transfer iMovie from Mac to iPhone again. If you want to transfer media files to iMovie for iOS or Mac, you can use Apeaksoft iPhone Transfer or USB connection. The former one offers the faster speed. As for exporting an iMovie project to another device, you can do as the part 2 shows. Thus, you can continue editing your iMovie project on other Apple devices.