How to Transfer Photos from a Computer to an iPhone
Apple released multiple ways to transfer iPhone photos to a computer. When it comes to transferring photos from a computer to an iPhone, you also have multiple methods. These methods work for different scenarios. Picking an appropriate method streamlines the workflow and protects your photo quality. This guide identifies the proven methods, lists the prerequisites, and demonstrates the workflows. Thus, you can add photos to your iOS device without quality loss.
PAGE CONTENT:
- Part 1: The Fast Way to Transfer Photos from PC to iPhone
- Part 2: How to Load Photos from a Computer to an iPhone via iCloud Drive
- Part 3: How to Move Photos from Computer to iPhone Using iCloud Photoss
- Part 4: How to Sync Photos from Mac to iPhone by AirDrop
- Part 5: How to Pass Photos from Computer to iPhone via Email
- Part 6: How to Transfer Photos from PC to iPhone with iTunes
Part 1: The Fast Way to Transfer Photos from PC to iPhone
If you need a fast way to export photos from your PC to your iPhone, Apeaksoft iPhone Transfer is a good option. It allows you to add any picture from your hard drive to your iOS device. More importantly, the software transcodes photos automatically during the process.
A Fast Way to Transfer Photos from PC to iPhone or iPad
- Add unlimited photos from PC to iPhone quickly.
- Preview and manage iPhone photos.
- Re-encode photo files during the process.
- Keep the photo quality using advanced technology.
- Support the latest versions of iOS and iPhone.
Secure Download
Secure Download

How to Transfer Photos from PC to iPhone
Step 1. Detect your iPhone
Start iPhone Transfer once you install it on your PC. There is another version for Mac. Connect your iPhone to your PC with a Lightning cable. If prompted, tap Trust on your screen to trust this PC. Then, the software will detect your device immediately.
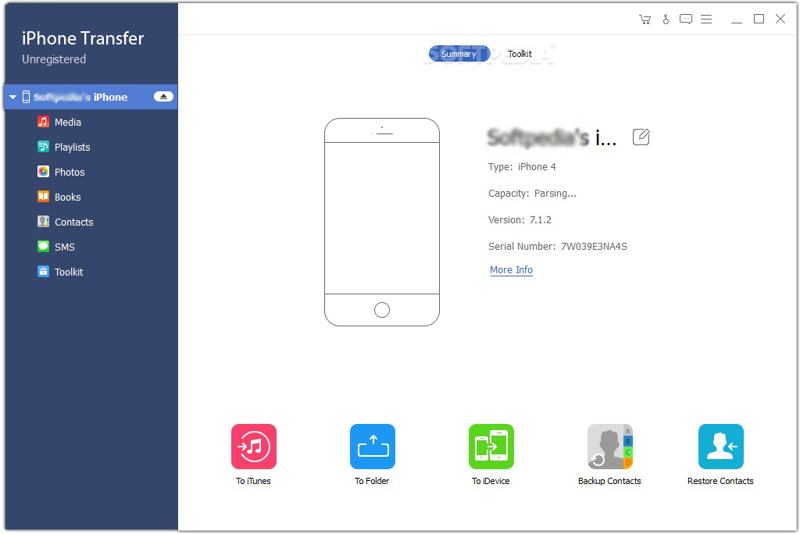
Step 2. Preview iPhone photos
Go to the Photos tab on the sidebar to view all photos on your iPhone. If your iPhone doesn't have enough storage, select unwanted photos and click the Delete button to free up space.
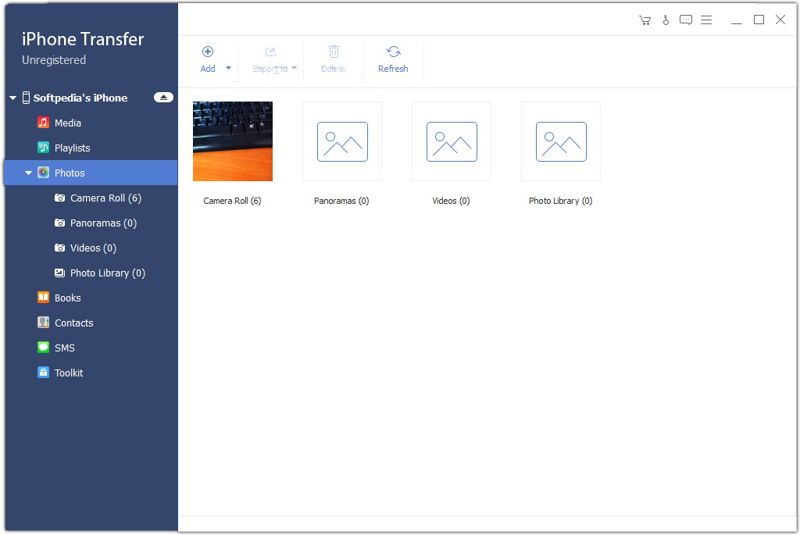
Step 3. Export photos from PC to iPhone
Go to the desired album, and click the Add button on the top ribbon. Locate the photos you want to transfer, select them, and click Open. You can also transfer iPad iBooks to computer with this program.

Part 2: How to Load Photos from a Computer to an iPhone via iCloud Drive
iCloud Drive is a simple way to load photos from a computer to an iPhone wirelessly. This method requires a stable network. Remember that it is not a good choice to transfer lots of large picture files.
Step 1. Go to www.icloud.com in a browser and sign in with your Apple account.
Step 2. Choose iCloud Drive.
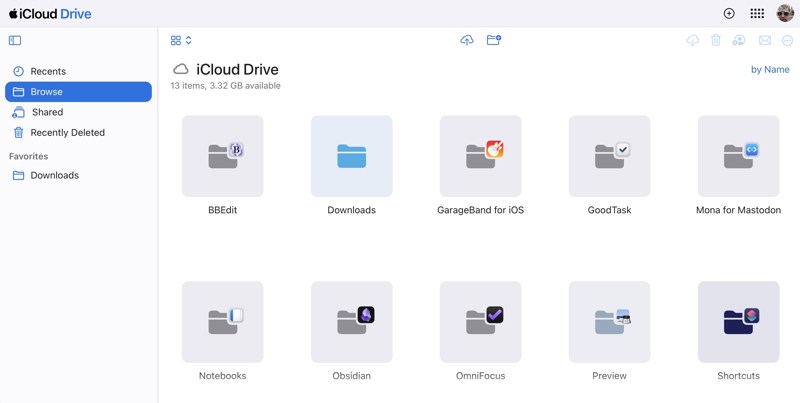
Step 3. Go to the Browse tab.
Step 4. Click the Upload button, select the desired photos, and upload them.
Step 5. Turn to your iPhone, run the Files app, and choose iCloud Drive to load the photos.
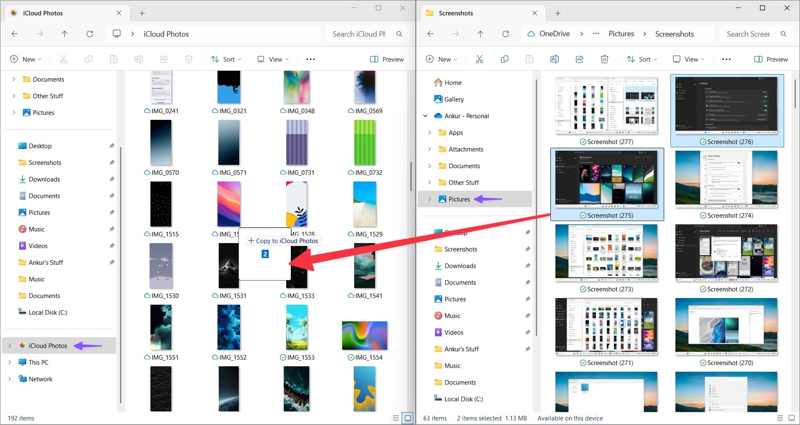
Part 3: How to Move Photos from Computer to iPhone Using iCloud Photos
iCloud Photos is a wireless method to move photos from a computer to an iPhone or vice versa. It works through an internet connection. However, it syncs all photos to your iPhone without a preview.
On a PC:
Step 1. Install the iCloud app, open it, and log in with your Apple account.
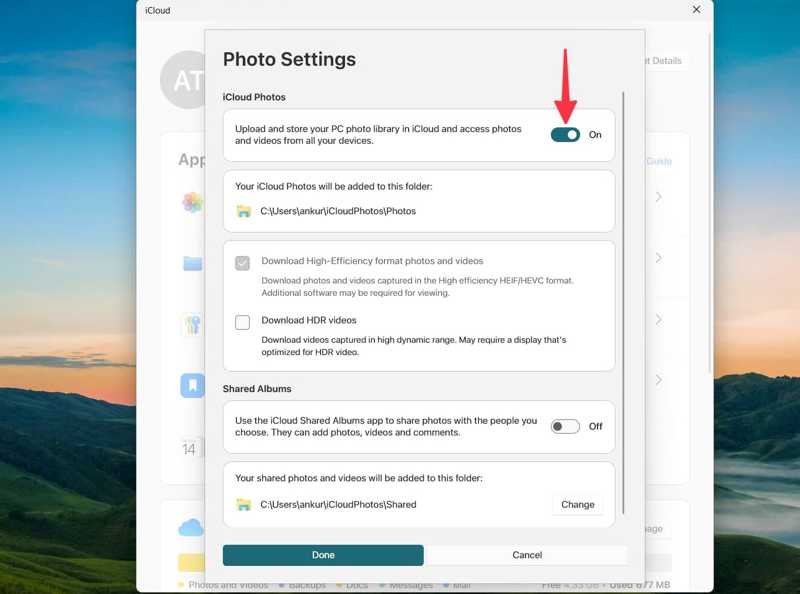
Step 2. Click iCloud Photos and turn it on.
Step 3. Open File Explorer, and add the desired photos to the iCloud Photos folder.
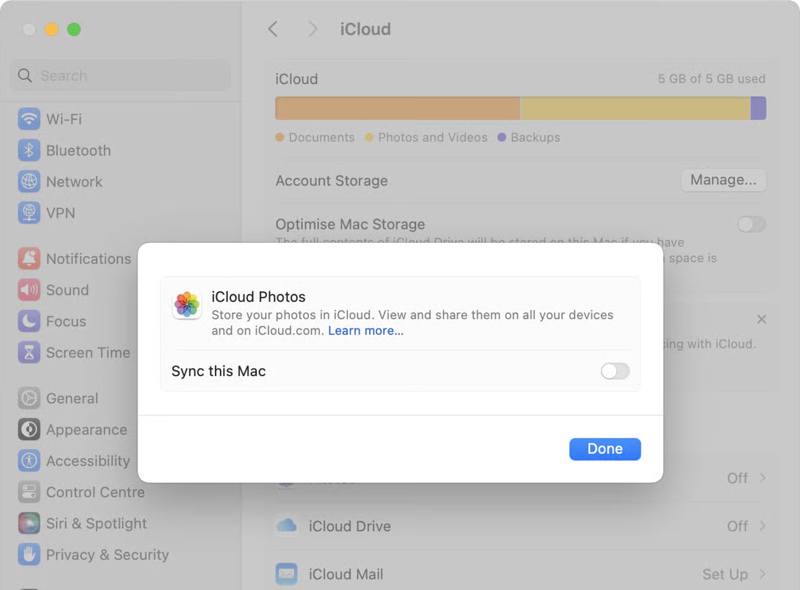
On a Mac:
Step 1. Click the Apple menu and choose System Settings.
Step 2. Click your Apple ID, and choose iCloud.
Step 3. Select Photos, toggle on Sync this Mac, and click Done.
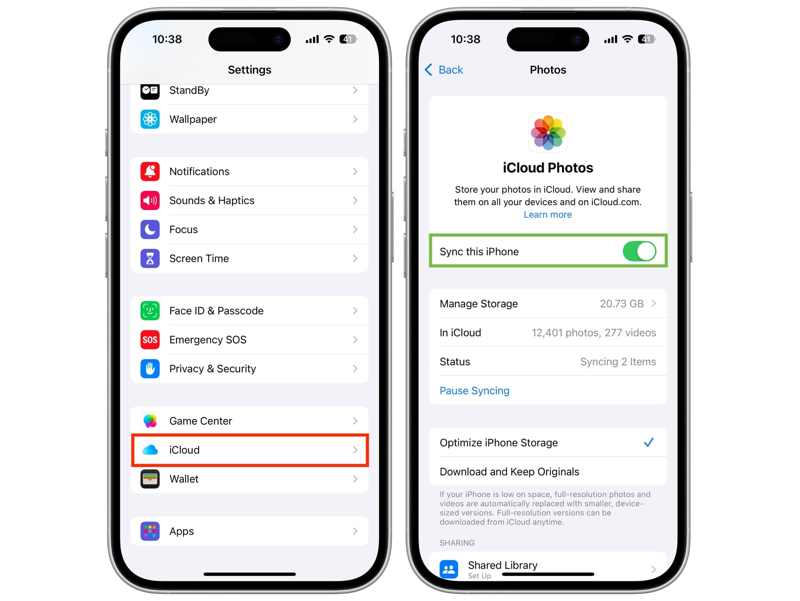
Move Photos from Computer to iPhone
Step 1. Tap on your profile in your Settings app.
Step 2. Connect your iPhone to Wi-Fi or cellular data.
Step 3. Choose iCloud, tap Photos, and toggle on Sync this iPhone.
Part 4: How to Sync Photos from Mac to iPhone by AirDrop
If you are using a MacBook, AirDrop is a fast way to sync photos from your Mac to your iPhone wirelessly. This method doesn't require extra software or hardware, but it is not suitable for syncing too many photos. However, if you macOS is old, the AirDrop may not work.
Step 1. Turn on your iPhone and go to the Control Center.
Step 2. Tap Wi-Fi and Bluetooth to enable them.
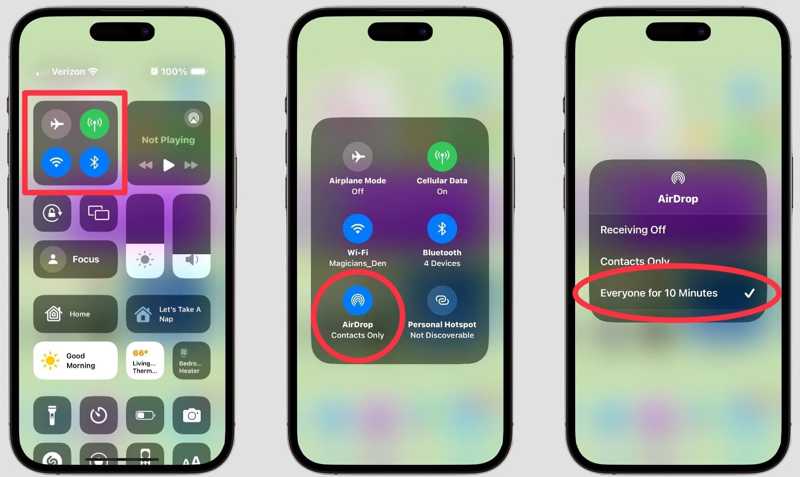
Step 3. Long-press the network pane and tap AirDrop.
Step 4. Choose Everyone or Everyone for 10 Minutes.
Step 5. Open Finder on your Mac, and choose AirDrop on the sidebar.
Step 6. Pick Everyone from Allow me to be discovered by.

Step 7. Run your Photos app, drag and drop the desired photos on your iPhone name on the AirDrop screen.
Step 8. Next, tap Accept on your iPhone to receive the photos.
Part 5: How to Pass Photos from Computer to iPhone via Email
If you just want to pass several photos from the computer to the iPhone, email is another option. This method doesn't require any service except an email address. Nevertheless, you must use an iOS-supported format.
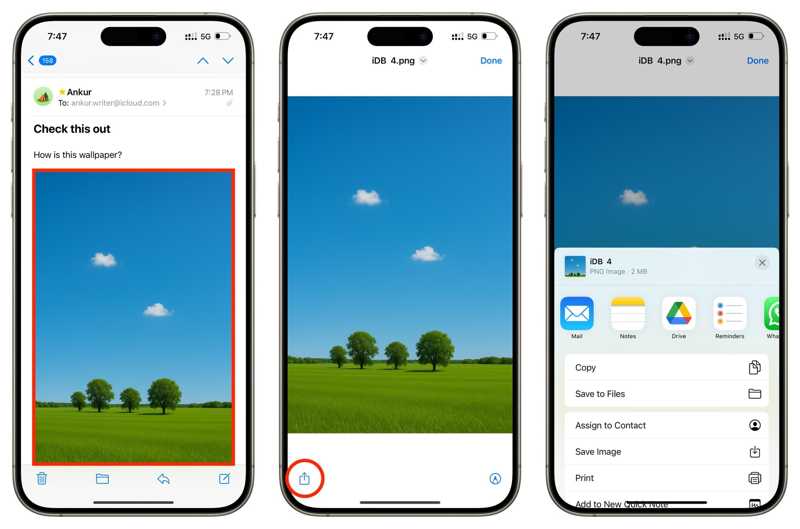
Step 1. Create a new email in a browser or email app on your desktop.
Step 2. Add the photos as attachments and send the email.
Step 3. Turn to your iPhone.
Step 4. Open the Mail app and read the new email.
Step 5. Tap an image attachment, hit the Share button, and choose Save Image.
Part 6: How to Transfer Photos from PC to iPhone with iTunes
Another way to transfer photos from PC to iPhone with USB is iTunes. It is able to sync a photo folder on your hard drive to your iPhone without a network. This method requires the latest version of iTunes.
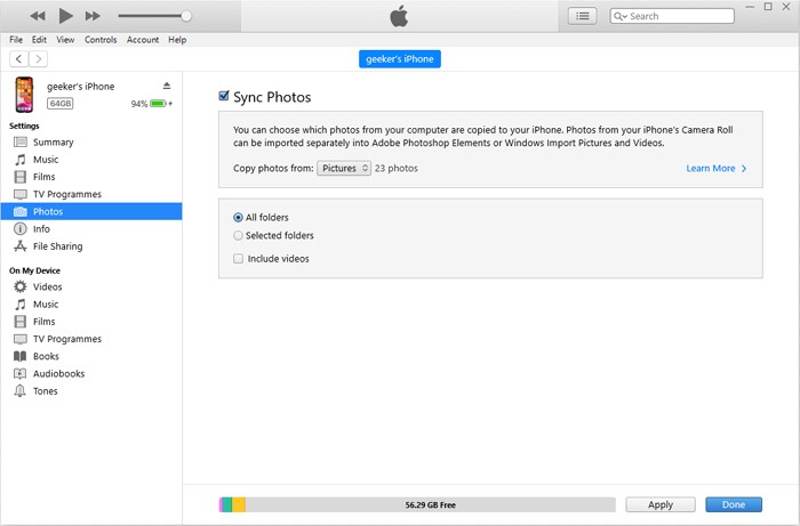
Step 1. Plug your iPhone into your PC with a USB cable.
Step 2. Open iTunes, and click the Phone button after your device is detected.
Step 3. Go to the Photos tab under the Settings section.
Step 4. Check Sync Photos.
Step 5. Pull down the Copy photos from option, and select the folder that stores the desired photos.
Step 6. Finally, click on the Apply button to confirm it.
Conclusion
Now, you should learn at least 6 methods to transfer photos from PC and Mac to iPhone with a USB cable or wirelessly. You can pick an appropriate method according to our description and follow the steps to get your photos to your iPhone quickly. Apeaksoft iPhone Transfer is a quick way to complete the job without losing quality.
