How to Sync Photos on iCloud on iPhone and iPad Easily
In the digital age, our memories are captured in pixels. Whether it's a breathtaking sunset from your last vacation or a candid video of a family gathering, these moments are precious. For Apple users, iCloud is the heart of this digital ecosystem. However, understanding the nuances of sharing photos through iCloud or knowing how to sync iCloud photos efficiently can often feel overwhelming.
This guide will walk you through everything you need to know about managing your visual library, from basic sharing with friends to the technical steps of how to move iCloud photos to an external hard drive.
PAGE CONTENT:
Part 1: How to Sync Photos in iCloud
Why Syncing iCloud Photos Matters
Syncing photos to iCloud ensures that a photo taken on your iPhone instantly appears on your iPad and Mac. It's not just about convenience; it's about creating a unified library.
How to Enable iCloud Photos
On Your TiPhone or iPad:
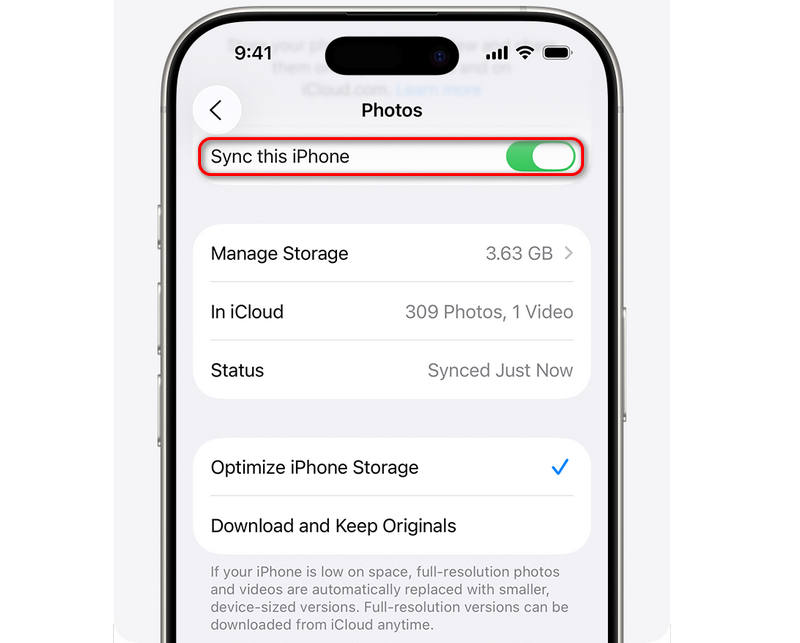
Step 1. Open the Settings app. Then, tap your profile.
Step 2. Tap the iCloud button, and then select Photos. Here, you should turn on iCloud Photos. Then, you can share photos on your iPhone or iPad through iCloud.
On Your Mac
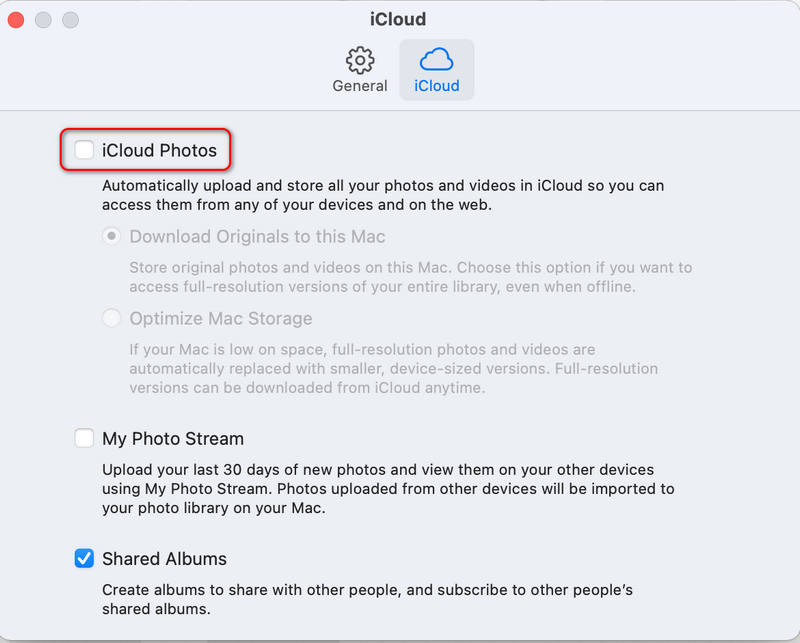
Step 1. Open the Photos app on your Mac. Go to the Settings tab.
Step 2. Select iCloud Photos. That's how to sync iCloud photos on your Mac.
By mastering how to sync iCloud photos, you eliminate the need for manual uploads and ensure your library is always up to date across the globe. All the Apple devices - iPhone, iPad, and MacBook, will see same photos as long as the same Apple ID is logged in.
Part 2: How to Share Photos on iCloud
One of the most powerful features of the Apple ecosystem is the ability to distribute images to friends and family. There are several ways to approach how to share iCloud photos, depending on whether the recipient uses an iPhone or a different device.
Share Photos on iCloud through Shared Album
Shared Albums allow you to create a private social network of sorts. Here is how to share photos on iCloud using this method:
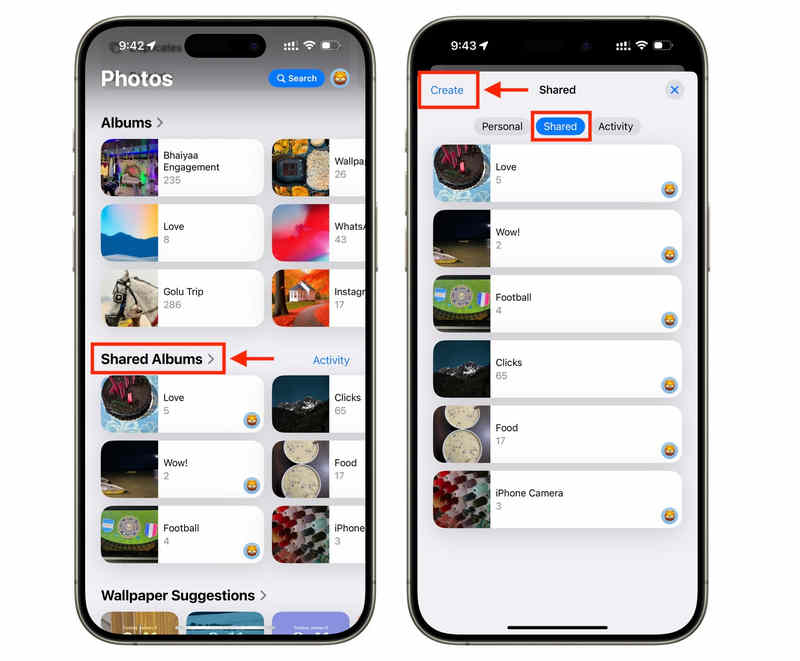
Step 1. Open the Settings app and select Photos. Then, go to the Albums tab. Tap the Add button and select New Shared Album.

Step 2. Now, open the Photos app and slide down to select Shared Album. If you haven't created a shared album, tap the Created button on the top left side.
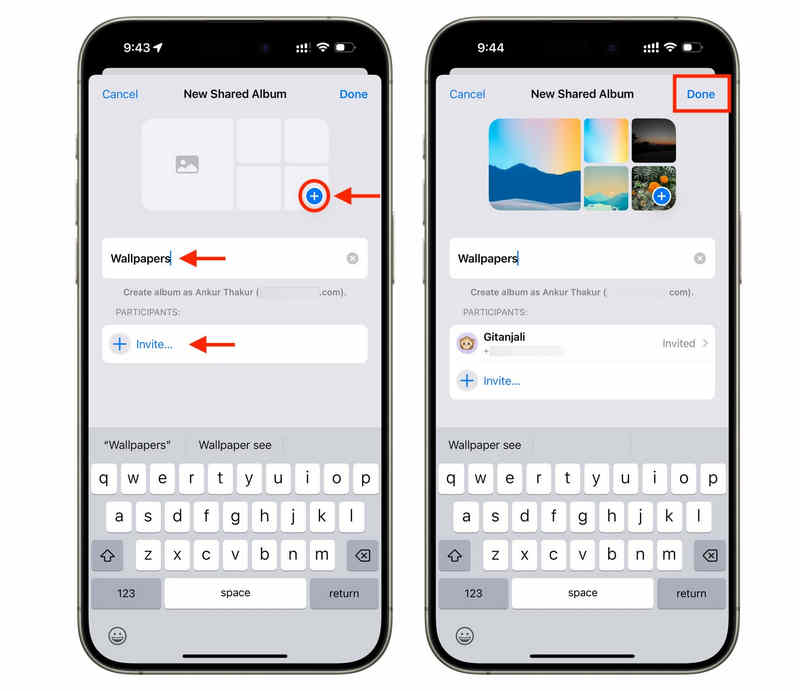
Step 3. Click the Add button to add photos to your shared album. Click the Invite button to invite people via their email or phone number. This way, everyone in the album can like, comment, and even add their own photos.
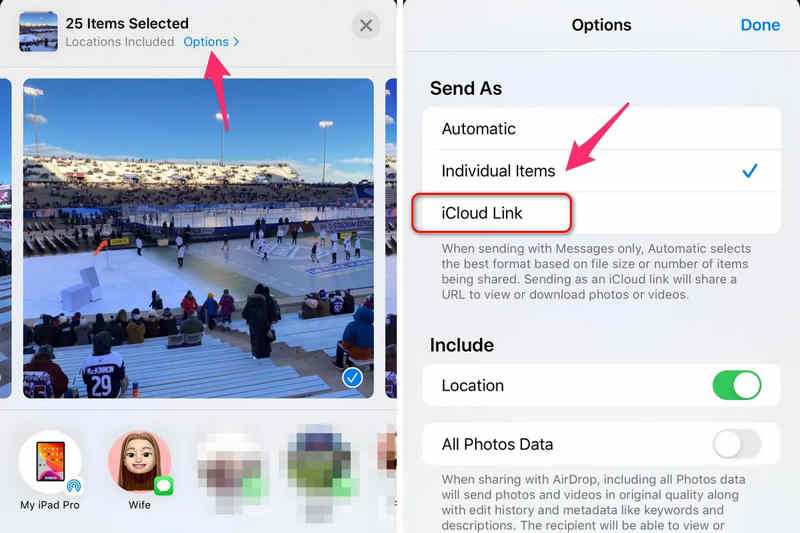
How to Transfer Photos on iCloud with iCloud Link
If you want to know how to transfer photos on iCloud to someone who doesn't have an iPhone, the iCloud Link is your best choice.
Step 1. Select the photos you want to send. Tap the Share button.
Step 2. Select Copy iCloud Link. The recipient receives a URL where they can download the high-resolution files for up to 30 days.
Part 3: How to Transfer Photos from iCloud to PC
Method 1: The iCloud for Windows App
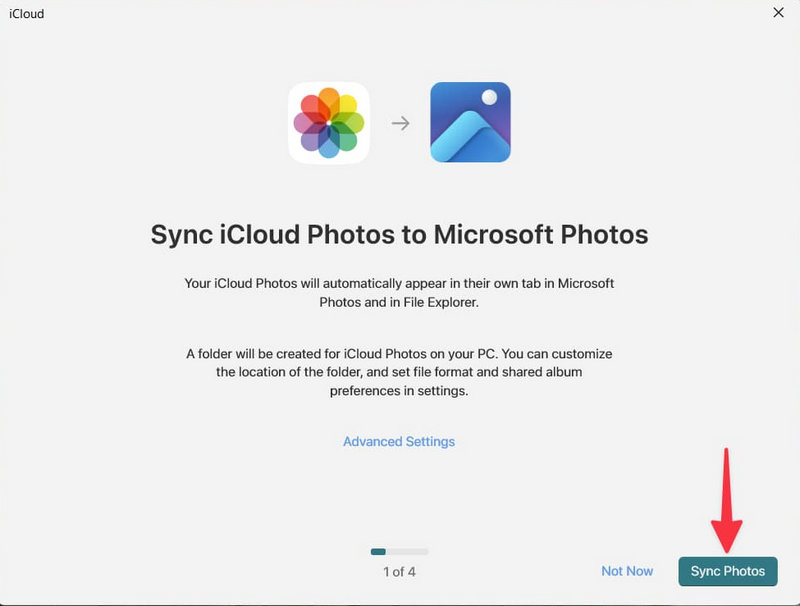
Step 1. Download and install iCloud for Windows. Sign in with your Apple ID.
Step 2. After login, you will see an introductory screen that prompts you to sync iCloud Photos to your Microsoft Photos. Here, you can click the Sync Photos button on the bottom right side.
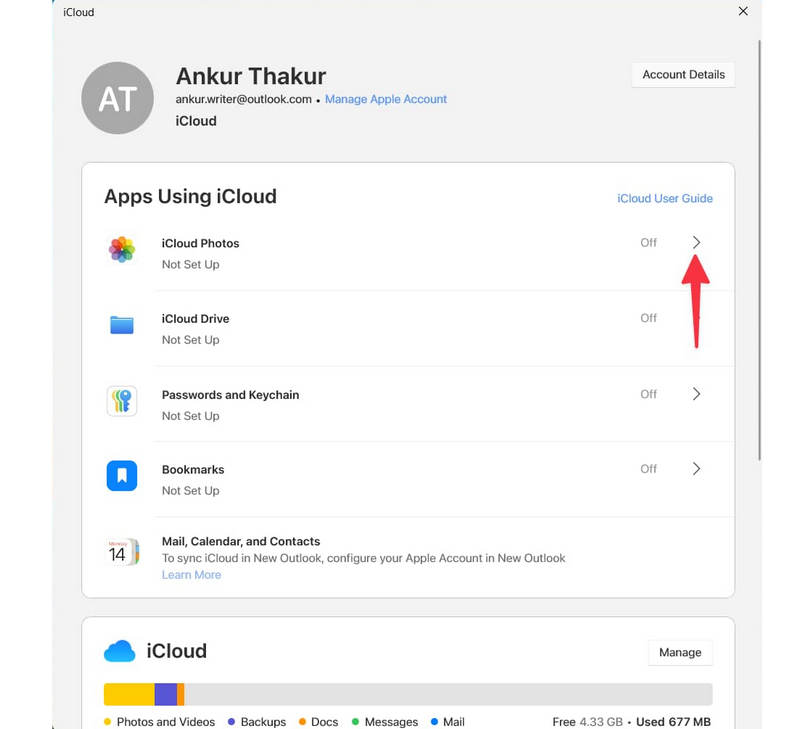
If you have already installed and set up iCloud on your Windows PC, you can enable iCloud Photos. This way, your can sync photos from iCloud to your PC in your File Explorer under iCloud Photos.
Method 2: iCloud.com
If you don't need to sync photos, but just transfer some pictures from iCloud to your PC, iCloud can help you without installation. Here is how to copy photos from iCloud to pc directly:
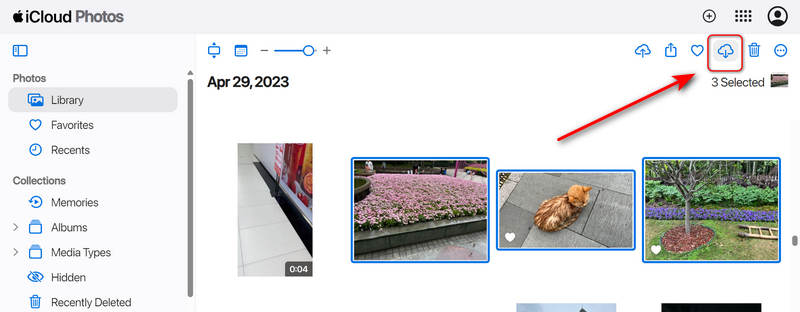
Step 1. Visit iCloud.com and log in with your Apple ID.
Step 2. Click on the Photos button. Here, you can press the Ctril key to select the images you want in batch.
Step 3. Then, click the Download button. This method is perfect for those wondering how to import iCloud photos to pc quickly without a complex setup.
Further Reading
Bonus: Easily Transfer Photos from iPhone to PC or Mac
While iPhones are great for capturing moments, many users prefer a Windows PC for long-term storage or editing. Knowing how to transfer photos from iCloud to PC is a common pain point that we can easily solve. That's where Apeaksoft iPhone Transfer can help you. It is a dedicated program to transfer all types of files between iPhone, iTunes, iCloud, PC, and Mac. You can easily select all your desired photos or albums and share them to your Windows or Mac computer. With this program, you can copy photos from iCloud to PC as easily as on a Mac.
Easily Share iPhone or iPad Photos to PC
- Connect your iPhone or iPad to PC to share photos without the internet.
- Share live photos, videos, simple photos, and all types of images or videos.
- Preview photos before you transfer photos to PC or Mac.
- Allow you to select desired photos or one-click transfer all photos.
Secure Download
Secure Download

Part 4: How to Move iCloud Photos to External Hard Drive
Cloud storage is convenient, but it isn't infinite. Eventually, your 50GB or 200GB plan will hit its limit. This is when you need to know how to move iCloud photos to external hard drive.
Step 1. Plug your external hard drive into your Mac or PC. Maybe some newer PCs or Macs don't have a USB port, so you'll need an adapter.
Step 2. Use the iCloud for Windows app or the Mac Photos app to ensure your Originals are downloaded to the computer.
Step 3. On your Mac, you can directly copy photos in the Photos Library to an external hard drive. On your Windows, you'll need to copy the iCloud Photos folder to your USB.
Conclusion
Mastering your photo library is about more than just clicking buttons; it's about ensuring your life's history is safe, accessible, and shareable. Whether you're figuring out how to share iCloud photos with a grandparent across the country or learning how to transfer photos on iCloud to a new device, the tools are at your fingertips. You can also use Apeaksoft iPhone Transfer to easily transfer photos from your iPhone or iPad to your PC or Mac. You can directly copy images without needing an internet connection.
Related Articles
How to send videos from Android to iPhone? 7 solutions are offered here to help you easily transfer large videos without losing quality from Android to iPhone.
When software errors or glitches occur on your iPhone, you can put your iPhone in Recovery Mode following our step-by-step guide.
To fix an iPhone stuck on the Apple logo, you can read our concrete guide and follow our solutions to re-access your device.
Here are seven effective solutions to help you fix an iPhone running slow and quickly improve your handset's performance.
