iTunes is a useful service for iPhone owners with extensive functionalities. For example, it allows you to manage iPhone data on computer, transfer music and other files from computer to iPhone, purchase media contents, make backup for iPhone or doing troubleshooting. Moreover, Apple keeps introducing new features into iTunes, such as Wi-Fi syncing feature.
However, there are some questions related to iTunes Wi-Fi syncing functionality. Do you know how to set up or how to use this feature? Don’t worry! You can get everything you should know about this feature in this tutorial.

Part 1. How to Sync iPhone with iTunes Wi-Fi Sync
As a new feature, Wi-Fi sync can be found in iTunes 10.6 or above. So, you’d better update your iTunes to the latest version. Other requirements to sync iPhone with iTunes over Wi-Fi include:
- Your iPhone, iPad or iPod Touch should run iOS 5 or later.
- Your iOS device and computer must connect to the same Wi-Fi network.
Set up iTunes Wi-Fi syncing
You still need a wire the first time to sync iPhone wirelessly using iTunes. That is because you have to set up iTunes Wi-Fi sync through a wire connection.

Step 1. Connect your iOS device to your computer using the Lightning cable came with your handset.
Step 2. Open the latest version of iTunes and wait for it to detect your iOS device. Then click the Device button at upper left corner.
Step 3. Go to the Summary tab from the left hand column and locate the Options section on the right panel.
Step 4. Check the box next to the Sync with this iPhone over Wi-Fi option. Then click the Apply button to confirm that change.
Step 5. Next, click the up-facing arrow next to the Device button at the left side to eject your iOS device. Now, you can disconnect your iPhone from your computer.
How to sync iPhone with iTunes over Wi-Fi
After setting up iTunes Wi-Fi sync feature, your settings will be remembered. Whenever you need to sync your iPhone, follow the steps below.
Step 1. Connect both your iPhone and computer to the same Wi-Fi network. (If your are using a Mac computer, you may need this post: How to fix Mac not connecting to Wi-Fi?)
Step 2. Turn on your iPhone, open the Settings app and tap on your name.
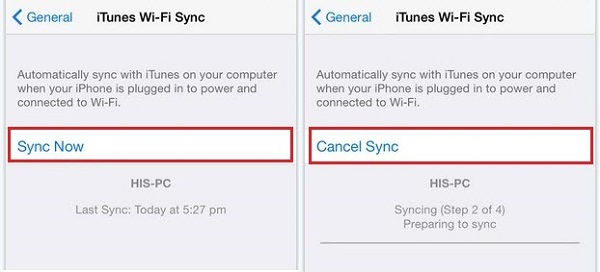
Step 3. Go to General > iTunes Wi-Fi Sync and touch your computer on the list.
Step 4. Tap the Sync Now button to start syncing iPhone using iTunes over Wi-Fi. When sync is complete, you will get the message.
Note: Syncing iPhone wirelessly is slower than doing it via the Lightning cable. However, wireless syncing is more convenient since it is triggered automatically once your iPhone and computer connect to the same network.
After that, you could check the iTunes backup location to see if the backup is done.
What you can do when iTunes Wi-Fi sync not working
iTunes contains a lot of bugs. For example, users complained that iTunes Wi-Fi stop working. If you encounter the same problem, try the fixes:
- Restart your iPhone. That could fix a lot of issues cause iTunes Wi-Fi sync not working.
- Check if your iPhone and computer are on the same Wi-Fi network as well as your computer is not in the sleep mode.
- Disable third-party antivirus software. Plus, you should check your firewall and make sure it allows connections on TCP ports 123 and 3689, as well as UDP ports 123 and 5353.
- Fix iTunes error.
Part 2. Best Alternative of iTunes
In fact, iTunes Wi-Fi syncing is not the only way to sync iPhone. For instance, Apeaksoft MobieTrans is the best alternative to iTunes, which includes extensive features:
- Transfer data from iPhone to computer or another iOS device in one click.
- Back up iOS data from iPhone to computer with the original condition.
- Preview and manage iPhone data for selectively transfer or backup.
- Support a wide range of data types, such as photos, music, videos, contacts, messages, etc.
- Compatible with iPhone 16/15/14/13/12/11/X or earlier, iPad and iPod Touch.
How to sync iPhone without iTunes or Wi-Fi network
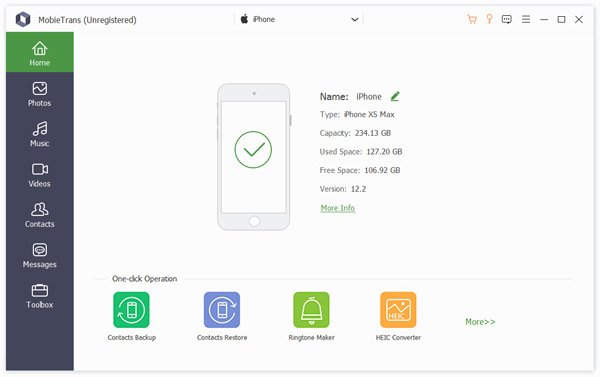
Step 1. Connect iPhone to MobieTrans
Download and install the best alternative to iTunes to your computer and hook up your iPhone to the same computer. The application will recognize your handset automatically.
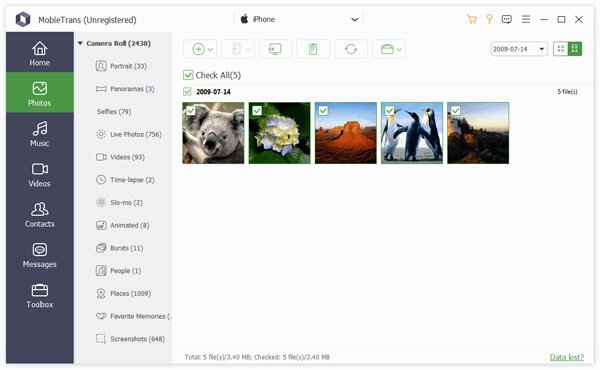
Step 2. Sync iPhone without iTunes Wi-Fi
Select the data type you want to sync from the left side, such as Photos. To sync data to iPhone, click the Plus button and drag and drop the desired photos into the window. If you want to transfer iPhone photos to computer, select them and click the PC button at the top of the interface.
When syncing is done, quit the iTunes alternative and remove iPhone from your computer.
Conclusion
This tutorial has shared the basic knowledge about iTunes Wi-Fi syncing feature. Nowadays, we have been comfortable to use wireless networks around us. It makes sense that Apple introduced Wi-Fi sync functionality into iTunes. If you have more questions related to iTunes Wi-Fi sync, leave the messages below.