How to Quickly Sync iTunes Playlist to Your iPhone
iTunes was a utility to manage and sync music on iOS devices; however, Apple has stopped it. Currently, the new Apple Music app replaces iTunes. All your purchased music will automatically transfer over, including the imported CDs and created playlists in iTunes. If you cannot find your playlists on your iPhone, follow our guide to add playlists from iTunes to iPhone with a USB cable or Wi-Fi network.
PAGE CONTENT:
Part 1: How to Sync iTunes Playlist to iPhone with iTunes
While Apple has discontinued iTunes, the utility is still available on Windows and macOS Mojave or earlier. You can get iTunes playlists to your iPhone through a USB cable or a Wi-Fi network.
Step 1. Open the latest version of iTunes.
Step 2. Connect your iPhone to iTunes:

Option 1: via a cable
Connect your iPhone to the computer with a compatible cable.
Option 2: via Wi-Fi
Connect both your iPhone and computer to Wi-Fi.
Tips: You must have checked Sync with this iPhone over Wi-Fi in iTunes.
Step 3. Click the Phone button at the top left side once your device is detected.
Step 4. Go to the Summary tab and locate the Options section.
Step 5. Check Manually manage music and videos if you want to copy a playlist from iTunes to iPhone.
Tips: To sync all playlists, check Automatically sync when this iPhone is connected.
Step 6. Click the Apply button at the bottom.

Step 7. Go to the Music tab under Settings on the sidebar.
Step 8. Check Sync Music, and pick Selected playlists, artists, albums, and genres.
Step 9. Next, select the desired playlist in the Playlists pane.
Step 10. Finally, click the Apply or Sync button to sync a playlist from iTunes to iPhone.
Part 2: How to Add an iTunes Playlist to iPhone via iCloud
If you are using iCloud Music Library, make sure to enable it on both your computer and iPhone. Then, all your playlists created in iTunes will automatically sync across devices logged in with the same Apple ID.
Turn on Music Library on iPhone

Step 1. Open the Settings app.
Step 2. Go to Music.
Step 3. Toggle on Sync Library.
Turn on Music Library on Mac
Step 1. Make sure to sign in with the same Apple ID.
Step 2. Open the Apple Music app.
Step 3. Choose Music and pick Settings.
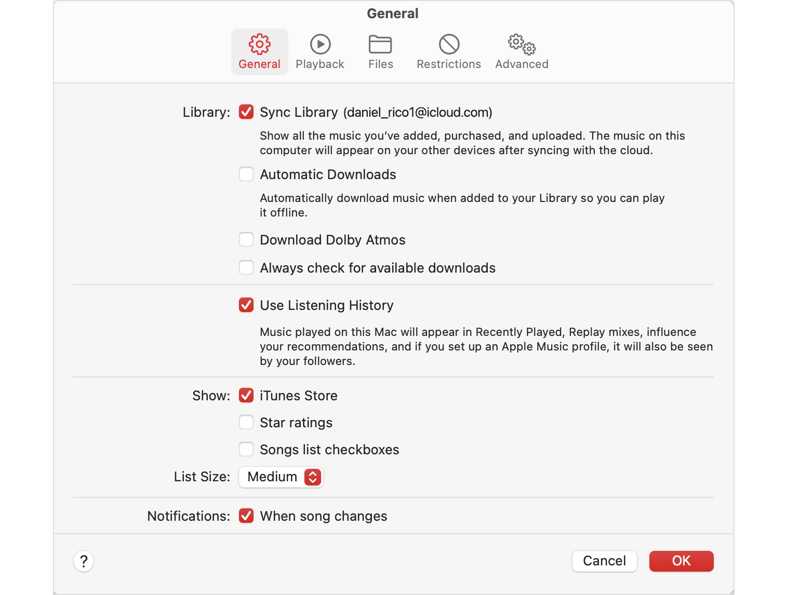
Step 4. Go to the General tab.
Step 5. Check Sync Library and click OK to export the iTunes playlist to iPhone.
Turn on the Music Library on the PC

Step 1. Open the Apple Music app.
Step 2. Sign in with the same Apple ID.
Step 3. Click Sidebar Actions and choose Settings.
Step 4. Click General, and toggle on Sync Library.
Further Reading
Part 3: How to Import iTunes Playlist Using iPhone Transfer
If you have stopped using iTunes, you still can transfer playlists from iTunes to iPhone with Apeaksoft iPhone Transfer. It is able to transfer both purchased and non-purchased music to your iPhone from a computer. More importantly, the intuitive interface makes it easy to navigate, especially for beginners.
A Quick Way to Move iTunes Playlists to iPhone Without iTunes
- Move iTunes playlists to your iPhone quickly.
- Work for all music files, including encrypted ones.
- Compatible with a wide range of audio formats.
- Manage music files and albums on your iPhone.
- Support the latest versions of iOS and iPadOS.
Secure Download
Secure Download

How to Import iTunes Playlists to iPhone from Computer
Step 1. Connect to your iPhone
Download and install the iPhone transferring software on your PC. There is another version for Mac users. Connect your iPhone to your PC with a Lightning cable. If prompted, tap Trust on your screen to trust this PC.
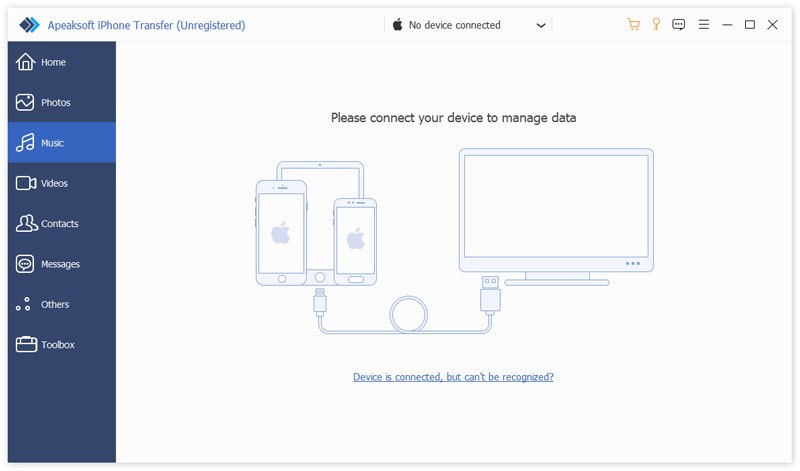
Step 2. Preview iPhone music
Once your iPhone is detected, go to the Music tab to view all music and albums on your device. If you want to free up space, select unwanted songs and click the Delete button on the top ribbon.

Step 3. Import iTunes playlist to iPhone
Click the Toolbox button and choose New Playlist to create a new playlist. Next, click the Add button and choose Add Files or Add Folder. Locate your iTunes Library, select the desired music, and click Open. Then, select these songs, right-click on one of them, choose Add to Playlist, and pick the new playlist.
Conclusion
This guide shares three ways to get iTunes playlists on an iPhone with a USB cable or wirelessly. If you still have iTunes on your computer, you can sync all or specific playlists to your handset. With the wireless connection setup, you can complete the process with Wi-Fi. Of course, iCloud Music Library enables you to sync playlists quickly. Apeaksoft iPhone Transfer is a fast way to move any songs from your computer to your iPhone or iPad.
Related Articles
How can you temporarily deactivate your Apple ID account properly? You can find the step-by-step guide from this single article.
This concrete guide explains what HEIC is and how to open HEIC files on iOS, Android, macOS, and Windows without quality loss.
Newer iOS versions may have hidden bugs or errors, especially when it's a Beta version. This article tells you how to downgrade iOS.
Accidentally install beta version of iOS? Don’t panic! You can remove iOS 26/18 beta from your iPhone following our guide.
