What should you do to transfer favorite movies from Mac to iPhone or iPad? As for the case, you can enjoy them wherever you want. There are different types of files you need to transfer among Mac, iPhone, iPad and other Apple device, including music, photos, videos, apps, messages and so on. But there is one major problem: iOS isn’t designed to accept just any file.

Don’t worry! This passage is going to discuss how to transfer files from Mac to iPhone or iPad. You can learn 6 different methods to achieve the goal, all of them are easy and efficient. Please read on and learn more details.
- Solution 1: How to transfer files between iPhone and Mac with dedicated iPhone transfer tool
- Solution 2: How to transfer files from Mac to iPhone/iPad with iCloud drive
- Solution 3: How to sync data from Mac to iPhone/iPad with AirDrop
- Solution 4: How to transfer files from Mac to iPhone/iPad via iTunes
- Solution 5: How to sync data between Mac and iPhone/iPad via Dropbox
- Solution 6: How to send files from Mac to iPhone/iPad by email
- FAQs about Transferring Files between iPhone and Mac
Solution 1: How to transfer files between iPhone and Mac with dedicated iPhone transfer tool
The most efficient and secure method to transfer files from Mac to iPhone or iPad without overwriting is to use a dedicated iPhone data transfer tool. Here we highly recommend Apeaksoft iPhone Transfer for Mac, which is specially designed to help Apple users transfer files and data like contacts, messages, notes, photos, music and more between iPhone/iPad and Mac computer.
More importantly, this program is also available for Windows version. If you are a Windows user and want to send files from iPhone to Windows, this software is also suitable for your needs.
iPhone Transfer – Transfer Data between iPhone/iPad and Mac without Data Loss
- Transfer different files and app data from Mac to iPhone/iPad or vice versa quickly and safely without overwriting or data loss.
- The supported data types include contacts, messages, photos, videos, music, audio books, voice memos, PDF, ePub, and more.
- Sync files between iOS device and computer or iTunes in one click.
- Convert HEIC images to JPG/PNG.
- Make customized ringtone for your iPhone with your favorite music.
Follow the easy steps below to transfer files from Mac to iPhone/iPad with this iPhone Transfer tool.
Step 1. Connect iPhone to Mac
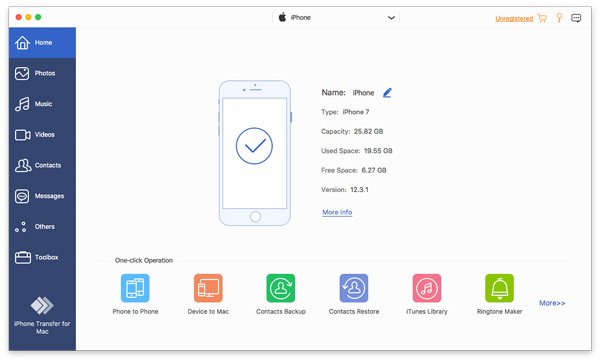
After downloading and launching this iPhone transfer tool on your Mac, connect your iOS device to your Mac with a USB cable.
Step 2. Add data from Mac to iPhone
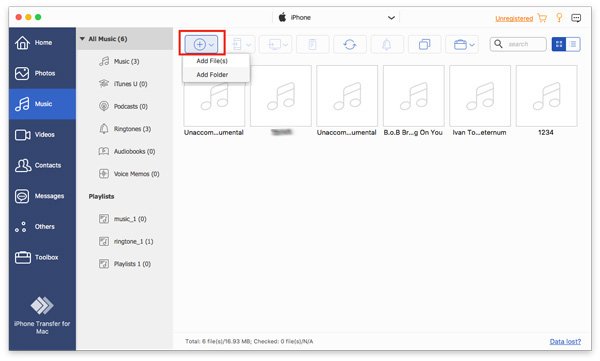
After the successful connection, Apeaksoft iPhone Transfer will scan your iPhone and list all the data in categories at the left panel. To transfer a certain type of files from Mac to your iPhone, firstly navigate to the data type, here we take Music as example. Click Music, then click the Plus button on the top bar to select the music files or folder you need to add from your Mac in the pop-up window.
Step 3. Data transfer succeed
Then tick "Open". After a few seconds, you will see the success window, and you can find the music files on your iPhone now.

Solution 2: How to transfer files from Mac to iPhone/iPad with iCloud drive
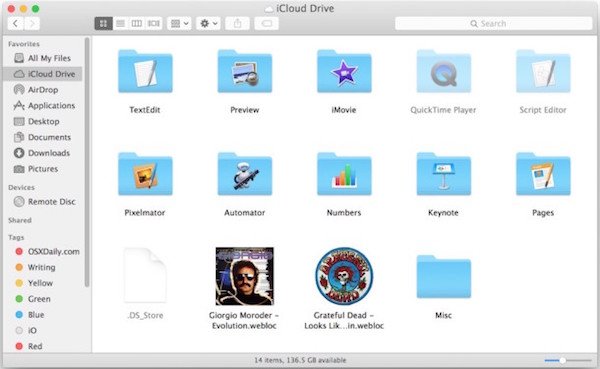
Apple's iCloud drive enables iOS users to easily view and share all files stored in iCloud on any Apple device and on the web. In order to use iCloud drive to transfer files from Mac to iPhone or iPad, you have to first set up iCloud drive on your iPhone and Mac. Then you can follow the instructions below to share files between Mac and iPhone/iPad.
Step 1. Add files to iCloud Drive on Mac
Open Finder app on your Mac, and start iCloud Drive. Then drag your selected files into the location you desire in iCloud.
Step 2. Open files on your iPhone/iPad
Launch iCloud Drive app on your iPhone or iPad, tap on the file you just added into, and then tap on the Share button to choose an app to open this file. Then you can see files on Mac from iPhone.
Solution 3: How to sync data from Mac to iPhone/iPad with AirDrop
AirDrop is a new technology of Apple that aims at sharing files between different AirDrop compatible devices. With AirDrop, you are able to sync files from Mac to iPhone or iPad easily.
Step 1. Activate AirDrop on iOS
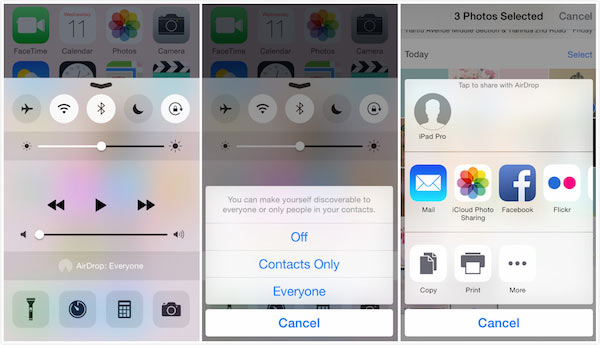
Go to your iOS device, swipe up from the bottom of the screen to start the Control Center, and activate the AirDrop.
Step 2. Activate AirDrop on Mac
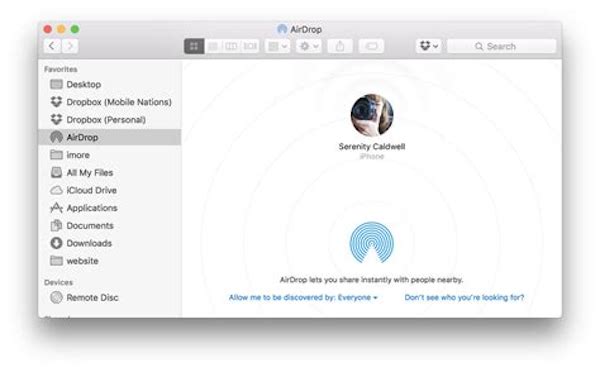
Launch your Mac, go to Finder and select AirDrop, too. Then locate a file that you are going to transfer from Mac to iPad, drag the files onto the iPad icon.
Step 3. Open files on iOS
Turn to your iOS device where you can see a menu offering to open the file as well as related apps to open the file type. As for the case, you can get the files from Mac on iPhone or iPad.
Solution 4: How to transfer files from Mac to iPhone/iPad via iTunes
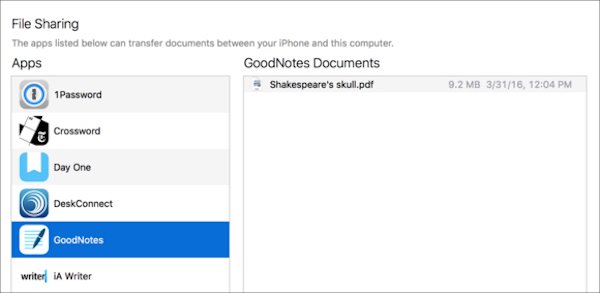
iTunes is Apple's another important software program that acts as a media player, media library, mobile device management utility, and the client app for the iTunes Store. Some iOS Apps support iTunes file sharing, which allows you to add and manage files in iTunes. Thus, when you want to transfer files from Mac to iPhone/iPad, iTunes is also an option. Follow the guide below.
Step 1. Connect iPhone/iPad to Mac
Connect iPhone or iPad to Mac via the original USB cable. Usually Mac will detect iPhone or other iOS device automatically to launch iTunes on your computer.
Step 2. Launch iTunes app
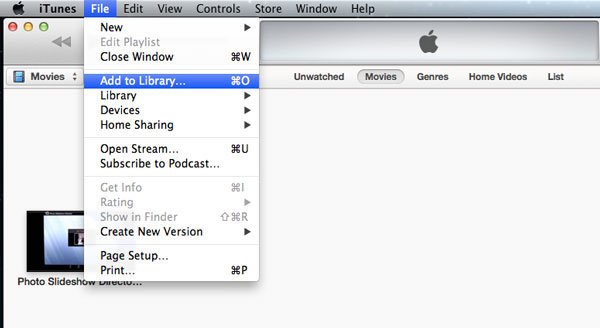
Double click iTunes to open this app on Mac, click on "File" option and then "Add to Library". Here you are able to import files from Mac to iTunes.
Step 3. Select iTunes File Sharing
You can also choose Apps in the sidebar of iTunes, and click on "File Sharing" section to sync files and data from Mac to iPhone or iPad.
Solution 5: How to sync data between Mac and iPhone/iPad via Dropbox
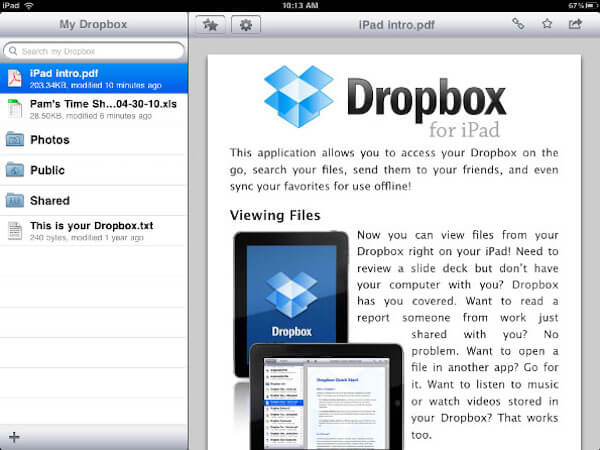
If you have already installed Dropbox or other cloud service, such as Google Drive or Box on your iOS device, you can consider transferring files from Mac to cloud, with which you can access them on your iPhone or iPad.
Step 1. Launch the "Dropbox" desktop app and sign in the account. Make sure you sign in the same account for Mac and iOS devices.
Step 2. Drag files from Mac to the Dropbox application, you can drag different data formats into the application.
Step 3. Now just launch the Dropbox app on your iPhone or iPad, you can access the files you shared from Mac on your iOS devices easily.
Solution 6: How to send files from Mac to iPhone/iPad by email
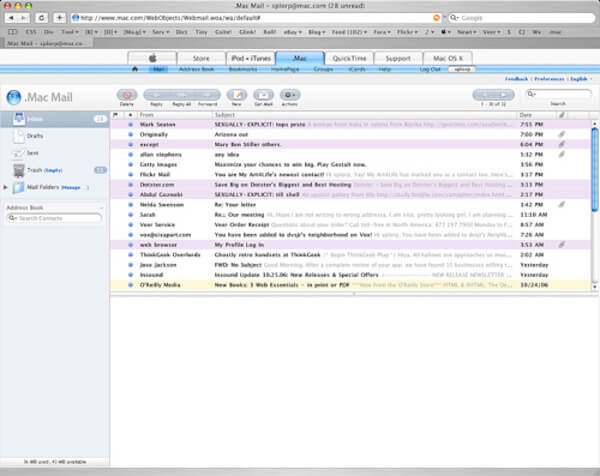
If the file size were quite small, it would be a nice way to send the small file from your Mac to iOS device by email. One thing to illustrate, this solution requires a fast network connection. And here is a general guide about how to use email to transfer files.
Step 1. Send email to iOS device
Create a new address to yourself on your Mac, add the local files as an attachment to the email, and click on the Send button.
Step 2. Download and open files
Open the email on your iOS device, and tap the attachment to download the files. Tap on the downloaded file, your device will offer related apps to open it.
FAQs about Transferring Files between iPhone and Mac
How do I transfer files from Mac to iPhone wirelessly?
To transfer files from Mac to iPhone wirelessly, you can use AirDrop, cloud service (iCloud, Google Drive, Dropbox, etc.), or email. Just follow the step-by-step guide introduced above.
How do I transfer files from Mac to iPhone without iTunes?
If you do not want to transfer files from Mac to iPhone with iTunes, we recommend you to use use the dedicated iPhone data transfer tool, Apeaksoft iPhone Transfer. It can transfer various files and app data from Mac to iPhone or vice versa without overwriting or data loss.
How do I transfer files between iPhone and iPad?
The 6 methods recommended above can also be used to sync files between iPhone and iPad. The operations are similar, you can give them a try.
Conclusion
When you want to transfer files or data from Mac to iPhone or iPad, you can find multiple solutions from this article. Just compare the different methods to find the one that works best for you. If you have any further questions on this topic, you can share your thoughts in the comments below.

