Step-by-Step Guide: How to Transfer Files from PC to iPad
If you've got a new iPad and want to copy backups from PC to iPad, or need to take files with you on the go, you might be wondering how to transfer files from PC to iPad. In this guide, we'll show you various methods to transfer computer files to an iPad in different situations. Follow these steps to get your files on your iPad quickly and safely!
PAGE CONTENT:
Part 1: How to Transfer Files from PC to iPad Using USB
Method 1: Transfer Files from PC to iPad via Data Transfer Tool
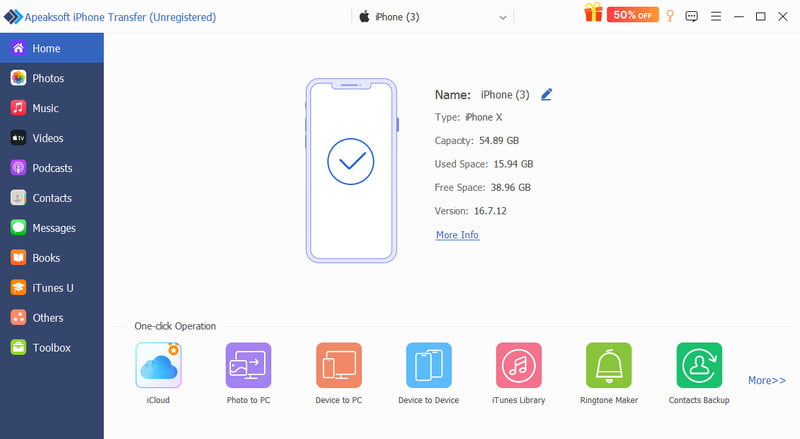
If you're looking for an all-in-one solution to transfer your files from PC to iPad, Apeaksoft iPhone Transfer should be your best choice. This powerful tool can transfer all types of data between iOS devices, PC and Mac in all directions, including photos, music, messages, videos, contacts, WhatsApp, and more.
Apeaksoft iPhone Transfer - One-Stop iOS Data Manager
- Transfer data between iPhone, iPad, iPod, PC, and Mac in all directions.
- Move all popular file types safely without data loss.
- Offers various features: HEIC conversion, iTunes data management and ringtone creation.
- Support all iOS models and versions, including the latest releases.
Secure Download
Secure Download

Step 1. Connect your device to the PC using a USB cable. Launch the software and select the file type you want to copy in the sidebar.
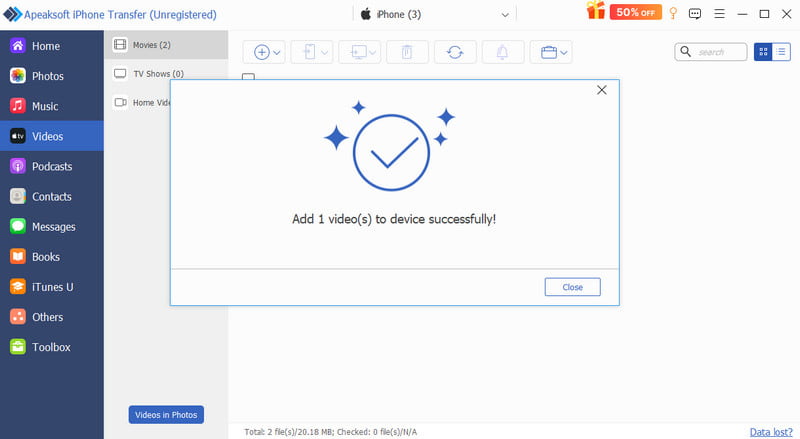
Step 2. You can view all files on the screen. Click the Plus button to select the files or folder you need.

Step 3. Click Open and the files will be moved to your device in a few minutes.
Tips: You can also use this software to transfer files from iPad to PC! It also supports transferring files between Mac and iPad!
Method 2: Transfer Files from PC to iPad with iTunes
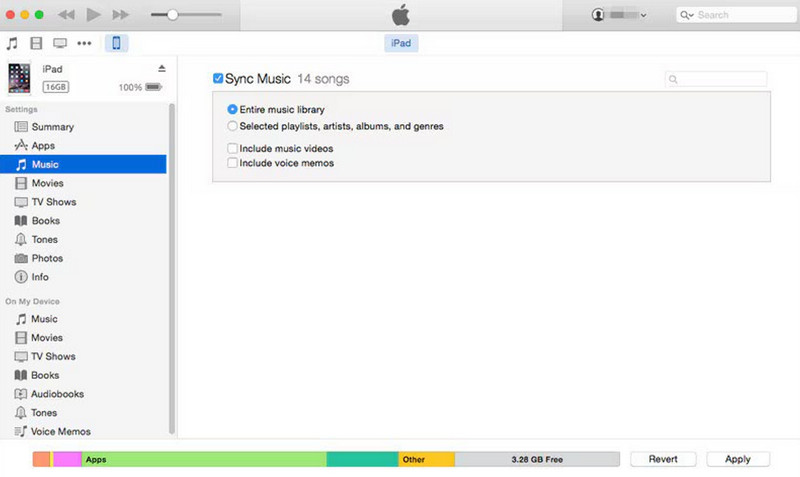
Apple provides an official way to transfer files from PC to iPad with iTunes. It supports two options: syncing data or using the File Sharing feature. Since syncing may overwrite the existing data on your iPad, it's safer to use the File Sharing feature to move files from PC to iPad.
Step 1. Connect your iPad to your computer via USB.
Step 2. Open iTunes on your PC, click the iPad button in the top left corner.
Step 3. Select File Sharing in the sidebar, then choose the app you want to copy a file from.
Step 4. Click Add File, select the files you want to transfer, then click Sync.
Method 3: Transfer Files from PC to iPad with File Explorer
You can also use Windows File Explorer to transfer photos and videos to your iPad. However, this method only gives you access to the DCIM folder, which stores photos and videos. So, you can't transfer documents, music, or other file types to your iPad.
Step 1. Connect your iPad to your computer using a USB cable.
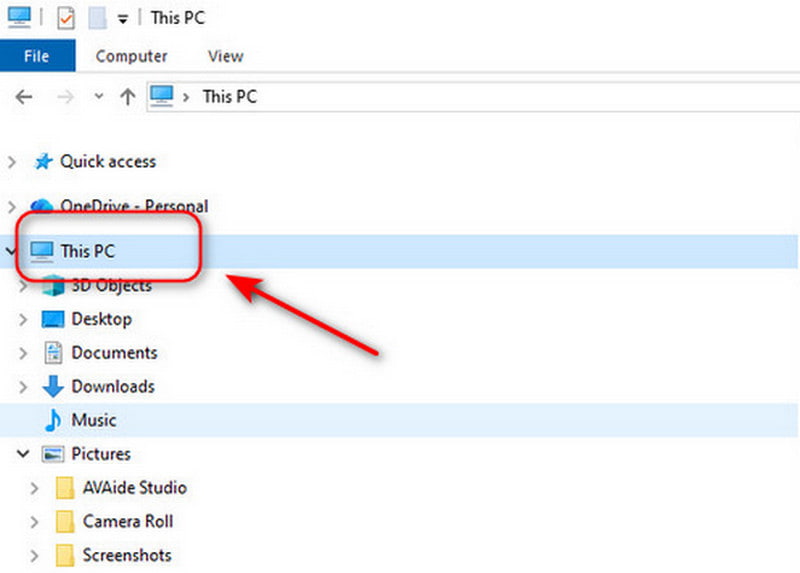
Step 2. Open File Explorer on your PC and find your iPad under This PC. Click Internal Storage > APPLE100 > DCIM.
Step 3. Copy and paste photos and videos you want to transfer to your iPad into the DCIM folder.
Step 4. Check the transferred items on your iPad.
Part 2: How to Transfer Files from PC to iPad Wirelessly
Don't have a USB cable nearby? Wireless transfer is a more convenient way to move files between your PC and iPad. Below are three simple wireless methods you can try.
Method 1: Transfer Files from PC to iPad via Email
You can use Email to send small files wirelessly. It requires no extra setup and works anywhere with an internet connection. However, most email services limit attachments to about 25MB, so this method is best suitable for small files.
Step 1. Open your Email on PC and start a new email.
Step 2. Add the files as attachments you want to transfer and send them to your own email address.
Step 3. Locate the same email account on your iPad to download the attachments.
Method 2: Transfer Files from PC to iPad with Cloud Storage
Cloud storage is great for transferring large files. By keeping iCloud syncing across your devices, you can share your files with others on other devices and back up important data safely online. Popular cloud services include iCloud Drive, Google Drive, OneDrive, and Dropbox. One limitation is that free cloud services always come with limited storage space, and you may need to upgrade to a premium version.
Here we'll use iCloud as an example:
Step 1. On your iPad, go to Settings > [your name] > iCloud and toggle on iCloud Drive.
Step 2. Log in to your iCloud account with the same Apple ID on PC. Go to This PC and select the iCloud Drive folder. Then drag the files to the iCloud drive folder.
Step 3. Open the Files app on your iPad, click Browse and choose iCloud Drive to check the files.

Method 3: Transfer Files from PC to iPad Using Messaging Apps
You can also transfer files from PC to iPad using common messaging apps, such as Telegram, WhatsApp, Skype, AirDroid, and Discord. Simply log into the same account on both your PC and iPad, then send files to yourself and save them on your iPad.
This method is easy and convenient for daily use. But the transfer speed depends on your internet connection, and some apps may limit file size or compress media during transfer. Additionally, files remain in chat history, so you need to download them for long-term use.
Part 3: How to Transfer Files from PC to iPad with a USB Stick
If you don't have access to cloud services, a USB stick can help you transfer files effortlessly. This method works completely offline and requires no extra apps. Your iPad must support external storage devices, and you may need a compatible adapter.
Step 1. Plug your USB stick into your PC. Copy the files you want to transfer onto the USB drive. Safely eject the USB when finished.
Step 2. Connect the USB stick to your iPad with an adapter. If your USB stick has a regular USB‑A connector, choose a Lightning to USB Camera Adapter or USB‑C to USB Adapter, depending on your iPad model.
Step 3. Open the Files app on your iPad. Find your USB drive under Locations and browse the files. Copy or Move the files you want to save to your iPad's local storage.
Conclusion
Transferring files from PC to iPad is simpler than you think. Whether you want to move photos, videos, music, or documents, you can copy files easily and safely by using a USB connection, wireless transfers, or a handy USB stick. Each method has its own advantages and limitations, so choose the one that best fits your needs and get started!
Related Articles
How to transfer photos from iPhone to computer? Read this guide to learn multiple best ways to download photos from iPhone to PC/Mac easily and quickly.
You can follow our guide to efficiently sync messages from your iPhone to MacBook including text messages and iMessage.
Do you undergo improper ways of transferring iPhone to iPad? This article illustrates 5 effective ways to transfer photos from iPhone to iPad.
Want to know how to transfer videos from your iPhone to your computer without compromising the original quality? Here are the most effective of the six methods.
