How to Quickly Transfer Your Files from an iPad to a PC
The ability to move files between devices from different operating systems is more important than ever. Before freeing up space, for example, you’d better transfer files from your iPad to a PC. However, the Apple ecosystem is exclusive and difficult to exchange with the outside world. This article identifies multiple methods and demonstrates the workflow for each method. If you are an iPad user with a Windows computer or laptop, you will find our guide helpful.
PAGE CONTENT:
Part 1: The Easiest Way to Transfer Files from iPad to PC
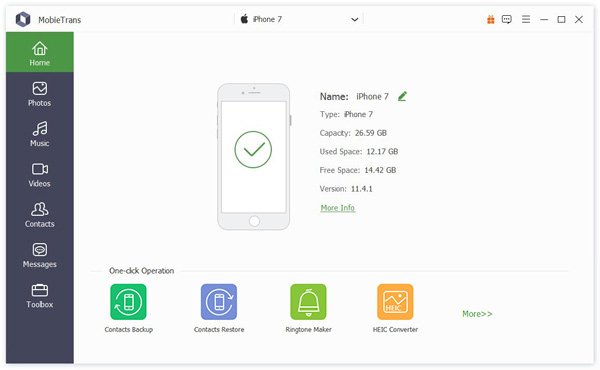
As mentioned previously, iPadOS and Windows use completely different file systems. Luckily, Apeaksoft MobieTrans can help you transfer files from an iPad to a PC via USB or vice versa. Furthermore, it can re-encode your files according to the target platform. You can quickly learn the software due to the user-friendly interface.
The Best Way to Transfer Files from iPad to PC Without Data Loss
- Transfer iPad files to your PC with a USB cable.
- Support a wide range of files, like photos, videos, music, etc.
- Move files from a PC to your iPad quickly.
- Preview iPad files before data transferring.
- Include bonus features, like a ringtone maker and HEIC converter.
Secure Download

How to Transfer Files from iPad to PC via USB
Step 1. Connect to your iPad
Launch the best way to transfer files from iPad to PC after installing it on your desktop. Plug your iPad into your PC with a Lightning cable. If you link two devices for the first time, tap Trust on your screen to trust this PC.
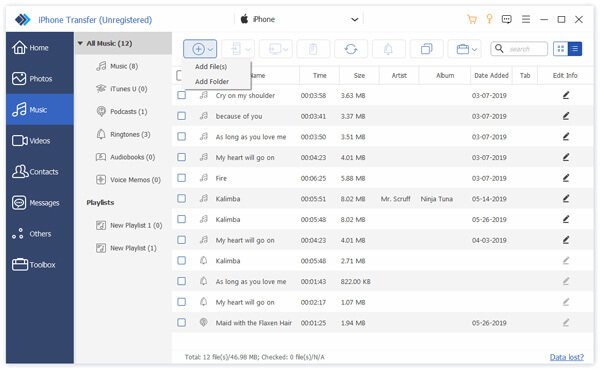
Step 2. Preview iPad files
Once the software detects your iPad, all files on your device will load. Go to the desired file type, such as Photos, in the sidebar. Preview your iPad files according to date, subfolder, and more.
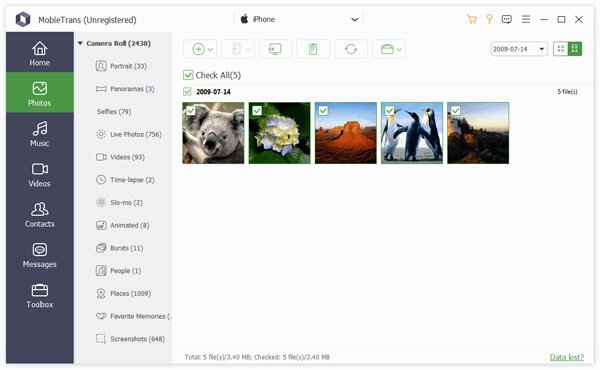
Step 3. Transfer iPad files to a PC
Select all iPad files you want to transfer, click the PC button on the top ribbon, and choose Export to PC. Finally, select an output folder and confirm file transferring.
Part 2: How to Transfer Files from iPad to PC via iTunes
If you are still using iTunes to manage your data, it lets you transfer files from an iPad to a PC. It requires the latest version of iTunes and a USB cable. You can even transfer iTunes music to your computer local storage. Remember that iTunes cannot re-encode your iTunes files. Therefore, some files are not openable on your PC.
Step 1. Connect your iPhone to your PC with a USB cable.
Step 2. Open iTunes on your desktop.
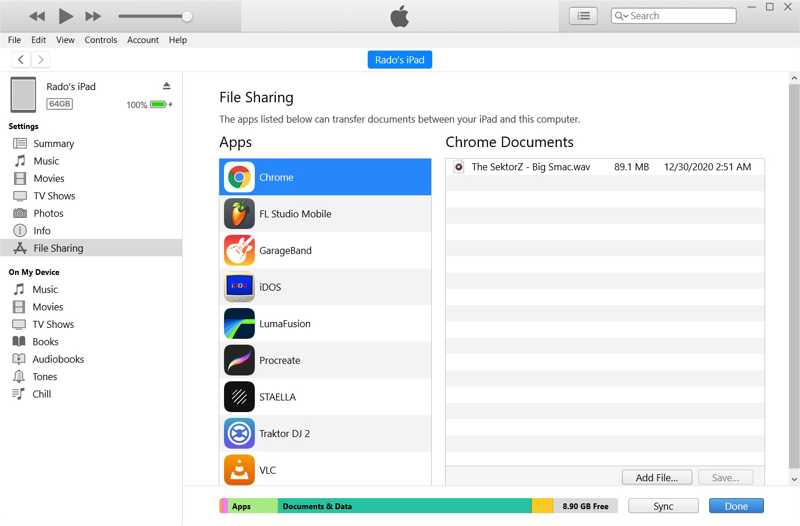
Step 3. Click the Device button at the top left side after your iPad is detected.
Step 4. Go to the File Sharing tab under the Settings section on the sidebar.
Step 5. Select the app that stores the desired files and view them.
Step 6. Press the Ctrl button and click the iPad files.
Step 7. Drag and drop selected files onto your desktop.
Step 8. If you want to transfer music files from your iPad to your PC, go to the File menu.
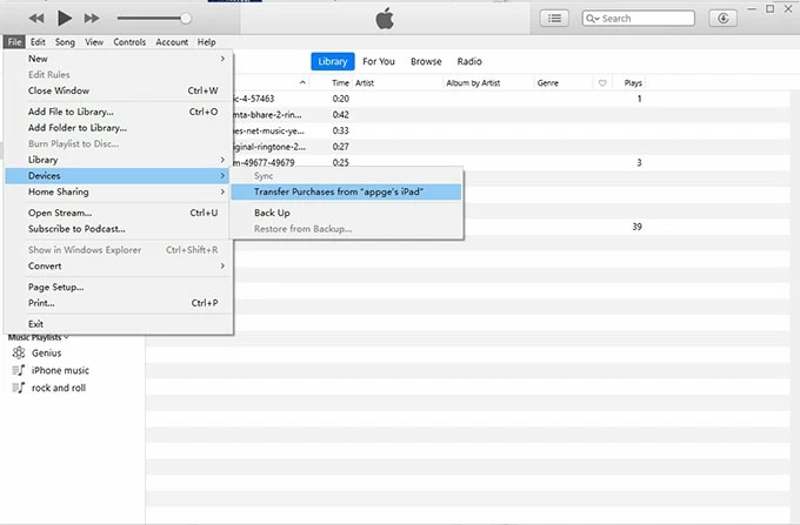
Step 9. Choose Devices and pick Transfer Purchases from "iPad name" .
Note: To transfer image files from iPad to PC, open a File Explorer window after linking the two devices. Find and open your iPad, navigate to Internal Storage and DCIM. Then, move the desired image files to your hard drive.
Part 3: How to Transfer Files from iPad to PC via iCloud Drive
iCloud Drive is one way to transfer files from an iPad to a PC wirelessly. You can move desired files to your iCloud Drive and then access iCloud Backup in a web browser on your PC. Next, you can download these files to your hard drive. This method requires a stable Wi-Fi network. Make sure that your iCloud has enough storage.
Step 1. Open the Files app on your iPad.
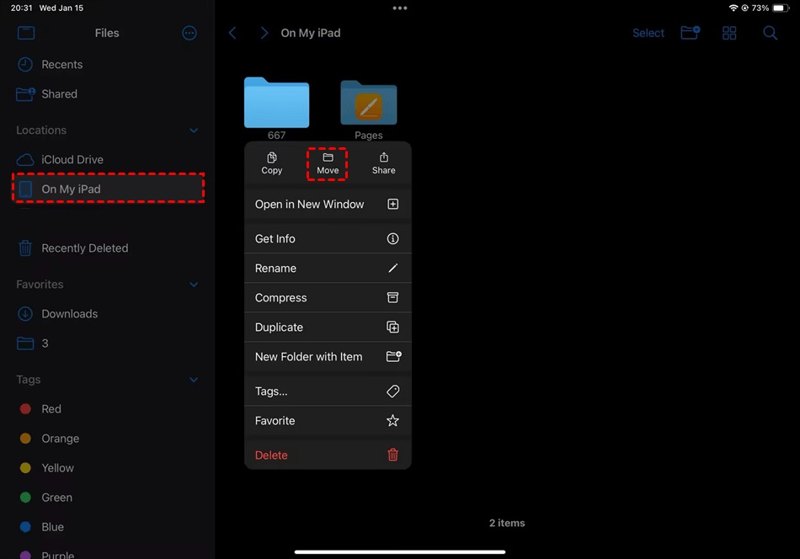
Step 2. Find the desired file, long-press it, and choose Move.
Step 3. Select iCloud Drive or a folder in iCloud Drive to save it.
Tips: If you want to transfer a file to other apps, select it in the app, tap the Share button, and choose iCloud Drive.
Step 4. Turn to your PC and open a web browser.
Step 5. Go to www.icloud.com and sign in to iCloud with your Apple ID and password.
Step 6. Choose iCloud Drive to open the iCloud Drive page.
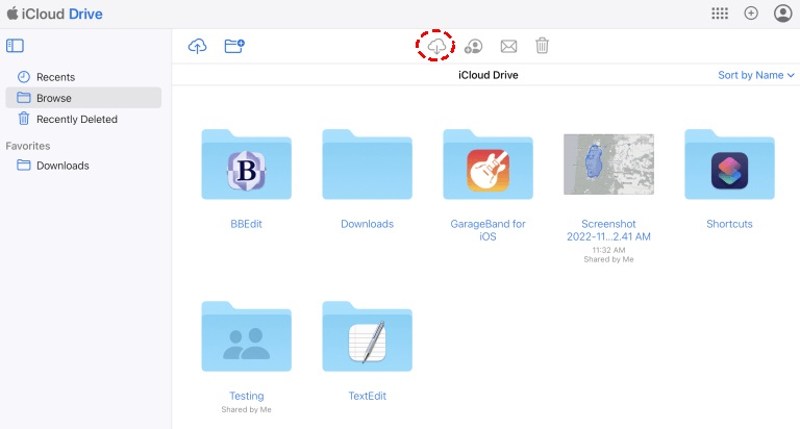
Step 7. Find the file, select it, and click the Download button.
Step 8. If prompted, confirm iPad file transferring.
Conclusion
Now, you should understand how to transfer files from your iPad into a PC. iTunes allows you to drag and drop iPad files on your desktop or other folders through a USB cable. iCloud Drive is the wireless option to download your iPad files. Apeaksoft MobieTrans is the best option for average people.
