How to Quickly Transfer iPad Photos to Your Computer
Transferring photos from an iPad to a computer is not simple due to the design of iPadOS. The workflow is different from phones or tablets of other brands. The good news is that you have multiple methods to complete photo transferring, depending on your situation. This guide lists each proven method, its prerequisites, and the workflows. Thus, you can back up your iPad photos before deleting them.
PAGE CONTENT:
Part 1: The Easiest Way to Transfer iPad Photos to a Computer
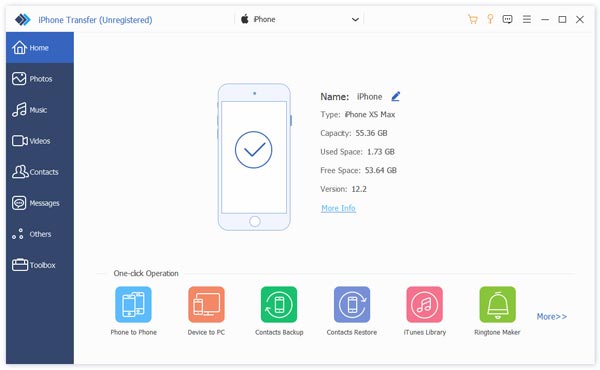
Apeaksoft iPhone Transfer is the best option for transferring photos from a PC to an iPad or vice versa. More importantly, it protects your photo quality during the process. The user-friendly interface allows ordinary people to navigate easily.
The Easiest Way to Transfer Photos between iPad and Computer
- Transfer photos from iPad to computer or vice versa.
- Manage iPad photos on your computer.
- Convert HEIC images to JPEG or PNG.
- Support the latest versions of iPadOS.
Secure Download
Secure Download

How to Transfer Photos between Your iPad and PC
Step 1. Link your iPad to a PC
Launch the best iPad photo transferring software after installing it on your PC. There is another version for Mac. Link your iPad and PC with a Lightning cable.
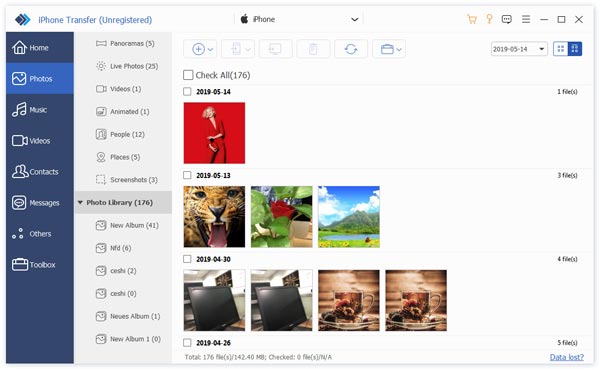
Step 2. Preview photos
After your iPad is detected, choose Photos on the sidebar. Now, you can preview photos on your iPad by album, date, and thumbnails.
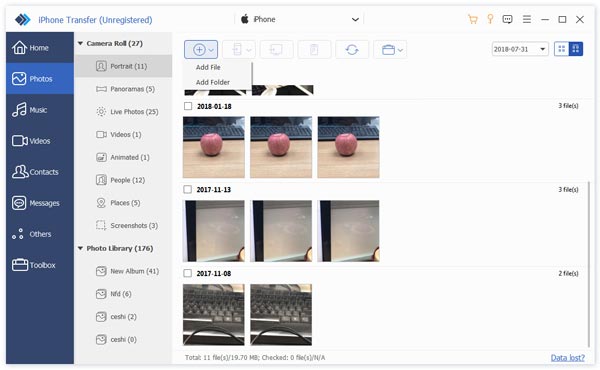
Step 3. Transfer iPad photos
To transfer photos from your PC to iPad, click the Add button, and choose Add Files. Find and select the photos on the window, and open them.
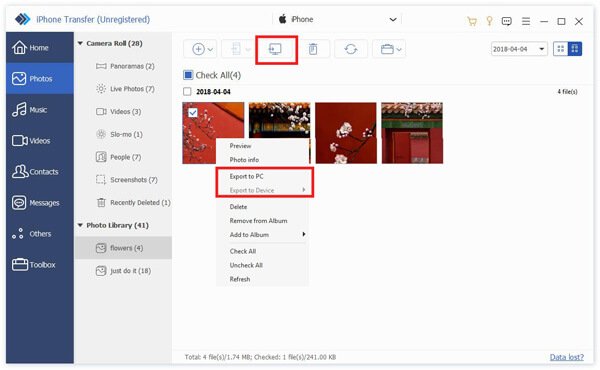
If you need to transfer photos from your iPad to a PC, select all photos. Click the PC button on the top ribbon and choose Export to PC. Set an output folder and confirm it.
Part 2: How to Export iPad Photos to PC via a Cable
If you need to download your iPad photos to a computer, all you need is a compatible cable. This method is only available to the photos that you took on your iPad and saved in your Camera Roll. You can also transfer music from iPad to computer.
Step 1. Use a USB cable to connect your iPad and computer.
Step 2. Open a File Explorer window.
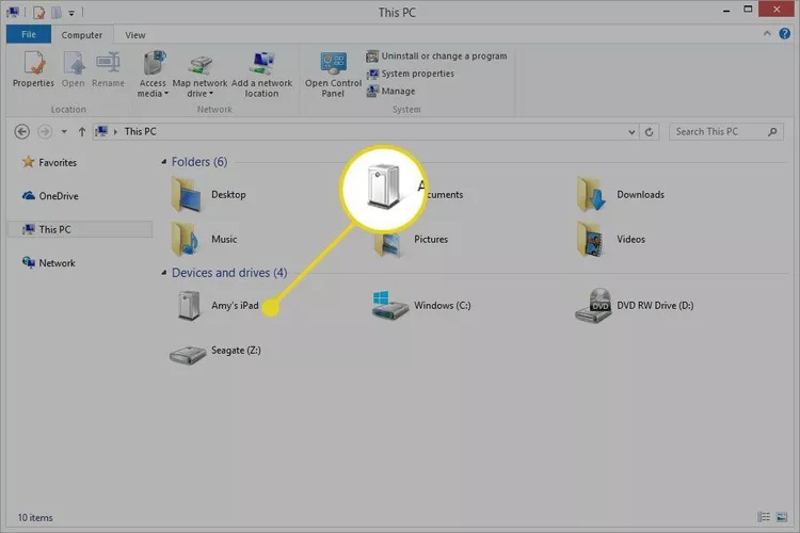
Step 3. Find and click your iPad under the Devices and drives section.
Step 4. Open Internal Storage, and enter the DCIM folder.
Step 5. Press Ctrl and click each desired photo.
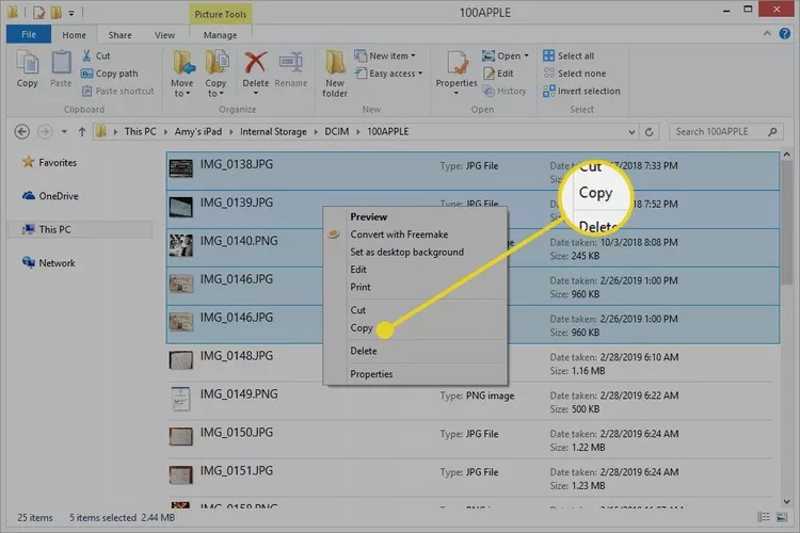
Step 6. Drag and drop them on your desktop or destination folder.
Part 3: How to Download iPad Photos to PC with iCloud
Some users prefer to sync their iPad photos to iCloud. That makes downloading photos from iPad to computer simply. You don’t need to connect your handset to the PC. This method requires a stable Wi-Fi.
Step 1. Open your Settings app and tap on your profile.
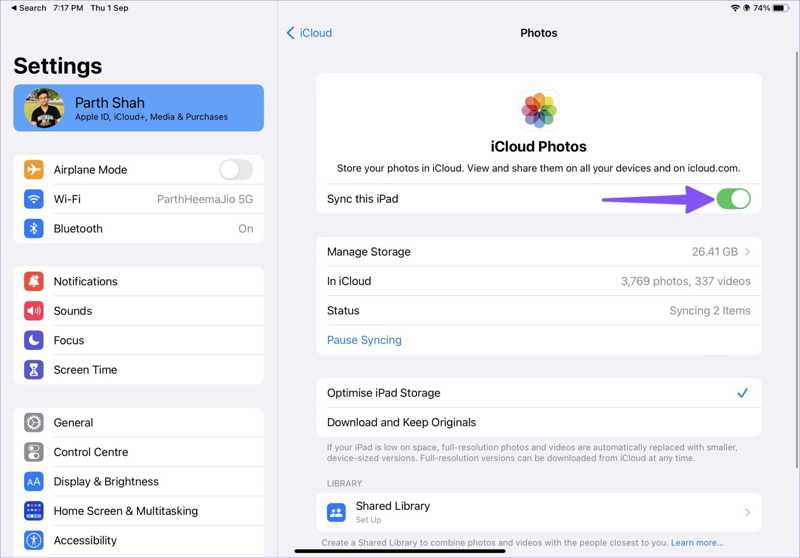
Step 2. Choose iCloud and select Photos.
Step 3. Make sure to toggle on Sync This iPad.
Step 4. Turn on your PC and visit www.icloud.com in a browser.
Step 5. Sign in with your Apple ID and password.
Step 6. Choose Photos to enter the iCloud Photos page.
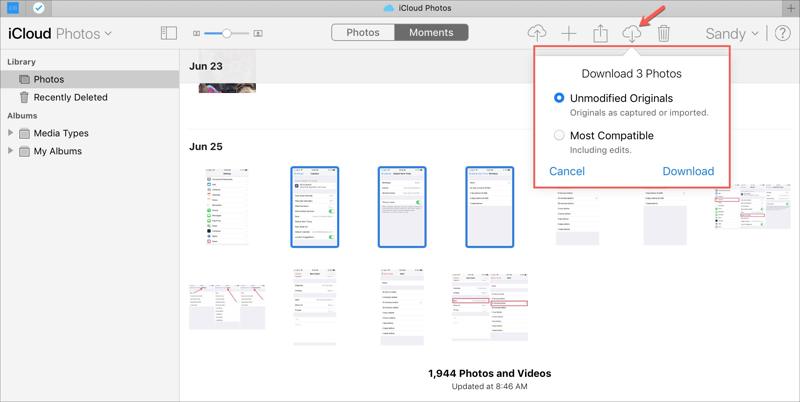
Step 7. Select the desired photos, click the Download button, and hit Download.
Note: If you didn’t change the output folder, you will find the iPad photos in the Downloads folder on your PC.
Part 4: How to Get iPad Photos to Windows 11/10 Using Photos
On Windows 11/10, the pre-installed Photos app allows you to get iPad photos to PC without extra software or hardware. Of course, this method works through the physical connection: a USB cable.
Step 1. Plug your iPad into your Windows 11/10 computer.
Step 2. Open the Photos app from the Start menu.
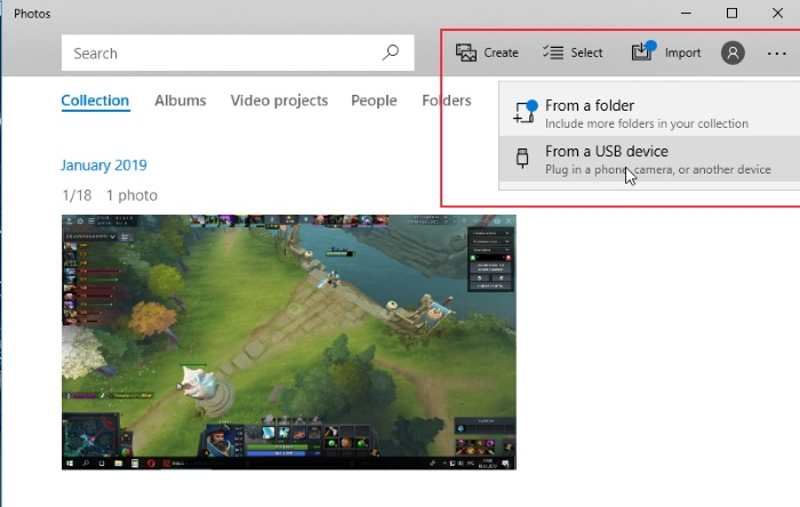
Step 3. Click the Import menu on the top ribbon and choose From a USB device.
Step 4. Choose your iPad from the pop-up dialog. If your PC cannot detect your iPad, disconnect it and try again.
Step 5. By default, all photos in your Camera Roll will be selected. You can unselect the unwanted iPad photos.
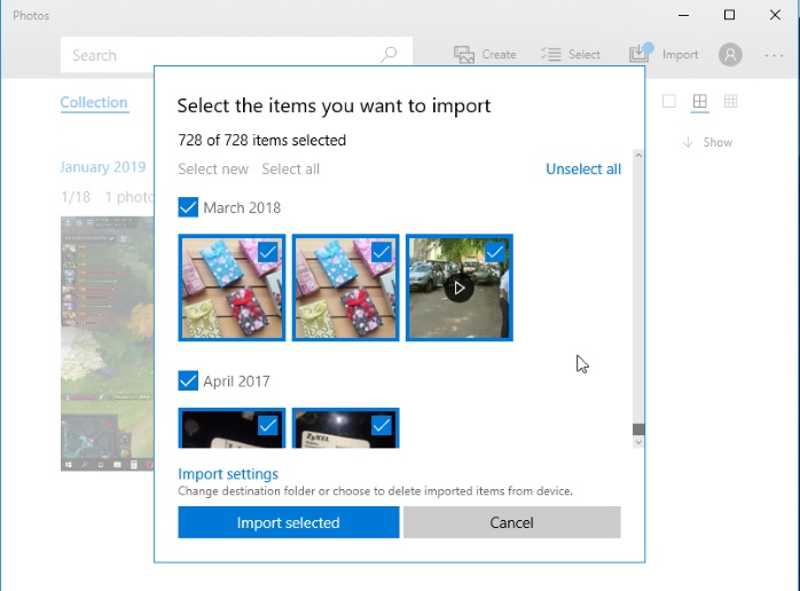
Step 6. Finally, click the Import selected button to get iPad photos to a PC.
Part 5: How to Transfer Photos from PC to iPad with iTunes
iTunes is still a data manager among iPad users. If you wish to sync photos from your PC to an iPad, it can meet your needs. You’d better move all desired photos into a single folder on your drive.
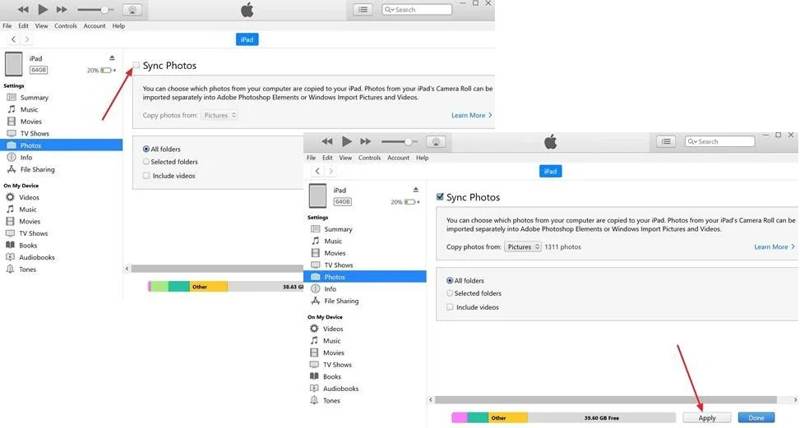
Step 1. Connect your iPad to your PC with a USB cable.
Step 2. Open the latest version of iTunes.
Step 3. Click the iPad button at the top left side and choose Photos under the Settings section on the sidebar.
Step 4. Tick the box of Sync Photos.
Step 5. Click the Copy photos from box and choose the folder.
Step 6. Finally, click the Sync or Apply button.
Conclusion
Now, you should learn at least five ways to transfer photos from an iPad to a computer or vice versa. You can read our post and pick an appropriate method according to your needs and conditions. Apeaksoft iPhone Transfer is the best option for beginners. If you have other questions about this topic, please write them down below this post.
