This article talks about how to compress QuickTime video files on your desktop or online. QuickTime video files can be very large. That is a problem for sharing or uploading. Unless you need the highest resolution, making video files smaller is better for various purposes. However, how do you compress a QuickTime video?
A right video compressor can help you to compress video and make the video file smaller. Here you can learn 5 ways to compress your MOV videos.

- Part 1: Top 3 Ways to Compress QuickTime Video on Desktop
- Part 2: 2 Best Ways to Convert QuickTime Video Online
Part 1: Top 3 Ways to Compress QuickTime Video on Desktop
Method 1: Easiest Way to Compress QuickTime Videos
The file size of QuickTime videos is determined by resolution, bitrate and encoding, so you need a video editor to adjust these parameters and compress QuickTime videos. From this point, we recommend Apeaksoft Video Converter Ultimate. It can meet all your need of QuickTime compression.
1. Compress QuickTime videos without losing quality.
2. Batch process multiple QuickTime videos at the same time.
3. Support a wide range of video formats including MOV, MP4, etc.
4. Offer extensive video editing tools, such as crop, rotate, and more.
5. Available to Windows 11/10/8/7 and macOS 15.
In short, it is the easiest way to compress your QuickTime videos on your desktop.
How to Compress QuickTime Videos in Batch
Step 1 Install the best video compressor
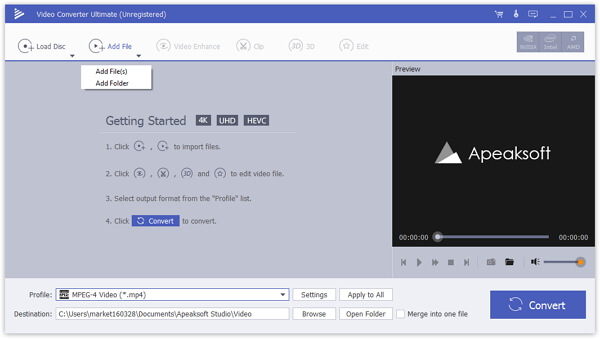
After you install Video Converter Ultimate on your PC, launch it. There is another version for Mac. To add the QuickTime videos that you want to compress, click the Add File menu on the top ribbon. Alternatively, you can drag and drop the videos into the home interface.
Step 2 Compress QuickTime videos
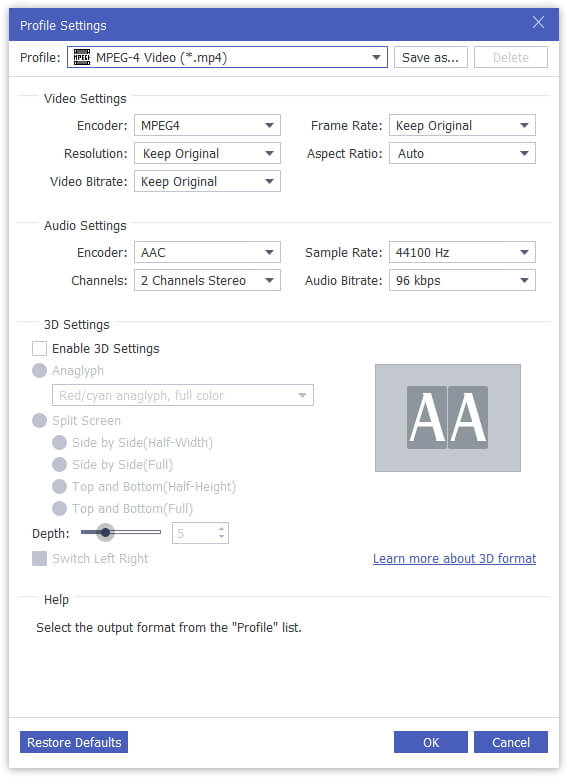
Locate the bottom area and click the Settings button to open the Profile Settings dialog. Expand the Profile drop-down list and choose MP4, and select H.264 from the Encoder option. Adjust the Resolution and Video Bitrate to compress QuickTime video further. Click OK to confirm it.
Step 3 Export QuickTime videos in batch
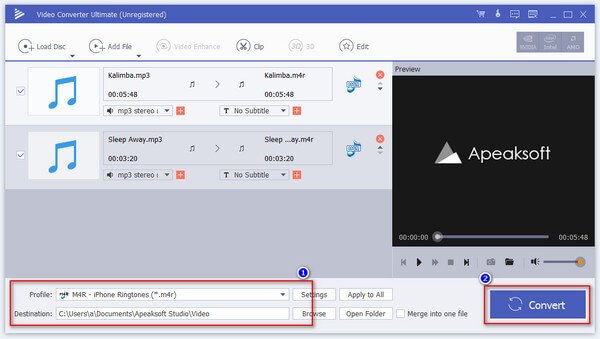
Click the Browse button at the bottom of the interface and set a specific folder to store the compressed QuickTime videos. Finally, click the Convert button.
Method 2: Compress QuickTime Videos with QuickTime Player
QuickTime Player is able to compress QuickTime videos by resizing the dimensions, decreasing the frame size and bitrate. It is the built-in media player for Mac OS X/11, so you can use it for free.
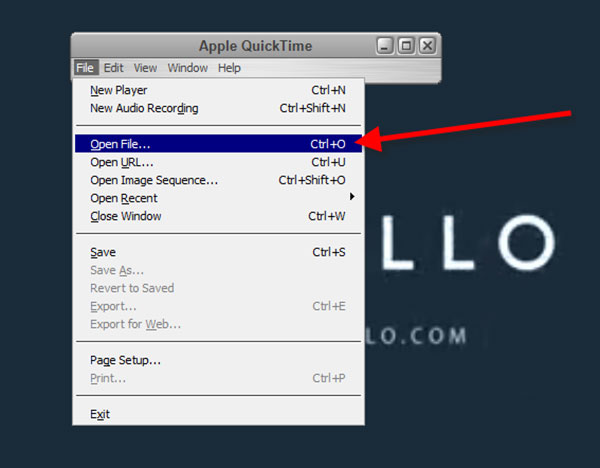
Step 1 Click File -> Open File in your QuickTime Player to open the QuickTime video into the media player.
Step 2 Then click File -> Export to open the Save exported file as dialog. Make sure to select Movie to QuickTime Movie from the Export dropdown list.
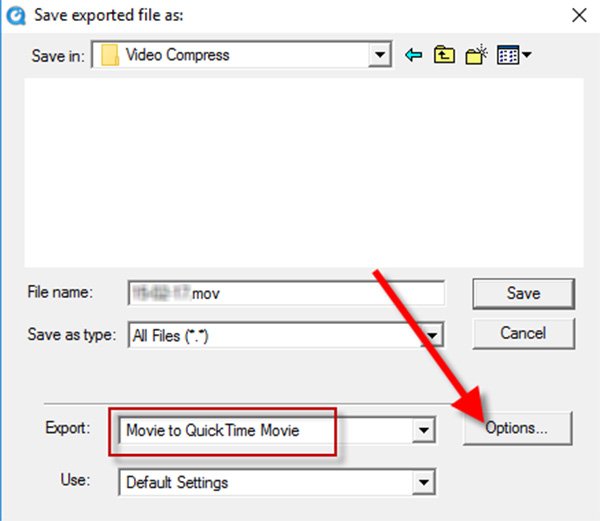
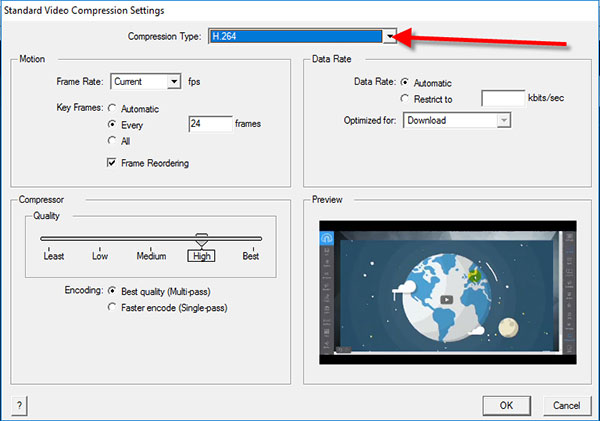
Step 3 Click Options -> Settings to open the Standard Video Compression Settings pop-up. Select H.264 from the Compression Type and then adjust the Quality. Click OK to confirm it.
Step 4 Hit the Size button on the Movie Settings dialog and choose the lower sizing option. Click OK and then hit Save button to compress the QuickTime video.
Method 3: Compress QuickTime Videos with VLC
VLC is an open-source media player. In addition to video playback, it also provides extensive features including compress QuickTime videos. Moreover, it is compatible with Windows, Mac and Linux, so you can use it on any platform.
Step 1 Run VLC and click Media -> Convert / Save to trigger the Open-Media dialog. Click the Add button to import the MOV videos you want to compress.

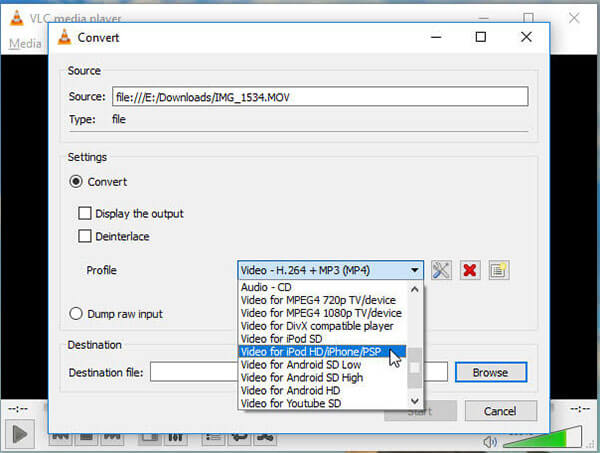
Step 2 Hit the Convert / Save button to open the next dialog, and then choose the proper output format or target device from the Profile dropdown list. Hit the Settings button next to the Profile option to move on.
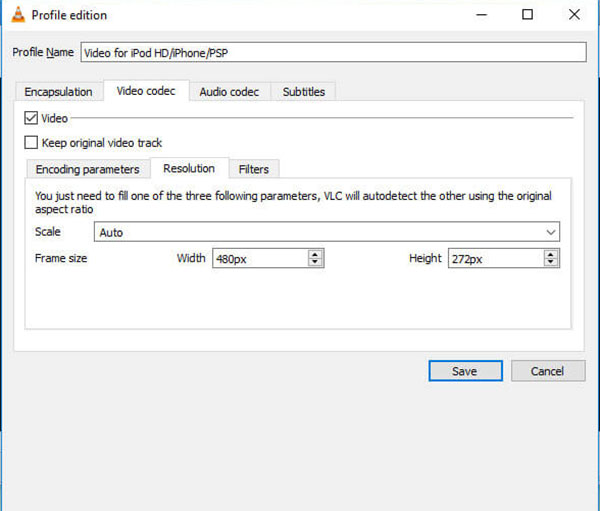
Step 3 Go to the Video codec tab and downscale the Resolution. Click the Save button, and set the destination and file name by hitting the Browse button.
Step 4 Once click the Start button, VLC will start compressing QuickTime videos.
Part 2: 2 Best Ways to Convert QuickTime Video Online
Method 1: Compress QuickTime Videos with Online Video Compressor
Web apps are a convenient way to compress QuickTime videos. They do not require installation, but have some drawbacks, such as file size limit. Apeaksoft Online Video Compressor, on the other hand, allows you to process unlimited MOV videos online.
Step 1 Visit the online video compressor in your browser and click the Add Files to Compress button to get the launcher.
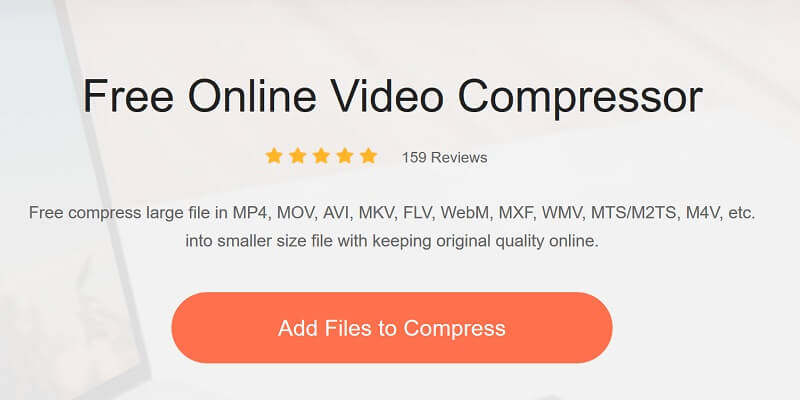
Step 2 Then click the Add File button on the launcher and import the QuickTime videos to compress from your hard drive.
Step 3 Then decrease the value of Size and other parameters based on your wish.
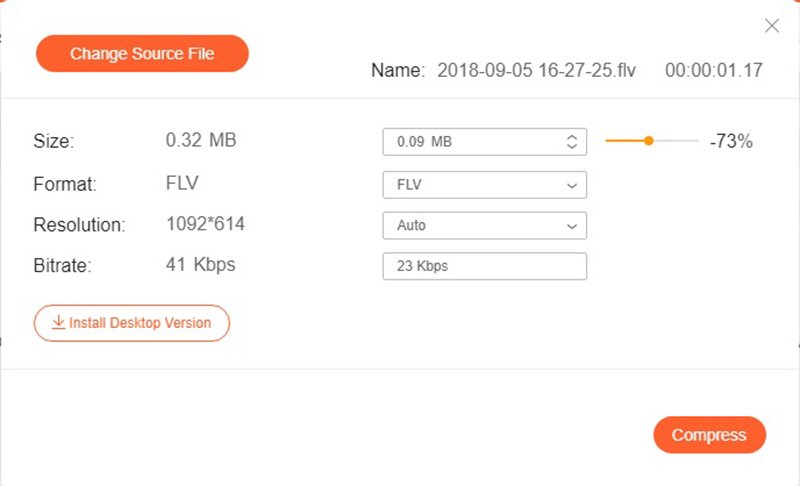
Step 4 Finally, click the Compress button to initiate QuickTime video compression online.
Method 2: Compress QuickTime Videos on YouCompress
YouCompress is another video compressor online. It is a good starting point to compress a QuickTime video since it does not contain any custom options. Bear in mind that it can only process one video per conversion.
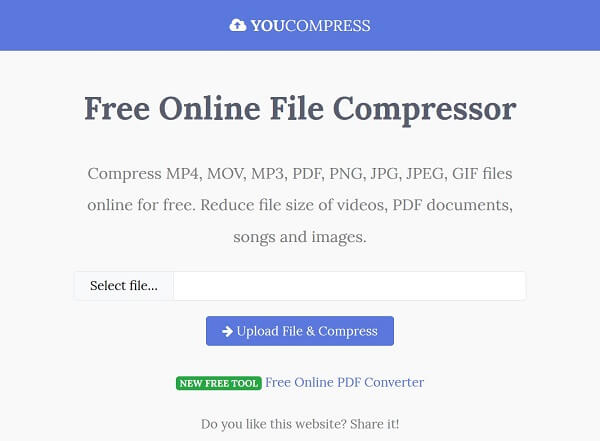
Step 1 Open a web browser, copy and paste https://www.youcompress.com/ in the address bar and hit Enter key.
Step 2 Click the Select file button to load a MOV video from your computer.
Step 3 Next, hit the Upload File & Compress button to start uploading the video. Then the online video compressor will initiate the QuickTime video compression automatically. When it is done, download the smaller video file to your hard drive.
Conclusion
This article has identified and shared 5 methods to compress QuickTime videos on your desktop or online. You can pick up the right one based on your situations. Apeaksoft Video Converter Ultimate can meet all your need involved with video compression. The biggest advantage is to protect the video and audio quality as much as possible. Moreover, it is pretty easy to use. If you have other questions related to QuickTime video compression, please leave a message below.


