The built-in Voice Memos app on your iPhone or iPad offers a convenient way to make audio recordings for free. Whether you are capturing a lecture, remembering your current thought, or brainstorming an idea, you can rely on it.

If you often record audio clips using the Voice Memos app on your iOS device, you may need to edit and trim your recordings. Do you know how to trim voice memos and remove unwanted portions?
- Part 1. Trim Voice Memos on iPhone
- Part 2. Trim Voice Recordings on Computer
- Part 3. FAQs on How to Trim Voice Memos
Part 1. How to Trim Voice Memos on iPhone and iPad
The Voice Memos app comes with built-in editing features for you to edit the recorded voice clips. You don't need to install an audio editor app for post-processing work. You can directly trim a recording in Voice Memos, replace and delete audio recordings, and do other operations. You can check the following part to learn how to trim voice memos on your iPhone.
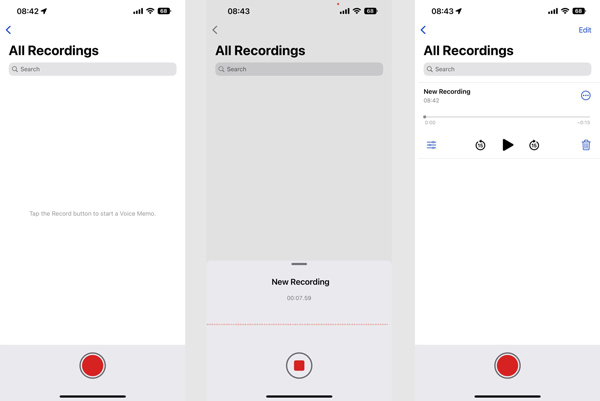
Create a recording in Voice Memos
When you enter the Voice Memos app, you can simply tap on the Record button to start your voice recording. When you want to finish your recording, you can tap on the button again. Your captured audio will be automatically saved and listed there. You can tap the Play button to listen to it.
Edit and share a recording in Voice Memos
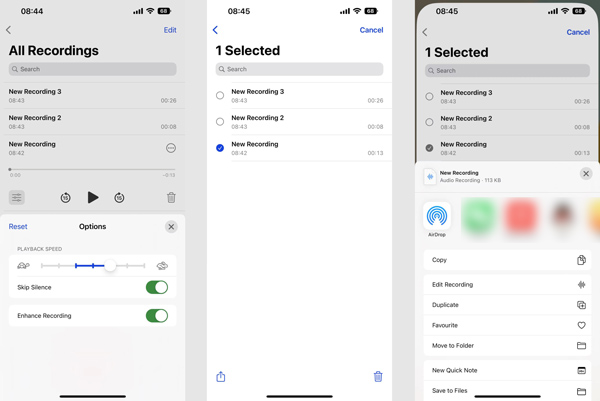
After making a recording in Voice Memos, you can tap on the Options button under your recording file to access some basic editing functions. Here you can freely adjust the playback speed, skip silence, and enhance your recording.
You can tap the Edit button in the upper-right corner, select the specific recording file, and then tap the Share button in the bottom-left to share it through AirDrop or other apps. During this step, you are also allowed to set it as Favorite, copy and duplicate it, move it to Folder, save it to Files, or open it in another app.
Trim a voice memo on iPhone
Now we come to the key point, how to trim a recording in Voice Memos. When you want to trim an iPhone voice memo, you should also tap on the Edit button. Select the voice memo you like to trim, tap on the Share button, and then choose the Edit Recording option.
You can see a blue line appears in your iPhone voice memo. It indicates the time of the playback and the recording flows behind it. If you want to quickly change and replace the content of a certain part of your recording, you can tap on the Replace button and start a new audio recording.
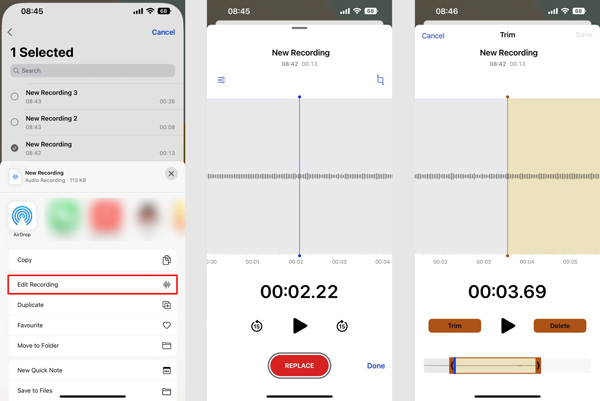
To trim a recording in Voice Memos, you can tap on the Trim button and then drag the trimming bars on the bottom screen. After that, you can tap the Trim button to confirm your operation. Here you can also select the unnecessary part and then tap the Delete button to remove it. After you trim an iPhone voice memo, tap on the Save button in the upper-right corner.
Part 2. How to Trim Audio Recordings on Mac and Windows 10/11/8/7 PC
To cut your voice recordings or other audio files on your computer, you can use the all-featured Video Converter Ultimate. It gives you a simple way to trim any video and audio files without losing sound quality. Besides, this robust tool can convert and compress your voice memos to make it easy for you to email voice memo.
4,000,000+ Downloads
Trim any audio and video files to remove unwanted parts.
Combine two or more voice recordings into one new audio file.
Offer trim, split, crop, rotate, enhance, effects, and other editing features.
Carry toolbox of audio sync, audio compressor, video trimmer, and more.
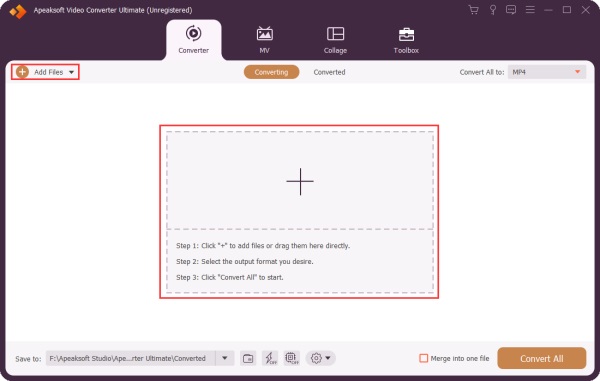
Step 1 Free download and open Video Converter Ultimate on your Mac or Windows computer. Click Add Files or + to add your audio recording. All popular audio formats like MP3, M4A, M4R, AAC, ALAC, FLAC, and others are supported.
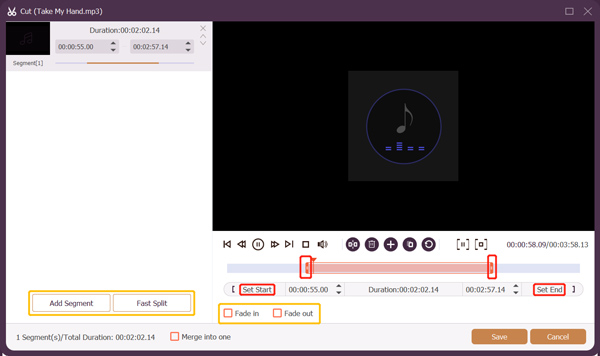
Step 2 When your recording file is loaded, you can click the Cut button to open the main audio trimming window.
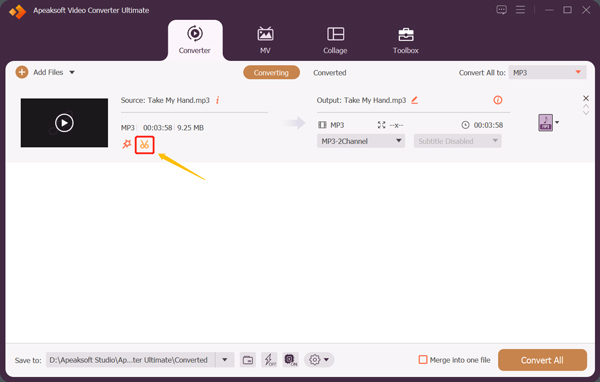
Step 3 Drag the left and right trimming handlebars to freely cut your audio recording. You can also set the Start time and End time to trim it. What's more, this voice recording cutter provides you with the Fast Split, Add Segment, and other functions to quickly cut audio.
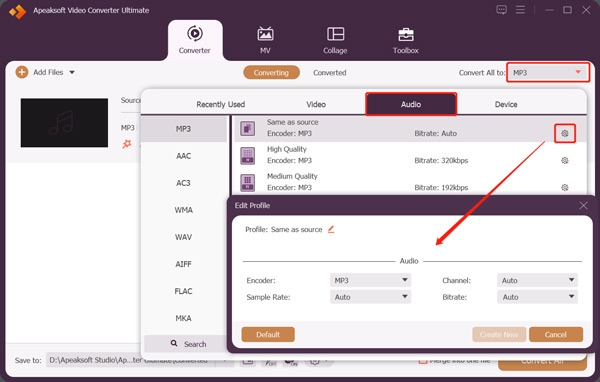
Step 4 After trimming a voice memo, you can go back to the home window and select a suitable output audio format from Convert All to.
Part 3. FAQs on How to Trim Voice Memos
Question 1. How do you duplicate voice memos on an iPhone?
Before you edit a recording in the Voice Memos app, you'd better make a copy and ensure you always have the original file. To duplicate a voice memo on your iPhone, you can tap on the 3-dots button of your recording and then select the Duplicate option. By doing so, the Voice Memos app will instantly make a duplicate copy of your recording.
Question 2. Can I recover accidentally-deleted voice memos on my iPhone?
Yes. Your deleted voice memos will be stored in a separate folder called Recently Deleted. You can go there to easily recover any accidentally deleted voice memos on an iPhone. When you enter the Recently Deleted folder, you can tap to choose the recording you like to restore and then tap on Recover to get it back.
Question 3. How to separate audio from iPhone voice memos?
Open the Voice Memos app on your iPhone, select a recording file, and then tap the 3-dots More button. Choose the Separate Audio feature in the popup and then use it to separate audio from the voice memo.
Conclusion
After reading this post, you can learn some useful tips about how to use the Voice Memos app on your iPhone or iPad. You can easily record, edit, share, or trim a voice memo.