How to Back up Your iPad to an External Hard Drive
It is a good idea to use a backup hard drive for your iPad. That can expand your memory storage and avoid data loss when freeing up space on your handset. Due to the closed design, you cannot simply insert an SD card into your iPad as you do on an Android device. However, you still can back up your iPad to an external hard drive with or without a computer.
PAGE CONTENT:
Part 1: How to Back up an iPad to an External Drive Without a Computer
Currently, you can connect a Lightning flash drive to your iPad and back up iPad files to the external hard drive. This method requires a compatible flash drive and a Lightning to USB-C hub or adapter.
- Backup iPad without a computer.
- Move iPad files quickly.
- Don’t require Wi-Fi.
- Only available for photos, videos, and documents.
- Require a USB-C hub.
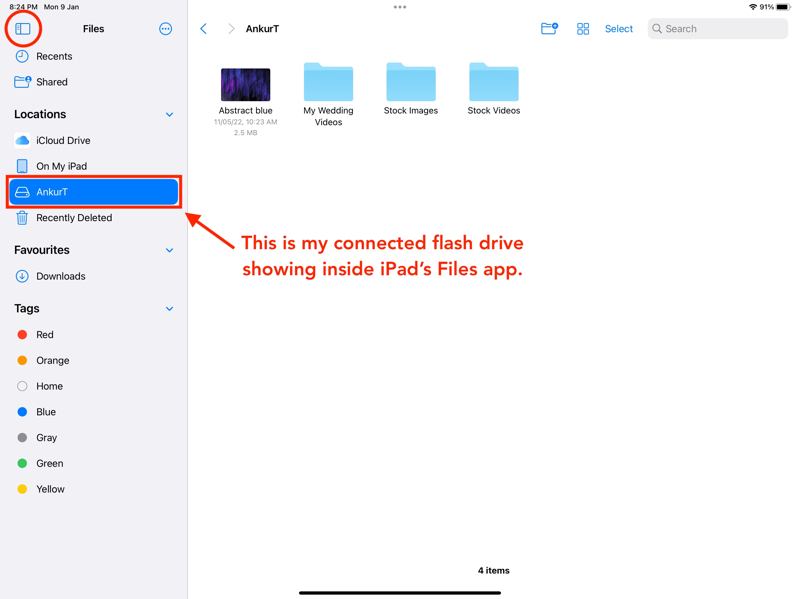
Step 1. Plug the cable of the hub into your iPad, and insert the flash drive into the hub to connect the external hard drive to the iPad.
Step 2. Open the Files app, and find the hard drive on the sidebar.
Step 3. Switch to the app that you want to back up, such as Photos.
Step 4. Select the files you want to back up, tap the Share button, and choose Save to Files.
Step 5. Go back to the Files app and locate the files.

Step 6. Long-press one file and choose Move. Or tap Select, select all desired files, and hit the Browse tab.
Step 7. Pick the external hard drive.
Part 2: How to Back up iPad to External Drive on a PC or Mac
If you wish to back up the entire iPad to an external hard drive, you will need a computer. Back up your iPad with the latest version of iTunes or Finder, and then move the backup file to a flash drive.
- Backup iPad quickly.
- Protect iPad backup with password.
- Keep all data on iPad.
- Back up file cannot be open.
- Require the latest version of iTunes or Finder.
Step 1. Connect your iPad to your computer with a compatible cable.
Step 2. Open iTunes on Windows or macOS Mojave and earlier. For macOS Catalina or later, run the Finder app.
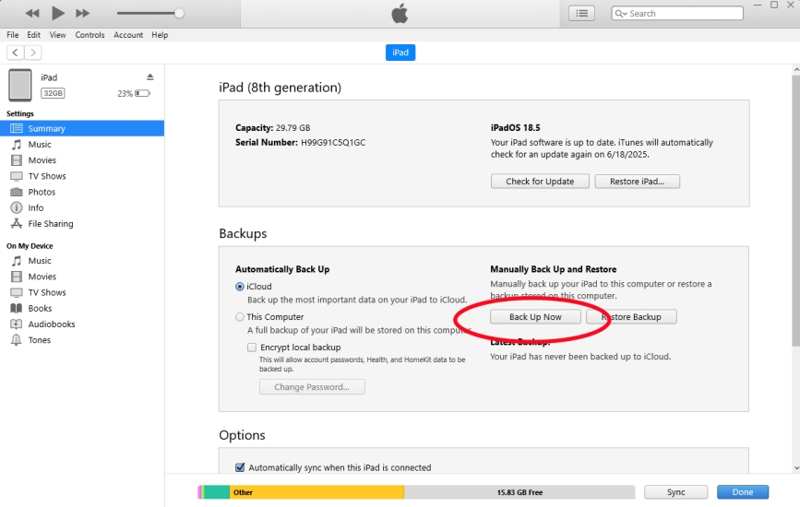
Step 3. Click the Device button in iTunes, and go to the Summary tab.
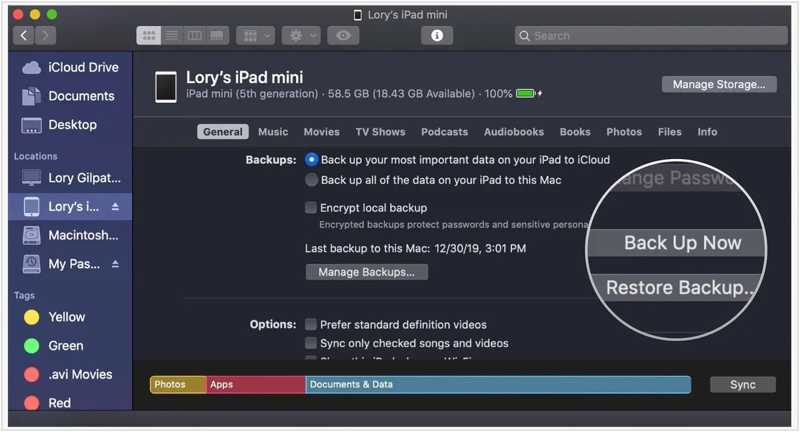
In Finder, click your iPad name, and head to the General tab.
Step 4. Click the Back Up Now button in the Backups section to back up your iPad immediately.
Step 5. Locate the backup file on your hard drive:
On PC: click the Start menu, type %APPDATA%Apple ComputerMobileSync in the search bar, and hit the Enter key on your keyboard.
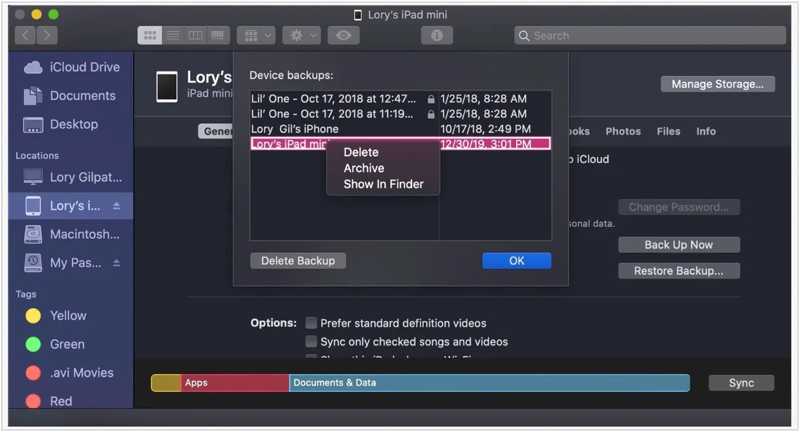
On Mac: click the Manage Backups button in Finder. Select the latest backup, and choose Show in Finder.
Step 6. Connect an external hard drive to your computer.
Step 7. Move the iPad backup to an external hard drive.
Part 3: Ultimate Way to Back up iPad to External Hard Drive
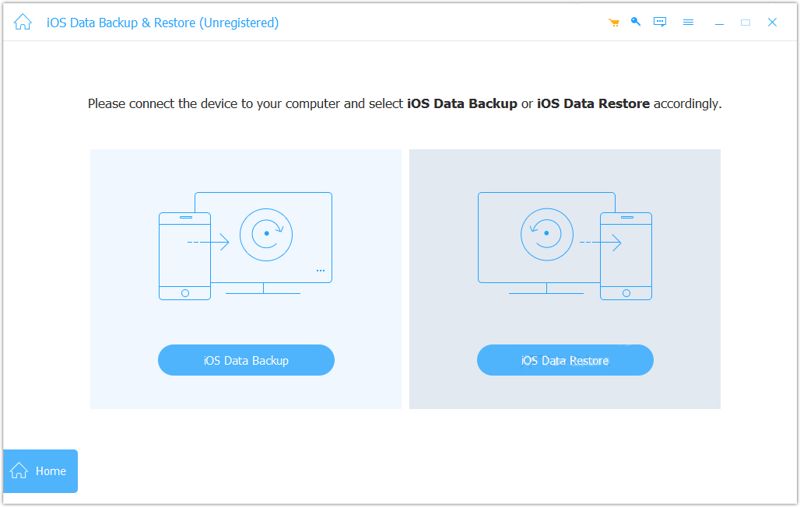
iTunes or Finder can only back up all data and settings on your iPad, so the backup file is large. If you wish to back up specific data types on an iPad to an external hard drive, Apeaksoft iOS Data Backup & Restore is worth using. The user-friendly interface simplifies the workflow.
An Ultimate Way to Back up iPad to External Hard Drive
- Backup iPad to local or external hard drive.
- Save entire iPad or specific data types.
- Compatible with a wide range of data types.
- Restore data to iPad or computer easily.
- Support the latest editions of iPadOS.
Secure Download
Secure Download

How to Back up an iPad to an External Hard Drive
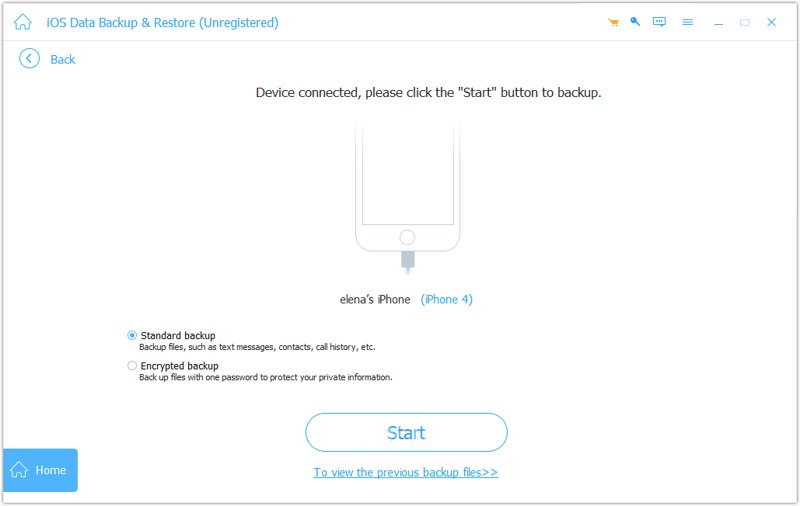
Step 1. Scan your iPad
Start the iPad backup tool once you install it on your PC. There is another version for Mac. Plug your iPad into your PC with a Lightning cable. If prompted, tap Trust on your screen to trust this PC. Click the iOS Data Backup button to proceed.
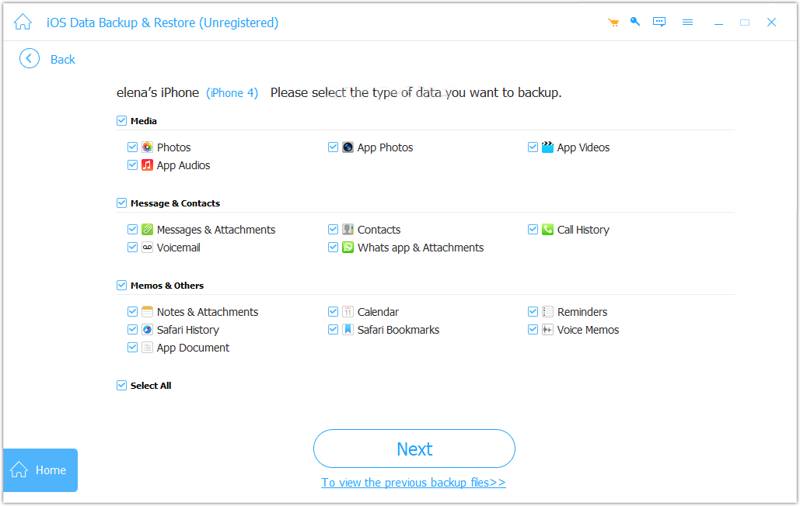
Step 2. Select data types
Select Standard backup, or Encrypted backup, and leave a password. Hit Start, and check the boxes next to the data types you want to back up. To back up the entire iPad, check Select All.
Step 3. Back up iPad
As long as you are ready, click the Next button to initiate iPad backup. When it is done, transfer the iPad backup to an external hard drive.
Conclusion
Following our guide, you should learn three ways to back up an iPad to an external hard drive. The File app allows you to move photos, videos, and documents from your iPad to an external hard drive. Or you can create a backup using iTunes or Finder and move it to a flash drive. Apeaksoft iOS Data Backup & Restore is a quick way to back up iPad data to a local or external drive.
Related Articles
To enjoy your favorite music across devices, you can learn multiple ways to transfer music between an iPad and an iPhone.
If important messages disappear on your handset, here are proven methods to recover deleted messages on your iPad Pro/Air/mini.
To add MP4 files to an iPad, apart from iTunes, you can also use the cloud service, WALTR 2, VLC, or dedicated iOS data transfer software.
If you are looking for the best iPad data recovery software, you are lucky since we identify and review the top 6 tools.
