Erase Hard Drive on Mac: Everything You Need to Know
Running out of hard drive space on your Mac is really annoying. It'll make your system lag and apps launch slowly. Do you know what's taking up the most space on your Mac? Why does your storage still run out even after deleting photos and videos? How to clear hard drive space on Mac? This guide answers all your questions and gives you effective ways to manage your Mac storage easily.
PAGE CONTENT:
Part 1: How to Check Mac Hard Drive Space
Before cleaning your Mac's hard drive, the first step is to find out how much space is available and what's taking up the most space. This information can help you clean your storage space more efficiently. Checking hard drive space on a Mac is very simple:
Step 1. Open the Apple Menu on the top left corner of the desktop screen and select System Settings.
Step 2. Click General in the sidebar, then select Storage.
Step 3. Click All Volumes, then you can see the available storage space and the specific amount of space each category uses.
Part 2: How to Clear Hard Drive Space on Mac
Checked your Mac and found your hard drive space is heavily used? It's time to clear unnecessary files and free up available storage! Depending on your needs, you can clean your Mac manually or use a professional tool for a faster and easy fix.
Free Up Hard Drive Space on Mac Manually
Manual cleanup lets you choose exactly what to delete, reducing the risk of accidently removing important files. You don't need to install any software, but it can take a lot of time, and it's easy to miss hidden cache or system junk files. Common cleanup methods include:
Delete Junk Files and Folders
Junk Files include browser cache and cookies, log files, duplicates, temporary files, deleted items, old downloads and more. They will take up your storage space significantly.
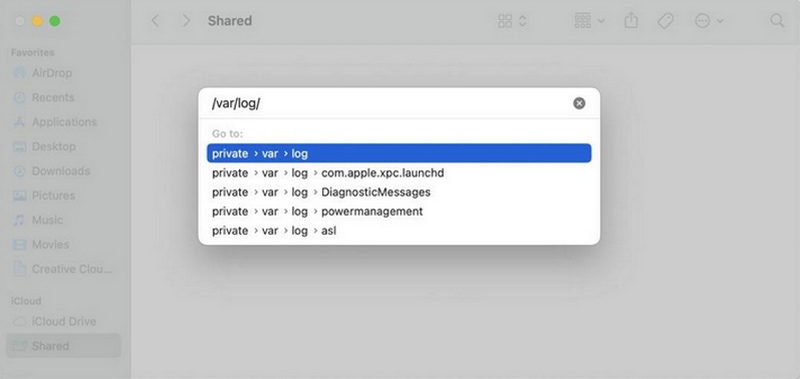
Step 1. Open Finder and select Go to Folder.
Step 2. Type /var/log in the window and click Go.
Step 3. Select the useless files and delete them.
Uninstall Apps You Rarely Use
If there are apps you haven't opened in months, they're likely taking up space for no reason.
Step 1. Go to Finder and select Applications.
Step 2. Select the Apps you don't need any more and click Move to Trash.
Step 3. Empty Trash to clear storage space.
Empty Trash
Files moved to the Trash are not deleted right away. They continue to occupy hard drive space until the Trash is emptied. Don't forget to enable the Automatic Empty setting.
Step 1. Go to Finder and select Preferences.
Step 2. Hit Adavanced and pick Remove items from the Trash after 30 days.
Delete Browser Cache
Web browsers store cache files to load pages faster, but over time, these files can take up a lot of hard drive space. Deleting your browser cache can free up hard drive space and improve website performance.
Step 1. Open Finder and select Go to Folder.
Step 2. Type ~/Library/Caches in the pathname window.
Step 3. Select the folders you want to clear and move them to the trash.

Remove Old Backups
Old iTunes/Finder/Time Machine backups can use a significant space on your Mac. Remove those old backups if you have a newer one.
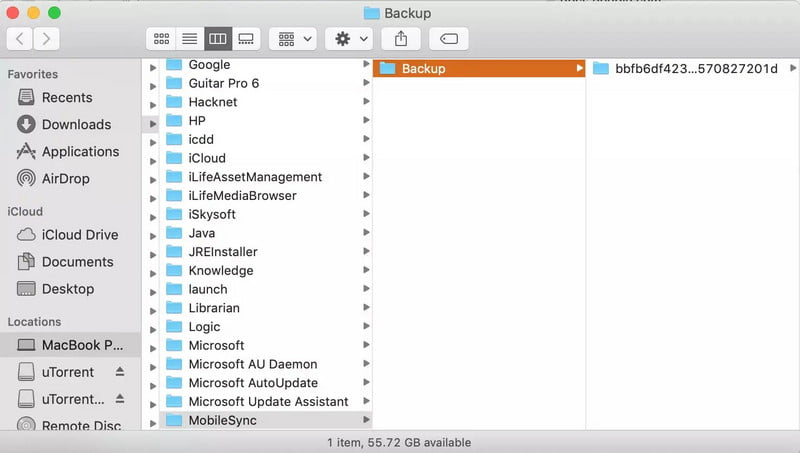
Step 1. Open Finder, click Go and choose Go to Folder.
Step 2. Type this path: ~/Library/Application Support/MobileSync/Backup.
Step 3. Drag the target backup to the Trash.
Use Apeaksoft Mac Cleaner
If you want a faster and easier way to free up hard drive space, this professional cleaning tool can solve your problem - Apeaksoft Mac Cleaner! It quickly scans your Mac, displays all system junk files and swipes away unnecessary files in a few minutes! It supports multiple macOS systems, including the latest macOS 26, and works on Macs with 1.4GHz dual-core Intel Core i5 or above, as well as Apple M1/M2/M3 chip.
Free Up Your Mac as New
- Delete old/junk/large/duplicated/outdated files on your Mac.
- Monitor your system performance in all aspects.
- Increase your Mac's running speed as new.
- 100% secure and clean to free up Mac storage space without data loss.
Secure Download

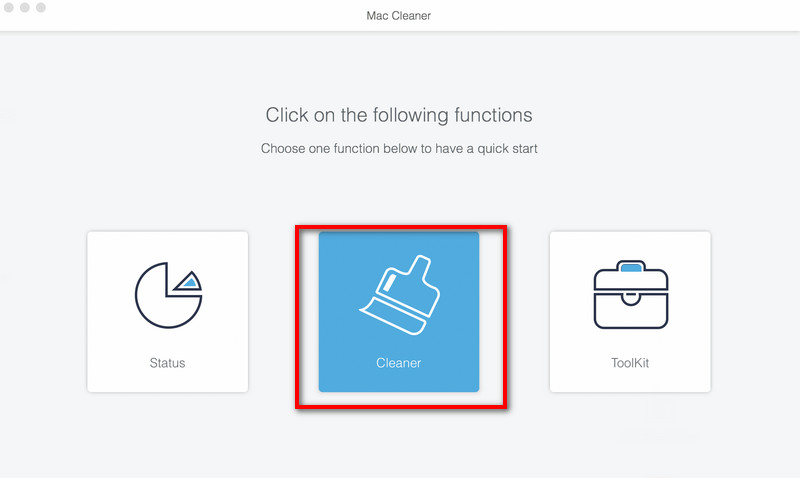
Step 1. Launch Mac Cleaner on your Mac and click Cleaner in the interface.
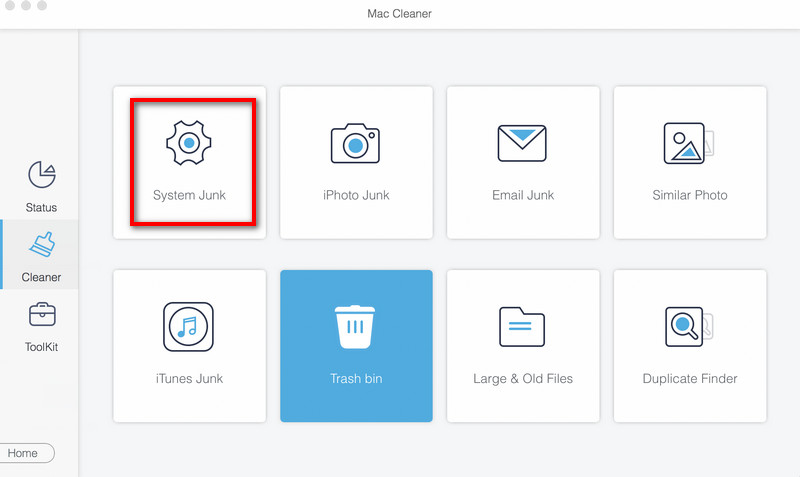
Step 2. Click System Junk to proceed.
Step 3. Click Scan to scan the system junk on your Mac. After scanning, choose View to see the results.
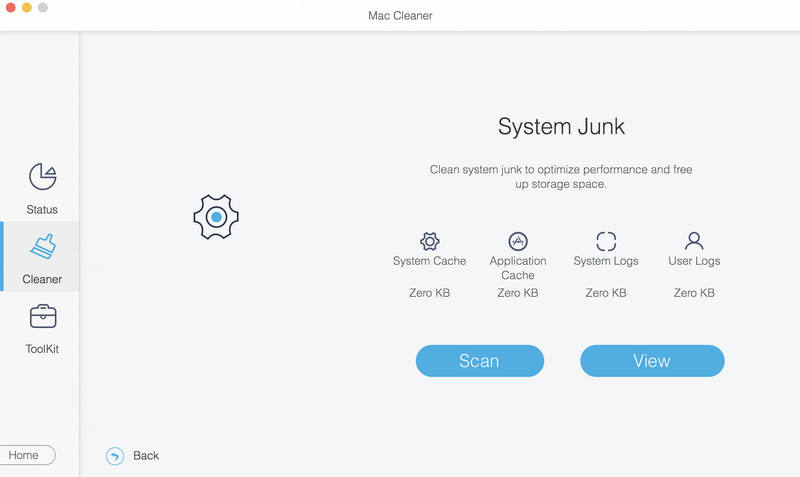
Step 4. After scanning, hit View to see the results. Choose the files you want to delete, then select Clean to remove them. Confirm it in the prompt window, then your Mac will free up hard drive space in minutes.

Part 3: How to Wipe Internal Hard Drives on Mac
If you want to sell, give away, trade in, or recycle your Mac, cleaning files is not enough. You need to completely wipe the internal hard drive on your Mac to protect your privacy. Here are two official methods to erase your Mac:
Note: Erasing the hard drive on your Mac will delete all your data, so don't forget to back up your Mac files before erasing! You can use iCloud or Time Machine to keep your data safe!
Use Disk Utility - For All Mac Models
Disk Utility is Apple's built-in cleaner for macOS and supports all Mac models! Whether you're using a newer Apple Silicon Mac or an older Intel-based one, it can erase your internal hard drive thoroughly.
Included Mac Models:
- All Apple Silicon Macs (M1/M2/M3/M4 series: MacBook/Air/Pro, Mac mini, iMac, Mac Studio, Mac Pro).
- All Intel-based Macs with/without T2 Security Chip.
Step 1. Start up your computer in macOS Recovery, then choose Disk Utility in the Recovery app.
Step 2. Select Macintosh HD in the sidebar.
Step 3. Click the Erase button, choose a name - Macintosh HD, and choose a format - APFS or Mac OS Extended (Journaled).
Step 4. Click Erase Volume Group or Erase. If asked, enter your Apple ID.
Step 5. Exit Disk Utility and choose Reinstall macOS.

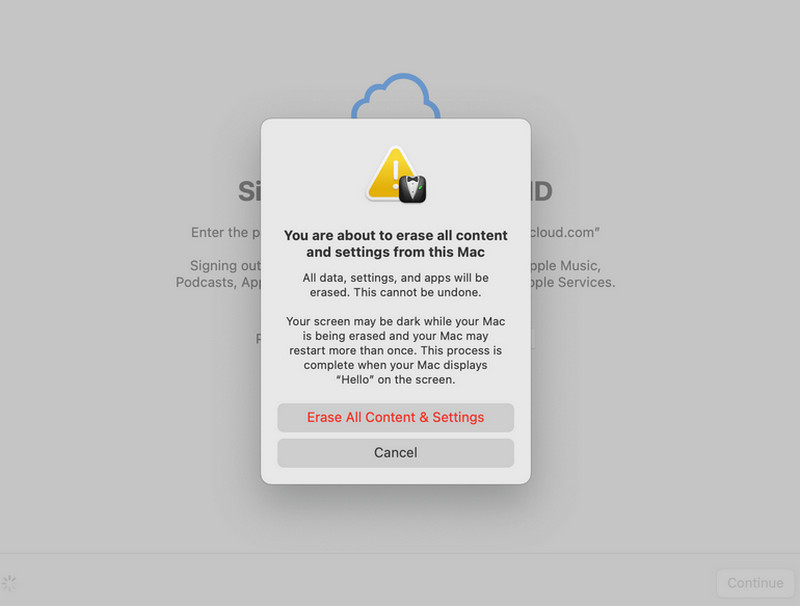
Use Erase All Content and Settings - For Macs with macOS Monterey or Later
If your Mac is running macOS Monterey or later, this handy feature is your best bet. You can use Erase All Content and Settings to wipe your Mac with only a few clicks.
Included Mac Models:
- All Apple Silicon Macs with macOS Monterey or later.
- All Intel-based Macs with the T2 Security Chip support macOS Monterey and later.
Step 1. Go to Apple Menu and select System Settings.
Step 2. Choose Erase All Content and Settings from the System Preferences menu (Tap General and click Transfer or Reset if you use macOS Ventura 13 or later.)
Step 3. Your Mac will start to reset to factory settings.
Part 4: How to Format External Hard Drives on Mac
When an external hard drive becomes laggy, unrecognizable, or starts showing errors on your Mac, formatting the drive can help resolve the problem. You can do this quickly using Disk Utility.
Step 1. Connect the drive to your Mac.
Step 2. Open Finder and select Applications. Choose Utilities and select Disk Utility.
Step 3. Choose View and hit Show All Devices.
Step 4. Select the external drive you want to erase and click Erase.
Step 5. Enter a Name, Format - APFS or Mac OS Extended (Journaled), and Scheme - GUID Partition Map.
Step 6. Click Erase, then click Done.
Conclusion
Your Mac is probably packed with work files, project backups, and apps you barely use. Over time, storage issues are bound to pop up. If you're experiencing the same problem, this guide should help you free up hard drive space on your Mac and boost your Mac's overall performance. Planning to wipe a hard drive on Mac? Make sure to back up your data first, so you won't lose anything important!
