How Can You Get Rid of Private Browsing on Your iPhone
Currently, most web browsers support the private browsing mode, including Safar, Chrome, Firefox, Edge, and Opera. When you use the standard mode of your browser, it stores the addresses of websites you visit, the cookies that track your activities, the login information you have entered, and more. The private browsing mode won’t store these data. However, you may lose the crucial websites in this mode. Our guide demonstrates how to remove private browsing on your iPhone.
PAGE CONTENT:
Part 1: How to Remove Safari Private Browsing on iPhone
As the built-in web browser, Safari is widely used among iPhone and iPad users. Of course, it supports Private Browsing mode. If you want your browser to save your login browsed URLs, you can remove Private Browsing in Safari on your iPhone or iPad.
On iOS 17 or Later
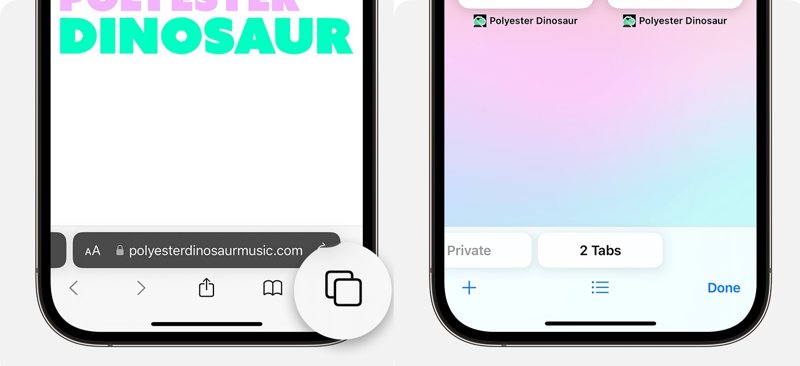
Step 1. Open the Safari browser on your iPhone.
Step 2. Find the Tabs button at the bottom right corner of your screen and tap it.
Step 3. Swipe right and left to locate the [number] Tabs tab.
Step 4. Then tap any tab to get rid of Private Browsing in Safari.
On iOS 16 or Earlier
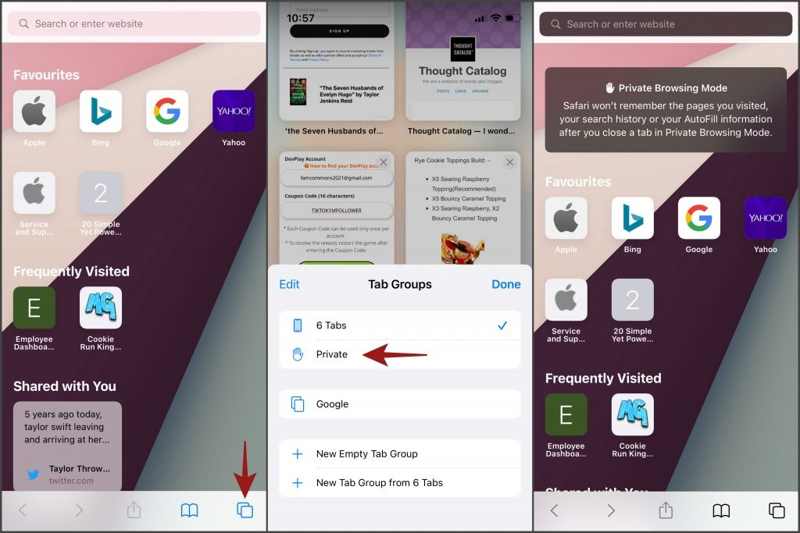
Step 1. Run the Safari app from your home screen.
Step 2. Tap the Tabs button at the bottom.
Step 3. Choose Private to show the Tap Groups list.
Step 4. Tap [number] Tabs and hit Done to remove Private Browsing in Safar.
How to Permanently Remove Private Browsing in Safari for iOS
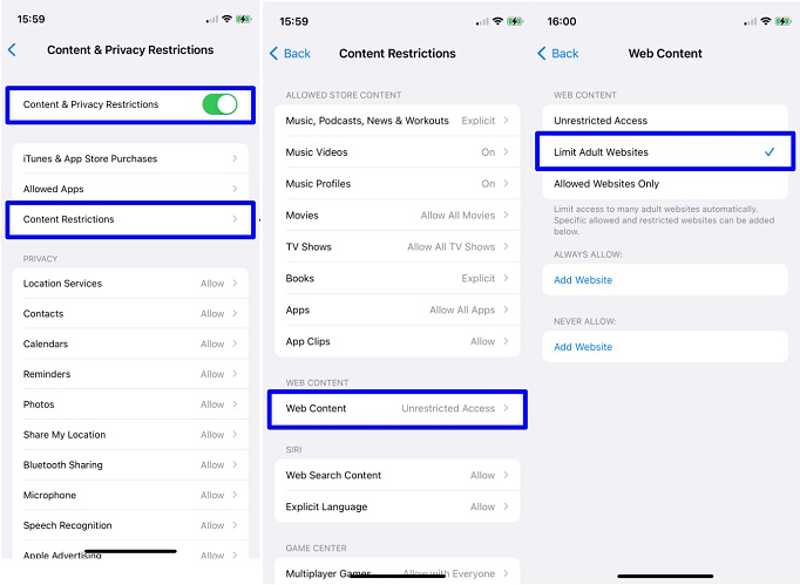
Step 1. Open the Settings app from your home screen.
Step 2. Go to the Screen Time tab.
Step 3. Choose Content & Privacy Restrictions and select Content Restrictions.
Step 4. Tap Web Content and select Limit Adult Websites.
Bonus Tip: How to Fix Unable to Remove Private Browsing in Safari
If you cannot get rid of Private Browsing in Safari on your iPhone, here are solutions to fix this problem. You can perform them one by one to switch to regular mode in your web browser quickly:
Solution 1: Restart Safari
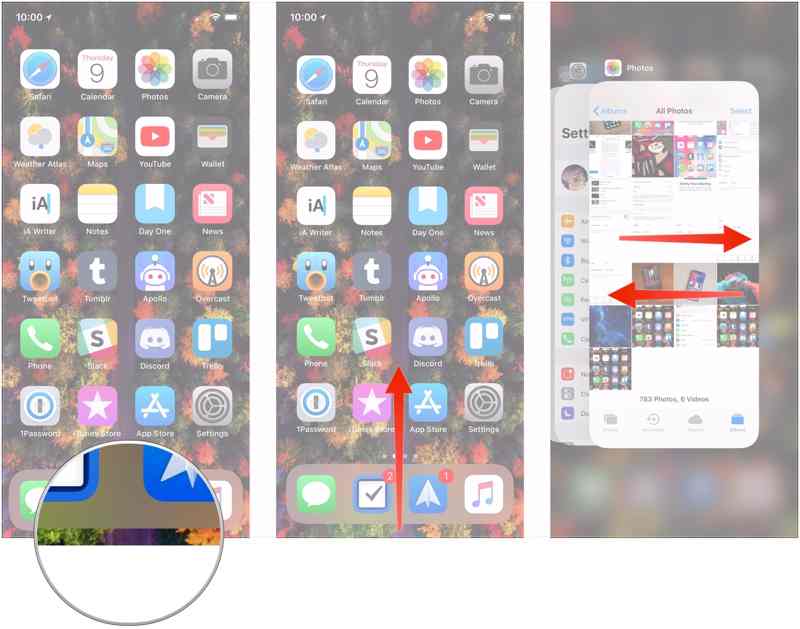
Access the Fast App Switcher with the right gesture. Swipe left and right to find your Safari app. Then, touch it and swipe upward to quit your browser from the background. Open Safari from your home screen again and turn off Private Browsing.
Solution 2: Restart Your iPhone
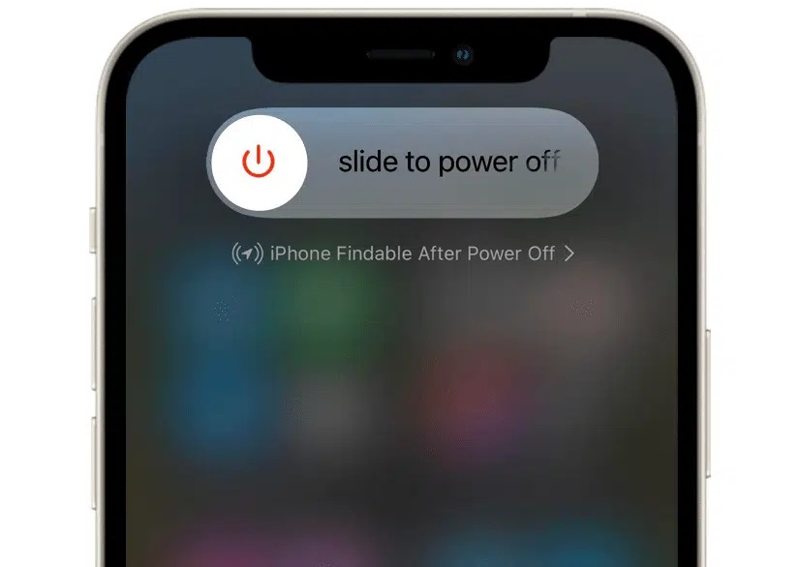
Long-press the Side or Power button until the power-off screen appears. Move the slider to the right side. Wait for a few minutes after your screen becomes black. Then, hold the Side or Power button until you see the Apple logo.
Solution 3: Update Safari
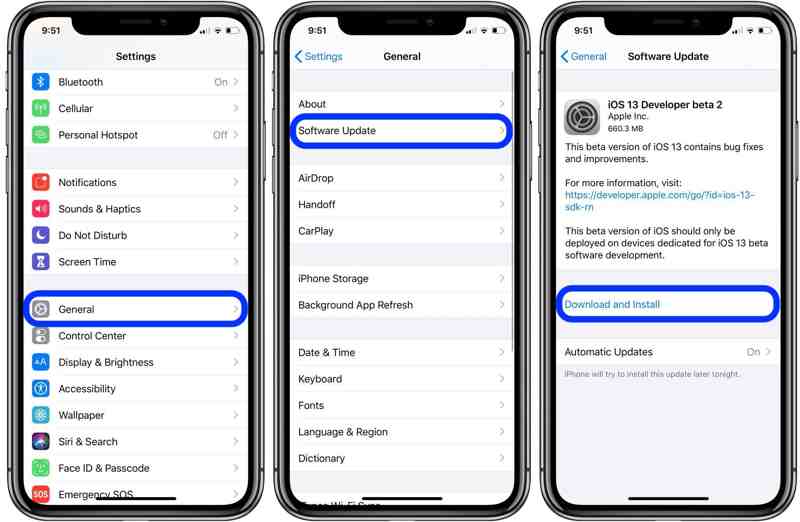
Step 1. Go to the General tab in your Settings app.
Step 2. Tap Software Update to search for updates.
Step 3. If an update is available, tap the Download and Install button.
Step 4. Follow the onscreen instructions to update the software and Safari.
Solution 4: Reset All Settings
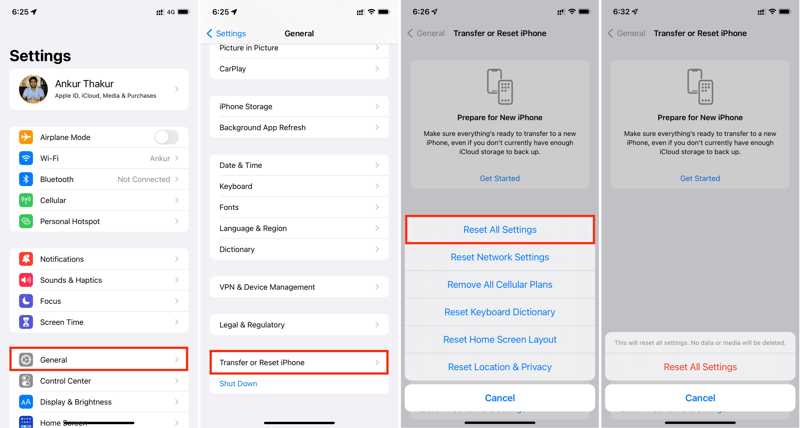
Step 1. Open your Settings app.
Step 2. Choose General and tap Transfer or Reset iPhone.
Step 3. Tap Reset and choose Reset All Settings.
Step 4. Hit Reset All Settings and follow the onscreen prompts to complete it.
Part 2: How to Get Rid of Private Browsing in Other Browsers
Some people have a second browser on their iPhones and iPad. Therefore, you should get rid of Private Browsing mode in their browsers. We demonstrate the workflows for popular mobile browsers respectively.
How to Remove Private Browsing in Chrome
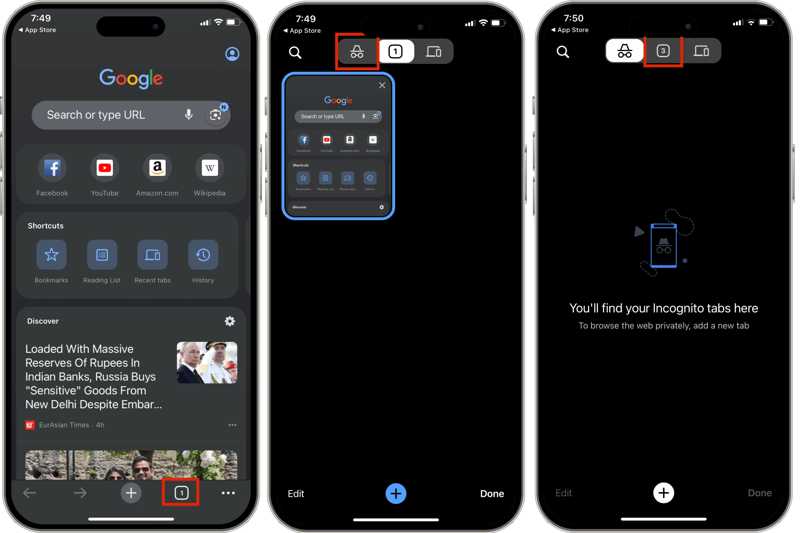
Step 1. Run your Google Chrome app on your iPhone.
Step 2. Press the Tab button at the bottom.
Step 3. Tap the Regular tab or just swipe to the left to remove Private Browsing mode in Chrome on your iPhone.
How to Remove Private Browsing in Firefox

Step 1. Start your Firefox browser app on your iPhone.
Step 2. Go to the Tabs tab at the bottom.
Step 3. Tap the Mask button on the top of your screen to get rid of Private Browsing mode and switch to regular mode.
How to Get Rid of Private Browsing in Edge
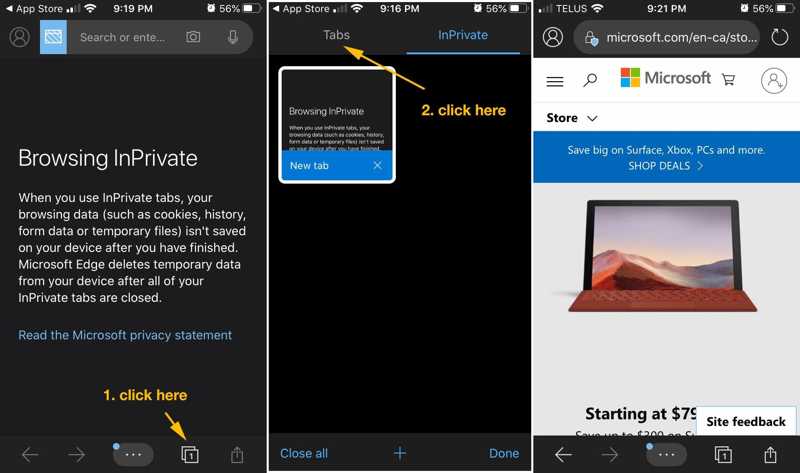
Step 1. Open the Edge for iOS app on your home screen.
Step 2. Go to the Tabs button at the bottom.
Step 3. Switch to Tabs from the top of your screen to get rid of Private Browsing mode.
Part 3: How to Clear Browsing Data in Any Browser on iPhone
If you want to sell your old iOS device or give it to others, Apeaksoft iPhone Eraser can help you clear browser data in any browsers on your iPhone, including Safari, Chrome, Firefox, and more. Moreover, it simplifies the workflow.
The Best Way to Clear Browser Data on iPhone or iPad
- Erase all data for your browsers on your iOS device.
- Clear browser cookies and data without recovery.
- Free up space and improve performance.
- Support the latest models of iPhone and iPad.
Secure Download
Secure Download

How to Clear Browser Data on Your iPhone
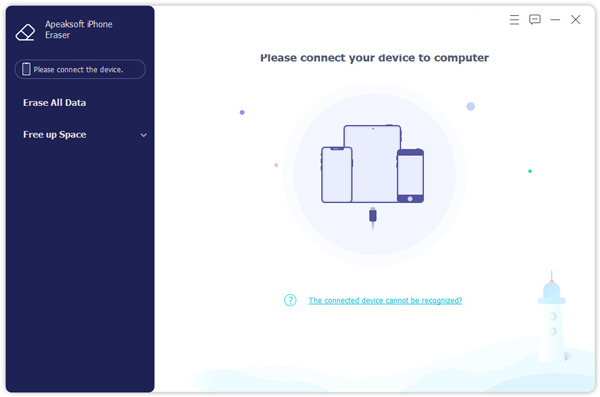
Step 1. Install iPhone Eraser
Launch the best iPhone erasing software after installing it on your computer. Connect your iPhone to your computer with a Lightning cable. Go to the Erase All Data tab once your device is detected.
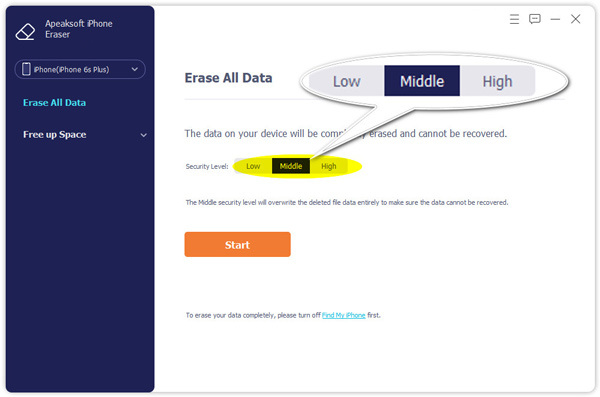
Step 2. Select a level
Select an erasing level: Low, Middle, and High depending on your situation. The higher the level, the more secure your private browsing data.
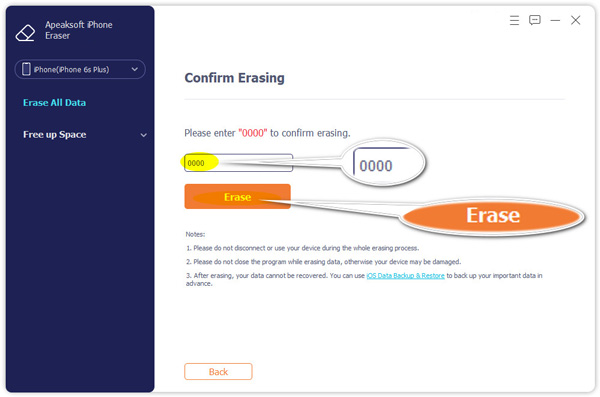
Step 3. Clear browser data
Click the Start button to proceed. Input 0000 to confirm your action, and click the Erase button to begin clearing browser data on your iPhone, along with other files. You can also delete downloads on your iPhone if they are useless.
Conclusion
This article has demonstrated how to remove private browsing on an iPhone or iPad in Safari, Chrome, Firefox, and Edge. You can enter the regular mode, access websites, and store the URLs. Apeaksoft iPhone Eraser is the easiest method to remove data effectively from your browsers on your iPhone or iPad. If you have other questions about this topic, please feel free to leave a message below this post, and we will reply to it as soon as possible.
