How to Fix Low Resolution Photos on Computer and Mobile
Today, taking HD photos is easier than ever before with a smartphone or digital camera. However, old photos are still precious. The big problem is the low resolution and blurry look. This guide explains six methods on how to fix low-resolution photos and turning them into something worth keeping. With a bit of effort and the right tool, you can breathe new life into lackluster photos and get more mileage out of your photo library.
PAGE CONTENT:
Part 1. The Easiest Way to Fix Low-Resolution Photos
Apeaksoft Free Image Upscaler is the easiest way to fix a low-resolution photo for free. Moreover, it is web-based and doesn't ask you to install any software on your desktop. The web app is available to almost all web browsers.
The Easiest Way to Crop an Image on Mac and Windows
• Upscale image resolution online.
• Free and safe to use.
• Enhance image resolution up to 8x.
• Preview the output in real time.
• Won't add watermarks to your images.
How to Fix a Low-Resolution Photo for Free
Step 1. Go to https://www.apeaksoft.com/image-upscaler/ in a web browser.

Step 2. Click the Upload your photo button and import a photo you want to edit.
Step 3. Choose an option next to the Magnification.
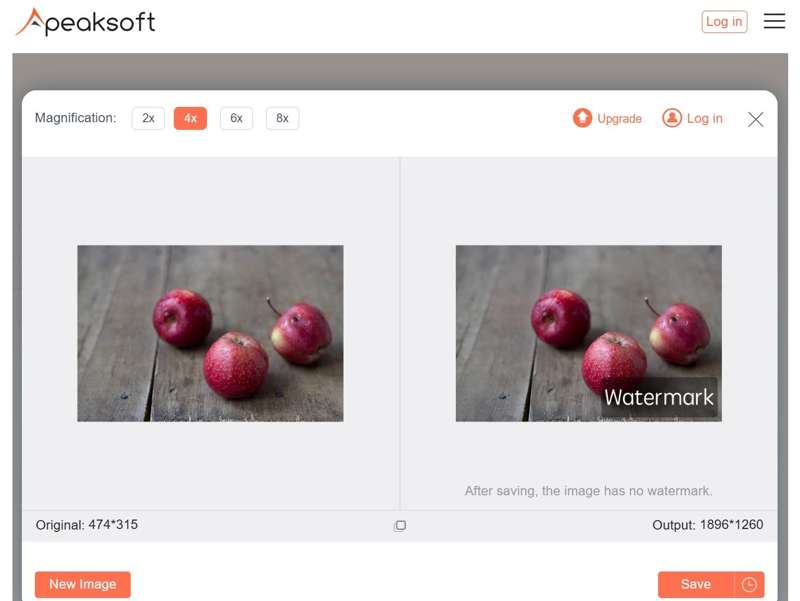
Step 4. Preview the result in the Output pane, and click Save if you are satisfied. This best image resolution enhancer can also automatically fix blur after upscaling.
Part 2. How to Fix Bad Quality Pictures in Photoshop
As a professional image editor, Photoshop comes with a wide range of useful tools. The drawback is the high price, but you can make full use of the free trials to sharpen an image with Photoshop. If you already have it on your desktop, you can fix bad-quality pictures in Photoshop following the steps below:
Step 1. Open a low-quality picture in Photoshop.
Step 2. Go to the Image menu on the top menu bar and choose Image Size.
Step 3. Change the Resolution to 300 or higher to fix low-resolution photos for printing. For web, 72 or higher is ideal.
Step 4. Check the Resample option and select Preserve Details 2.0.
Step 5. Click OK to apply the change.
Step 6. Go to the Filter menu, choose Sharpen, and click Smart Sharpen.
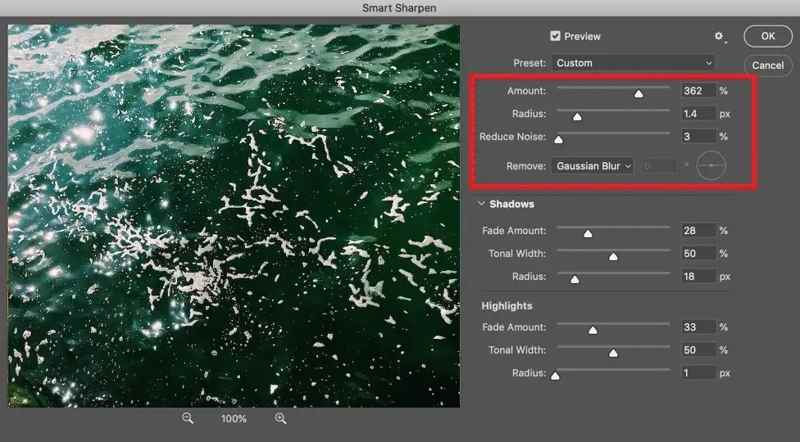
Step 7. Increase the Amount to 150% or above. Set Radius to 1-2 px.
Step 8. Click OK to confirm the setting.
Step 9. Then, choose Noise from the Filter menu, and click Reduce Noise.
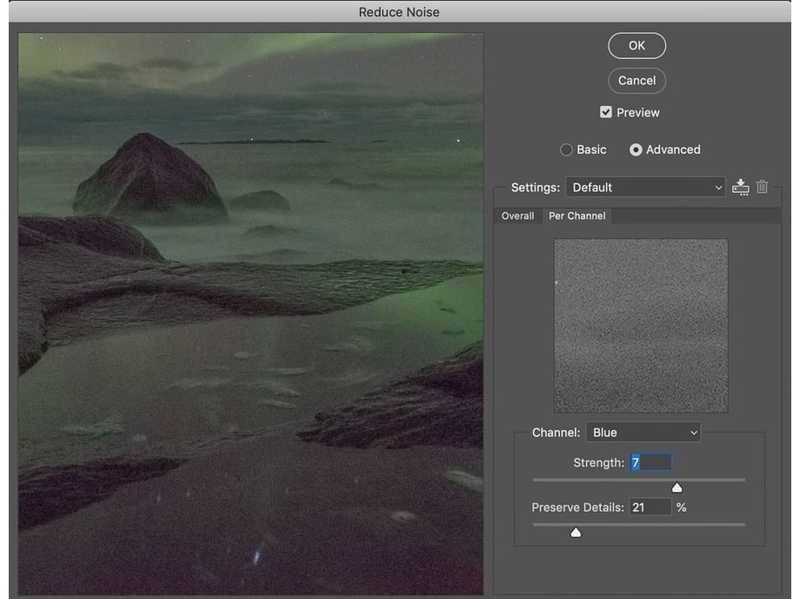
Step 10. Increase Strength to 5 to 10, set Preserve Details to 50% to 70%, and adjust Reduce Color Noise to 50%.
Step 11. Hit OK to reduce noise.
Step 12. Finally, go to the File menu and export the high-resolution image.
Part 3. How to Fix Bad Picture Quality Online
There are a lot of web photo enhancers online. They claim to be able to fix bad picture quality online; however, only a few can achieve the task. Moreover, most web enhancer apps are not free. We use Let's Enhance as an example to show you the workflow.
How to Fix Bad Picture Quality in Let's Enhance
Step 1. Go to the picture enhancer online in a web browser.
Step 2. Log in with your account.

Step 3. Open a File Explorer and locate the low-resolution picture on your hard disk. Drag and drop it to the picture enhancer page.
Step 4. Choose the upscale size under the Factor section.
Step 5. Then, click the Start processing button to begin making the photo higher resolution.
Step 6. Once it is finished, click the Download button to save the image.
How to Fix a Low-Resolution Image on Fotor
Step 1. Visit https://www.fotor.com/photo-editor-app/editor/ and sign in with an account.
Step 2. Click the Uploads button and upload the desired image.
Step 3. Press the Adjust button on the sidebar and choose Resize.
Step 4. Click the Lock button to keep the aspect ratio. Then, upscale one value under Resize.
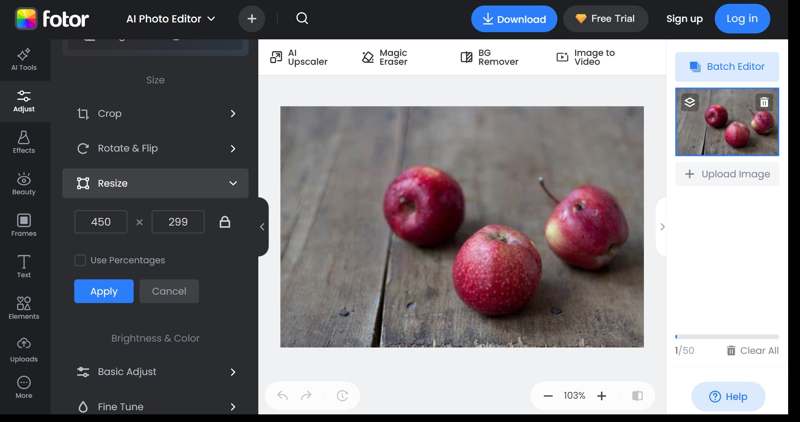
Step 5. Press the Enter or Return key on your keyboard to confirm it.
Step 6. Click the Download button to save the photo with a higher resolution.
Part 4. How to Fix Low-Resolution Photos on iPhone
The built-in Photos app cannot fix low-resolution photos on your iPhone. Alternatively, you can use the Shortcuts to enhance your photos. Another option is using a third-party photo enhance app.
How to Fix Bad Quality Pictures Using Shortcuts
Step 1. Open the Shortcuts app and go to the Shortcuts tab.
Step 2. Tap Add Action and input resize in the search bar.
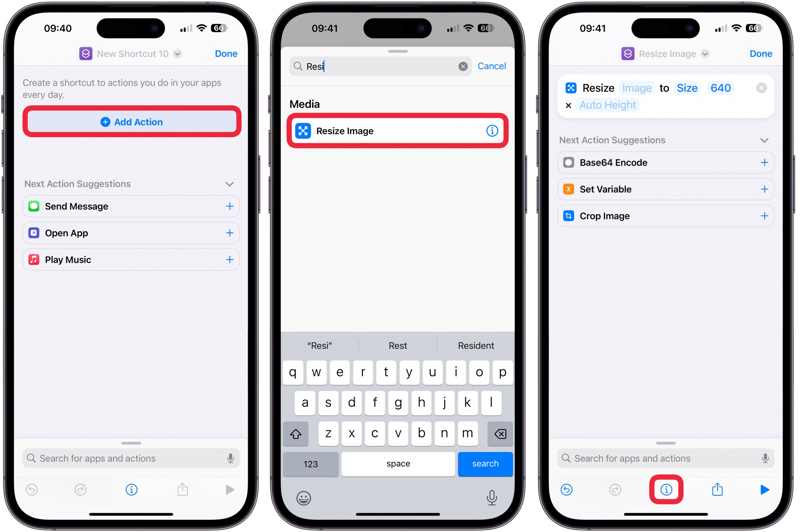
Step 3. Select Resize Image from the result and set the shortcut according to your photo resolution.
Step 4. Tap the Info button at the bottom and toggle on Show in Share Sheet.
Step 5. Tap Done to move on.
Step 6. Go to your Photos app and choose the low-resolution photo.
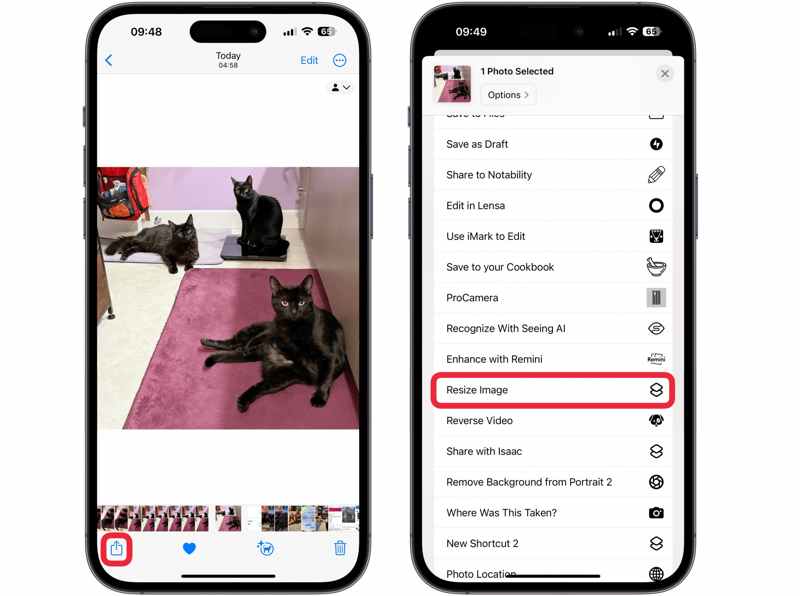
Step 7. Tap the Share button and choose Resize Image on the list to fix the bad-quality picture on your iPhone.
Note: If you intend to fix another picture, reset the Resize Image shortcut.
Conclusion
This article shares 6 methods to fix low-resolution photos on your computer and mobile device. Photoshop is a professional option to upscale image resolution and remove noise on a desktop. The Shortcuts allows you to enhance image resolution on an iPhone or iPad without a computer. An online image enhancer app lets you do the job without installing any software. Apeaksoft Free Image Upscaler is the best option for beginners and average people to enhance image quality without paying a penny.
